Electrical systems are the safest equipment, thanks to which you can create a comfortable temperature in the room during the winter. The efficiency of an electric heating boiler is quite high, especially since in order for it to operate normally and stably for a long time, you do not have to waste free space for laying flammable material.
Electric boilers completely lack a mechanical component, making their use much easier and also reducing the likelihood of a malfunction or serious breakdown.
The design of an electric boiler implies temperature regulation. Due to this, the system can respond in a timely manner to any changes in temperature in the environment. The boiler either increases or decreases the heating temperature of the coolant if necessary.
Many boilers are economical; for example, to heat 30 cubic meters of space you need to spend only 4 kW per day. The use of such boilers makes it possible to heat rooms of much larger volumes than with other types of boilers.
During operation, the boiler does not emit any harmful or toxic substances such as carbon dioxide or carbon dioxide. In this regard, they can be installed directly in residential premises and used to heat bedrooms and children's rooms. Another advantage is that during installation you will not have to obtain any permissions from the relevant authorities.
Electric boilers can either be used as an additional source of heating or the structure can be made the center of the heating system. This boiler is powered from an ordinary electrical network with a voltage of 220 V. The average weight of the boiler is 22 kg, its dimensions are also not too large, but it is capable of heating a volume of air up to 400 cubic meters.
device
Features and application of electric boilers
The reliability of electric heaters can be explained simply - they have no mechanical components, so in principle there is nothing to break. The design is complemented by temperature regulators, which allows you to quickly set the devices to warm-up mode - reduce or increase power depending on the weather outside the window.
As for efficiency, a properly made homemade electric boiler can heat rooms of 30 m3 in just 4 kW/day. This is a very good and low indicator. Another way to save money is to install two-tariff meters and put equipment into operation at night, when the price of energy is much lower.
A little about the advantages:
- No harmful emissions. Electrical appliances do not emit gas, combustion products or other toxic substances, so there are no restrictions on the installation area.
- To form a heating network you will not have to obtain permission. The only thing that is required is the presence of a powerful electrical network or wiring of a separate power cable from the panel.
- Versatility. Depending on the power and performance indicators, the units are used as the main or backup heat source.
- Compactness. On average, a boiler powered from a 220 V outlet and weighing up to 22 kg can easily warm a room up to 400 m3.
The disadvantages are that the device is completely dependent on energy – if there is a power outage, the equipment will not start working. But this drawback is offset by the presence of a generator.
Reliable electric boilers for home heating at 220 volts
When preparing the rating of the best household electric boilers 220, a considerable number of various factors were taken into account - the company, power, the possibility of simultaneous supply of heat for heating and hot water supply, the highly economical process of obtaining energy.
Among the best cheap 220V wall-mounted boilers are:
- EVAN Warmos-IV-5. A budget device made in Russia, with a wide range of functionality. Despite its low power of 5 kW, the boiler works very well in a “warm floor” system, and the “anti-freeze” function makes it indispensable for private houses with an area of up to 60 m2, which can be heated shortly before the arrival of residents. As of November 1, 2019, the price of the unit is 15,520 rubles.
- RusNIT 209K electric boilers made in Russia, with designs well adapted to rural living conditions. A boiler with 100% automation of the technological process, smooth adjustment of the heating water temperature in the range from 40 C to 80 C, is capable of efficiently and quickly heating a room area of up to 100 m2. As of November 1, 2019, the price of the unit is 12,890 rubles.
- Thermotrust ST 9 is the best price of the Swedish brand with full assembly in Russia. The 9 kW model is designed for connection to a 220 V household power supply and operates with an efficiency above 93.0%. Despite its budget price, the generator is equipped with block stainless heating elements. As of November 1, 2019, the price of the unit is 11,814 rubles.
The best wall-mounted electric boilers according to the “price-quality” criterion
- Protherm slope 9 kr 13 is new for 2022. Slovak device with soft start and fully automatic process safety. A wide range of powers from 6 to 28 kW, which makes it possible to create a different heating system for an individual house or apartment, using them as the main or backup source of heat supply. It is possible to connect various components to them for control, accumulation and exchange of information - electronic temperature sensors, programmers, solenoid valves and devices for using a diphtariff meter in order to use cheap electricity at night. As of November 1, 2019, the price of the unit is RUB 32,340.
- Vaillanteloblockve 9 is a very stylish heat generator from Germany. All control is performed with one button, and the information is sent to a two-segment monitor. Directly under the glossy protective casing, a powerful potential is hidden - a heating output of 9 kW. As of November 1, 2019, the price of the unit is RUB 37,709.
- STOUT SEB-0001-000018. These boilers from a Russian manufacturer provide the best price-function ratio and are capable of heating a house up to 200 m2. It is thanks to the integrated synoptic thermostat that it is possible to optimize the temperature regime, thereby reducing the specific costs of electrical energy consumption. As of November 1, 2019, the price of the unit is 34,900 rubles.
The electric boiler market is slowly, but still increasing its momentum
To date, consumers have been wary of this choice. In addition, there are many rumors that the devices are expensive and often break down. Maybe this was true at the dawn of their development, but today the technology for their production has made great strides forward, leaving many of the shortcomings of the first models behind.
This may have been true at the dawn of their development, but today the technology for their production has made great strides forward, leaving many of the shortcomings of the first models behind.
Main structural elements
In general, an electric boiler consists of the following components:
- Heat exchanger: This is a reservoir connected to the heating system in which the working medium flowing through it receives thermal energy.
- Heater: An element in a heat exchanger in which electrical energy is converted into thermal energy through resistance.
- Electrical circuit: a set of parts due to which electric current appears in the heater.
- Automation unit: monitors the temperature of the coolant using sensors and, if necessary, turns on or off the electric boiler.
All of the above is placed in a steel box with thermal insulation - the housing.
Assembling a heating boiler on electrodes
Devices of this type have become actively used only in the last 10-15 years. These are more technologically advanced devices compared to heating elements.
Design
In electronic electric boilers, the liquid plays the role of a heating element. A self-assembled electric boiler of this type is a metal casing, inside of which there is an insulated steel electrode.
0 is supplied to the housing, and phase is supplied to the electrode. When voltage is applied, water ions begin to vibrate with a frequency of 50 hertz. In this case, the liquid gradually heats up. Due to this property, such boilers are also called ion boilers.
The dimensions of electrode boilers are small. They can be made from a pipe with a cross-section of up to 320 mm and a length of up to 60 cm. However, an electric boiler for heating a house with your own hands can be made much smaller.
- small dimensions, thanks to which the ion boiler can be placed even in a small apartment;
- the absence of the so-called “dry running”, which guarantees the serviceability of the boiler, since without liquid inside it will not work;
- resistance to voltage surges;
- high heating and cooling speed, which means ease of adjustment;
- efficiency in energy consumption compared to devices using heating elements.
Among the disadvantages of such boilers are the following:
- An important condition for the effective functioning of an electrode boiler is the level of thermal conductivity and the quality of the coolant;
- the device must be reliably grounded, since there is a high risk of electric shock;
- It is important to exclude the possibility of air getting inside the system, otherwise the electrodes will become unusable due to corrosion.
Connecting the device to the heating system
Installation of the boiler is accompanied by its reliable fixation to the wall. Heating element devices should be suspended at a level of 1.5 m from the floor surface or more. If we are talking about the other two types of equipment, then they can be installed lower, as far as it will be convenient for tying. The last two types of heat generators are installed vertically.
Connecting a heating element boiler with a circulation pump and automatic safety system to the heating system is very simple. The outlet pipes must be connected to the pipelines using a ball valve, which is supplied with American fittings for convenience. A membrane expansion tank is connected to the return line, and a mesh filter, also called a mud filter, is installed on it. For easy cleaning, an additional ball valve should be installed in front of the mud trap. This will eliminate the need to empty the entire system.
Electrode boiler assembly
It's easy to make an electrode heater. To do this, the master will need:
- iron pipe with a diameter of 57 mm or more with thick walls;
- iron sheet more than 2 mm thick;
- internal electrode with a diameter of 25 mm;
- paronite or rubber gaskets and connecting terminals.
As in previous cases, you need to start by attaching pipe connections to the future boiler body. At one end the pipes are welded to the unit, at the other they are threaded.
When making an electrode boiler with your own hands, a hole is drilled in the body for the plug. An electrode is attached to the latter and installed inside the boiler. At the final stage, the homemade body is welded by installing a lid and bottom cut from an iron sheet.
After cleaning the welds, you need to check them for permeability. To do this, the welding area is covered with soap foam, and pressure is injected inside the housing using an air press. Where bubbles appear, the boiler will leak. When all identified faults have been eliminated, the body can be treated with enamel paint.
The boiler will work properly if the water in the heating system of the house contains soda. The latter is added in order to increase the current strength: this indicator can be calculated by dividing the power of the unit by 220.
It is quite possible to build a heating boiler in country houses that are not connected to a central gas pipeline, even on your own. In this material we will talk about how to make an electric heating boiler with your own hands. We will consider 3 available options for electric boilers - heating elements, electrode and induction.
List of necessary tools and stages of installation work
So, for high-quality installation you will need:
- hardware for mounting the boiler on the wall and mounting plate;
- diagram of the correct installation of an electric boiler;
- drill for mounting holes;
- pipes, flanges and couplings that meet the design parameters;
- cable with the required cross-section;
- instructions for the device you are going to install.
Having collected all the necessary tools, you can begin installation.
First make sure that the wall material can support the weight of the boiler. The location is selected so that there is some space on the sides and top of the device. This is necessary to ensure further access to the device if repair work is necessary.
Usually the required distance is specified in the instructions supplied with the heating boiler. The equipment, in turn, must be placed on the wall without any distortions, which is very easy to check using a building level.
A mandatory requirement is the material from which the wall is made. It must be non-flammable. To ensure the correct positioning of the device, a special mounting plate is used. Absolutely all pipelines connected to it must be calculated based on the characteristics of the pump.
There should not be any particular difficulties during the installation process.
However, pay attention to possible nuances. For example, devices with low power can operate from 220 V, but for more powerful analogues it is necessary to connect to a three-phase network
It is very important to correctly calculate the cable cross-section. This is necessary so that it can withstand the power of the unit and pass a current of a certain amount
After installing the boiler, pipelines are connected to it.
Starting the boiler
Preparing an electric boiler for startup means that it must be completely checked all connections, the electrical network, and the filling of the system with water. If there are pinched or torn wires in the wiring, they will need to be replaced and carefully insulated. It is prohibited to do otherwise, since in a three-phase network there is voltage with a decent current strength, and the replaced section can break through.
Preparation also involves cleaning the structure from dust and dirt. You should also take care to prevent voltage surges both during the first start-up and during further operation. To prevent this from happening, install a residual current device.
Start:
- First you need to fill the system with water, and do this in such a way that there are no air pockets in it. As a rule, radiators have special taps in their upper part to release accumulated air.
- In the future, all that remains is to turn on the boiler to the electrical network and wait until it warms up.
Safety regulations
When carrying out installation work, it is necessary to comply with safety requirements. Violations can cause damage to the installation and a short circuit. Errors can cause ignition during the startup phase of the device.
Laying the power cable of the device requires disconnecting the voltage to prevent electric shock. Electrical equipment used to heat a room must be grounded.
When connecting, it is necessary to lay new wiring with a cross-section corresponding to the power consumption. The equipment must be mounted on a substrate made of non-combustible material.
The simplest design
A self-produced electric boiler is usually a simple design. It consists of several pieces of pipes and a three-phase heating element. Making it, as a rule, is also simple.
We will need a grinder, a welding machine, pipes, bolts, a steel sheet with a thickness of 2 mm and several hand tools. First of all, you need to buy a heating element of the required power. It can be calculated based on the power and heating area of factory boilers.
Then we select a steel pipe with a recommended diameter of 219 mm and a size of about 0.5 m to hide the heating element. If there is no suitable size, then cut the pipe with a grinder to the required size. The upper part must be marked with a hole with a diameter of about 50 mm. Hot water for the heating system will flow through it.
Welding work
At the next stage, we will use any type of welding machine. We weld steel sheets to the ends of the pipe for the heating element, and on the side, at the upper and lower edges, there are bends for connecting to the heating system. A nut is welded to one of the ends of the selected pipe, into which a three-phase heating element is then screwed.
A water circulation pump is mounted to the pipe that supplies chilled water. Ball valves complete the design to shut off the water without the need for frequent drainage from the system.
Assembling the electrical panel
In some cases, repairing a boiler or heating system requires the use of power tools. Therefore, de-energizing automatic plugs on the meter is extremely undesirable. Most household machines are not designed for three-phase voltage. Yes, and three-phase connection is carried out separately. So to control a homemade boiler you need an electrical panel. It is a metal structure in which most of the wiring, toggle switches, control relays, control buttons, etc. are hidden.
If you can assemble the heating boiler yourself, then the installation of the electrical panel must be entrusted to experienced electricians. The shield must also be grounded using a wire and bolt structure. After installation is completed, the electrical panel door with warning notes is locked. The key must be kept out of the reach of children.
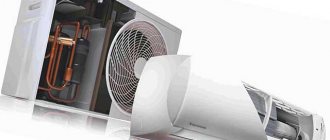
Air conditioners
An air conditioner is often perceived as a device for cooling air.
It is important to understand that any such device is a type of heat pump operating on an air-to-air cycle. If you start it for heating, it demonstrates no less efficiency than similar direct heating equipment
The ratio of thermal power to consumed energy for modern inverter air conditioners is in the range of 3.6 - 5.
Heating functions can be effectively performed at a lower operating temperature of -25 degrees. In regions located in central Russia, air conditioners often serve as an auxiliary heat source, regardless of the time of year. Installation of equipment can be carried out either independently or by numerous companies. The most convenient in this regard are considered to be window models, the installation location of which is often an open sash.
Operating principle of the boiler
A high-quality and functional boiler in a heating system operates on a principle of operation similar to other boilers, but operates on a different alternative fuel. The essence of its action is that the heating element effectively heats the coolant, that is, water, which is intended for heating radiators. As in other heating systems, a special forced method of circulation processes is used, which is carried out through an installed pump. In addition, natural circulation may be involved.
Important! Close attention must be paid to the fact that most professionals advise against installing a special circulation pump in the system. In other words, a forced circulation process cannot be used if there is an electric boiler
In such a situation, it is recommended to get the help of professionals who can carry out the heating process so that everything works exclusively using normal natural circulation.
Electric boiler installation
It is possible to organize heating of a private house with an electric boiler yourself! Installation of an electric boiler, compared to gas or solid fuel boilers, is quite simple. But you must strictly follow all the rules and requirements.
- There is no need to allocate a special room for the equipment. Due to their minimal dimensions, most electric boilers can be installed anywhere. And the modern design of the equipment can fit perfectly into any room interior. If you wish, you can hide the boiler in a special niche.
- Special ventilation systems or chimneys may not be used. This equipment does not create waste that threatens human life and needs to be disposed of.
- Connecting the equipment is easy.
- The heating scheme with an electric boiler is quite simple, so the installation and connection of this type of heating does not require approval and approval from the relevant authorities. Also, in the future, systematic checks, which often bring discomfort and conflicts, will not be carried out.
Heating a private home with an electric boiler is an innovation, but it is gaining popularity every year. Thanks to the availability of various modifications of equipment for heating with electricity, you can find a suitable option for a particular structure. Before purchasing equipment, each home owner needs to calculate the power of the electric boiler for a specific room, taking into account all heat losses. Therefore, you should worry about insulating the building in advance. This will avoid troubles associated with the heating system.
11 Weird Signs That You're Good in Bed Do you also want to believe that you please your romantic partner in bed? At least you don't want to blush and apologize.
10 mysterious photographs that will shock Long before the advent of the Internet and the masters of Photoshop, the vast majority of photos taken were genuine. Sometimes the pictures captured were truly incredible.
Contrary to all stereotypes: a girl with a rare genetic disorder conquers the fashion world. This girl's name is Melanie Gaydos, and she burst into the fashion world quickly, shocking, inspiring and destroying stupid stereotypes.
Our ancestors slept differently than we do. What are we doing wrong? It’s hard to believe, but scientists and many historians are inclined to believe that modern man sleeps completely differently than his ancient ancestors. Initially.
What does your nose shape say about your personality? Many experts believe that you can tell a lot about a person's personality by looking at their nose.
Therefore, when you first meet, pay attention to the stranger’s nose
7 Body Parts You Shouldn't Touch with Your Hands Think of your body as a temple: you can use it, but there are some sacred places that you shouldn't touch with your hands. Research showing.
Electric boiler for heated floors: self-assembly and connection
An electric boiler for a warm water floor is the most popular device for heating private homes and commercial buildings that do not have access to central heating. It does not emit harmful substances into the atmosphere during operation, operates silently and does not cause fires. Ease of installation, no need for a chimney or boiler room are the main advantages of the devices.
electric boilers for heated floors
Manufacturers offer a wide selection of products suitable for rooms of different sizes.
Reliable devices with a long service life are:
- RusNIT (Russia);
- Dacon (Czech Republic);
- Protherm and Eleko (Slovakia);
- Ferroli (Italy);
- Viesmann (Germany).
Russian products have a power of up to 100 kW. Despite their low cost, they meet all GOST requirements and have excellent characteristics. Slovak Protherm (from 9 to 24 kW) and Czech Dakon (4 to 60 kW) offer a wide range of models, the price of which is 20% higher than their domestic counterparts. The standard equipment of imported electric boilers for heated floors includes multi-stage pumps and coolant pressure sensors. There are models with safety valves and a built-in expansion tank.
For connoisseurs of famous German quality, the ideal solution would be Viesmann products. These are the most expensive, but also the best representatives of the devices in question.
If you are confident in your engineering abilities and do not want to spend a lot of money, then there is a way to install a heated water floor from an electric boiler in your home with your own hands.
Do-it-yourself production provides several advantages:
- Low cost of consumables;
- Step-by-step assembly is the most convenient option for underfloor heating from an electric boiler, which can be gradually equipped with additional automation to increase convenience and productivity.
Compared to factory-produced budget series products with similar technical characteristics, home-made options often turn out to be more reliable.
Heating scheme for underfloor heating with an electric boiler
Automatic units consist of a start relay actuated by a thermostat. They are sold in any specialized store.
A do-it-yourself underfloor heating boiler with a power of up to 7 kW can be connected using a single-phase circuit. For greater power, three phases are connected. To do this, it is necessary to officially notify Energosbyt.
A separate cable is laid from the input distribution device to the unit, which is connected only through a circuit breaker and an RCD.
Sequence of manufacturing and installation work
There are two main types of homemade electric boilers for heated floors:
- Heating element new. The heating element is placed inside the pipe section. Pipes (40-50 mm) are welded to its sides, and the heating circuit is connected to them. One side of the pipe is closed with a steel disk, the other with a washer. A nut is welded in its center, and a heating element is screwed into it (their threads must match).
- Do-it-yourself induction electric boiler for heated floors. Inside a half-meter piece of polypropylene pipe (with a diameter of 10 cm) shavings of stainless wire are poured. Couplings with fiberglass or nylon mesh are welded on the sides. 90 turns of wire are wound onto the pipe and connected to a conventional 15A inverter (DC-AC converter). Adapters are welded into the connection points to connect the system.
Connecting an electric boiler to the heated floor of a heating element, the coolant of which circulates using a pump, is best placed with the contacts facing up for ease of maintenance. For natural circulation, for uniform heat removal, it is placed with heating elements down.
If you used a 3-phase heating element, then remove the connecting strip from the buttons of the automatic control box. This manipulation will allow you to turn on the device at 1/3 or 2/3 of the intended power, supplying one or two phases.
Experts recommend placing the induction version at a distance of at least 30 cm from the walls and 80 cm from the ceiling or floor in order to prevent heating of the metal structures located on them.
Manufacturing technology. Instructions
After familiarizing yourself with the structure of the boiler, you can try to make a similar device at home
This process is not as difficult as it may seem, but it requires utmost care and attention. Otherwise the finished product may be unsafe
Stage 1. Preparing everything you need
To work you will need the following equipment:
- welding machine;
- electrodes;
- iron tee;
- electrode insulation (polyamide);
- neutral wire;
- coupling;
- ground terminals;
- steel pipe of appropriate dimensions;
- insulation for terminals.
Stage 2. Assembling the ion boiler
Assembling the boiler
First, let's clarify a few important aspects. So, the ion boiler needs grounding, as mentioned above, and the neutral cable must be supplied exclusively to the outer pipe. It is also worth remembering that the phase should only be supplied to the electrodes.
Assembling the boiler
With proper preparation, the assembly procedure should not cause any difficulties.
Assembling the boiler
Step 1. First, take a pre-prepared pipe (optimal dimensions - length 25 cm, diameter 8-10 cm). On one side, a set of electrodes is placed in the pipe, and on the other, a coupling is installed for connection to the heating main.
Ion boiler drawing
Step 2. An insulator is installed near the electrode, which, in addition to its direct function, will also serve for additional tightness of the boiler.
Step 3. High quality heat-resistant plastic is used to make the insulator. But not only tightness is important for the device, but also the possibility of threaded connection of the electrode with a tee. That is why it is recommended to entrust the manufacture of the insulator to an experienced specialist who will make the part in accordance with the required dimensions.
Parts for boiler assembly
Step 4. A large bolt is welded to the body. Next, the neutral cable and grounding terminals are attached to the bolt.
Step 5. After connecting to the heating system (this is done using a coupling), all that remains is to hide the finished boiler with a decorative coating. Such a coating is necessary not so much for aesthetic purposes, but for safety and protection from electric shock. This should not be neglected, since it is necessary to limit access to the heat generator as much as possible.
Stage 3. Installation work
Boiler connection diagram Boiler connection diagram
- air vents;
- pressure gauge;
- fuse.
In this case, the shut-off valves are installed after the expansion tank. The above diagram will help you get acquainted with the connection features in more detail.
Installation of an electrode boilerInstallation of an electrode boilerConnection diagramAssembling a heating systemAssembling a heating systemAssembling a heating systemPolyphosphate filterAdjusting an electrode boiler
Video - DIY ion boiler
Other important installation points.
- The boiler is installed exclusively vertically, which can only be explained by its operating features. Fasteners must be separate.
- Before installing the device, the entire heating system is thoroughly washed. To do this, take clean water diluted with an appropriate product (such as Rothenberger). If a contaminated coolant is used or the line has not been properly flushed, the performance of the ion boiler will decrease significantly.
- For grounding, you can only use a copper cable ø4 mm (or larger) with a resistance of no more than four ohms. The cable is connected to the zero terminal, which, accordingly, is located in the lower part of the unit body.
- Heating devices (batteries) are selected in accordance with the volume of the system. The best option is that a kilowatt of device power corresponds to 8 liters of total volume. If this figure is exceeded, the boiler will operate longer than required, resulting in increased energy costs.
- In addition, when arranging a heating system, preference should be given to bimetallic alloys or aluminum. The use of other alloys is unacceptable, since they contain many different impurities that affect the electrical conductivity of the working fluid.
- If an open system is installed, then the batteries used must in any case have a polymer coating on the inner surface, which will prevent air from entering and, as a result, prevent corrosion. Closed systems do not have this disadvantage.
- Cast iron products should be abandoned altogether, because the impurities they contain in large quantities will reduce the performance of the ion boiler. Also, such batteries are too large, which will increase energy consumption.
Installation and connection of equipment
connection diagram
The most difficult thing is to connect the structure to the electrical network. Since we have to deal with heating devices, we will have to install the input on 3 phases.
A number of systems will need to be installed directly in the electrical panel itself:
- machine;
- relay;
- toggle switch;
- fuse;
- temperature sensor;
- various control buttons;
- magnetic starters and a number of other elements, if necessary;
It is mandatory to make a grounding loop. To do this, you need to take a metal pin or reinforcement, the diameter of which should be approximately 15-20 mm, and attach a metal bolt to it. This structure is placed under the floor of a residential building and a wire coming from the electrical panel is passed to it.
The procedure for assembling a boiler with heating elements with its own rivers
Before you make an electric boiler with your own hands, you should make sure that you have a reliable power supply line. Only equipment with a power of no more than 6 kW can be connected to ordinary networks with a voltage of 220 V and a frequency of 50 Hz. If a more powerful boiler is required, it needs a three-phase wiring and a separate input.
So, we begin assembling a homemade electric heating boiler from a pipe with a cross-section of 159 mm and a wall thickness of 10 mm. This pipe will serve as the boiler body. It will require either a factory-made hemisphere with a cross-section of 159 mm and a thickness of 10 mm, or sheet metal with a thickness of 8 mm or more of a similar section.
The boiler roof, into which the heating elements will subsequently be embedded, can be made from an 8 mm thick channel.
We cut a ¾-inch coupling into the boiler dome. We will screw the drain valve into this coupling. In addition, you will need 2 pipes with a cross-section of 1 inch for inflow and return. The threads on the pipes can be made both internal and external. It all depends on which one you are more comfortable working with.
Please note that it is advisable to cut the threads on the pipes and adapters immediately. Prepared pipes with threads, the same as on heating elements, must be immediately screwed into the adapters
This is necessary so that the threads are not damaged during welding to the arch. To mark the insertion points of the heating elements, the outer diameter of the pipe must be divided into 6 equal sectors according to the radius size. Then we draw three identical sectors strictly at an angle of 120°
Prepared pipes with threads, the same as on heating elements, must be immediately screwed into the adapters. This is necessary so that the threads are not damaged during welding to the arch. To mark the insertion points of the heating elements, the outer diameter of the pipe must be divided into 6 equal sectors according to the radius size. Then we draw three identical sectors strictly at an angle of 120°.
The next step is to start cutting. Having finished with the markings, using a plasma cutter we cut out holes for the pipes for the heating elements. They should be cut only along the outer contour. With all other pipes this is not of fundamental importance.
Let's start welding work. First we intercept the pipes at several points so that they do not lead. Then we check the accuracy of the location, if necessary, lightly tap with a hammer, and then make a continuous seam
It is important that the adapters for heating elements in an electric boiler for heating with your own hands protrude 1 cm above the surface of the boiler roof
Next, you need to make sure that the heating elements fit completely inside the body of the electric boiler. Therefore, after applying a continuous seam, it is necessary to screw the heating elements into the adapters.
Let's start cutting out the vault from the channel. In its center we make a hole for the air valve pipe, after which we weld the pipe itself. We make a hole on the side for the temperature sensor and also weld a pipe under it.
All protrusions, burrs and welding residues must be thoroughly cleaned using a grinder. The inner surface of the arch platform must be perfectly flat. The pipes for installing heating elements will protrude only 1 cm from the outside.
We got a fairly powerful electric boiler with our own hands with 3 heating elements. If you need a simpler unit, using the same principle it can be assembled using 1 or 2 heating elements.
Types and principle of operation
There are 2 main types of electric boilers:
- Electrode.
- Induction, –
At the same time, all the others are just modifications of one of these types. An electrode boiler is often also called an ion boiler, since it converts electrical energy into heat.
The design takes up a minimum amount of space, and it is fixed directly to the pipe; it does not even have to be attached to the wall. Just in case, it is placed on 2 screws, but this is not necessary.
Outwardly, it looks like a small piece of pipe, the length of which is about 40 cm. At the end of the heater there is a metal rod, and on the opposite side the heater is welded or there is a special pipe in it, due to which the coolant is transferred throughout the entire system.
The design provides for the presence of 2 pipes into which pipes for return and supply are inserted:
- One of them can be located in the end part , and the second is installed at a right angle in the side part.
- They are often installed from the sides perpendicular to the rest of the structure and so that they become parallel to each other.
principle of operation
This boiler has the following operating principle: the cathode (positively charged electrode) and the anode (negatively charged electrode) are placed in the coolant. When energized, they trigger the movement of ions. Their polarity changes from time to time, in particular, one charged ion will change its charge from one to another approximately 50 times per second.
This ultimately leads to friction in the liquid due to this movement of ions, which causes an increase in temperature.
This technology leads to some disadvantages:
- The coolant will be energized in any case.
- be prepared in terms of salt content before being poured into batteries
- non-freezing liquids in the heating system.
Induction boilers operating on electric current heat the coolant using a magnetic field that arises from the electric current.
This whole design is quite simple and includes the following elements:
- frame;
- insulation;
- the core where the coolant will be heated;
- coil;
The key difference from the electrode design is that in induction boilers the liquid is completely isolated from the conductive elements, so it will not be energized.
The coil winding, made of copper wire, is connected to the network through a special control system. Due to this, a magnetic field appears in the coil. It will heat up the pipe, which acts as a core, and it will already give off some heat to the water. At the same time, the body of the heating boiler will continue to remain cold, since its design contains a layer of insulation.
It should also be said that the core is not made straight, but has a curved shape, sometimes in the form of a spiral, so that the coolant passes through it much longer. The service life of such a boiler is at least 25 years. After this time, the pipe, which is the core, will rust.
Installation rules and requirements
Electric boilers are compact in size, require a minimum of wiring and have a modern design, which allows them to be installed anywhere.
All general requirements are described in the PUE (7th edition). Electric boilers with a power of up to 10 kW do not require approval from the Energonadzor services. However, if you want to install a meter that differentiates electricity consumption by zone of the day, which we recommend doing in order to save money, you will still have to coordinate the installation. For boilers with a power of more than 6 kW, three-phase power supply (380 V) is required; 8-12 kW models can operate from a single-phase (220 V) network, but it will not provide operation at full power.
The choice of installation location for an electric boiler is more extensive than for gas or solid fuel boilers. Electric boilers can be installed in a residential area, for example, a corridor, hallway or kitchen, but keep in mind that in any case you need to run pipelines, wiring, grounding and other communications to it. The installation of an electric boiler in the bathroom and toilet is prohibited.
The requirements for the installation surface are also minimal, it can also be a wooden wall, but in this case it is necessary to insulate the installation site with a layer of non-combustible material (basalt cardboard, xylolite sheet).
Fireproof protective plate when installing an electric boiler on a wooden surface.
Manufacturers also impose requirements on the space around the electric boiler necessary to ensure maintenance and repair. The values differ depending on the model, so before planning the installation location and wiring, you should find them in the operating instructions. Usually this:
- from 0.7 m from above the boiler;
- from 0.5 m on the sides (including to the pipeline) and below;
- from 0.7 m in front of the boiler unit;
- at least 3 cm between the wall and the boiler.
Reasons for the popularity of electric boilers
Electric boilers do not have mechanical elements, making them much easier to use. In addition, the likelihood of a breakdown is reduced several times.
Electric boilers are equipped with an automatic temperature control system. This helps to turn it off at the slightest change in ambient temperature. If the need arises, the boiler will either increase the temperature or reduce it.
The device operates safely, without producing carbon monoxide and other harmful substances, so it can be installed to heat any premises, including children's and bedrooms. In addition, installation of equipment does not require obtaining appropriate permits from regulatory authorities.
In this video you will learn how to make an electric boiler:
Such boilers can be used as additional equipment for heating a room or made the main source of heat in the house. The device is powered by a 220 V network and, as a rule, weighs about 20 kg. Even with such small dimensions, it is capable of heating up to 400 cubic meters of air.
Many electric boilers are characterized by good efficiency. For example, to heat 30 cubic meters of air you need to spend 4 kW of electricity per day. The use of such devices allows you to heat a much larger room than could be done with other types of heating equipment.
Water heating with electric boiler
Water heating systems for private houses are constructed according to a closed scheme and operate on the principle of forced coolant circulation. The construction of a complex with natural circulation is impractical - due to the low speed of the coolant in the system, fuel consumption is not rational - this will cause an increase in electricity bills.
The basic elements of electric autonomous water heating systems are the following types of boilers:
- heating elements;
- Electrode;
- Induction.
Heating element models are the most common version of the equipment - this is due to the simplicity of the design and reliability in operation. The heating element of the boiler is a tubular electric heater - its design consists of a conductor insulated in a dielectric with high thermal conductivity - both elements are placed in an outer metal or ceramic casing. Heating elements (or a group of heating elements) are placed in a tank with pipes through which the coolant circulates. The power of the equipment is controlled in steps or smoothly.
Heating element devices have a fairly high efficiency, but are inferior in this indicator to their counterparts (electrode and induction units). The decrease in efficiency is due to the need to overcome the thermal resistance of the dielectric and the shell of the heating element.
Electrode boilers carry out their work by using the conductivity properties of water - they can only work with it as a coolant, and the water must have certain parameters in terms of chemical composition and conductivity. When current passes from the electrode to the body, the water heats up due to resistance and transfers heat to the heating devices during circulation.
Electrode electric boilers have high efficiency (up to 98%), energy consumption is on average 15 - 20% lower than that of heating element analogues. But at the same time, electrode-type equipment also has disadvantages:
- Boilers only work with water of certain parameters;
- The power of the unit is unstable and largely depends on the conductivity of the water;
- There is virtually no quality regulation of productivity;
- Rapid wear of working elements - electrode and housing;
- The need to construct a high-quality grounding loop.
Induction electric boilers operate on the principle of using the properties of electromagnetic induction. The basic elements of the product design are the primary and secondary windings. The secondary winding (closed) is a tubular element - the coolant circulates through it, a current is passed through the outer primary winding and an electromagnetic field arises, under the influence of which the tubular element heats up and transfers heat to the water (coolant).
Induction equipment has the highest efficiency among electric boilers - its value is close to 99%. Energy savings compared to electrode and heating elements units can reach 30 - 40%. The following criteria are also significant advantages of the equipment:
- Versatility in terms of coolant type;
- Possibility of precise power control;
- No deposits due to microvibration;
- Safety, high heating rate.
At the same time, the equipment is very expensive and has a significant mass - this somewhat complicates its installation.
The main advantages of organizing an autonomous water boiler based on an electric boiler are:
- There is no need to build a smoke removal system;
- No separate room is required to place the boilers;
- No waste is generated during the operation of the equipment;
- Affordable cost of boilers;
- No fuel storage required;
- It is possible to reduce electricity bills by integrating a heat accumulator into the circuit (at a two-rate or three-rate tariff).
The main disadvantage of any electric heating configuration is the high cost of energy. In addition, it is often not possible to provide a limit on free power (by the electricity supply organization) and the construction of high-quality wiring of certain parameters is required.
Electric boiler
This invention is not new and does not relate to space technology. Be that as it may, the essence is the same - to heat the coolant in the heating system.
We have a house, and there is also a water heating system in the house. But there is no centralized gas supply to install a gas boiler. It remains to decide how to heat this coolant. Alternatively, it could be a homemade electric boiler.
And this is a good option, since such equipment is easy to place and receive heat if there is a power supply.
Positive sides
In addition, there are other positive aspects:
- Easy to install.
- Compact sizes.
- Ergonomics.
- No special permissions are required for installation.
- Environmentally friendly - no harmful emissions into the atmosphere.
- Silence.
- Does not require an additional hood or chimney.
- There is no need for additional fuel storage facilities.
Meanwhile, there is nothing difficult here. Heating elements are placed in a special metal container. The tank is connected to the heating system. The coolant is usually ordinary water.
It is this water that is poured into the system through a metal container. All that remains is to apply electric current to the heating elements.
When exposed to current, the heating blocks become hot and transfer their heat to the water. Hot water from the tank rushes through the pipes into the heating radiators, heating the entire house.
Everything seems simple!
This is the heating circuit in principle.
It can be supplemented with such innovations as:
- system monitoring and control device,
- expansion tank,
- circulation pump.
- automatic water heating regulator.
Flaws
There are disadvantages, how could we live without them? These include:
- Dependence on power supply.
- Scale that forms on heating elements leads to a decrease in their efficiency.
- Dimensions of the expansion tank - the higher the power, the more space there is for placing heating elements.
Full glazing of the veranda
If you don’t have the necessary tools at your dacha or in a private house, and you simply don’t have the funds to buy expensive wooden blocks, then there is only one way out - solid window frames.
In order to create such a masterpiece, you need to prepare:
- Planks of wood from which the structure will have to be made. Small blocks of 50/50 mm are best suited. They must be cut in the required quantity, after which they are fastened to the frame, which is also made independently.
- It is recommended to fasten the glass to the frame using silicone sealant, but if this is not available, then you can do it the old fashioned way with glazing beads.
- The final stage is processing the joints with platbands.
Difficulty of operation
The disadvantage of any electric heater is the danger of exceeding the limit for connecting electrical equipment in a private home. Thus, the total power of all electrical appliances used in the home should not be more than 15 kW.
To service a private house with an area of about 100 m2, a unit with a power of at least 10 kW is required.
Therefore, by connecting an electric boiler with your own hands, you allocate only 5 kW of energy to use other appliances. To increase the consumption limit you need to obtain a special permit.
DIY electric boiler for heating
(Last Updated On: 02/23/2018)
Homemade electric boiler for heating
In Russia, abnormally low cold weather occurs almost every year, so the question of insulating and heating your home always remains relevant, so that the family hearth does not turn into a cold cave. If your financial resources are limited, but the need for heating is higher than ever, and you can create miracles with your own hands, then homemade electric heating boilers are what you need.
Home-made electric boilers for heating require skills, extensive experience and high responsibility in their manufacture, because the cost of an error is very high - if a home-made boiler fails, a fire may occur, jeopardizing the entire house, since a home-made heating boiler with a power of 220 volts is quite dangerous .
Making a homemade electric boiler for heating
To successfully design and assemble a boiler, it is first of all important to clearly understand the principles of its operation, the structure and purpose of each part. To do this, it is best to draw up a drawing of a homemade heating boiler
After this stage, you will need to select the materials you will need:
- One steel pipe with a diameter of 10 to 12 cm.
- Two small pieces of pipe, approximately 5 to 15 cm long, with a diameter of 4 or 5 cm.
- Steel, preferably stainless, sheet with a minimum thickness of 2 mm (in this case, the more, the better).
- One tubular electric heater (abbreviated TEN), which must have three electrophases. The recommended power is 9 kilowatts.
Homemade electric boilers for heating are essentially an ordinary heater, since the heating element is a fundamental part in our future homemade boiler, we buy it first and, depending on the size of the heating element, we buy the remaining components (for example, the diameter of the steel pipe must correspond to the heating element so that it can fit into pipe).
Depending on the desired size and performance of a homemade electric boiler, a pipe is cut, and pre-prepared steel sheets must be welded to it at the ends, and bends with a diameter of 4-5 cm are attached to the remaining planes (sides, top and bottom) for inclusion in the heating system.
A nut is screwed into one of the end holes of the largest pipe, which is necessary for the subsequent attachment of the heating element to it.
Safety first!
The next very important point is safety.
To ensure this, it is important to observe three points:
- Grounding. We need to weld a bolt onto the body of our future boiler, to which the ground will be connected.
- For the boiler, you need to build a reliable casing that provides its reliable protection from external factors, including from children.
- Carefully consider the place where you plan to place your boiler. There should be no combustible or flammable materials nearby. A homemade electric boiler should not be accessible to children to avoid their contact with hot and live surfaces.
The heating element will be located depending on the type of heating you want to use:
- When installing a homemade electric boiler connected to a water heating system, the location of the electric heating element is not of fundamental importance (but preferably with the heating element facing up).
- If the heating element will heat the air, then for its uniform heating and, accordingly, long service, it is better to place it from top to bottom.
A programmable automatic control system is installed on ready-made homemade electric heating boilers, which allows you to control the temperature and operating mode of the device manually or automatically.
Advantages and disadvantages of homemade electric boilers for heating
Homemade electric boilers for heating have obvious advantages:
- Cheapness.
- Easy to assemble and operate.
- The ability to select individual characteristics suitable for your premises.
On the other hand, there are also disadvantages:
- Increased fire hazard.
- Low energy efficiency.
- The need to have the skills of an electrician and turner to produce a high-quality boiler.
Thus, homemade electric boilers for heating make sense to manufacture if you are in dire need of a means of heating the room and do not have the appropriate financial capabilities. In other cases, we recommend that you purchase domestically produced electric heating boilers that have the best price-quality ratio.
Option No. 3. Induction boilers
Of the widely used models, the induction boiler can be considered the latest development.
How do induction heaters work?
Without going into the intricacies of the device, an induction boiler is the same as a microwave; the coolant is heated by a magnetic field.
The heating system design involves operation at a given time interval.
Advantages:
- Safety;
- High efficiency;
- These units can use any coolant; its quality does not matter;
- There is practically no scale formation in induction boilers.
Flaws:
- The cost of induction boilers is quite high;
- These devices have relatively complex control automation. It is problematic for an amateur to assemble it with his own hands.
Assembling a simple induction heater
When I started studying homemade induction heaters, I realized that the instructions were not simple, and the drawings were quite complicated for a home craftsman, but there was an interesting solution, which I will talk about later.
| Illustrations. | Recommendations. |
| What does the boiler consist of? To assemble such a boiler, you need to buy an induction stove with a power of 2.4 kW (costs about 2,000 rubles) and 3 m of profiled pipe with a cross-section of 25x50 mm and a wall thickness of 2.5 mm. | |
| Principle of operation. We need to build a kind of flat container from a profiled pipe through which water will circulate. Then attach an induction stove to this container and turn it on. It's the same as putting a pot of water on the stove. | |
| We cut the pipe. The most difficult thing in this work is to do everything as accurately as possible. I cut the pipe using a miter saw on a bench with a stop. In my case, the pipe was cut into 400 mm sections, after which I cleaned the edges of burrs with a file. | |
| Capacity diagram. As shown in the diagram, water circulates like a snake through this improvised radiator. It was no coincidence that I made exactly 6 registers, so I will have the supply and return on one side and it will be easier to connect the stove to the heating system. | |
| We cut connecting holes. The connecting holes must be clearly opposite each other. In this case, I drilled 2 holes along the edges with a 10mm drill, and then cut out the middle between them with a small grinder. | |
| Numbering of pipes. There is a very important point: profiled pipes are not perfectly symmetrical; on one side they are slightly rounded and on the other they are smooth. If you look closely, you can see this in the photo on the left. So, we first need to fold the sharp edge of the pipes with the blunt one. To avoid confusion later, the pipes are numbered immediately. | |
| We collect the container. Now we need to weld all the seams between the pipes; to do this, we lay them out on a perfectly flat surface and tighten them with a clamp. Further, so that the slab does not move, we first grab all the seams point by point, and then thoroughly weld the seams. | |
| Close the end of the container. To seal one side of the container, I cut a strip. The strip was cut from the same profiled pipe; I simply cut off one of the sides with a grinder. We weld as usual, first we grab it, then we scald it. | |
| We weld the pipes. On the reverse side we do almost the same thing, with the only difference being that the inflow and return pipes are welded to the outer pipes. The contact area of our metal container with the induction stove should be maximum, so the welding seams need to be cleaned with a grinder. | |
| We mount the guides. To hang this entire structure on a vertical wall at the back, we weld 2 corners into which our induction stove will then be inserted, like into a niche. | |
| Painting. After completing the welding work, I painted the entire structure with heat-resistant paint and welded hinges for hanging our induction boiler on the wall. In principle, that’s it, now you can connect the boiler to the heating and use it. |