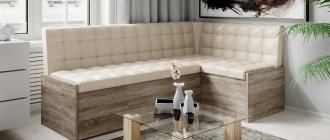
cabinet ideas for home
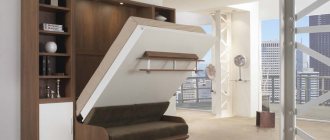
Shown here are examples of furniture for non-standard rooms made from non-standard materials. For example, how to make a wardrobe for a balcony with your own hands , and if you live in a private house, then you will need information on how to make a wardrobe for the attic . And of course, you can’t ignore the topic of pallets; look at several options for stylish and functional furniture made from this durable and affordable material. In addition, the article presents several interesting cabinet ideas for the home .
Step-by-step instructions for making a cabinet-house
Step 1. Draw it yourself or find on the Internet a sketch of a cabinet-house with suitable dimensions.
Sketch of a cabinet-house
Addition to the sketch
At the same time, pay attention to your initial conditions: the age and gender of the child, the number of children, the size of the children's room, the availability of special tools and equipment, practical experience in making furniture and financial capabilities.
Calculate the approximate amount of lumber, hardware and fittings.
Practical advice. Always buy hardware with a reserve; it is impossible to provide for everything at the stage of independent design.
Hardware
Choose the safest methods of fixation; there should be no sharp edges, burrs, etc. on the surfaces of the children's closet. Do not use fixes and minifixes. The fact is that these elements have technological holes that are closed with plastic plugs. Curious children will definitely pick out the plugs and gain access to the metal eccentrics. Then how lucky you are: whether they will be able to unscrew the eccentric and destroy the cabinet or not - no one can predict. But there is a firm belief that the consequences of dismantling the cabinet will be very sad.
For the cabinet we chose 10 mm thick plywood, which is quite sufficient for such loads. The area of one sheet is 2.3 m2, we need two. The dimensions were calculated after selecting the cabinet-house model. To make work easier, Sh1 grade plywood has one side sanded at the factory. In the same store you need to buy paint, brushes and the missing tools.
Plywood
Step 2. Make details and draw a cutting plan. If you plan to order cutting from specialized companies, then they have programs that make up the optimal plan for cutting the board. Professionals, by the way, strongly advise against cutting yourself.
If you do not have a workshop with good woodworking machines, then there are great risks of sawing waste, and the cost of damaged material far exceeds the price of sawing services. To the financial losses we must also add the loss of time and nerve cells. Another problem is that sawing furniture panels is accompanied by a lot of noise; not all neighbors will be grateful for such inconvenience.
If you buy materials from large construction stores, many of them provide this service to their customers for free - a great opportunity to save money.
Sawing can be ordered from most large hardware stores.
And one last thing. The more precise the parts, the easier their assembly is and the better the quality of the cabinet-house. And this design has a lot of constituent elements, some of them are large and some are quite small. Correcting mistakes later is very time-consuming and unpleasant.
Step 3. Bring the parts home, check their completeness and dimensions. Prepare your workbench for assembly. If you have a country house, great, it’s easier to work there.
Practical advice. It is not worth cutting very small parts in the store. Firstly, employees perform such work with great reluctance. Secondly, during assembly there may always be a desire to make certain changes; you will have to change the number and sizes of some parts.
Step 4. Mark out small elements, constantly check the list or sketch. Don't rush, if the cutting conditions are incorrect, a lot of chips will appear on the edges of the plywood. Removing them is time-consuming and difficult, and leaving them on children's furniture is strictly prohibited.
Marking small elements
Drawing cutting lines according to the sketch
Step 5. Very carefully cut off the missing pieces. The plywood must be pressed to the table with clamps; you can work with an ordinary electric jigsaw. If you don’t have clamps, you’ll have to call a friend for help; cutting is very inconvenient for him. You have to hold the plywood with one hand and use the jigsaw with the other. The pressing force changes, the workpiece can rotate, and this is either a defect or a breakage of the tool saw.
Cutting parts with a jigsaw
Children's wardrobes have a large number of openings: windows and doors, patterns and ornaments. Cutting them out is quite difficult and troublesome; you always need to pre-drill holes, otherwise you will not be able to get the saw into the right place. The process will be much simpler if you prepare not one hole, but several along the entire perimeter of the part.
Drilling followed by sawing
Plywood is drilled much easier than sawed; this algorithm of actions makes it possible to reduce the time for preparing elements and at the same time significantly improve their quality.
Step 6. Using sandpaper, carefully remove sharp corners and burrs. Process each part at least twice; after the first, there are often gaps. Don’t rely on your attentiveness; long-term work sharply worsens it.
Careful sanding
Young children can injure not only their hands, but also their faces, and such injuries leave marks for life. Always remember this.
Step 7. Start assembling the cabinet-house. For fixation, you can use nails or screws. The first hardware is preferable, it is faster to work with them, and the heads are securely hidden in the plywood without preliminary drilling.
Assembling a cabinet-house
First, assemble the supporting frame, this structure will be subject to significant forces, pay due attention to the strength of the connection of the supporting units. Then install partitions in it, make a roof and other elements.
Side walls
Back wall
Partitions and roof
Individual small decorative items of the cabinet can be fixed with liquid nails, this is much easier, and does not have any effect on the quality.
Super strong glue
Step 8: Paint the closet.
Dye
Don’t be afraid to involve children in this work, let them take an active part in creating furniture. You can paint the base of the cabinet and let the children create their own drawings on it. Remember that, in principle, there are no ugly children's drawings; evaluate them only from this position. At least two layers of paint are applied to the surface of the plywood; if the pile rises, it should be removed with fine sandpaper.
Painting the house
Ready-made wardrobe
Show the children places for clothes and toys, and lay them out with them for the first time. Don’t forget to praise your child for his efforts and skill, this will give him confidence in his abilities and will be a very effective incentive for further cleaning the children’s room on his own.
The walls of the house are decorated with toys
Additionally installed LED lighting
How to make lighting in a dollhouse
And one last thing. Know that industrial children's furniture undergoes very complex state certification for many characteristics. Such stringent requirements exist for a reason, but to protect children’s health. Do the same strict control of all safety parameters for your furniture.
Video - Wardrobe-house for children's room
Today, children have a large number of toys and clothes. It is impossible to place them in one closet, and putting them in ordinary cardboard boxes is unsightly. Not all parents can afford to constantly buy new furniture for children’s rooms, but most of them can make very beautiful and original shelves and racks as needed. Practical advice on making wooden shelves and racks is on the pages of our website.
What to make a closet from
A cabinet made of wood would look great for a hallway or bedroom.
- It is unlikely that the frame can be made from a monolithic material - usually such a product is 1.8x125x250 cm.
- Where it is necessary to connect the boards, angles or connecting strips will be used.
- It is also worth buying pegs, material for making shelves, drawers and handles, or tubes for hangers.
The more elements you can make yourself, the more you can save. Of course, DIY furniture is also expensive - in this case, people pay for it with their own time. In addition, the cost of wood will be considerable.
Built-in wardrobe dimensions
This is a fundamental issue that must be resolved before purchasing materials. Using a tape measure and level, it is also worth checking the walls, ceiling and floor for unevenness.
You also need to plan the type and number of hangers from the very beginning - this will affect the size of the closet, including its depth.
How to make a cabinet yourself
The following are instructions for creating furniture with your own hands. It consists of several stages.
Stage 1. Frame assembly
First you need to install the elements that support the larger parts of the structure, that is, the frame of the entire cabinet. The next step will be to assemble the vertical partition.
- To do this, use dowels and a screwdriver to screw the corners to the wall, and then screw the boards to the corners.
- Corners are also installed on the side walls to support the shelves.
- It is better to start this work from the top, then the lower shelves will not interfere with the assembly of the higher ones.
Afterwards, hanging hooks are installed. Using a drill/screwdriver, they are screwed with self-tapping screws with a diameter of 15 mm.
Stage 2. Dividing the space
The body of the appropriate width is already ready, so it’s time to start screwing the guides to the side walls on which the shelves will be attached. They can be made independently or by a carpenter to order.
It is enough to use a thick and durable board. If space allows, you can also install convenient drawers. Use 15 mm self-tapping screws to secure the shelf holders.
Stage 3. Door installation
A suitable sized board for creating a door will also work. It will be easier to use traditional door leaves, but you can also install a sliding system at home. Open doors take up more space.
- Use two guides or a guide with space for two wings.
- The axes of both guides are set so that they are perfectly parallel to each other.
- We install running gears at the corners of the wings.
Then install the door on the guides and make adjustments.
What requirements must children's furniture meet?
| Characteristic name | Short description |
| Functionality | Children's furniture should be comfortable for use by both children and adults. It is very difficult to achieve such a characteristic; only professional designers can design furniture that is universal in terms of comfort. They use ergonomic recommendations, which makes it possible to optimally combine the body characteristics of young children and their parents. |
| Safety | Children run and fall; furniture can seriously injure them. The likelihood of unpleasant situations occurring is foreseen at the design stage of furniture parts protruding beyond the general perimeter. In addition to these, there are strict requirements for chemical safety. The vast majority of modern furniture materials contain artificial resins, and they release formaldehyde into the air. These are extremely dangerous toxic compounds for a growing organism. The best option for children's furniture is natural lumber. But then problems arise in protecting external surfaces from contamination. Currently, there are no simple solutions to the problem; we have to constantly look for a middle ground; in principle, ideal options do not exist. |
| beauty | Here, as you know, there is no consensus. There are recommendations from professional designers, it is recommended to listen to them. But the problem is that some people advise, but other people live in apartments. The conclusion is simple - furniture should be liked by users, in this case children. Parents can only express their wishes, and the final decisions are made by the children. |
| Versatility | Children are constantly growing, shelves that were previously comfortable become too low, and the number of toys and clothes changes. The cabinet-house must take into account objective factors and provide for changes in operational requirements for furniture several steps forward. |
Price | In principle, nothing beautiful, safe, strong, durable and at the same time cheap can exist; there is no point in wasting time looking for an impossible dream. What characteristic should you pay most attention to? For safety, all other parameters are also important, but in terms of their effect on the child’s body they are secondary. |
| Manufacturability | A children's wardrobe should not create difficulties during manufacturing. The cabinet-house should consist of the minimum required number of elements. Another requirement is that the furniture must be repairable, which significantly increases its service life. |
What types of cabinets can you make with your own hands at home?
The first thing to start with in the process of making a homemade cabinet is to determine the design. Two types of furniture are classified:
- case;
- built-in
The cabinet cabinet gives scope for further improvement of the design and change of internal contents. You can change the shelves for drawers and make room for a bar for outerwear.
Cabinet elements:
- back wall;
- bottom;
- side walls;
- roof;
- doors.
Additionally, niches and mirrors are installed.
Built-in structures save external space. In addition, their assembly requires less materials. Consequently, such a design will cost less than cabinet furniture. In these models, instead of side or rear panels, room walls are used.
The main disadvantage of built-in cabinets is the stationary nature of the product. It cannot be moved or moved to another room.
Features of the built-in wardrobe
Before planning your cabinet design, you should think carefully about which model to choose. You can make either a built-in or free-standing wardrobe.
The use of sliding doors, which can save a lot of space in the room, is becoming increasingly popular.
Advantages and disadvantages of these options:
- A built-in wardrobe is always a piece of custom-made furniture that allows you to perfectly manage the available space. It can be made of any material; it is possible to design individual elements in such a way as to fit any number of shelves and hangers, or make a small storage room. The disadvantage is that it is placed in one place - the built-in wardrobe cannot be simply moved.
- Freestanding is a cheaper and easier to assemble option. Can be placed anywhere in the bedroom, hallway or other room. They do not always fit perfectly into the interior layout; they usually have less space.
Wardrobe arrangement
A closet can be used to store clothes, but the space inside sometimes also serves as storage space for other items.
- It should have enough shelves and drawers to ensure comfortable use of the furniture.
- The closet should be deep enough so that bulky winter clothes can be hung on hangers.
Sometimes it's worth installing a few extra shelves so you can sort things later.
Rack
Sometimes there is no need to assemble an entire closet to get additional storage furniture. For this reason, shelving is increasingly being manufactured. Of course, wood is most often used as a raw material. In case of much larger loads, you can safely think about a rack whose frame is made of metal.
Regardless of the design of the cabinet, its implementation will require not only effort, but also time. Time can be reduced by purchasing ready-made components or material that does not require additional processing (cutting, gluing, etc.).
Anyone familiar with the furniture market knows that, in general, making your own cabinets is more financially profitable than buying a custom-made option. However, it should be remembered that not every enthusiast will be able to cope with this task with his own hands.