Why do you need a basic pattern?
The finished pattern for the women's base is based on a typical figure. With standard body sizes, you can create patterns yourself. Then you can take into account all the features of the figure, along with chest size, posture, hip volume and abdominal convexity. All patterns are obtained by modeling the basic base. That is, having created a basic model once, you can create various products based on it, sewing over hundreds of clothing models.
Basic pattern
Of course, creating something new is easier than redoing something old. However, it will be easier to correct and adjust a finished base than to create a new one and look for information on how to make a pattern.
Note! Even if you don’t use ready-made magazine patterns, you can always adjust the product to the required dimensions if you have an understanding of the design principles. When creating a basic pattern, there is virtually no need to make changes after the first fitting. Even a novice master can handle them.
Construction of a future product as a purpose
Simple summer dress made of jersey with a cut bodice and skirt
To pattern a product with a cut-off bodice, you will need knitted material, a lining under the bodice, interlining and a hidden zipper. Separate parts of the product are cut out of the fabric according to the drawing lines previously applied to it, not forgetting the need for advance drawing and cutting of darts. The sequence of actions is as follows:
- process the bodice;
- tuck and stitch the bottom of the skirt;
- sew the skirt to the bodice;
- iron seam allowances;
- a zipper is sewn on the middle section of the back part;
- Darts are sewn on the lining and seams are made;
- treat the neck;
- if there are sleeves, then darts are sewn onto them.
The finished product is ironed.
Seamless bodice
Preparing a sketch of a future dress model
Before making a dress, especially a woman’s one, you must create a sketch to fully represent the construction of the pattern for the base of the dress and determine the stages of sewing the product on a sewing machine. A sketch of the future product will help you decide on finishing elements, color, fabric quality, silhouette and details. It is worth pointing out that it is not necessary to be able to draw beautifully and understand human body proportions. You can use ready-made design solutions and supplement them.
The biggest mistake novice designers make when making patterns is the fact that they try to create complex dress models with a lot of darts, complex curves and cutouts. In addition, they plan to use expensive canvases and materials that professional craftsmen cannot always handle. Without the necessary experience and knowledge, you should not try complex silhouettes right away. An experienced tailor, when modeling a loose-fitting dress for a woman, can take the basic dress pattern and make changes to it using chalk on the fabric.
You might be interested in this: Beautiful patterns for sewing trousers for boys
Sketch of the future dress
How to make a sewing pattern yourself
In cutting and sewing courses from masters for beginners, the topic of the need for patterns is discussed. They also tell you how to make it at home. First you need to understand what it is and why a novice seamstress needs the device.
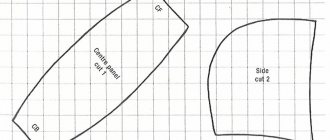
A sewing pattern, whether made by hand or purchased, is necessary for constructing a drawing on fabric. Curvilinear patterns make the work of tailors easier. Only experienced professionals can draw an intricate pattern by hand. Newbies don't have a trained eye. At the initial stage, it is recommended to have an oval pattern at home, like a drop, and also a long one, like a saber.
You might be interested in How and from what fabric to sew potholders: simple patterns
The drop helps to shape the shoulder joints. The saber is designed to draw smooth lines on the side seams. There is also a French pattern, it suits everyone.
Set of patterns
How to make a pattern:
- Download the file for printing. Easy to find on the Internet. You can first choose two main types.
- Print at 100% scale. It is important that the image is of high quality and the marks are clearly visible.
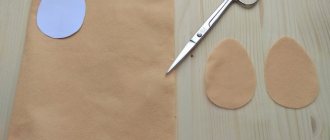
- Cut to shape. Glue the paper onto thick cardboard. If it is possible to cut a shape out of plywood, that’s good. Patterns are not used once.
Important! One of the options for first work on a sewing machine is bed linen.
Working with patterns
Tools
To create a pattern, the cutter needs to take specific tools. As a rule, you always need paper with a ruler and a pencil according to the instructions. It is best to take a transparent and wide ruler in the form of a half-drawn ruler, which is marked in inches and centimeters. Inches are applied at the time of constructing the pattern, which is taken from magazines or websites. You may also need paper tape. It can help with gluing additional paper sections and placing folds on the pattern. But it is enough to purchase a regular roll of masking tape, 3 centimeters wide.
A toothed copy wheel is a tool that will help you transfer a pattern onto paper.
A regular pencil with soft markings. Designed for drawing on thick paper or whatman paper. You will also need an eraser to remove unnecessary lines.
Tools you may also need are a tailor's tape measure, an elastic band or a full-length measuring tape along with tailor's scissors. The latter should be sharp and comfortable.
Note! It is not recommended to cut paper with tailor's scissors. Otherwise, they will become dull and it will be impossible to work with them further.
The tools for creating a pattern will need a rectangular ruler and graph paper to transfer the drawing onto a separate thick sheet.
Tools for creating patterns
What is a pattern and is it always needed?
Patterns are details of a future product, a pattern of fragments, for the manufacture of which paper, fabric, tracing paper or other material is used. This is a sample for creating clothes. It is suitable for sewing private orders. The seamstress can use the pattern repeatedly, making changes to the original design. For mass production, patterns are used. The pattern is characterized by advantages:
- the cutting process is accelerated;
- fabric consumption is reduced (the seamstress knows in advance the cut size for the product);
- it becomes possible to sew something with a complex cut without making major adjustments
- an optimal “fit” to the figure of the finished garment is ensured.
To sew a number of products, you can do without a pattern. We are talking about simple-style dresses, maxi sundresses (the base is a regular T-shirt), shopping bags, etc. Here you can do without constructing a technical drawing. When creating shoulder products or clothes with a belt, a pattern is necessary.
Terms used in construction
To correctly create a pattern for your own dress, apron, skirt or sundress, you need to know the terms. It is necessary to know the concepts of shoulder seam, shoulder dart, natural back curve line, seam allowance, back, center front, dart along the armhole line, center line of the dart. You also need to know the terms frontage system, shoulder taper, shoulder point, armhole, notch, bottom armhole point, side dart, horizontal balance and connecting seam.
Other terms may be required depending on the specific sewing method. As a rule, a complete list of them is given in any handicraft reference book. You can find out what the details listed above are from the picture below.
List of terms
LiveInternetLiveInternet
Basic pattern - what is it for?
Before sewing any product, be it a dress or a jacket, you need to make a sketch of it - a drawing of the future model. Once all the details have been thought out, you can begin modeling. It is at this stage that a basic pattern is needed, built according to the measurements taken from the figure. And here the main question arises: what basic pattern should I use? There are different silhouettes - close-fitting, semi-fitting and loose.
They differ from each other in that they fit differently on the figure. The close-fitting silhouette hugs the figure tightly, emphasizing all its curves and advantages. The semi-adjacent silhouette is more spacious; the name loose silhouette speaks for itself. And here the question arises: if the designer has developed a dress model according to the chosen silhouette, what basic pattern should be used? Answer: Each silhouette needs its own basic pattern. For beginner sewing enthusiasts, building a basic pattern seems difficult, however, if you build a basic pattern once and understand the basic principles of its construction, you will soon be able to do it without any difficulties. Especially for you, we have developed a simple method for constructing a basic pattern.
Summary: each product silhouette is modeled according to the basic pattern corresponding to the silhouette.
What paper should I use for patterns?
To create a basic pattern, we recommend using graph paper. This paper is marked in millimeters and centimeters and is sold in rolls of different lengths. After the pattern is created, transfer it to tracing paper and begin modeling the style of the product.
Rice. 1. Millimeter paper for patterns in rolls
Rice. 2. Tracing paper for patterns in rolls
How to read a pattern?
Yes, yes, the pattern can be read, because each pattern contains a lot of important information, which is encrypted in symbols, numbers and inscriptions.
Rice. 3. How to read a pattern
1. Direction of the grain thread. On each piece of the pattern you will definitely find an arrow with the inscription /Lobar thread or with the letters D.N., which is the same thing. What does this mean? The fact is that you need to pin the part to the fabric strictly in the direction of the grain thread, so that the direction of the arrow and the grain thread on the fabric coincide. 2. Fold the fabric. If the details of the pattern have the inscription Fabric Fold, such parts need to be laid out not only along the grain thread, but also along the fold of the fabric - exactly along the edge. No allowances are made for bends. 3. Special markers. Short lines and triangles mean that you will use these marks to combine what you did when basting. Marks in the form of short lines are additionally accompanied by numbers, which allows you to avoid confusion when basting the product. Be sure to use such marks when modeling your pattern. As a rule, the top point of the sleeve edging, intermediate points for attaching the edging, and zippers are marked. Straight short segments mark folds and tucks, etc. For folds, additionally use arrows that show the direction of laying the folds. 4. Marking of slotted and applied parts. If your product is planned to have welt or patch pockets, stripes or appliqués, or any decorative elements, they are marked in place in full size. 5. Fitting and assembling individual sections of the pattern. The area that needs to be attached or gathered is indicated by a wavy segment or a dotted line with asterisks along the edges, this designation will help you not to make a mistake with which area you need to attach or gather the product. Usually the sleeve caps, sleeves on the elbows, the shoulder of the back, and individual parts on those sides where assembly is required are attached. 6. Darts. Darts are marked on the pattern with the same lines as the outer contours of the parts. 7. Additionally, all necessary details are marked - such as arrow lines on trousers, places where stitches and belt loops are attached, hem lines, etc. 8. Details such as pocket burlap are removed from the pattern separately and cut out.
How to pin a pattern to fabric correctly
To pin the pattern to the fabric, it is better to use thin pins. If you are sewing a product from very thin fabrics, the pattern can be glued to the fabric using pieces of masking tape so that there are no holes from needles left on the fabric. The pattern details are outlined along the kennels with a solid line. Stepping back from the edges of the pattern, mark seam allowances - 1.5 cm on all sides, 4 cm along the bottom of the product and the bottom of the sleeves. To mark pockets and other details on light fabrics, you can use a simple pencil, on dark ones - tailor's chalk.
Rice. 4. Pattern pinned to fabric
Marking pockets with a pencil
Marking pockets using tailor's chalk
How to transfer the contours of a pattern onto fabric
The contours of the pattern are transferred to the fabric using a tailor's chalk or a special disappearing marker, which can be purchased at hardware stores. It is better to buy chalk in light shades - white or yellow - for light fabrics. If you are using a disappearing marker, and after sewing the product the outlines have not completely disappeared, just soak the product in water for a short time.
How to lay out a pattern on fabric
As a rule, pattern pieces are laid out on the fabric along the grain thread, except for those cases when it is necessary to arrange the pieces according to a pattern, etc. If there is a pattern direction on the fabric, the pieces are laid out in one direction. On checkered fabrics, it is necessary to combine the details according to the location of the cage. Fabrics such as velvet, corduroy, faux fur, etc. have a pile direction. In this case, all parts are laid out in the direction of the pile - from top to bottom.
Rice. 5. Incorrectly placed pattern on the fabric
Pattern placed correctly on the fabric
Is a pattern always needed?
A pattern is needed when designing and sewing shoulder products, waist products - skirts and trousers. But there are products the sewing of which does not require a pattern, since they can be sewn without one. These are, as a rule, dresses and blouses in the form of robes, ponchos, skirts with gathers at the waist (the so-called “tatyankas”), etc. Such models are very easy to sew and are very popular with beginners. We have prepared many simple models for you, you can choose your favorite ones and sew them.
Ready-made patterns from their magazines - how to use them?
The easiest way to get a ready-made pattern for the model you like is to copy it from a magazine. However, many who used ready-made patterns from magazines complained that they did not correspond to the stated sizes, the finished product fit baggy and the result was disappointing. To help you avoid this, take note of a few simple tips. 1. Take accurate measurements of your figure, starting with your height. 2. Compare your measurements with the table ones and determine your size (or the one closest to yours). 3. For shoulder products, the main measurement is the chest circumference, for waist ones - the hip circumference. 4. Before retaking the pattern details, use a measuring tape to measure the chest circumference according to the drawing, waist circumference and hip circumference. In some magazines, when modeling patterns, too large increases in freedom of fit are included, which is why the finished product turns out to be too loose. In this case, it may be worth choosing a pattern one size smaller. 5. Height is also an important measurement; if your height is larger or smaller than standard, the pattern will have to be cut and lengthened or shortened vertically. Instructions on how to do this can usually be found in the pages of magazines.
Magazine patterns can be used if you have standard sizes and the models offered in the magazine suit you. However, to make your wardrobe exclusive, come up with models yourself. This approach allows you to realize the most daring ideas, opens up limitless possibilities and gives real pleasure from creativity.
How to store patterns?
To ensure that the details of your pattern are not lost and you can sew on it again, use one of the methods we offer: 1. Create a folder with files, and fold each pattern and place it in a separate file, pinning the pattern details with pins. In each file, additionally include a sheet with a drawing of the model on the front and back and an indication of the size. Write down any additional information on the same sheet. 2. The second option is to glue the pattern pieces onto thin cardboard, cut out the pieces along the cardboard, then carefully sew all the pieces together with thick woolen threads (a couple of stitches) so that if necessary, you can easily untie the pattern pieces. Make a loop and store the pattern hanging in your closet.
Sew beautiful things and wear them with pleasure!
See also:
DIY dress patterns
Skirt patterns
Trouser patterns
Jacket patterns
Measurements for creating a dress pattern
To build a dress, regardless of its shape, three-quarter sleeves, length, material and other factors, you need to know the girth of the chest, waist and hips. You will also definitely need measurements of the back, front and additional measurements in the form of armhole depth, shoulder width, arm and wrist circumference.
Standard measurements for a classic figure
Half-girths
Half girths are girth measurements that are divided in half. To build a dress or any other product, creating a basic pattern, you need to know the half-circumference of the chest, waist and hips.
You might be interested in this: Creating a pattern and sewing dropped sleeves for tops and other clothes
Lengths
Length measurements are measurements of the distance from the back to the waist, the entire back, the length of the front to the waist. This is also necessarily the length of the entire product. When creating darts and yokes, you also need to know their heights and lengths.
Heights
To create the most accurate basic pattern, you need to know the height of the chest, the oblique back, shoulder pads, and the oblique chest height. In some models you also need to adjust the seat height.
Tapered sleeve pattern
On the left side of the sheet, draw a line on which to mark the length of the sleeve, and put A and H. Draw lines from A and H to the right.
Sleeve width
From A to the right, set aside the measurement OP plus 7 cm and put B. (29 + 7 = 36 cm.) From B, lower the line, mark the intersection with the bottom line as H1.
Sleeve hem
From A down, set aside ¾ of the back armhole depth plus 1 cm and place O (19:4 x 3 + 1 = 15.4 cm). From O to the right, draw a line, mark the intersection with BH1 as O1.
Elbow line
From A down, set aside the length of the sleeve to the elbow plus 2 cm and put L (32 + 2 = 34 cm). From L to the right, draw a line, mark the intersection with BH1 as L1.
Cutting edge
Divide line O O1 into 6 parts, mark the division points as O2, O3, O4, O5, O6. Draw lines from each point upward, mark the intersection with AB as A1, A2, A3, A4, A5. From O2 up, set aside ⅓ of the height of the sleeve hem minus 1 cm and place A7 and A8 (15.5: 2 - 2.2 = 2.9 cm). From O6 up, set aside 1/6 of the height of the sleeve cap and place A9 (15.4: 6 = 2.5 cm). Divide the segment O6O1 into three equal parts, mark the right division point as O7. O, A6, A7, A3, A8, O7, O1 and connect.
Sleeve midline
Extend A3 O4 downwards, mark the intersection with the line of the elbow and bottom as L2 and H2. From H2 to the right, set aside 2 cm and place H3. Connect H3 and L2.
Front sleeve cut line
From H3 to the right, set aside ½ of the wrist circumference plus 2-3 cm and place H4 (16: 2 + 3 = 11 cm). Connect H4 and O1 with a dotted line. From the intersection of the dotted line with the elbow line, set aside 1 cm to the left and place L3. Connect O1, L3, H4.
Back sleeve cut line
From H3 to the left, place a perpendicular to the line L2H3. From H3 along this line, set aside ½ of the wrist circumference plus 2-3 cm and place H5 (16: 2 + 3 = 11 cm). From L to the right, set aside 2 cm and place L4. Connect L4 with O and H5. Mark the intersection with line HH1 as H6.
Elbow dart line
From L4 down, set aside the value of the segment H5H6 and place L5. From L4 to the right, set aside 6 cm and connect to L5.
Calculation
To construct a size chart, you need to know the neck half-circumference with the chest and hip half-circumference. You also need to know the value of half the waist circumference. From the lengths, you should know the length of the product, the shoulder, the back to the waist and the shelf to it. From the width - the width of the shoulder, chest and back. From the heights - listed above.
Note! When taking measurements, it is necessary that the centimeter be located on a strictly horizontal surface in a narrow and wide place. The tape should not be stretched due to the narrowness of the product. You can see what an example calculation looks like below.
Meshing example
Modeling the dress O silhouette
A barrel dress, an oval dress, that’s what we used to call it. I didn’t come across a picture of a similar dress in old magazine patterns, but I did find something similar. This silhouette can be of different volumes: from low-volume sheath dresses to a loose dress in a boho style. The length is completely different. Don't forget to think about the freedom to step at the bottom of your dress. It may be worth considering a slit in the middle back seam.
- First, we draw new side seams, according to your idea - as voluminous as your dress is supposed to be.
- Then we move the dart to where it will be in the finished product.
- Pay attention to the bottom line, see fig.
This silhouette, slightly oval with a tight fit across the chest, is very suitable for owners of figures with an “imperfect” waist.
Meshing
Creating a mesh is not a difficult task if you have the appropriate design knowledge. Below is shown how to build a standard sheath dress model with the bust, waist and hip measurements given above.
Drawing the backrest
The backrest is built taking into account the knowledge of the abduction of the center of the backrest at the top, the deposition of the level of the shoulder blades and its connection with a point that has the purpose of a time line. Next, it is built taking into account the knowledge of the width of the back of the neck.
Drawing the backrest
Building a drawing of a shelf
The shelf is created by setting aside a tap along the waistline for semi-adjacent products. To construct the middle back seam, you need to draw a line from the resulting point. Next, from the back neck along the middle seam, set the length of the back down and get the correct length of the product. Then you need to line up the point of the center of the chest, the top and width of the neck of the shelf
Building a drawing of a shelf
Construction of lateral lines
The side lines line up from the middle of the armhole and the center line of the side seam. They are obtained at the intersection of the lines of the waist, hips and bottom, after calculating the solution of the darts along the waist. To make a side seam, you need to divide the resulting number of the full dart solution. To calculate hip extension, divide the previous number by two.
Construction of lateral lines
Sequence of cutting and sewing
Cutting and sewing of the finished product begins only after all the details have been prepared, including those intended for finishing the product: collar, pockets, cuffs. There is a standard sequence of cutting and assembly that must be followed when sewing.
Full sleeve pattern
Neck line
Before you start creating the neck pattern? calculate its width for each part. The front neck and back neck have different depths and widths. They are cut out separately, after which they are combined and, in this form, attached to the already assembled parts. To calculate the depth and width of different parts, separate formulas are used.
Bust dart
The chest darts are transferred from paper to fabric. They are sewn down even before assembling the product itself, that is, before joining the dress along the side lines and shoulders. To build a dart you need to know:
- shelf armhole height;
- chest width (measured twice using two different parameters).
It is more convenient to construct such a dart in a side seam or armhole.
Front shoulder line
To build the front shoulder line:
- from the top point of the left side of the chest dart to the top point of dividing the auxiliary line of the back armhole, draw a dotted line;
- 8 cm are laid along it;
- From the same dotted line, draw another line down, 2 cm long at a right angle.
Draw the front shoulder line.
Back armhole line
To design the back armhole line, four key points are determined in the drawing. The armhole line is drawn through these points.
Draw the back armhole line
When creating a pattern, take into account that losses in the width of the back may occur. To save it, a separate section is laid to the right of the armhole line.
Armhole line
Before cutting, the product is determined by the style, a large amount of paper is stocked for drawing a drawing on it, which is subsequently transferred to the fabric. The complexity of constructing a drawing and subsequent cutting largely depends on the type of fabric and the seamstress’s ideas. The dress is cut following the standard cutting sequence. Even a novice seamstress can handle this.
https://www.youtube.com/watch?v=JvjIgtWH4qg
Bodice
The sun bodice pattern is a basic dress design with a sculptural fit. To build it, you need to understand that the base is obtained by adding centimeters of loose fitting. The amount of increase will depend on the silhouette and type of material.
You might be interested in this: Creating patterns and sewing backpacks according to instructions
Note! All distances in the diagram are based on individual measurements so that the bodice is not stretched across the armhole. The sleeves of the dress are attached to it last.
Construction of the bodice
Neck
The neckline is the most labor-intensive part in creating a pattern. For it you need to know the back area and the shoulder line with the dart. It is equal to one third of the half-circumference of the neck and plus 0.5 centimeters.
Creating a neck
Shoulders
The shoulder line is located at the edge of the neckline. It moves slightly towards the border of the back area. To build it, you need to know the shoulder length measurement and add 1.6 centimeters for the dart. You also need to know the slope of the shoulder line.
Creating the Shoulders
Bottom of armhole
The armhole is always equal to one-fourth of the chest half-circumference. Always falls down to the chest line. The upper two-thirds of the height goes straight down.
Creating an Armhole Bottom
Reference point for constructing the armhole
Located midway between the bottom of the armhole and the front armhole. Determined independently, without calculations.
Reference point for constructing the armhole
Armhole
The height of the armhole is equal to the half-circumference of the chest divided by 4 + 5 centimeters. The armhole has two bends: upper and lower. One is deflected to the side, the other begins at one third of the height of the chest.
Creating an Armhole
Bust dart
The height of the chest dart always reaches the chest line. The tip should coincide with the thoracic apex. The width is determined by half the chest measurement plus a centimeter.
Forming a bust dart
Back dart
It is located four centimeters from the edge of the neckline, has a dart depth of 6 centimeters and a width of 1.6 centimeters.
Forming a dart on the back
Waist darts
Usually found on the parts of the shelf or back. They are not cut or continuous darts. Always made in quantities of two pieces. Located in the middle of the front or back.
Formation of waist darts
What you need to learn to sew.
1) First you need to acquire desire and free time. It is advisable to have a strong nervous system and several pieces of steamers. 2) Take it out of the pantry or buy a sewing machine from the store. 3) And of course – fabric, threads...
If there is no first, there is no point in spending money on the second and third. How and which one to choose a sewing machine for sewing at home. Each machine has a certain set of options. Some of them are simply necessary - the quality of the sewn item depends on them, some are needed under certain sewing conditions, and some are completely useless (especially when it comes to stitching).
In the technical characteristics of the description of sewing machines, the following data is most often given: A pressure regulator for the presser foot on the fabric - a necessary thing - is found in almost all sewing machines except toy ones. Maximum stitch width - the larger the better. The stitch width affects the decorativeness of the seams. It is advisable to choose machines with a larger stitch width. The champions in this indicator are Pfaff machines (some top models have up to 9 mm). The maximum stitch length should also be as large as possible. As a rule, this value can indicate the class of the machine (4 mm for inexpensive and 6 mm for middle and higher class machines); the longer the stitch, the denser materials the machine can sew. The number of lines also depends on the class of the machine. To sew high-quality items, I would recommend the following minimum required stitches: Naturally, straight stitch (stitch length up to 6 mm or more). Width-adjustable zig-zag (stitch width up to 6 mm), preferably with reverse. Knit stitch – for sewing elastic fabrics. Reinforced straight stitching (two stitches in the forward direction and one reverse stitch in the opposite direction) is also indispensable for sewing knitted fabric and for making particularly strong seams. The knit stitch and reinforced stitch are very useful stitches, even if you have a 5-thread overlocker for finishing the edge and sewing knits and other fabrics at the same time. The three-step zigzag is indispensable for sewing on elastic, and also has a very decorative appearance. This set of stitches is used to make almost anything.
Other useful stitches: feather stitch - for sewing pieces end to end, overlock stitch - naturally used for overcasting an edge, blind stitch for hemming a product, bridge stitch - for sewing end to end or so that there is a gap between the pieces. The remaining stitches are largely decorative, they are used more often or less often, and the cost of the machine indirectly depends on their set.
Sleeve platform - (free arm or free sleeve) - a very convenient thing for sewing narrow elements: cuffs, trouser legs or small children's clothes. A very convenient option, it seems to me that almost everyone, even very cheap machines, has this. The size of the sleeve platform matters; it is usually indicated in length and girth. It's good when the platform is long and narrow. Reverse – with this function, it is possible to sew in the reverse direction. This is necessary not only to secure the seam at the end of the stitch, but very often it is necessary to make some section of the seam stronger, in this case stitching back and forth, back and forth helps... More expensive automatic sewing machines have a function for securing the stitching, but even in this case it would not hurt to have a reverse (for example, for the same additional strengthening of a seam or for embroidery), although in such machines there is almost always a reverse. The lifting height of the presser foot is an important indicator; it shows how thick fabrics the machine can sew. Loop sewing mode – automatic or semi-automatic. Automatic is faster, but it’s not a fact that it’s more accurate, and considering how often you have to sew buttonholes, I don’t see the fundamental importance of this parameter. It’s good when there is a mode for sewing buttonholes with an eye, but this is for expensive machines that have 8-10 different types of loop processing. Upper conveyor – but this is really it!!! important, perhaps this is the most important option, for which you don’t mind paying extra money. If there is an upper conveyor, both the lower and upper layers of fabric move simultaneously. Without this, it is impossible to qualitatively sew thin silk, thick denim, knitwear, and sew a thick section of a thing that has many layers (where several parts are joined at once or a linen seam passes through layers of 6 thick fabrics). Machines equipped with an upper conveyor usually have a more advanced design and fewer plastic parts. Now there is an attached upper conveyor on sale, but it seems to me that this is a waste of money, because very precise synchronization of the movement of the upper and lower conveyors is required, and this is only possible in a single design. If you have the opportunity to choose a more expensive machine, choose one with an upper conveyor. The ruler on the body is a very useful thing for quilting, maintaining decorative parallel stitches... Type of shuttle - almost all entry-level and mid-level machines are equipped with horizontal rotary shuttles, vertical double-running shuttles are available in the designs of quite expensive machines, and although bobbins in such shuttles are slightly more difficult to insert and require regular lubrication, there are much fewer problems when sewing (thread tangling, especially if it is embroidery silk). Needle positioning is a controversial concept - for some reason everyone praises machines in which the needle always stops in the up position. This is, of course, good, but only half the time. When you need to turn the fabric at some angle and continue the stitching, you need to keep the needle in the fabric. In this case, machines with an additional needle positioning button are ideal, but only expensive sewing machines have this option. The location of the spool is good when, in addition to the traditional vertical placement of the spool, it is possible to install the spool horizontally; this can be convenient when sewing with slippery silk threads. The width of the conveyor comb - the larger this value, the less the fabric will “float” to the side, the stitching will be smoother, and the quality of the sewn product will be higher. The presence of an embroidery unit is important for very expensive machines, but even on a middle-class machine with a limited set of embroidery stitches you can make unique things. And if you plan to embroider a lot and a variety of embroidery, it may make sense to take a closer look at embroidery machines - now there are very good models at a very affordable price, embroidery on special machines will be of much higher quality than on any, even very expensive, sewing machine.
In addition to these characteristics, you need to pay attention to how the machine is positioned: a seamstress, a station wagon, or a sewing machine for dense, heavy fabrics.
Method of tattooing on a mannequin
This is the creation of a shelf to obtain an accurate design. This replaces the process of creating a product drawing. This is done by pinning the layout. Clearly repeats the volume of the future product.
Method of tattooing on a mannequin
In general, a basic pattern is a ready-made sketch of a future product, without which it is impossible to draw details and construct the silhouette of a dress or other product. It can be done only with the help of measurements, which can be done with a measuring tape and other tools. When constructing a model of a women's or children's dress, it is important to take into account the measurements of length, half-circumference, height and increases of the product, described in the designed dimensional grid. To adjust the product according to your figure and make it more elegant and sophisticated, it is enough to make a chest and waist dart, and a dart along the back.
Technology of cutting and sewing products
To sew a straight-cut dress with a full or simple skirt, you need to think through a step-by-step design and choose the appropriate material. Afterwards, you can start making a pattern or think about how to sew a hoodie dress with your own hands quickly and without a pattern. Then you can start cutting the fabric into appropriate parts and stitching the elements in strict order by hand or using a sewing machine.
The first step in cutting and sewing is to prepare the parts. When cutting, you need to carefully remove the seams from the product and get rid of unnecessary threads.
Preparation of parts
Next, after cutting and before sewing, you need to cut out the necessary parts and sweep them. Then sew it together using a sewing machine. Can be sewn without a pattern.
Basting and stitching
After stitching the front and back, you can iron the resulting product to understand exactly which elements need to be trimmed and which ones need to be basted again.
Ironing the product
Next, you need to process the seams and edges and do a test fitting before completely sewing the home dress with your own hands. Fitting is necessary in order to quickly remake possible parts before decorative finishing. You may want to make additional details and such an element as a pattern for a loose dress with a sleeve will be necessary.
Control fitting
In general, all you need to cut a straight-cut dress is to take needles, threads, the necessary material and a design diagram, and then build the pattern yourself or make the parts without it. For work, you can use ready-made designer summer models with undercuts. You can also rely on the available master classes for one-piece products in the shape of a rectangle, swing and raglan.
