Each of us in life has more than a dozen reasons to make pleasant gifts and surprises for our family and friends: birthdays, anniversaries, weddings, birth of a child and much, much more. Any gift or surprise you purchase can be beautifully and unusually packaged and presented to your loved one. You can, for example, have such a beautiful packaging option as a heart box, which we will make with our own hands.
Beautiful and unique, an exclusive heart-shaped box made of paper is a wonderful opportunity to give your loved ones a smile and a good mood. How to make a gift box - a heart from cardboard or paper - you will definitely find on these pages the necessary packaging master class for the chosen gift.
Our whole life consists of small little things. And we have the power to tell someone near and dear to you how close and dear he is to you by giving him an exclusive handmade item. Below in the article are templates for cutting and a master class on beautiful packaging made from thick paper.
How to make a gift box with your own hands - step-by-step instructions
A beautifully wrapped gift is already half the success. Of course, today there is no shortage of packaging boxes - money can buy a product of any size. But the price for such packaging is often high, especially during the holidays, when the demand for them increases several times. Therefore, it is much easier to make it yourself, just have the necessary materials and show a little imagination.
The easiest way is to use a regular empty box, but at the same time decorate it beautifully by covering it with wrapping paper. And knowing how you can make an original gift box with your own hands, you can easily surprise your loved ones and friends. Moreover, there are a lot of blanks that can be used to quickly and effortlessly make packaging of any size and shape. Such a gift will certainly be the center of attention.
What you need to make a gift box from cardboard and paper
Before you start creating a gift option, you need to make sure that you have everything you need at hand:
- thick corrugated and thin colored cardboard;
- glue (PVA or gun);
- tape (double-sided).
For ease of work, you will also need scissors, a stationery knife, and a ruler.
And, of course, you need to stock up on all kinds of decor - beads, lace, twine, decoupage napkins, etc.
Well, then everything is extremely simple: choose the template you like, print it out, trace it on cardboard, cut it out as carefully as possible, connect the parts and that’s it, the packaging is ready! All that remains is to decorate it, using your imagination and the preferences of the person (favorite color, hobbies) to whom the gift is intended.
You can also use a ready-made box at home, for example, a shoe box. Of course, you can’t give it away in its original form, so you’ll have to try: cover it with special paper on the outside and inside. By the way, in addition to paper, you can also use fabric. Want to decorate with more ribbon? It should be three times the perimeter of the product itself. If there are decorative elements, they are simply glued on. You can use stickers, flowers, lace and whatever you have on hand.
How to make a box with your own hands: 40+ original ideas for gift boxes with patterns
On the eve of the New Year holidays, store windows are full of gift boxes, decorative bags, and wrapping paper for every taste.
Smiling sellers helpfully offer to provide wrapping services for New Year's gifts. And all this seems great, because you must admit, it’s much nicer to receive a New Year’s trinket in a beautiful package.
But on the other hand, the whole meaning of the gift is lost, the very gift that should be intended specifically for you.
The recipient of the gift will be doubly pleased if, in addition to choosing the gift, you spend a little more time on wrapping it. In this article we will teach you how to make gift boxes from paper or cardboard with your own hands.
This is not at all difficult to do, because all the crafts presented with us are accompanied by ready-made diagrams, templates and step-by-step master classes. All you have to do is choose the appropriate box option, print out the diagram and glue the paper box together according to the instructions.
By the way, some of the boxes we present are made using the origami technique, which means that you don’t even need glue!
So, before we get started, let's check if everything is ready. To make a paper gift box with your own hands, you will need: beautiful wrapping paper (you can get by with plain white paper and then decorate it), scissors, pencil, ruler, glue or double-sided tape, and a stationery knife. Everything is? Well then, let's create!
#1 Box “Herringbone”
A great way to pack a small trinket for friends or family is this New Year's themed box. By the way, it’s very easy to do. You'll need green paper and hole punchers (although you can do without). Well, any rhinestones, beads, sequins are suitable for decoration, in general, to your taste!
#2 Gift box “Mint Candy”
And here is another original version of a gift box, which you can very easily make with your own hands, especially with our step-by-step master class. You will need red construction paper (for the box itself), as well as white paper for decoration.
You can make the upper part of the box with applique or simply color the white sheet with pencils or felt-tip pens. By the way, there doesn’t have to be a lollipop on top.
You can get creative with a New Year's theme and decorate the box on top, for example, with a snowflake, a Christmas ball or red M&M's.
#3 Box with lid (diagram)
Well, if you don’t have the time or desire to tinker with the box for a long time, you can use a simple ready-made template. You need to download it, print it, cut it and glue it. Voila, the box is ready! Please note that we have prepared 2 diagrams for you: square (size 5x5) and rectangular (size 7x6x4). Download diagram 5x5 Download diagram 7x6x4
#4 Cup with a gift
But here is a gift packaging option for those who want to surprise with originality - a gift box-cup. It's quite simple to do, but looks impressive! To create, you will need thick paper, scissors and glue. And of course our step-by-step instructions!
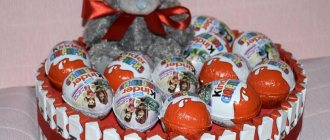
#5 New Year's box “Cake”
If the New Year's party is planned in a large company, for example with a large family, it makes sense to pack gifts for everyone in one large multi-pack box. The cake packaging box consists of 8-10 pieces, each of which is a separate paper gift box. Download the diagram
#6 Gift box with lid for muffins and other small items
During the New Year holidays, edible gifts are quite common: various sweets and baked goods. An original gift will be a muffin prepared with your own hands in a designer gift box. Download the diagram
#7 New Year's box “Diamond”
You can pack a New Year's gift in a diamond-shaped gift box. With our scheme, making such intricate packaging will not be difficult. All you have to do is print out the box template, cut it out and glue it according to the instructions. It's simple! Download the diagram
#8 New Year's packaging "Santa"
A very cute New Year's package will be made from a regular paper bag, decorated with a paper Santa. Download the Santa pattern, cut it out and glue it onto the bag. DIY Christmas packaging is ready! Download the diagram
#9 Boxes “Harry Potter”
Fans of stories about Harry Potter will be indescribably delighted when they receive a piece of their favorite hero as a gift. By the way, such a box with magic sweet beans can be a wonderful addition to a set of books about the adventures of a young wizard. Download the diagram
#10 Box “Gingerbread House”
The symbol of the Christmas and New Year holidays, well known to everyone from Hollywood films, is the gingerbread man. You can make a paper box in the shape of a gingerbread man's house.
By the way, putting the gingerbread men themselves in such a house will be very symbolic, but if you also make them with your own hands, there is no price for such a gift at all! The “Gingerbread House” box is made according to a special pattern, which you can download below.
Also below is a master class on making a box with your own hands. Download the diagram
Source: https://hny.by/podarki/kak-sdelat-korobochku-svoimi-rukami-podarochnye-korobochki-s-kryshkami/
The best templates and tips for making your own birthday gift box
You can pack the gift in any original box made by yourself. The main thing is that it matches the occasion and, of course, is made with love, from the heart.
Simple square
Making such a box is as easy as shelling pears. You will need square sheets of paper, it is better to take cardboard. On one, from one corner to the other, draw lines that will intersect in the center.
First you need to bend one part of the leaf to the center, then the second, do the same with the top and bottom parts. Make cuts along the fold lines as shown in the photo. Next, simply glue the sides together using PVA or a glue gun. All that remains is to make the lid. For it, use a sheet 5 mm larger. And, of course, decorate at your own discretion.
Round box template
Round packaging looks original and chic. To make this, you will need cardboard that is not too thick. Two circles and the same number of rectangles are cut out of it. One circle will be the outer bottom, and the second will be the inner one.
The lid is made according to the same pattern, but all the parts are 1 cm larger than the first workpiece. Next, collect the details and think about the decor. Quilling techniques, fabric flowers, all kinds of appliqués, etc. are perfect for this purpose.
DIY heart-shaped box
DIY heart-shaped box step by step with photo
Making a heart box.
Master class with step-by-step photos Author: Tamara Mikhailovna Lavrenko, teacher of additional education MBOU DO Youth Center of Yeysk Description: this master class is conducted with school-age children, it will also be useful for art and technology teachers, teachers of additional education of artistic and aesthetic orientation, parents and to all those who want to try their hand at arts and crafts. Application: the heart box can be used as a decoration for home or exhibition interiors, as a gift souvenir. Goal: making a heart box Objectives: educational: - teach how to consistently make a heart box; developmental: - promote the development of aesthetic taste, creativity, attention, fine motor skills; - awaken the desire to engage in applied creativity; educational: - to cultivate accuracy, the ability to achieve successful achievement of the goal. Materials: a roll of tape, a stationery knife, scissors, a metal ruler, a simple pencil, PVA glue, toilet paper, glue brushes, a small sheet of any paper, small cardboard, acrylic paints.
Progress of the master class:
After using the tape, you are left with a thick cardboard spool. It can be used for crafts. In this master class we will make a heart-shaped box. We need to divide the circumference of the coil into 2 equal parts. To do this, draw a pencil around the circumference of the coil on one side onto a sheet of paper.
Let's cut out this circle with scissors.
Let's fold the circle in half so that both parts coincide. We'll get the exact middle.
Mark the middle line with a pencil. Let's put this circle on the coil and draw a line on the outside of the coil, as shown in the photo. We'll do the same on the other side.
Let's apply strokes to the rim of the coil on one side and the other. Let's draw a straight line inside the coil, connecting these strokes. Attention! Using a ruler, we make a deep cut along the entire line from the outer part of the circle.
Then, using a ruler, we will also make a deep cut inside the circle. Now let’s squeeze the entire coil with our hands, giving it a heart shape.
Trace the resulting heart onto thick paper or cardboard. In the photo you can see the inner lines - this is the circled heart, and we will draw the outer lines evenly retreating from the inner heart.
Cut out a cardboard heart
We coat the resulting blank well with PVA glue, put a piece of toilet paper on it and glue it with PVA again. You don’t have to apply the paper very evenly, but it needs to be coated well with glue. Note: The connection of PVA glue and toilet paper gives a very strong connection!
We cover the heart with toilet paper outside and inside.
Then we will place the resulting heart on the cut one, which will become the bottom of the box. Try to glue the junction of the bottom and top of the box well and you can use a nail file to push the paper with glue into the resulting gaps.
Now it should dry for 2-3 hours until it is completely dry, and you can decorate it at your discretion.
I painted it with acrylic gold paint. The gift is ready. As an option: you can make a pincushion by inserting padding polyester or foam rubber. Another option: perform decoupage, i.e. stick on some pictures and sequins.
We recommend watching:
DIY gift for mom “Heart” Crafts for Valentine’s Day in the senior group Master class. DIY love tree Master class. DIY souvenir for Valentine's Day
Similar articles:
DIY Valentine's Day gift. Master Class
Schemes for making paper gift boxes in the shape of a pyramid and a Christmas tree for the New Year
Let's use the blank again. It must be carefully cut out, then attached to the sheet and circled, cut out again.
Punch with a thick needle, using a ruler, the outer parts and the central square and bend the workpiece along the resulting lines.
Make holes at the top of the petals using a hole punch.
Thread threads or ribbon through them according to the pattern suggested below.
That's all. Now place the gift in the center of the box and tighten the ties. A hanging tag (option for men) or rhinestone decoration (for girls) will help add originality.
The gift option in the form of a Christmas tree is truly New Year's. It's very easy to do if you follow the template. The most important thing is to trim the workpiece nicely and very carefully around the edges.
The progress of work is practically no different from the previous box:
- Let's make something like this.
- We bend along the main lines and pierce a hole at the top of each side.
- We glue or tie with a rope threaded through the holes and decorate.
Tips for beginners
Remember the most important rule - you only need to start working on creating an original and beautiful gift wrapping with your own hands in a good mood, because it is a piece of it that you put into every detail. Making a box is not difficult; all you need is a template, available tools and some free time.
So, funny boxes in the form of toys, animals, brightly decorated will suit kids. For women and girls, you can choose all kinds of ribbons, rhinestones, and stones as decorations. For men, it is better to wrap a gift in a more discreet, laconic style using appropriate shades. For a colleague or boss, the so-called. corporate style, when creating the box, a work theme is used. For a birthday, packaging in the shape of a cake would be perfect.
How to make a heart box with your own hands: detailed description
We invite you to learn how to make a beautiful heart-shaped gift box with sweets or other filling. Such a delicate and unusual box will be a wonderful addition to the main gift or become a present itself for your loved one, for example, on Valentine's Day.
We offer you a simple and accessible master class on how to make a heart-shaped gift box quickly and easily with your own hands for a surprise.
Before starting all manufacturing work, prepare all the necessary materials and tools. You will need the following:
- sheets of white thick cardboard;
- sheets of thin white cardboard;
- paper strip with ornament;
- bright cotton fabric with a small pattern (floral, polka dot or geometric pattern);
- sharp scissors;
- a simple pencil;
- universal high-quality glue;
- special glue for gluing fabric;
- good brush.
Using the template, draw two heart-shaped pieces on sheets of thicker cardboard and cut them out with scissors. In this case, one part should be one or two millimeters larger around the entire perimeter. This formed the bottom and lid of the future cardboard box. Next, using a simple pencil, outline the side of the heart, add two and a half centimeters, and another two centimeters on each side for the hem. You will only need four of these parts to make the side parts of the origami box and the lid. Make small slits in the hem to make it much easier to give the desired shape to your finished product.
Then carefully and carefully glue the side folds to the cardboard lid of the box. Now glue the second side part. Glue the main part of your heart-shaped gift box in a similar way.
Now use glue to glue the strip with the ornament to the side of the base of the box. Using a simple pencil, transfer the heart template onto your fabric. You will need two fabric pieces. The part intended for gluing the cardboard lid should be one or two millimeters larger around the entire perimeter of the template. Overlock the cut out heart-shaped parts on a special sewing machine. Glue one cut piece from the canvas onto the top of the box lid. Fix the second piece of fabric inside at the bottom of the box. Fold and glue the hem inside the side part. This is required in order to give the finished product completeness and strengthen all the side parts. The finished product can be used as a box for storing handicrafts, jewelry or sweets. You can decorate the box lid in a variety of ways, then the heart-shaped box will look completely different. For decoration you can use rhinestones, satin bows and ribbons, sequins, appliques, quilling and so on. As you can see, making beautiful packaging for your gifts with your own hands is not at all difficult. You just need to put in a little effort and creative imagination. Creative success to you!
Most popular questions
Making a gift box with your own hands is not difficult at all. By showing a little imagination, you will delight your loved ones with a pleasant surprise. And such a gift, decorated appropriately, will cause real delight and genuine admiration among others.
- Studied at DonNU Philological Faculty in Donetsk. Currently on maternity leave. I’m new to copywriting, but I really liked this work because it helps me develop and expand my horizons.
- Authors of articles
Japanese style
Creating a heart box using the origami technique will be unusual and new. Moreover, such a box has a separate lid and can serve as a mini-package.
This option is attractive because it does not require the preparation of materials. All you have to do is take a sheet of paper and get to work.
Since the process of folding the box is multi-stage, it is recommended to use the attached product assembly diagrams.
Due to the fact that regular paper is used, the folded box is not very durable. Therefore, it can only serve as packaging for very light items.
Cardboard heart box
Materials used:
Manufacturing:
We transfer this diagram for making a heart box onto a sheet of cardboard - you can print it or draw it.
We cut out the resulting cardboard blank along the contour using scissors or a stationery knife, and then bend the side fragments.
Next, we begin assembling the box. To do this, grease the edges of the heart with glue and press the corresponding parts tightly against them.
Let the glue dry and the heart-shaped box is ready. The size of the box may vary depending on your wishes and the parameters of the gift.
This homemade case is ideal for sweets and small gifts.
How to make a heart-shaped box from cardboard: video
In order to get such a beautiful cardboard box in the shape of a heart, you will need: cardboard, glue, a brush, openwork or colored paper, bows for decoration. First you need to prepare the blank using a pattern.
Now we cut out the blank from cardboard and put it together, then glue it. You will need two of these blanks. One of them will be the base, and the other will be the lid. Leave the finished cardboard box for a while to dry.
When the box has dried well, it can be covered with paper on top or painted with paints. Glue bows on top and you're done. You can see more clearly how to make a heart-shaped box with your own hands in the video:
Open heart box
Materials used:
Manufacturing:
We transfer this diagram onto cardboard or thick paper and cut it out along the contour.
We tint the outline of the hearts with a marker or felt-tip pen in a color close to the shade of the paper used.
Fold and glue the box along the dotted lines. When the heart-envelope is dry, write a beautiful congratulation on the front side with a marker and fill it with sweets or small souvenirs.
Miniature box with a heart
Materials used:
Manufacturing:
We transfer the diagram for making the box onto colored paper or cardboard, and then cut it out along the intended contour.
We bend the resulting workpiece in the places marked with a dotted line. In other places we cut as shown in the photo.
We assemble the box by closing the top flaps. A miniature heart will act as a lock on the box.
Heart pocket
Another heart box in the form of an open pocket is recommended as an original packaging for sweets, shaped cookies or nuts.
When working, it is enough to have on hand:
- cardboard of any color;
- pencil;
- glue.
A diagram of the product is drawn on paper in the form of two identical hearts connected to each other by a wide jumper. Along the outer edges of the hearts, you need to set aside a distance equal to the width of the jumper.
The workpiece is cut out. Folds should be made along the lines that follow the shape of the heart. At this stage you need to design the main walls of the box. They are the hearts themselves.
If bright colored paper is chosen for production, then elaborate decoration is not required. It is enough to write a few lines of pleasant content. After this, the extreme folds of the box are connected and glued together.
Related article: DIY pasta angel: master class with photos and videos
The top part remains open, which allows you to fill the box with delicious contents.
How to make a gift box with your own hands - step-by-step instructions
A beautifully wrapped gift is already half the success. Of course, today there is no shortage of packaging boxes - money can buy a product of any size. But the price for such packaging is often high, especially during the holidays, when the demand for them increases several times. Therefore, it is much easier to make it yourself, just have the necessary materials and show a little imagination.
The easiest way is to use a regular empty box, but at the same time decorate it beautifully by covering it with wrapping paper. And knowing how you can make an original gift box with your own hands, you can easily surprise your loved ones and friends. Moreover, there are a lot of blanks that can be used to quickly and effortlessly make packaging of any size and shape. Such a gift will certainly be the center of attention.
What you need to make a gift box from cardboard and paper
Before you start creating a gift option, you need to make sure that you have everything you need at hand:
- thick corrugated and thin colored cardboard;
- glue (PVA or gun);
- tape (double-sided).
For ease of work, you will also need scissors, a stationery knife, and a ruler.
And, of course, you need to stock up on all kinds of decor - beads, lace, twine, decoupage napkins, etc.
Well, then everything is extremely simple: choose the template you like, print it out, trace it on cardboard, cut it out as carefully as possible, connect the parts and that’s it, the packaging is ready! All that remains is to decorate it, using your imagination and the preferences of the person (favorite color, hobbies) to whom the gift is intended.
You can also use a ready-made box at home, for example, a shoe box. Of course, you can’t give it away in its original form, so you’ll have to try: cover it with special paper on the outside and inside. By the way, in addition to paper, you can also use fabric. Want to decorate with more ribbon? It should be three times the perimeter of the product itself. If there are decorative elements, they are simply glued on. You can use stickers, flowers, lace and whatever you have on hand.
Making a heart-shaped box with your own hands
Remember that the finished box will still need to be decorated. After all, even a simple box can become a real work of art if it is beautifully decorated. For decoration, you can use lace of various widths and sizes, as well as guipure inserts and satin flowers. Satin bows look very elegant.
You can also use glass beads, sparkles or beads for decoration. It is better to attach them with glue in one layer. The entire box can be opened with glitter nail polish and it will also stick well. In addition, you can use small candies, toys, paper or foil bows as decorative elements. Photos of you together will look very cute, cut out in the shape of a heart and pasted on top.
We hope that our ideas will be useful to you and you will definitely be able to make one of these heart-shaped boxes with your own hands. Keep at it and you will succeed.
The best templates and tips for making your own birthday gift box
You can pack the gift in any original box made by yourself. The main thing is that it matches the occasion and, of course, is made with love, from the heart.
Simple square
Making such a box is as easy as shelling pears. You will need square sheets of paper, it is better to take cardboard. On one, from one corner to the other, draw lines that will intersect in the center.
First you need to bend one part of the leaf to the center, then the second, do the same with the top and bottom parts. Make cuts along the fold lines as shown in the photo. Next, simply glue the sides together using PVA or a glue gun. All that remains is to make the lid. For it, use a sheet 5 mm larger. And, of course, decorate at your own discretion.
Round box template
Round packaging looks original and chic. To make this, you will need cardboard that is not too thick. Two circles and the same number of rectangles are cut out of it. One circle will be the outer bottom, and the second will be the inner one.
The lid is made according to the same pattern, but all the parts are 1 cm larger than the first workpiece. Next, collect the details and think about the decor. Quilling techniques, fabric flowers, all kinds of appliqués, etc. are perfect for this purpose.
In the form of an animal for a child's birthday
Such gifts are suitable for children; they will be truly delighted when they receive an animal box, and even with a pleasant surprise inside. The main thing is that the product turns out colorful. The workpiece is simply cut out according to the pattern, slots are made, and bent, securing with ears. Next, all that remains is to glue the eyes, tail and paws.
Sweet heart
The most common material in making boxes is cardboard. This is what will be used in our work. A small box for sweet surprises is offered for study.
Before you begin the creative process, you should prepare:
- white cardboard;
- white paper;
- paper with ornaments;
- colored cotton fabric with small patterns;
- scissors;
- PVA glue, brush;
- pencil;
- fabric glue.
Two heart-shaped details of a given size are drawn on thick cardboard. In this case, one element should be 1-2 mm larger in area than the other. Templates are cut out. They need to be used to make similar parts from white cardboard.
Using the pattern, you need to circle the side of the heart. Having departed from the drawn line, the distance specified as the height of the box should be duplicated. Then 2 cm is added to the two parallel lines on each side.
You need to make four of these parts. The blanks are cut out and folded along the lines. Using scissors, a semblance of a “fence” is formed from the side parts. To each base heart, jagged blanks are glued to the outside, forming walls.
Paper with an ornament is glued to the walls of the box.
The heart-shaped lid template is placed on the fabric and outlined; a similar heart is drawn separately, but 1-2 mm smaller than the previous one.
The pattern is cut out. To prevent the fabric from fraying, its edges should be treated with an overlock or a special machine stitch. Fabric blanks are fixed on the outside and inside of the lid with the front side up. The work uses fabric glue.
Related article: Celtic patterns with photos: description of woodworking
The remaining teeth along the edge of the lid are glued to the inner parts of the walls.
This box of chocolates will be an excellent gift for a loved one.
Advice! If you need a large box for a gift, you can use similar instructions, replacing the cardboard with a thicker one and changing the size of the templates. In this case, the box lid will require additional decor in the form of satin ribbons or lace.
Schemes for making paper gift boxes in the shape of a pyramid and a Christmas tree for the New Year
Let's use the blank again. It must be carefully cut out, then attached to the sheet and circled, cut out again.
Punch with a thick needle, using a ruler, the outer parts and the central square and bend the workpiece along the resulting lines.
Make holes at the top of the petals using a hole punch.
Thread threads or ribbon through them according to the pattern suggested below.
That's all. Now place the gift in the center of the box and tighten the ties. A hanging tag (option for men) or rhinestone decoration (for girls) will help add originality.
The gift option in the form of a Christmas tree is truly New Year's. It's very easy to do if you follow the template. The most important thing is to trim the workpiece nicely and very carefully around the edges.
The progress of work is practically no different from the previous box:
- Let's make something like this.
- We bend along the main lines and pierce a hole at the top of each side.
- We glue or tie with a rope threaded through the holes and decorate.
Tips for beginners
Remember the most important rule - you only need to start working on creating an original and beautiful gift wrapping with your own hands in a good mood, because it is a piece of it that you put into every detail. Making a box is not difficult; all you need is a template, available tools and some free time.
So, funny boxes in the form of toys, animals, brightly decorated will suit kids. For women and girls, you can choose all kinds of ribbons, rhinestones, and stones as decorations. For men, it is better to wrap a gift in a more discreet, laconic style using appropriate shades. For a colleague or boss, the so-called. corporate style, when creating the box, a work theme is used. For a birthday, packaging in the shape of a cake would be perfect.
Featured video for the article
After reading our article, we suggest that you familiarize yourself with several interesting videos on the presented topic. In these videos you will get ideas for creating and decorating a heart-shaped box. We hope that the material we offer will be useful to you. Have fun and useful studying!
We all already know the legend that surrounds the celebration of St. Valentine's Day. She tells us that Emperor Claudius II, who forbade his soldiers to marry for greater courage in battle, was forced to sentence to death the priest Valentin, who disobeyed him and continued to illegally marry everyone. Before his execution, Valentin wrote a farewell letter to a blind girl, which healed her illness. Such a beautiful legend tells us to honor Saint Valentine as the patron saint of couples and follow his example every year by making and signing love messages to our dear friends.
Most popular questions
Making a gift box with your own hands is not difficult at all. By showing a little imagination, you will delight your loved ones with a pleasant surprise. And such a gift, decorated appropriately, will cause real delight and genuine admiration among others.
- Studied at DonNU Philological Faculty in Donetsk. Currently on maternity leave. I’m new to copywriting, but I really liked this work because it helps me develop and expand my horizons.
- Authors of articles
Sources:
https://kaknazvat.com/rukodelie/korobka-dlya-podarka/ https://www.kakprosto.ru/kak-910381-kak-sdelat-korobochku-serdechko-svoimi-rukami https://kaknazvat.com/rukodelie /korobka-dlya-podarka/
How to make a paper heart box: video
Even a child can glue together such a beautiful heart-shaped box. Its only disadvantage is that it can only be made from thin cardboard or paper, and therefore it is better to put funny little things or sweets in it as a gift, but nothing heavy, as it simply will not hold up. In order to make such a box, you will need:
- pencil;
- ruler;
- glue;
- pink paper;
- scissors.
Cut out the blank according to the pattern.
It is better to make the edges of the side element into teeth, so they will fit better. Then we glue the box together. You can decorate the finished product with sparkles, bows, or simply decorate it at your discretion.
Another way to make a heart-shaped box that will be attached to a neat bow is presented in the diagram below.
You need to prepare colored paper and satin ribbons. Cut out a piece of paper and fold along the fold lines. Make small holes on top for ties. If you want to watch a more detailed description of the process of making an original box with your own hands from paper, then you will find this video useful: