Every home still has furniture from the last century: everyone’s favorite wardrobes, which can hold quite a lot of things, and sideboards. The furniture looks boring, and has also lost its appearance. The houses or apartments of modern people should have stylish furniture. After all, what was fashionable 10-20 or even 30 years ago is now considered relics of the past.
We are not forcing you to get rid of your interior items, but we are presenting some tips that will help you transform your old furniture.
From the wall - into a stylish set
The owners of this brown “wall” took it to their dacha, and then decided to try their hand at remodeling it into modern furniture.
The chipboard covering was cracked and peeling off in places, so it was completely removed. The cabinet frames were dismantled and re-attached with Euroscrews. The parts were sanded, puttied and painted. The tabletops and legs were made from old boards, and the door layout was re-nailed.
Moldings were added to the front of the cabinet, making it unrecognizable. The result was three sets for different rooms: two bedside tables for the living room, a wardrobe for the bedroom and another set of three cabinets.
And here you can watch a detailed video about remaking a bookshelf from an old wall. The owners turned it into a TV stand.
Filling elements
As mentioned above, the cabinet can have additional elements and accessories as filling. They are expressed in detail in the following list:
- Shelf - the materials used can be regular laminated chipboard. The edge is melamine, which is not entirely welcome. In this case, it is better to spend money on more expensive and high-quality material;
The location of the shelves in the hallway closet.
- If your wardrobe is at least 500mm deep, it makes sense to use tubes with coat hangers (the hangers are placed perpendicular to the back of the wardrobe).
- If the depth of the cabinet is less than 500 mm, end hangers, that is, retractable ones, will be more promising for use. They are secured parallel to the rear wall of the cabinet. However, a standard clothes rail, which is also more spacious, is considered a more convenient option.
Options for the location of retractable hangers for the closet.
- A drawer is considered a multifunctional addition. To work comfortably with it, you will need to buy normal guides. You should not be tempted by the cheap option, as if the guides are bad, the drawer may tip over. Use ball guides at a cost of 100-150 rubles. Although you may overpay, you will be able to freely open and close the drawer more than halfway.
Drawers are multi-functional and easy to use.
- The net is needed for shoes. This element can be multi-level or retractable.
In a hallway closet, a shelf for shoes is most often made of mesh.
The above paragraphs list only the main content elements. Of course, there are additional items, but not everyone always uses them.
An example of different elements filling the cabinet space in the hallway.
Cabinet assembly
- If your plans call for drawers, start with those. Assemble the frame using confirmations, then screw the lower part, attach the parts that are part of the roll-out telescopic system.
- Fold all the shelves evenly, mark the indentations and draw a vertical line along the ends of the identical parts under the square. Using a core punch, mark the locations for the holes at the ends. Make holes with a drill.
- Screw the fixed parts of the telescopic drawer slides.
- On the inner surface of the cabinet partitions, apply markings for installing shelves; these markings will disappear when the parts are installed in place. Make a through hole in the marked places, and then you can make a countersink from the outside.
- We assemble the frame of our cabinet. To increase rigidity, be sure to install ties.
- Screw the bottom of the cabinet, install bottom supports.
- We install the resulting structure vertically, after which we attach the cabinet lid to the furniture corners.
- We place the drawers in their places.
- We install the rear walls of the wardrobe and secure them with self-tapping screws.
- We install rods to place clothes.
- We adjust the fronts of drawers.
Article on the topic: Do-it-yourself napkins for the table
Decoupage of kitchen facades
Decoupage is a great way to update your kitchen set and give it a touch of Provence style. After the transformation, the facades will look as if talented artists painted them for you, but you will know that you made all this beauty with your own hands. You can put absolutely any design on cabinets and shelves, but usually they choose something related to plant and kitchen themes: images of fruits and vegetables, coffee, jars of spices and cereals, flowers, etc. Decoupage will help decorate facades with ornaments in the style of Gzhel or Petrikov painting. The main thing is to find a suitable drawing - no one limits your imagination.
Everyone can cope with the restoration of facades on their own:
- remove all doors, remove fittings;
- If the surface of the headset is perfectly flat and smooth, then you only need to wash it well to get rid of stains of grease and dirt. If there are defects, it is better to sand the surface. First use fine-grained sandpaper, and then coarse-grained sandpaper. If you have a sanding machine at your disposal, it will greatly simplify the process. If there are cracks, depressions, or pits, it is better to fill them with putty. When it dries, the treated areas are sanded again. After this, the facades can be primed, but many skip this stage;
- The decoupage technique is suitable not only for wood, chipboard and MDF - it can also be used to decorate plastic and glass facades. Preparing them for decoration is very simple - just get rid of all the dirt and grease;
- The easiest way is to use three-layer napkins for decoupage. Think in advance about which part of the façade the drawing will be located. Don't use images that are too small. Different cabinets can be decorated with pictures in the same style. The image can be glued to regular PVA glue;
- Now all that remains is to open the facade with acrylic varnish, it is better to use 3-4 layers, each applied after the previous one has completely dried. The easiest way to work is with a narrow brush with long bristles;
- All that remains is to return the fittings and install the facades.
If this is not your first work using the decoupage technique, then you can use not only special napkins. Experienced craftsmen know that fragments of wallpaper with a suitable pattern, and even maple for a kitchen table, will do, not to mention that the image you like can be printed on a printer.
Advantages and disadvantages
Today, a wardrobe can be placed on a par with the most popular types of furniture. Due to sliding doors, it allows you to significantly save space, which is an important factor for modern apartments. Its “filling” can be almost anything, based on the wishes of the owners, and the floor, ceiling and walls of the room can serve as the bottom, top and even walls of the cabinet, which allows you to save consumables.
Before designing a product, it is important to take into account its advantages and nuances.
Let's consider the advantages of a sliding wardrobe:
- Space saving. Sliding doors do not require extra space, and the product itself is installed as close to the wall as possible.
- Capacity. The large volume allows you to store many necessary things.
- Versatility. The design can be adapted to any interior design of the rooms.
- Internal filling. Making a wardrobe with your own hands means providing it with the elements you need.
- Zoning. Often, sliding wardrobes are used to divide studio apartments into separate zones.
- Wide design possibilities. There are many types of products that are suitable for placement in your home.
The disadvantages include the need for precise measurements regarding the cabinet design. It is important to consider the width of the doors, the correct location of the rails and other nuances for the normal operation of the product.
We recommend taking a training course on making cabinet furniture at home at a professional level. You will not only learn how to make furniture with your own hands , but you will also be able to earn money from this skill ! You can watch a free introductory lesson using this link.
Choosing material
Its durability depends on the correct selection of raw materials from which you plan to make a wardrobe for your bedroom with your own hands. Mahogany is considered the most durable and reliable. Oak and beech will be equally high-quality materials. More expensive, but also excellent wood would be Karelian birch, which ensures a long service life of the product.
Recently, fiberboard, MDF, laminated chipboard, as well as plywood are often used to make furniture. Structures made from them differ in reliability characteristics, but they are cheaper compared to solid wood. As for aesthetic qualities, laminated pressed boards and MDF are today manufactured in various design variations. Internal components are also made from MDF, chipboard, and plywood.
Drywall is used less frequently as a raw material for the production of cabinets, since it provides parameters that are less resistant to external influences. It will be difficult to move such a structure, since the material crumbles when unwinding again.
Furniture panels contain a special wood structure and are often found defective, which affects their strength. This kind of material may not be very advantageous in comparison with more durable and reliable MDF and laminated chipboard panels. The panels are suitable for creating small cabinets in niches. For large-scale products, the use of strong solid wood is recommended. The facade can be decorated with glass, tinted with film and other materials.
Place the mirror
One of the simplest and most popular options is the mirror surface of doors. This can be one central or two side sections, or a continuous mirror surface over the entire area. A huge advantage of this solution is the visual expansion of a small space. Reflective surfaces create more light and air, which is very important for small apartments.
If the owners are not happy with large mirrors in sight, you can place the canvas on the inside of one of the swing doors. And if you duplicate the mirror on the second door, you will get the effect of a dressing table, allowing you to see yourself both from the front and from behind.
An interesting modern option is a retractable mirror on a bracket that can be rotated any way you like. Great for creating intricate hairstyles.
Base
If the floor surface is uneven, this defect will become very noticeable when installing the structure. The guides will have to be aligned, which will leave unsightly gaps. Installing a base will help hide this drawback.
Lighting
For greater comfort, the cabinet compartments can be equipped with spotlights, LED strips and other suitable lighting fixtures. Open shelves and glazed niches with such illumination look wonderful. And good lighting inside allows you to quickly and easily find the thing you need.
Mezzanine
This separate section is used to store things that are required occasionally or are seasonal. For example, winter clothes for the summer or equipment for summer hikes, when the snow has already settled firmly. Since it is difficult to get to the top compartment without a ladder or stool, it makes no sense to store everyday things in it.
The mezzanine is usually a single space, without division by shelves. If the ceiling height is small, you don’t have to make separate doors for this compartment; common ones will suffice.
Black cabinet with engraving
The story of how this bedside table was remade is a complicated one: the owner found it in a landfill and several times wanted to take it back for “disobedience.” It took 10 coats of remover to remove all the varnish from the veneer! This took several days.
After applying protective oil, flaws were revealed, and the craftswoman partially painted them over. The owner was not satisfied with the result, so the cabinet was completely painted black. Only the legs remained intact.
Using a pencil, we drew a design on the door and drilled it out with a small drill with an engraver attachment. The result exceeded all expectations!
In order not to waste time on removing the varnish, you should sand the surface to a rough state, apply an acrylic primer and paint it with moisture-resistant paint in 2 layers. In this example, "Tikkurila Euro Power 7" was used. The top of the bedside table is covered with acrylic varnish.
How to decorate old furniture: veneer and wallpaper for furniture or decoupage?
Another interesting way to update old furniture is to cover its surface with the selected type of material. You can use popular self-adhesive films - with a pattern or imitating wood, wallpaper, and even fabrics or thick paper used in the decoration technique - scrapbooking. Decoupage is also an effective method, thanks to which the furniture will acquire a rustic character.
If you choose self-adhesive film, then most of the work and attention should be paid to accurately adjusting its size to the selected surface. You can use it to overlap furniture, leaving extra thicker strips on the sides and folding the excess underneath, or trimming the film just to the edge. The second important issue is the removal of air bubbles that appear under the film. Always start gluing from the top, gradually and slowly peeling away the layer of paper protecting the adhesive. How much does this type of furniture repair cost? Film prices start at 180 rubles per square meter.
You can also cover old furniture – in whole or in part, decoratively – with wallpaper. It is best to roughen the selected surface, as before painting. Then apply wallpaper glue to it (we can buy it for about 250 rubles for 200 g) and carefully glue it, smoothing out air bubbles and unevenness. You can choose any type of wallpaper, and the cheapest paper ones should be additionally secured with a layer of varnish. This way you can decorate small surfaces, for example, with thick paper with interesting patterns.
When restoring old furniture, you can also use one of the decorative arts - decoupage. You can combine this technique with a previous painting or use it to decorate furniture whose color suits you and the surface is in good condition. You will need decoupage glue (about 300 rubles for 250 g), special rice paper decors (about 100-150 rubles) or napkins with a beautiful pattern and colorless wood varnish. The composition of the decorations must be glued to the selected parts of the piece of furniture, and then carefully secured with varnish.
Cabinet assembly
- Assembly begins by installing the main walls and edging the opening around the perimeter with narrow strips of laminated chipboard.
- The frame is attached to the walls, ceiling, floor with dowels.
- The parts are assembled together using corners. If you want to do it beautifully, use plastic furniture corners that will cover the screw heads. If the main thing is a reliable result, you can use small steel angles.
Drill for confirmation
- The best and modern way to fasten parts to each other is to use furniture bolts (Euroscrew), but they require pre-drilling holes, which is difficult to do by eye. To create holes, use a special confirmat drill (you can do without it, but you will have to use several drills of different diameters).
- If fastening with euroscrews is planned, furniture dowels are used for additional rigidity and preliminary fixation of parts.
- The Euroscrews are tightened with a hexagon, and plugs are inserted into the caps to match the color of the cabinet.
- When the base of the cabinet is ready, they begin to install the partitions, and then the shelves themselves.
Article on the topic: DIY Provence style chandelier
Attaching a clothes rail
Fastening the shelves
Options for shelf supports made of plastic and metal
Shelves can be attached in several ways, we list them.
- Corners - simple, but ugly. This method is good only in extreme cases when other types of fastening are not suitable.
- Confirmats (euroscrews) - reliable, suitable for high loads, but they are used only in invisible places, so as not to spoil the appearance with caps.
- Eccentrics are a good, but labor-intensive method, and the screw head (plug) will be visible from the bottom of the shelves.
- Shelf supports are the best option; they are not visible from both sides.
Sliding doors
The most difficult element of a wardrobe is the sliding doors. You can’t skimp on fittings here, otherwise you’ll suffer with doors jamming and falling out. In almost every city you can find domestic sliding systems from Aristo, Versailles, Polish Laguna, they are quite good for their price.
Attaching a 4 mm mirror to a profile using a silicone attachment
A wardrobe in a hallway usually consists of two, less often three doors. Each door is a leaf enclosed on four sides in a frame made of aluminum profiles. It does not have to be uniform, the parts can be combined freely, and a special profile is used for joining at any angle. Standard profiles are designed for chipboard thickness of 10 mm.
A mirror 4 mm thick can also be easily inserted into such profiles, after first placing a silicone seal around the perimeter, which will add the missing 6 mm.
The main thing is to buy mirrors with a special elastic film that will hold the fragments in the event of a strong impact.
It is not recommended to make doors more than 1 m wide. Firstly, it is inconvenient, and secondly, it is difficult to deliver materials for them safely.
You can order ready-made doors or assemble them yourself. There are no particular difficulties: you just need to put the material in a frame and tie it with screws.
Assembly begins with transverse profiles. They are filled with a rubber hammer or through a wooden spacer.
After the horizontal profiles, vertical handles are stuffed and secured with 5x30 or 6x35 mm self-tapping screws. Before the final frame tightening, the upper and lower rollers are installed.
To prevent the fastening from being visible, holes for the screws are made with drills of several diameters: the first large hole of 9 mm will freely let the head inside the profile (if you look at it in section, you can see the compartment that will hide the head). The second 5 mm hole is made under the screw leg (see photo).
Article on the topic: DIY furniture made from unedged boards
Horizontal and vertical profiles are different. In the vertical profiles, you should end up with three holes: one at the top and bottom for assembly, and one at the bottom for attaching the lower rollers.
Top rail fastening
The door itself will ride on guides that are mounted in the same plane at the top and bottom. The upper rails will ensure the doors are fixed relative to the depth, and the lower rails will ensure opening/closing. The lower rollers are most often made of plastic, have shock absorption in the form of a spring and a screw for adjusting the door height. The upper rollers have a rubberized surface.
All aluminum profiles and guides are cut to size and screwed onto self-tapping screws. You will need to install a door stop in the bottom rail. If desired, closers are installed in the upper guides, which themselves will close the door completely.
To install the doors, first insert it into the far channel of the upper guide, and then insert it into the corresponding lower channel. Second doors are also installed.
After installation, the lower rollers are adjusted along the vertical wall of the cabinet so that there are no gaps. Schlegel (buffer tape) is glued to the vertical handles.
Assembling a kitchen and a wardrobe are the most affordable options for testing your skills. Such cabinet furniture does not require the development of a special design or the use of non-standard solutions. You just have to choose the finished material, color and assemble it correctly.
Hallway configuration
An elongated narrow corridor needs to be visually expanded. A sliding wardrobe with mirrored doors installed along a long wall will add air and light.
Painting the ends of the room in darker colors than the side walls will help visually shorten the length. Horizontal stripes will expand the space.
A small hallway will require a thoughtful, compact solution to save every centimeter. Mezzanines, narrow wall hangers, and folding shelves would be appropriate here. A corner cabinet will help save space.
A large hallway allows you to create additional storage areas for sports equipment: bicycles, skis, skateboards, and for household items: vacuum cleaner, ironing board.
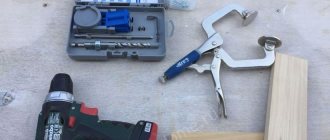
Required Tools
To assemble a hallway cabinet with your own hands, you may need a classic set of tools:
- Screwdrivers and keys for hardware.
- Drill with a set of drills.
- Screwdriver.
- Hacksaw.
- Hand tools: mallet, hammer, clamp, square and level.
- Small things: tape measure, ruler, pencil, breadboard knife, core.
Depending on the chosen concept, you may need: hooks, furniture fittings (handles, door hinges, locks) or guides for drawers. In addition, you should take into account the type of connections of structural elements and make sure in advance that there are: hardware, confirmations, rafixes, furniture corners and plugs of various types.
When selecting materials for making a cabinet, you should take into account both its technical characteristics of the specific material and the level of humidity in the room.
Progress
- First, the two main walls are installed. The opening can be edged with strips of chipboard;
- The frame is attached to the floor, wall and ceiling;
- Each part is assembled using wooden or metal corners. For aesthetics, option 1 is suitable, but for reliability, option 2 is recommended;
- To secure the parts, a Euroscrew is used (preliminary drilling with confirmat is required);
- To add more rigidity when attaching a part or to secure it in advance, you can use a dowel;
- To tighten the euroscrew you will need a hexagon. Also don't forget about the plugs. It is advisable to choose them to match the color of the furniture;
- The first step is to assemble the base of the structure, and then you can proceed to installing shelves and other partitions;
- After installing storage systems, we move on to installing cabinet doors. Secure the door hinges at the top and bottom of the door blank, attach them to the walls.
Now the closet is ready. When installing doors, the main thing is not to skimp on fittings. Otherwise, you may end up having trouble with their subsequent repairs. A homemade wardrobe in the hallway will not only save you money, but will also endow the entire home interior with the owner’s extraordinary taste.