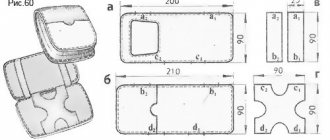
What can be made from old jeans: photo
The Internet is replete with a variety of crafts that skilled needlewomen make, literally, from everything that comes to hand . And it’s not at all surprising that fabric from old jeans has found its way into such homemade projects, because it is versatile, beautiful and quite practical.
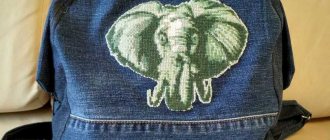
Decorative pillow Craft “Cat” made from jeans Cosmetic bag made from old jeans Original backpack
Denim moccasins Denim skirt
Decorative stands Extravagant shoes
Sofa upholstery made from jeans
Potholders made from jeans
Prom dress
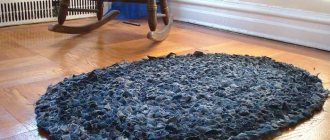
Notepad made from old jeans Patchwork denim rug
Children's handbag
Women's handbag made of jeans Bag made of jeans
absolutely anything can be made from old jeans Since jeans are durable, it is rational to use them both for sewing clothes and for making toys , various items often used in everyday life, and interior parts.
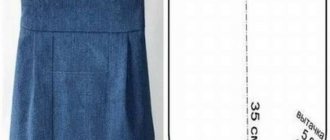
How to sew a denim skirt from old jeans: pattern
From old jeans, which have long gone out of fashion and are just gathering dust in the closet, you can make a beautiful, comfortable skirt , and most importantly, it will be created by your own hands. You can quickly and easily create a new highlight in your wardrobe .
Any jeans can be used to create a skirt.
To make an original knee-length skirt, you will need a pair of old, out-of-fashion jeans, which are probably lying and collecting dust in your closet. At the same time, it doesn’t matter at all what style and color they are , but torn jeans are not suitable for this, just as jeans with rhinestones and sequins would be undesirable.
A pair of jeans
For work you will need the following tools and materials:
- sewing machine
- ruler
- pencil or chalk
- scissors
- threads and needles
- jeans
- decorative materials (at your discretion)
Ripped jeans
The first step on jeans is to carefully rip the inner seams , while leaving the outer seams unchanged.
Jeans blanks
Take one of your jeans and use a ruler and chalk to measure a straight line below the pocket . After that, cut off the excess.
The seams of the jeans are carefully steamed with a blade. Blank for the skirt. Base of the skirt.
The edges need to be rolled up
Raw edges
The second jeans will be the basis of the skirt . We bend them as shown in the photo. After this, place one of the parts of the first jeans inside the workpiece. the raw edges under and pin them, and do the same with the bottom edge of the skirt.
Aligning hems
Align the hems so that they are the same width, as shown in the photo.
The hems are pinned with pins
After making sure that the hems are the same size, secure them with pins.
Inner side of the skirt
The inside view of the skirt should correspond to that shown in the photo:
Seam stitching
If all actions have been completed according to the instructions, then at this stage you can start stitching on a sewing machine.
Excess fabric must be trimmed
After sewing, the skirt must be turned inside out and all protruding parts of the fabric must be trimmed.
Then do all the above operations with the front part of the skirt: also fold the edges, pin them, stitch and trim off the excess.
Skirt front
At the final stage of making the skirt, cut it to the desired length and also stitch it.
Hem your skirt to the desired length
This is the kind of denim skirt you can make from old jeans. And most importantly, you will not spend any extra time or extra money , because everyone has the materials and tools for the work at home.
Ready-made skirt
Transforming jeans
Let's get to work. First, the selected jeans must be washed well, ripped at the seams and carefully ironed so that not a single wrinkle or bruise remains on the parts.
Then we trace the paper parts of the pattern along the contour, attaching them to the jeans.
If you choose the option where you only need to open the inner seams, then the back pattern should be positioned so that the outer seam of the jeans is exactly in the middle.
We place the front parts of the paper vest pattern on the fabric in a mirror image to each other.
Read this: Trouser pattern for girls: a comfortable update for every day
After transferring the contours of all the details onto the fabric, parts of the vest are cut out with scissors and the side and shoulder seams are connected. Open sections of parts can be processed with an overlocker, double hemmed on the wrong side, secured with a machine seam, or just beautifully frayed edges. If desired, you can make a zipper, buttons or snaps at the front.
The master class in this video will tell you more about sewing a vest from jeans:
How to sew slippers from old jeans: pattern
If you don’t yet have comfortable indoor slippers , then immediately look for old jeans. Well, if you personally don’t need slippers, then you can make a wonderful present that will not only be made with soul, but will also show what a skilled craftswoman you are.
Making slippers from jeans is very simple, for this you need:
- padding polyester
- old jeans
- scissors
- needles and threads
- cardboard, paper, pencil
- pins
Slippers from jeans Pattern of slippers
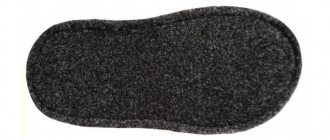
The first thing you need to do is cut out the main parts. House slippers have only two of them - the sole and the upper part.
You can create templates from cardboard, and then apply them to fabric, trace them with a pencil or chalk, and cut them out. To create the sole part you will need thick cardboard (the denser the better), two denim blanks and padding polyester .
It is necessary to cut out identical elements from all these materials, as shown in the figure , taking into account that the cardboard should be a centimeter smaller than the blank made of jeans and padding polyester.
Create blanks from paper
When the sole elements are ready, they need to be folded in this order: denim blank, padding polyester, cardboard and the remaining denim pattern.
At the same time, do not forget that there is no need to stitch the cardboard - it is smaller than other blanks and is needed for the strength of the structure.
By analogy, the second sole is formed and sewn, after which you can proceed to making the upper part of the slippers . To do this, cut out a template from cardboard according to the pattern and use it to create blanks from padding polyester and denim.
For each slipper you will need one cutting from padding polyester and two from old jeans. They are sewn together in such a way that the padding polyester ends up inside the denim “shell”.
Women's jeans slippers
The finished pieces are stitched together. The resulting slippers can be decorated with ribbons, sequins or beads. The tousled denim edge of the slippers can be hidden by sewing on a small piece of denim , but leaving the tousled edge will only add decorativeness to the slippers.
Ready-made slippers from jeans
DIY vest made from old jeans
A denim vest is a fashionable item in the wardrobe of a modern girl. It goes well with almost everything: a T-shirt, dress, shorts, skirt, jeans. It can even be used as office wear, for example, with a snow-white blouse.
Important! As a rule, the problem areas of jeans are the knees and walking areas, which over time quickly fray and tear. But in this case, we will not need them, but will only need the top of the product - the one that is slightly below the crotch seam and the top part with a belt.
Let's start sewing a denim vest:
- We measure ourselves from the neck to the waist, or a little lower if you want a long vest. This indicator will be the length of our new product. We measure the resulting length on old jeans, starting from the very top of the waistband and heading down (just below the crotch seam). Add a 2 cm allowance to the bottom at the shoulder seams.
- Now we need to carefully open and remove the zipper and the double seams underneath it, being careful not to spoil the fastener fabric, which will serve as the front part for the future vest. We remove the excess protrusions from the belt for the fastener. Steam the back and crotch seams, leaving the back of the waistband.
- We received two ripped patterns - the right and left parts of the jeans with a solid side seam and a waistband. We cut off the rubbed areas from the crotch, if any are available.
- We take the back parts - those from which unnecessary parts were cut off, and sew them together. This line will be the middle seam of the back of the vest.
- Now you need to fold all the parts so that the back of the jeans is facing us and the waistband is at the bottom, that is, turn the legs upside down.
- We draw horizontal lines for the shoulders and neckline, taking into account the allowances. We cut out the shoulders from the front and back of the product.
- Making the front cutout. Draw a line from the top of the shoulder to the clasp.
- We sew along the sides the seams for the armholes, approximately 30.5 cm. We leave the untouched fabric near the waistband - the side seams of the future vest.
- To give roundness and smooth lines to the edges, we trim the corners of the neckline, armholes and neckline.
- We turn up the neckline, armhole and front neckline, and then sew with a double stitch. Sew the shoulders.
Your DIY vest is ready!
How to sew an apron from old jeans: pattern
For any housewife, an apron made from jeans will be an indispensable companion in the kitchen. Even a person who is completely far from sewing can make such a necessary thing, because this does not require any specific knowledge and skills, and you certainly have all the materials and tools at home.
Jeans apron
To create an unusual apron you only need one leg of jeans . It must be cut along the inner seam, leaving the outer seam intact, and then make blanks.
Blank for the base of the apron
Tape is used for edging
Cut out a edging from denim from any available fabric (it can be denim, but a contrasting fabric will look better) and wrap it around the frayed edges of the future apron, pinning them with pins. Then sew the edging using a sewing machine.
a pocket from the jeans and carefully sew it to the apron in the center.
The basis of the apron An invariable attribute of the apron is the pocket.
The apron is almost ready, all that remains is to cut out and sew the ties to it . They can be either denim or fabric that was used as edging.
Ready-made apron made from jeans
You can make an apron even more simply:
- Cut off the top of the jeans, measuring just above the knee (preferably the back)
- Sew the piece where the pant legs begin to separate
- Trim the edges to hide fraying and sew on the ties.
A simpler version of the apron
DIY denim vest: tips for a beginning seamstress
Business, as you know, is afraid of the master. And if this master has some secrets, the job will be completed faster, and the result will exceed all expectations. Want to learn tips on sewing a denim vest? Okay, we’ve persuaded you, let’s tell you:
- The color palette of threads and material must match.
- To avoid spending hours trying to “dismantle” old denim trousers or a shirt, use a blade and nail scissors.
- If you sew an elastic band to the inside of the back, the product will fit better on the figure.
The color palette of the threads and the material must match. To avoid spending hours trying to “dismantle” old denim trousers or a shirt, use a blade and nail scissors. If you sew an elastic band to the inside of the back, the product will fit better on your figure.
- When using plus size jeans as the starting material, you can simply cut off all the seams for ease and convenience. The small model will have to be cut out.
- Before sewing all the details, try on the product in front of a mirror. Only after you are sure that the vest fits properly, connect all the parts with strong seams using a sewing machine.
How to sew a vest from old jeans: pattern
a stylish vest from old jeans . To do this you will need the following set of tools and materials:
- jeans
- threads and needles
- white chalk
- cardboard
- scissors
- ruler or centimeter
- safety pins
- any decorative elements with which you would like to decorate the finished vest
Vest pattern Alternative apron pattern
The presented patterns are a more complex option for creating a vest for those who have any experience in sewing. We will create a vest using a simpler design.
Before you begin the process of making a vest, you need to wash, dry and iron your jeans.
Jeans from which the vest will be created.
Then you can start cutting. It will be quite simple, since the back of the jeans, where the pockets are located, will be taken as the basis of the vest. You just need to give this blank the correct shape.
Marking lines Edges need to be folded
After the cutting lines have been drawn, we can safely cut out the elements of the future vest we need. Next, you need to cut a hexagon out of cardboard and, attaching it to the existing blank, cut out two such hexagons from jeans.
Creating a hexagon using a stencil
the finished hexagons together , make small indentations for the seams and pin them. After this, the elements are sewn on a sewing machine or by hand.
Two hexagons are stitched together
Put the main workpiece aside and move on to creating the harnesses . You need to measure them according to your parameters from neck to chest.
Making harnesses for a vest
Cut out the pre-marked harness strips, tapering from the neck and widening towards the chest. Remember to leave 1-2 cm for the seams and pin them. Sew the harnesses to the base of the vest.
The edges are rolled up for seams.
At the front, the seams should be absolutely invisible and neat. This can be done most aesthetically and quickly using a sewing machine.
Front view of the workpiece
When the blanks are connected together, you can proceed to stitching the edges of the harnesses.
Stitched edges of vest harnesses
From the remaining trouser legs, cut out the back of the vest , based on your own parameters and taking into account that its width should correspond to the width of the base.
Back pattern
The edges of the cut are also folded for seams and pinned. Only after this, having made sure that the lines of the part are as smooth as possible, can you proceed to darning the edges.
Sewing the edges of the vest element
To decorate the back, cut two pieces of fabric from the legs, as shown in the photo. You need to make a bow from them.
Denim rectangles
Sew the large rectangle around the edges, and roll and sew the small one, as shown in the photo.
Blanks for a bow
Drag the large rectangle over the small one to make a bow . From the back side, make a seam that holds the parts together.
Decorative bow for a vest
Sew a bow to the back and connect the vest.
All elements are sewn to the base
Vest - front view Finished vest from old jeans
You can make such a fashionable and easy-to-make vest from old, unnecessary jeans.
Sewing stages
For the first method. Sew the finished pieces together. Use a sewing machine or by hand. For hand sewing, use a thimble as the denim fabric is quite strong and you can prick your finger when piercing it.
For the second method with hexagons:
- From the lower part, from the thigh to the shin, cut out the harnesses. But first, take your measurements, covering your neck to the chest area of your body.
- Prepare the template according to your measurements and then pin it to the fabric.
- Step back two centimeters on the sides and cut out.
- Sew the harnesses along the fold lines, then sew them to the base of the vest.
- Cut out the back, equal in width to the base. Make sure the edges are straight. It’s better to pin it with pins to be sure, and only then stitch it thoroughly on a typewriter.
How to sew a bedspread from old jeans: master class, photo
A durable and unusual blanket made from unwanted jeans can be a great help for a picnic and even a bedroom attribute. At the same time, sewing such a bedspread is very easy - it uses a patchwork sewing technique, which even a beginner in needlework can master.
Patchwork blanket made from jeans
Be prepared for the fact that you will need a lot of scraps, which means you will need to use several jeans . Before starting work, they are washed, dried and ironed.
Bedspread pattern
Also, in addition to jeans, you will need a piece of durable fabric with parameters of 150*200 cm , which will become the bottom part of the bedspread.
To create a bedspread, you need to cut 35 squares of jeans with sides of 20 cm.
Jeans squares
Sew all the squares into one fabric . Then the lower part of the bedspread is attached to the fabric (using a sewing machine) on four sides. After this, the side seams are covered with strips of fabric, which are folded up and create a border of the bedspread.
Finished denim bedspread Jeans bedspread
What to wear with a new vest?
Now, after several hours of effort and creation, you see in front of you a new trendy vest. Now it remains to decide what things can be combined with the product. At the end of this article, you will learn what to wear, how to combine and how to complement your new look.
An original solution is to decorate the vest with a belt. The vest can also be complemented with a sheath dress
Vest over a warm hoodie
- A new vest can complement a look with a plain tank top, leggings and white sneakers. You can add a stylish baseball cap and a crossbody bag or backpack to this look.
- A denim skirt, a loose T-shirt with a bright pattern and a vest - a casual urban look is ready!
- A strict black turtleneck and tapered black trousers. Why not an option, huh?
- A V-neck long sleeve and low-waist jeans are perfectly complemented by a stylish handmade vest. Shoes can be beautiful ballet flats, moccasins, and even brutal ankle boots without heels in a cowboy style.
- A delicate summer dress with a bright floral print, sandals and a denim vest - it’s not a shame to appear in a city park or cinema in such an outfit.
- A spacious, shapeless dress can also be worn with a denim vest, but only if the top item does not create folds on the bottom of the ensemble.
Glam rock look
An indispensable thing for everyday looks Blue goes well with white An original addition to summer overalls There are a lot of options for combining a vest made of denim, so there is no doubt that you will not be able to use your masterpiece for its intended purpose. There are
a lot of options for combining a vest made of denim, so There is no doubt that you will not be able to use your masterpiece for its intended purpose. Imagine, don’t be afraid of bright and unusual ideas, strive to get away from templates and standards - only a creative approach and the desire to be fashionable will help you create a truly worthwhile thing!
How to sew shorts from old jeans?
The traditional end of the life of jeans is to cut them down to the level of shorts. It is not only economical, but also very stylish. In addition, creating shorts from old jeans is very simple - you just need to trim the legs correctly and stitch the edges.
You can make shorts from old jeans
There is an easier method for creating shorts that does not require manipulation with a needle and thread. Such shorts are created using the bleaching , which we will discuss below.
To create trendy shorts you will need:
- old jeans
- scissors
- chalk and centimeter
- bleach
- accessories (bucket and hanger)
The main tool for creating shorts is scissors.
Before work, jeans must be washed and ironed. After this, you can begin to directly create the shorts: measure the required length using a measuring tape and mark a line with chalk (it should go diagonally, as in the photo). Next, cut off the excess part of the trouser leg with scissors.
Cut off jeans
The edges of denim shorts can be slightly frayed to create a fashionable casual effect, or you can leave a straight line.
The next stage is bleaching . To do this, you need any clothes bleach, which you need to fill the bucket by a third.
Whitening shorts
Hang the shorts on a hanger and lower them into the bucket so that the shorts are halfway submerged in the bleach. Leave for no more than three minutes.
Shorts need to dry
After this time, remove the shorts from the bucket and hang them to dry for an hour. The bleaching is not yet so noticeable, but do not put your shorts back into the bleach - the effect will appear later. Simply rinse the shorts in clean water and then hang them to dry until completely dry (for example, you can hang them overnight).
Creating frayed edges Ripped shorts
If you want the shorts to have a more hooligan look , then after drying you can fray the edges using scissors. You can also cut small slits to create the effect of ripped shorts.
Ready-made shorts from old jeans
These original shorts can be created without a single seam - very quickly, stylishly and without unnecessary labor. Everyone will envy such a craft.
How to sew a backpack from old jeans: pattern
The durability of a material like denim allows you to create backpacks and bags that will not only last a long time, but also look good. You can sew a backpack from old jeans using the photo instructions below.
In addition to jeans, you will need fabric for the interior trim and trim.
You will also need cardboard and padding polyester
Backpack elements
Pattern diagram for a backpack Cut out squares from jeans Cut out squares from jeans with sides 13 cm
Backpack pattern Connect the squares together with pins into one piece
Sew the squares
Sew the seam lines of the squares with rapeseed tape.
The tape is sewn vertically and horizontally Fabric covered with rapeseed tape Sew the fabric into a bag without a bottom
Glue thick cardboard to the jeans to give strength to the bottom of the backpack. Sew the resulting bottom to a piece of padding polyester of the same size. Cut off the protruding edges and excess padding polyester.
Cut two pieces of 7 mm long from the belt tape and, folding them, sew on the rings. Sew the resulting rings to the bottom of the backpack. Turn the base of the backpack inside out and stitch the bottom.
Using the pattern, cut out the flap, stitch the edges. Sew the flap to the backpack from the inside, tighten the straps into the rings and sew them to the top of the flap. Form holes and stretch the rope Turn the backpack inside out and sew the lining
How to sew a sundress from old jeans: pattern
If old jeans are gathering dust on a shelf in the closet, and your child hasn’t had a new pair for a long time, then you can easily sew a children’s sundress out of them.
Jeans sundress for girls
Those who are familiar with sewing first-hand can sew a sundress using a pattern where all measurements and parameters are indicated.
Sundress pattern
If you are new to creating clothes and sewing from patterns is not entirely clear to you, then the parameters can be copied from any children’s dress, using it as a stencil.
Any dress will serve as a stencil for a sundress
From jeans, measure and cut out two identical pieces (as shown in the photo), which will become the basis of the sundress.
Basic details of the sundress
From the remaining denim scraps, cut out two rectangles measuring 10x27 cm . Fold them over and sew the edges together to form two straps.
Creating sundress straps
the back and front of the sundress together , cut out a square from old jeans and sew on a pocket. Sew all the details, as in the photo, with colored threads , forming a decorative seam.
The straps, base of the sundress and pocket are stitched with colored threads
Sew the top edge of the sundress at the front and back, then sew on the straps.
Straps sewn to the base
Sew buttons to the straps, and make loops for them at the base of the sundress.
Straps with buttons
Cut out a design template from paper . It can be absolutely anything - depict what your imagination suggests. The best option would be your favorite children's cartoon character . Using the template, cut out a pattern from the fabric and sew it to the sundress.
Creating a pattern on a sundress
A durable and comfortable sundress for games and going to kindergarten is ready.
Ready-made children's sundress
Decoration of products
Beads of various shapes and sizes, braid, lace, guipure and leather are very harmoniously combined with denim.
Decorating the product with chaotically arranged pearls looks very beautiful, as in this photo:
With such beads you can decorate the vest asymmetrically, on one side the lower part of the pocket, on the other - only the upper flap.
Guipure can be used to decorate the bottom and edges of the vest's armholes, to make openwork appliqués and inserts on the front, back or sides.
Embroidered elements and patches also look interesting.
Rivets and spikes will give the vest a special “aggressive” charm:
The threads used to join the parts must match the color of the selected fabric as accurately as possible and should not be too thin, otherwise the seams will be fragile. To carefully rip your jeans, use small nail scissors, a razor blade, or a special ripper.
For a better fit to the figure, you can sew an elastic band on the inside of the back. If fairly large and wide jeans are used to make a vest, then the seams can not be flogged, but simply cut. Before final fastening of all seams, it is better to baste the product and carry out at least one fitting.
How to sew a bag from old jeans: pattern
Pattern of a bag
In a woman's wardrobe there are some types of clothing and accessories, of which there can never be too many. One of these accessories and the most practical element of the image is a bag. Try creating an extraordinary bag from old jeans and show off your personality.
Sequence of work:
- Draw a pattern on paper, then transfer it to the ripped jeans
- Fold the resulting two identical parts face to face and, stepping back 1 cm from the edge , stitch one of the sides
- each dart in half, pin it in place, and then stitch along the fold line
- pockets from jeans and sew them on the sides
- From a variegated fabric, cut a strip 1.2 x 0.7 m, which will be a ruffle for the bag.
- Pin the edges of the ruffle along the entire length with pins to form folds , and then make seams in these places
- Cut the waistband and yoke from the jeans (the triangular part under the waistband) and sew the ruffle to the wrong side so that it shows 30mm
- Sew the yoke to the top of the bag
- Braid two straps , after which they are sewn on from the inside
- Decorate the top of the bag with sequins or beads in any order
Sequence of work to create a bag
DIY vest made from old jeans - a simple pattern
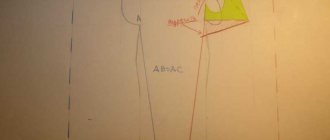
This pattern can be easily created from a ready-made dress pattern, if one is available. If you don’t have one, then here is a step-by-step master class on sewing a denim vest with a pattern:
- Starting from the cervical vertebra, we measure down the length we need. Draw the relief of the back.
- We increase the neckline by 2 cm along the shoulder line, cut the back and front. Draw a line for the neckline.
- Now we need to deepen the armhole of the front and back by about 1.5 cm.
- From the top of the neck we set aside the length of the shoulder seam - 7 cm.
- We retreat down 2 cm from the middle point of the shelf. After this, we draw a line for the edge of the future side. We draw the bevel of the side and the bottom line of the shelf.
- From the top of the neck we step back 5 cm and draw a cut line. These steps are necessary in order to transfer the dart to the chest part of the vest.
That's all! The pattern is ready! By sewing all the details together, you will get a stylish wardrobe item!
Important! A DIY jeans vest looks good with a straight skirt or classic trousers. This is exactly the option that we talked about at the very beginning of the article - a vest for office work. Strict dresses, mini or maxi skirts are also perfect for this denim vest.
Old jeans: tips and reviews
As you can see, you can breathe life into old, long-forgotten jeans in various ways. Jeans have long moved into the category of things that are stupid to throw away after they become unfashionable and unclaimed - it is much more practical to repurpose them into a useful and beautiful thing.
Analyzing numerous reviews about handicrafts from old jeans, we can say that absolutely anything can be created from this material - jeans are so versatile. In addition, denim items are always in fashion , you just need to choose the right style and put a share of imagination and creativity into the product.
Video material
Now you can easily make a denim vest from long-forgotten jeans, decorating it as you wish. And our recommendations will help you save time on correcting possible errors. We are very pleased to help you! Never throw away old things, they will be very useful to you!
