How to make a horse from paper and cardboard
A cardboard horse head is usually made to be attached to a stick to create a previously popular children's play accessory. You can make a horse out of cardboard using the following algorithm:
- Prepare a sketch of the animal's head on cardboard.
- Cover the base with paper.
- Attach the head to a wooden stick.
- Carry out decoration.
Naturally, in order to obtain a high-quality and durable product, you need to consider the manufacturing principle in more detail.
Step-by-step assembly of a horse's head on a stick
A horse head for a paper stick is made as follows:
- Using a simple pencil, sketch the animal's head almost to full scale.
- Then you need to embed the finished sketch along the contour. Attach the finished template to the second part of the cardboard, trace and cut out the second part.
- Then attach the cardboard base to a sheet of brown colored paper, trace and cut out the template.
- Glue the colored base to the cardboard blank. It is enough to glue each part on that side so that after assembly the colored parts are on the outside.
- Then you need to cut out an oblong “eye” from white paper and color it with a black felt-tip pen or marker. You can use paints to draw a bridle, a nostril and partially outline the ears. Glue a strip of fringe along the curved back - a mane.
- Finish the second part in the same way. Then you need to wrap the stick around the entire perimeter with electrical tape or masking tape. Coat the stick with a glue gun and glue 2 parts of the head to it. The rest of the paper base can be glued together using PVA glue.
At this stage, the horse on a stick is ready for use. If it is not possible to find a wooden plank, then instead you can take several strips of cardboard glued together.
Origami with diagram
You can make an origami horse that you can play with, use as a bookmark, or use as a paper figurine to decorate a bookshelf. There are a lot of simpler or more complex schemes, among which there is a universal one.
A diagram that will help you understand how to make an origami horse in several stages:
- Cut a square from a sheet of paper. Fold it diagonally.
- Then lay the workpiece with the colored part up and fold the square in half along each side.
- Take the workpiece by the central point of intersection of all the bends and fold the side corners inward. The result will be a rhombus.
- Fold the side corners up, aligning them with the center line of all folds.
- Then unfold the workpiece and bend the upper corner to the center of the part. Disassemble the part again.
- Lay the diamond down and cut it partially along the center line of the fold.
- Place the side bent corners along the cut. Repeat the same on the other side of the workpiece.
- On the side, make a layout on the corner folds so that the colored side of the paper is on top.
- Then, along the assembly lines, bend the side elements along the main part of the workpiece.
- Separate the cut pieces of the craft. Straighten all the elements.
For production, you can use double-sided colored paper or single-sided. But it is better to use loose decorative cardboard.
Video master class
How to make a horse out of paper. Origami horse.
Applications for children
For children of the older group of kindergarten and primary school age, the ideal way to make a horse is the appliqué technique. There are several options for forming a multilayer picture, but it is better to use the simplest type of parts:
- Prepare 3 ovals: the first elongated (neck), the second small (head), the third - the largest and not too elongated in comparison with the others (torso).
- Prepare 4 identical strips with rounded edges (legs).
- 4 small squares with a side that matches the width of the leg strip. Arc-shaped 2 parts – tail and mane. Teardrop-shaped ears.
- You need to cut out all the parts and prepare for assembly.
Select a cardboard sheet of the desired color. For gluing, use a glue stick. Assemble the animal figurine.
Wolf Mask: Making Master Class
To work you will need:
Step-by-step production:
- You should first practice to draw the face of a wolf
. The volume of the mask will be given by details made of colored paper and a special cut of the mask. - Measure the circumference of the child's head
. The width of the mask should be one third of the circumference. - On gray cardboard, draw the outlines of the mask
- nose and cheeks. Draw holes for the eyes. The height of the mask can be half the face or completely cover it. - To add volume, make cuts
from the middle of the eye to the edge of the mask. - Separately cut out the ears
. They must have allowances at the bottom for gluing to the mask. Bend the allowances and make cuts on them so that it is convenient to glue to the base. Make cuts in the middle of the ears and glue their edges so that the ears become voluminous, wrapped inward. - Cut out the top of the head and the edge of the ears
from black paper . Glue the parts. - Cut the ribbon in half
. On the sides of the mask, strengthen the place where the tape is attached with pieces of craton. After making holes, thread the tape through them, leaving short ends on the front of the mask. - From white paper, cut out the lower part of the wolf's face
- the eyes and cheeks, and glue the details onto the base. At the same time, this part of the mask will cover the ribbons for the ties. - Cut out thin circles
from gray paper and cover the cutouts for the eyes with them. - from brown paper and stick it on
. The wolf mask is ready.
DIY horse on a stick made of cardboard
How to build a bird feeder from plywood, cardboard, wood with your own hands: a drawing with dimensions
Marina Khoda
Master class “Horse on a stick”
For the event, I urgently needed stick horses. I thought and wondered, they don’t sell them in our store, I don’t want to attract parents over trifles... Even in the evening (before the holiday)
I thought about just printing out the picture and attaching it to a stick, but... it seemed neither practical nor original. I turned on my imagination. And this is what I got.
To make one horse you need the following materials:
rail; 4 sheets of cardboard (whatever color you want)
; glue stick; glue "Master"
;
scissors; pencil; gouache; stapler; fringe for the mane, furniture stapler (or small nails and buttons, hammer)
.
We draw the horse's head - we make a pattern (I looked at a lot of drawings on the Internet, chose a more suitable and simple one, cut it out.
We glue the sheets of cardboard two at a time, trace the pattern, and cut it out.
Applying "Master"
-glue on one part of the “head”
, leaving the middle in the center unmarked, in order to insert the stick later. Glue the two parts together.
We draw the eyes and then whatever you need, whatever you want on both sides.
We also make a mane from the fringe on both sides. You can glue the horse’s head along the top edge to the “master”
-glue, or you can attach it with a stapler.
In the hole that was left earlier, we insert a stick (a strip, we had to wrap it with colored tape so that the children would not hurt their hands, we attach it with a furniture stapler on both sides, or you can simply nail it with a small nail, only through the button.
The horse is ready!
Master class “Do-it-yourself horse on a stick” You can make a children’s toy horse on a stick with your own hands in just a few minutes. This is especially suitable for those who do not know how to sew. 1. We find.
Master class “Theater on a stick” (making dolls for a tabletop theater from waste material) Theater is a beautiful art! It ennobles and educates a person. He who truly loves the theater always takes away the reserve from it.
- Wooden broom handle or long thin rolling pin
- Hand saw
- Men's size striped sock
- Two large beige or white eye buttons
- Two small brown or black eye buttons
- Soft, washable, hypoallergenic material for stuffing toys or sofa cushions
- Wool yarn for the mane (the thicker the better)
- Thick bridle cord (1 meter or 40 inches)
- Thin brown twine
- A small piece of brown felt for the ears
- Threads to match the color of the sock
- Sewing needle
- Scissors
- Adhesive tape
- Book
Take some soft padding and fill the sock.
iron man mask
All the boys are crazy about this steel hero. This carnival costume and mask is an excellent solution for any costume party.
To create a paper mask with your own hands, you will need the following materials and tools:
Performance:
- Draw the outline of the mask on red cardboard and cut out the shape.
- Make 2 pieces of ears out of cardboard and glue them to the mask.
- Place the mask on yellow paper and trace it with a pencil. Draw the yellow parts of the mask inside the outline. Cut out.
- Glue the yellow part onto the red one.
- Draw the eyes and mouth of the iron man with a pencil. Make holes for the eyes.
- Use a marker to draw the details of the head, outline the eyes and mouth.
- Glue the tape to the back of the mask.
Scroll:
- If a child takes part in a production and will need to sing or read poetry, then it is best to make a mask on the upper part of the face or 2/3 of the face, leaving the mouth uncovered.
- To quickly make a mask, you can use a template or a ready-made pattern. You just need to print out the pattern, transfer it to cardboard or thick paper, glue it and decorate it.
- It is best to use acrylic paints for painting masks. They dry quickly, do not fade over time and do not get dirty. This mask can be used more than once. Gouache is also suitable for these purposes, but this paint gets dirty when exposed to moisture.
- You can not only glue decorations and decor onto masks made of cardboard or paper, but also sew them on and glue them with hot glue.
Making any paper mask with your own hands is quite simple. To do this you need a little imagination, simple materials and desire. Children take part in such master classes with great pleasure, contributing their ideas to the creation of masks for the holiday and inspiring adults to create small objects of art for the child.
HOW TO MAKE a toy Horse on a stick with your own hands
How to make a cardboard box with your own hands. diagrams with dimensions, photos, instructions
1. Fill the sock with filler, not too tightly, leaving empty space in the elastic area.
2. Sew on the eyes. 3. Decorate the nose. 4. Sew the ears. We sew the parts from the wrong side on both sides, turn them inside out and sew the third side.5. Sew on the ears. 6. Make a mouth out of red threads, pulling them a little. 7. For the mane, cut a large number of threads of yarn. Sew thread by thread. We trim the threads and form bangs.
If desired, you can make a bridle. I am not a supporter of torturing animals, so our mustang is a happy free horse.
8. We make a hole in the stick to secure the horse.
9. Using strong threads, secure the elastic band of the sock to the stick. The connection can be hidden with a scarf. A wonderful horse for your baby is ready! My daughter's first meeting with a horse is very magical and surprising.
Give your child joy and a bright, interesting childhood! ALL IN YOUR HANDS!
I will be glad to see your comments!
Bear mask: Making master class
A quick way to make such a mask out of paper with your own hands, cutting out a total of 6 circles.
For this you will need:
Step-by-step production:
- On the cardboard, draw a circle with a diameter of 16-20 cm - the basis of the mask.
- Draw and cut out circles from colored paper. From brown paper a head, 16-20 cm in diameter, and 2 circles for the ears, 4-5 cm in diameter. From yellow/orange paper, a muzzle, 6-7 cm in diameter and 2 circles for the inner ears, 3-4 cm in diameter. Glue on the parts on cardboard. Cut out a nose from black paper. Draw a mouth on a muzzle made of light paper.
- Glue the ears together - place a circle of light paper in the middle of the brown circle. Attach them to the head so that they peek half over the edge.
- Cut out holes for the eyes.
- Attach an elastic band. You can make holes and secure the tape with knots, or you can attach it to the mask using a stapler.
DIY horse on a stick!
Toy horse on a stick
DIY flower bed: top 120 photos of non-standard flower bed ideas. step-by-step DIY instructions for beginners
A cute and simple toy horse on a stick - anyone can make such a horse with their own hands as a gift for a child! It’s especially great to find such a horse under the Christmas tree, because the coming 2014 is the Year of the Horse.
Now I’ll show you how to make a horse on a stick! I built two in a couple of hours, a conic and a horse :)
Needed:
- a sock - I took a blue one, because it’s the Year of the Blue Horse, - threads to match the color, - a needle, scissors, - a piece of fabric for the ears. - two buttons for the eyes, - a permanent marker used to sign discs, - Christmas tree tinsel (or short ribbons) for the mane, - cotton wool for stuffing.
How to make a horse on a stick:
Have you ever noticed how much a sock looks like a horse's head? If you attach ears, then great! And you don’t need to invent anything, and you won’t need patterns for a horse’s head on a stick. Even the seam on the toe, look, it’s definitely a smile! So we need very little to transform the sock into a toy - a horse on a stick!
First of all, fill the sock evenly with cotton wool.
Then you need to sew the ears for the horse. Cut out two triangular pieces, fold each in half inside out and sew one side together.
Then we turn it inside out and stuff it with cotton wool...
And sew it up, carefully folding the edges. You get cute ears!
Sew the ears into place.
Now firmly, so that the child cannot tear it off, we sew on the buttons - the eyes. If there are doubts about safety, it is better not to use buttons, but to embroider the eyes with thread.
All that's left to do is sew on the mane! The closest thing to a real mane is Christmas tree tinsel. This is what we used, cutting off the required length and sewing the mane to the horse's neck. But the tinsel can “crumble,” so a more durable option, although not as similar, would be to replace it with ribbons 10-15 cm long, firmly sewn in place of the mane.
And this side is even more beautiful!
We draw the pupils with a marker.
A stick for a horse can be made from a lath - of course, it is better to have a round cross-section, but it can also be square. To eliminate the risk of splinters, laminate the stick with self-adhesive film or just wide tape.
We insert the stick into place so that the horse's head rests well on it, and sew up the edge, tightening the edges of the sock around the stick with threads.
Your DIY horse on a stick is ready! Get on horseback and let's ride.
Horse costume for toddlers
For kids, you need to choose the simplest option, because it will be difficult for him to stay in a tightly closed suit for a long time.
The ideal horse costume for a baby would be a vest or turtleneck combined with shorts/pants or a skirt. Naturally, the color scheme of the kit should be brown, red or white. You can use woolen threads or false artificial hair strands as a tail.
It is much more difficult with a headdress, since it is difficult for children to wear it for a long time.
But you can come up with an easy option: sew a cap from a material that matches the color of the suit, make a mane from the same materials as the tail.
Or the simplest option: make a bandage around your head out of cardboard and glue a drawing of a horse’s muzzle onto it.
Paper mask
The simplest solution is to make a New Year's horse mask for a child, and you will learn how to do this in this master class on making a horse's face.
For this you will need:
- Colored paper.
- Styrofoam.
- Glue.
- Scissors.
- A simple pencil.
- Cardboard.
- Rubber.
- Template (you can download it from the Internet and print it on a printer or draw it by hand).
Tools for making a horse mask
Having prepared everything necessary, let’s begin to implement our plan:
- First you need to draw a horse's head on paper, but if drawing is not your thing, then just print out a mask template from the Internet. And in order not to waste time searching for the desired template, just enter “print a horse head mask” or “print a drawing of a horse’s head” in the search bar of your browser.
- So, the horse template for cutting is ready, it’s time to start making the parts of the New Year’s mask. To begin with, glue the template onto cardboard, and then proceed to choosing colored paper, preferably brown, yellow or orange and red shades. Having chosen the main background of colored paper, preferably brown, we place a template of a cardboard horse’s head on it and trace it along its outline with a simple pencil.
- Using scissors, we cut out the blank along the contour, and then make holes for the eyes on it.
- From yellow or orange colored paper, cut strips 5-8 cm long and 1 cm wide - they will be needed to form the horse's bangs.
- You should cut out the horse's lips and ears from foam plastic and cover them with colored paper, red lips and ears with brown paper, respectively.
- To make the mask voluminous, you need to glue the following parts to it: bangs (the thicker the better), lips (preferably in the form of a smile) and ears.
- To complete the touch, attach an elastic band to the mask.
DIY hedgehog mask
Don't know how to make a hedgehog mask for your head? It's very simple.
First, prepare everything you need, for example:
- Colored paper.
- Glue.
- Scissors.
- Rubber.
- Cardboard.
- Hedgehog mask template (a ready-made template can be found on the Internet by entering “how to make a hedgehog mask with your own hands” in the search bar).
- Pencil.
Manufacturing:
- We place the prepared template on colored paper of the desired colors and outline it along the contour with a simple pencil.
- In the finished hedgehog's face, we must make holes for the eyes and nose.
- We form hedgehog needles from colored paper. They can be made in two ways: by cutting strips or triangles.
- Needles should be glued onto the hedgehog mask using glue. If you don’t want to waste time making needles for a mask, make a one-piece hedgehog mask with needles.
Based on the above, you can make a nightingale mask or a man’s head out of paper with your own hands, and if you are in doubt about how to do it correctly, you can find the relevant information on the Internet by entering “how to make a man’s head out of paper” in the search bar of your browser, or "Nightingale for the New Year."
Polygons on a plane
- Creative set “Dinosaur Collection” (isothread or string art)
- Sticker "Dog" with a polygonal pattern
- Car sticker "Globe"
- Polygonal applications for children
- A paper butterfly that can fly on its own
- Wall stickers: world map or elephant head or dinosaur
Dad can do it!
But it’s worth noting right away: for a strong toy you will need strong male hands and a jigsaw for cutting. Here is the entire list of required items:
- pressed plywood (you can look for leftover plywood 5 mm thick in hardware stores);
- jigsaw for cutting (electric or manual);
- base stick (handle);
- sandpaper for processing and polishing the edge of the figurine;
- paints (aerosol, acrylic).
The method for making a plywood jumping horse depends on your skills and experience with a jigsaw. In general, the beginning is the same as in the case of a cardboard horse: draw or print a template, cut it out and transfer it to the base. Then you can go in different ways - simple and complex. To make it simple, we only need to cut out one piece from plywood and attach it to a wooden stick. The cutting should be carefully cut to the thickness of the plywood so that the part can be inserted into it. You can secure it in two ways - glue it or tighten it with bolts and washers. Since the toy is still intended for children, you need to think about how to close the piece of iron with this method of fastening. If you decide to glue, then epoxy glue or carpentry PVA will do. Additional tools you will need are a vice or a clamp to press the surfaces to be glued together more firmly. We carefully process all parts with sandpaper: coarse sandpaper to remove the coarsest nicks, fine sandpaper to sand and make the wood smooth.
After we have decided on the head of the future horse on a stick, sanded down the rough edges, we can start painting. If you choose acrylic paints for your work, do not forget to prime the surface before applying paint. This will allow the colors to be more vibrant. For primer, white acrylic paint or special primer from aerosol cans is suitable. The same applies to spray painting: the paint will lie more evenly on a primed surface.
The mane of a horse on a stick, cut from plywood, can be drawn, cut out together with the main part, and glued onto the finished product - it all depends on your idea. You can also draw the eyes and attributes of the horse’s uniform and attach them to the plywood using additional holes and glue.
Ways to decorate masks
Masks made of paper and cardboard can be simple or complex. The better the idea and quality of workmanship, the more interesting the main item of clothing for the child will seem. Even the simplest head mask can be turned into a work of art. What will you need for this?
Materials for decorating masks:
You can use any paints for decoration. It can be gouache, watercolor, or acrylic. Acrylic paints have a bright and rich palette of colors. For decoration, you can purchase special acrylic products that can be used to add volume - contour paints, liquid glass.
Can be used for decoration with craquelure varnish
and acrylic paints. Craquelure, when applied to paint, creates cracks, covering the surface with intricate patterns. The decoupage technique allows you to decorate with various floral or abstract designs.
Gouache is a quick-drying paint with a bright palette, perfect for decorating white paper or cardboard from which the mask is made.
Horse out of the box in half an hour
A jumping horse is an interesting toy that is suitable for boys and girls of all ages. This toy is intended for active games. The design of the jump rope is very simple and its manufacture takes very little time. A jumping horse from an ordinary box - let's make it quickly and easily!
Horse out of the box
What you need to make a jumping horse:
- cardboard (you can replace it with an unnecessary box),
- spray paint (preferably several colors to decorate the horse's head),
- glue (you can use hot glue gun type),
- various markers.
To create a template, draw the outlines of the future horse on paper with a pencil or marker and cut them out. For convenience, each side of the template can be marked with a marker.
Transfer the paper template with the frontal image of the horse onto the cardboard, then turn the template over and trace the other part of it. Now both contours of the future horse are ready.
Using a special knife, cut out two horse outlines from cardboard. Take one of the cardboard blanks and glue a measuring ruler to one of the horse profiles.
Then attach another piece of cardboard.
How to make a jumping horse
Apply paint to the horse's profile on both sides. Then use paint of a different color to decorate the mane, and use a marker to draw eyes on the head.
The horse is now ready and can be used for play. Source
Baba Yaga mask (papier-mâché)
An evil character from their Russian fairy tales with a hooked nose, how can I make this mask more like the original?
For this you will need:
Step by step process:
- First you need to make Baba Yaga's face. To do this, take a plastic mask, newspaper for pasting, PVA glue, and water.
- Lay out the first layer on the mask with paper soaked in water, without glue. This is to easily remove the resulting mask. Next, you should glue several layers (3-4 layers) of paper soaked in glue. Leave the mask to dry for several hours.
- Make the nose and chin of Baba Yaga. To do this, make a nose with a hook from plasticine, like a mask, cover it with paper and glue, and also leave it to dry. After drying, cut the nose in half and take out the plasticine. Glue the nose to the face with pieces of paper. Make a chin out of plasticine and also make a piece out of paper. Wait until completely dry.
- In the mask, cut holes for the eyes, or for the mouth, holes in the nose for breathing. Collect the mask. The nose and chin are attached to the mask with pieces of paper soaked in glue.
- To make eyebrows, twist twigs out of paper, soak them in glue and attach to your face. Make holes along the edges of the mask for ties. Thread the ribbon from the inside out, tie knots inside.
- Decorate the finished mask.
DIY sock horse
As a child, many of us had such a funny toy as a wooden horse, which was a horse’s head put on a handle. Throwing your legs over it, you could play cowboys or brave knights for hours. And the girls felt like real princesses with such a toy, being carried into the distance not by a wooden horse, but by a real racing horse! Today it is quite difficult to find such a toy among the entire variety of assortments in children's stores. However, there is a way out! And all you need for this is a desire, a wooden stick and a sock. Exactly! Using this master class, you will learn how to make a horse on a stick from a sock with your own hands.
We will need:
- a pair of oversized socks;
- felt of different colors;
- padding polyester;
- needle, thread;
- awl;
- drill;
- wooden stick;
- handles from an old bag;
- buttons;
- yarn;
- sandpaper.
- The horse's head is made from a sock, so fill it with padding polyester or cotton wool. Fill the filling more tightly so that the craft does not lose its shape when it is in the hands of a child. Then make a mane at the top using thick yarn, threading it through with a needle. Divide the mane, laying it on both sides of the head, and tie it at the attachment points with a thread. Make sure that the resulting parting is even. After this, even out the length of the mane on each side, trimming the threads that are too long. If you prefer an asymmetrical mane, don't do this.
Cut two circles from white felt. They will serve as eyes. Sew them on, placing a colored button in the center. It is advisable that a cross be embroidered in the center of the button. This will make your eyes look livelier and more natural.
To make our sock craft look more realistic, the horse needs to have nostrils. To do this, pinch part of the sock along the seam and secure the nostrils thus formed with threads. Don't over-tighten to avoid tearing the sock!
And now about how to sew horse ears from a sock. Cut two triangles of different sizes from felt. First, baste them along the bottom edge, and then tighten the thread. After making the second ear in the same way, sew the ears to the head.
Sew a bridle around the muzzle, that is, straps and handles from an already unnecessary leather bag. Make the seams decorative, and choose threads in contrasting colors. The head of a sock horse, which didn’t even require a pattern to create, is ready!
It's time to take care of a head holder, which can be used as wooden sticks of small diameter. Please note that the toy must be liftable for your child. If there is a man in the house, further work can be entrusted to him. Place the horse's head on the handle, step back 2-3 centimeters from the elastic band of the sock and drill a through hole. Thread a strong thread through it and wrap the elastic band tightly.
This is such a charming creature you should get!
Simplified version Is the list of materials needed to make a craft too long? You can make a horse in a simpler way. To do this, stuff a sock with cotton wool, embroider a mouth and two nostrils, tying large knots. Cut out the eyes and ears of the appropriate shape from felt and sew them to the horse’s head, make a mane from yarn.
All that remains is to attach the head to a wooden stick and put a bridle on the horse, tying thick yarn around the muzzle.
We assure you that after receiving such a cute gift from you, your baby will acquire a toy friend for a long time!
You can also make other toys from socks, for example, a bunny or a snowman.
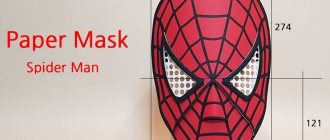
Spiderman mask
To work you will need:
Making a mask:
- From red cardboard, cut out an oval according to the shape of the face plus 3-4 cm allowance along the edge of the oval. Make slits for the eyes and holes for the nose. Even though Spider-Man doesn't have a nose, he still has to breathe somehow.
- Cut out a triangle from white paper - the spider's eyes, stick them on and use a black felt-tip pen to outline the eyes, not forgetting to cut out circles for the eyes. Draw a spider pattern on the mask with a black felt-tip pen.
- To make the mask voluminous, make cuts on the mask. Two at the top, approximately from the eyebrow line to the edge of the mask, and two on the chin. Glue the edges of the cuts.
- Secure the elastic band to the edges of the mask using a stapler. The super hero mask is ready.
Progress
We decided that our horse would be brown, but it could also remain white, blue or pink. Especially if it's a mask for a girl. Then the horse will remind you of your favorite cartoon characters about ponies. Let's get to work.
- We transfer the drawing from the template to paper of the main color. Ours is brown.
- Cut out the head.
- Cut out all other parts separately from colored paper. These are the eyes, mane, reins, part of the ears.
- When all the parts are cut out, glue them onto the base.
- Take a felt-tip pen and trace the outlines.
- Draw the horse's eyes.
- There is very little left to do. We glue the almost finished mask onto an A3 sheet at such a height that a white stripe remains at the bottom. This is the future headband. With its help, the mask will stay on your head.
- When our craft has dried, we cut it out with a rim.
INTERESTING: How to make an alien mask?
A cute, homemade horse mask is ready. Do not rush to throw it away after it has played its role. Place the paper craft in a book to keep it flat. The horse mask may come in handy in the future. Then it will be enough to change the headband, and you almost have a new fancy dress.
Making a horse costume
If you want to make a horse costume with your own hands for a boy or girl, then one mask will not do; you must prepare the body and tail of the horse.
For this you will need:
You can prepare the pattern yourself by first drawing it on cardboard or any other thick paper, or you can get an idea from the Internet. Having prepared all of the above, you can begin making a New Year's costume.
1815
Any holiday event for children will be much more exciting if it is costumed. New Year, a themed party in kindergarten or a birthday, costumes of fairy-tale and cartoon characters will add a little magic and mystery, delighting not only children, but also parents.
You can purchase masks for any holiday, but it is much more interesting to make a mask with your own hands. The most accessible materials are paper and cardboard. What else you will need for work, how to make and decorate a mask for the holiday - later in the article.
New Year can rightfully be called the most favorite children's holiday. Waiting for New Year's miracles, gifts from Santa Claus under the tree and, of course, the celebration itself. The New Year's carnival involves the presence of a fancy dress and mask.
The best ideas for children's masks for the New Year are considered to be:
Animals:
Characters from Russian fairy tales:
- Baba Yaga;
- Dragon;
- Ivan Tsarevich;
- Koschei the Deathless,
- Princess Frog
Heroes from domestic animated films:
- Snowman;
- Snow Maiden,
- Snowflake;
- the wolf and the hare from “Well, wait a minute!”;
- cat Leopold and mice.
Characters from foreign animated films:
- Snow White;
- The Snow Queen;
- Mickey Mouse;
- Goofy the Dog;
- Santa Claus.
Marvel Studios Super Heroes:
The Halloween holiday, which came to Russia from Western culture at the end of the last century, was immediately loved by children and teenagers.
Ideas for this holiday could be:
- Mr/Miss Pumpkin;
- Dracula;
- scull;
- bat;
- small witch;
- Frankenstein;
- casting;
- sad harlequin;
- evil clown.
For a themed birthday party, ideas can be drawn from fairy tales, popular cartoons, and children's films:
- Spongebob;
- Winnie the Pooh;
- Shrek;
- Elsa;
- Smeshariki.
A toy in a child's life
Our distant ancestors were very practical people and made nursery rhymes for their children with a specific purpose, to instill in future men dexterity and dexterity in work and in battle, and in future women the ability to handle household utensils and the desire for motherhood.
And modern children are accustomed to radio-controlled tanks, airplanes and other electronic equipment. It's hard to surprise them with anything. My husband and I, going into our beloved Dolphin, don’t know what to choose for our grandchildren.
Store-bought toys have become a common thing for them and no longer evoke a burning interest, as a result of which the child would become interested in something for a while and give the parents the opportunity to take care of household chores.
But we noticed that homemade things bring genuine joy to our children. A four-year-old grandson, for example, really enjoys playing hero; he feels strong and courageous and is eager to protect his little sisters from imaginary enemies.
Historically, children, living through certain moments in games, transfer them into real life as they grow up, and toys really help them with this.
Girls, playing mother-daughter, cradle their dolls, feed them and take them for walks, thereby learning the skills inherent in future mothers. Sometimes they enjoy “working” as a doctor and a nurse. Sometimes they open a “hair salon” and “shop” at home.
The boys are tinkering with cars, children's instruments (ours, however, is already with an adult, under the supervision of dad), railways, making something from construction sets. At the same time, they imagine themselves as builders, drivers, firefighters and pilots.
A child’s imagination is limitless; a child gives meaning to ordinary everyday objects that is completely unusual for them, but understandable only to him and necessary in this particular game.
A bottle of perfume or cologne becomes a washbasin, a box of chocolates becomes an apartment, a small piece of paper becomes a bed for a paper doll, a twig becomes a horse...
Friendly doggie face
Perhaps the most favorite animal for children and adults is the dog. For this reason, acting as your best friend at a kindergarten party or New Year’s celebration will appeal to many.
At the same time, if father, mother and child participate in the creation of the mask, then the result will be a family event that will be remembered for a lifetime. Such an evening will bring the family together and improve mutual understanding. By working together you can quickly create a unique masterpiece. Everyone has the necessary attributes.
Housewives
The image of the Horse has long been associated with masculinity, strength, and nobility. The horse is a helper, friend and protector. Such a talismanic image can be given to a close man - husband, brother, father, son, friend.
To make a horse, we will need the following materials: 3 sets of linen jute, 40 ropes each, 28 cm long, for the head, torso and legs, additionally we will need jute for the mane and for winding parts of the body; 5 multi-colored threads for the mane, a suitable colored piece of thick fabric for the blanket measuring 4 x 8 cm, a cord for the bridle, braid for the hooves and two black or brown beads for the eyes.
Let's start making the Horse's head. To do this, stepping back 1-1.5 cm from the edge of the bundle of ropes, tie this place tightly 2-3 times, secure it with a double knot and cut the ends short.
So we continue to form the mane, changing the colors of the threads. We remember that the winding must be done carefully and quite tightly (turn to turn), we hide the end of the thread under the winding.
To do this, we fold each half in half (it turns out 40 ropes) and tie VERY tightly, first BOTH legs together to Konik’s future chest, and then wrap each of them separately very tightly with jute until the very end. With each turn we make an even tightening, form a round leg and at the end we hide the rope under the winding. We try to make the legs the same length. To do this, we compare them all the time.
Let's start making the back and tail. To do this, we straighten the second set of ropes of 40 pieces and wrap them around the chest, and then wrap this bundle VERY tightly, making 10-15 turns, and hide the twine under the wrapping
We trim the tail and tie the bridle.
Glue or sew on the horseshoes. If the braid is loose, it is better to glue it. But the glue must be chosen so that it glues the fabric. You can also try PVA.
We glue or sew on the eyes, and secure the blanket with threads. And now our conik is ready!
For blankets and hooves, you can use fabric and braid with folk patterns.
The bridle may be made of silver lace, and the mane and tail may be made of blue-green yarn, as this year's horse should be. But the technology for making a horse in this case is somewhat different. You need to take only 2 bundles of jute twine (40 pieces, 28 cm long). From the first we make the head and front legs using the technology described here. At the same time, instead of a mane made of rope, we tightly wrap the head and neck with twine, and then under each turn of the winding we insert 3 multi-colored threads and thread their ends into a common loop (the same way as fringe is made). We repeat this 2-3 times so that the mane is thick and fluffy. And from the second bundle - the body and hind legs. We glue the yarn tail into the body and wrap it with twine. Then we divide the body into two parts (40 ropes each), and during the winding process we bend each part, giving it the shape of the back leg
Important: all 4 legs must be the same length for the horse to stand steadily. The leg wrap should be as tight as possible
Coffee rocking horse
A soft toy horse with your own hands can be made in the likeness of a wooden horse if you attach a rocking arc to its legs. You will get a wonderful rocking horse, familiar to us all from childhood. This toy is also interesting because it is tinted with coffee solution and painted with acrylic paints.
To make such a horse, you need to print out the pattern, cut it out and transfer it to fabric (preferably cotton), cut and sew the parts, and stuff it with filler. Next, we reconnect the parts with each other and make the mane and tail.
To tint our toy, we use the simplest method.
Dilute one teaspoon of instant coffee in 50 ml of water. Apply the resulting solution to the toy using a brush. After the first layer has dried, apply the second. While the surface is still wet, we paint the horse with acrylic paints to create an interesting blur. We also paint the hooves and seams. Then we paint the spots: first with light brown paint, then with dark brown paint on top. We make the eyes in the same way. Using black paint we draw the eyelid, eyelashes and nostrils.
All that remains is to dry the toy (which will take about a day) and voila - a wonderful coffee horse is ready!
DIY horse on a stick made of cardboard
> Horses
Even the most modern toys cannot compare with the good old and funny horse on a stick, especially one made by yourself. A mop stick, a sock and some scrap fabric is all you need to make toy horses with shaggy manes.
Getting ready for a walk with his horse named Veter, Fedya whispers something in his ear. It's good when horse and rider understand each other and have their own little secrets!
Having already galloped several laps around the garden, Asya and her horse are glad that they deserve a little rest. With a fiery red felt mane, blue eyes and a striped bridle, this toy is as adorable as its rider.
Fedya and Misha decided to explore the nearby clearing on horseback with their “race” horses. There is enough space here to play and have fun.
If the riders are friends, then so are their horses. Wind and Gray take a closer look at each other and decide that they are in good company.
You can also gallop along the road track, so that your rag mane flutters. The main thing is to stay firmly in the saddle.
It's time to get a little refreshment. Misha's horse is hungry.
Fortunately, her favorite food grows right in the clearing.
You will need:
- one large sock (at least size 42)
- cotton wool for filling
- twine
- remnants of felt or other dense soft material in black, white, light and dark brown (of course, you can choose other colors to make the horse unusual)
- pencil
- scissors
- double tape
- mop stick
For the bridle you will also need a 150 cm long cord or fabric cut into strips (for example, cotton knitted fabric).
Horse costume for school children
Teenagers already need more serious costumes. For girls, you can use a dress in brown colors and sew a tail on it. As a headdress, you can sew a long flowing material to one side of the hair hoop and secure the mane to it. A mane made of cardboard would not be appropriate for teenagers.
For young men, a brown suit is best, or a sports suit as an option. A hat is suitable as a headdress, to which you need to sew a mane on the inside, and ears on the outside.
Which socks should you choose?
It is better to take thick and large socks. You can also use wool ones. The main thing is that you want to create! So, you will need:
- base - stick;
- sock;
- padding polyester (foam rubber, cotton wool);
- needle and thread;
- felt;
- materials for mane and eyes.
For the base of such a horse, you can buy a replacement mop stick or use an old one; it has a convenient eyelet for hanging, as a result of which the horse can be conveniently stored by hanging it on a hook. A thin handle for a rake or lazy mop (sold in construction or hardware stores) will also work.
The work plan is incredibly simple: take a sock (preferably a new, large one, chosen with love for your future pet), stuff it tightly with padding polyester or cotton wool. To make the muzzle seem more realistic, you can add nostrils: embroider them with black thread or pinch part of the sock along the seam and secure it. Don't overdo it to avoid tearing the sock.
The head is ready, the nostrils are ready too - let's move on to the mane. The mane can be made from different materials: strips of faux fur, fringe, thick yarn. If everything is clear and simple with fur and fringe, then you will have to tinker with the yarn. In order to make the mane in this way, we find the middle of our horse. We thread it with a needle and secure it to the base. Sew tightly and with a buttonhole stitch. This mane can be made of different lengths and even tied into a hairstyle.
All that remains are the eyes and ears. We cut out the ears from felt (triangle), sew them along the bottom and tighten the thread. We got ears. Sew to the base. Eyes can also be made in different ways: buy ready-made eyes for soft toys, sew on buttons, beads, stick with self-adhesive felt, sew from different colored pieces of fabric - in general, do whatever your creative nose tells you. You can also decorate your horse with additional attributes of horse harness.
We attach the finished head to a stick. Place the horse's head on the handle, step back 2-3 centimeters from the elastic band of the sock and drill a through hole. Thread a strong thread through it and wrap the elastic band tightly. Ready!
Origami horse figurine
How to make a rockery with your own hands: what it is, step-by-step instructions and do-it-yourself planting schemes at the dacha
You will need:
- Album sheet.
- Scissors.
Step 1: Create a square from the sheet. Bend any corner diagonally, and cut off whatever is left.
Step 2: Open the paper and fold along the second diagonal to create two lines. Then unfold again.
Step 3: Bend the sheet in half horizontally. Then we unfold it again. We got four lines.
Step 5: We bend the sides of the entire rhombus into the center and then bend the upper triangle of the entire rhombus into the center.
Step 6: Unbend the surface diamond and cut the sheet from the top from the bottom edge to the horizontal strip of the entire center.
Step 7: After you have cut the paper, open up all the triangles that remain in the shape of a diamond.
Step 8: Bend each diamond horizontally towards the center.
Step 9: Turn the product over to the other side.
Step 11: Turn the craft around 180 degrees. Bend the triangle located in the middle of the corners towards the top.
Step 12: Divide the craft again so that it becomes a square.
Step 13: Making the horse's body. Fold the square in half horizontally. Then fold the sides towards the center. Carefully iron out all bends.
Step 14: Making the horse's leg. Bend the upper right triangle so that the bottom of the entire figure creates a horizontal line. Unfolding, bend all corners inward along the marked lines.
Step 15: Bend the upper right triangle just a little.
Step 16: Open and bend all corners inward along the lines.
Step 17: Making the horse's head. This is a very easy action. We bend the tip of the head inward so that the horse’s muzzle is not so sharp.
So our figurine is ready. Making an origami horse out of paper step by step is easy and quick. This way, the craft can be placed anywhere, because origami always and everywhere looks elegant and neat.
Preparation of materials
We are sure that everything you need will be found in every home. It’s more convenient to organize work at the table, since we’ll be doing drawing. But first you need to prepare:
You can draw the template yourself. Don't forget that our horse is fabulous. It's okay if there are some inaccuracies while drawing. Does the face that looks at you from a piece of paper look like a horse's? It means you did everything right.
