We eliminate flaws
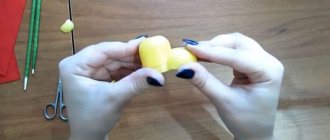
If the surface is decorated with small torn fragments, from which it is necessary to obtain a single whole, straighten the edges of the fragments with a brush or fingers.
If there is color unevenness somewhere, dilute the paint of the desired shade and paint over the translucent base. When the surface is no longer very wet, but has not yet dried, you can use thin brushes and acrylic paints to draw in the details, add brightness and clarity.
The next step is to decorate the edges of the product. There are different approaches here. In some places you have to trim the edges evenly, painting the sides, in others you can wrap the napkin on the back side and glue it there. In general, this is also a whole science.
Getting it to the finish line is an equally creative process.
After this, you can leave the product to dry. To speed up the process, you can use a hair dryer, but you need to keep it at a considerable distance, move it all the time and make sure that it dries evenly. If after drying you see that there is a fold on the glued napkin, you can still fix it. Take fine-grained sandpaper and sand it. We act gently so as not to damage the drawing around.
Magnet using decoupage technique
When beauty arises in a person, he tries to share it with the whole world, and this can be explained very simply - an invariable attraction to the world of creativity. One of the techniques that helps bring ideas to life is decoupage - the art of decorating a wide variety of things with fragments of paper napkins. Marie Antoinette was also fond of this creativity, and today each of us has the opportunity to create a unique thing. So, let's get to work!
In our work we will need:
blank, acrylic primer and paints, glue and varnish for decoupage (this can be two in one), stationery file, napkin, foam sponge, sandpaper.
1. Using a sponge, cover the working surface of the magnet with acrylic primer in several layers until it turns completely white (this can be done up to 3 times, each layer must dry). In between, sand the surface with fine sandpaper.
2. You can help the acrylic primer dry with a hairdryer. The next step is to cut out a piece of napkin you like according to the size of the magnet and remove the two bottom layers from it. As a result, we have a thin piece of paper.
3. Place the cut piece face down on the file. Pour some water into a cup, pour it over the fragment, completely cover it with water and pour the rest into the sink. Gently remove the bubbles with a brush.
4. Take the file by the ends and gradually apply it to the already dried workpiece. Use your fingers to expel any air bubbles. When all these manipulations are done, pry up the tip of the napkin, separating it from the file, and remove it. As a result, we get a beautifully glued fragment.
5. Using a wide brush, cover our magnet with glue, starting from the middle and carefully moving towards the edge, trying not to touch it.
6. Remove unnecessary parts on the sides and completely dry the magnet with a hairdryer. Next, we take acrylic paints and begin painting. We coat the magnet with varnish in at least 2 layers and let it dry completely. Enjoy the result!
Salt dough magnets
Salt dough is as flexible as plasticine, but after baking or being in a warm environment it becomes hard. Products made from it can be coated with paint and varnish.
We take flour, salt and water in proportions 4:2:1. Mix the dough. Roll out the layer 1 cm thick and cut out any shape using a cookie cutter. You can cut it out with a knife using a paper pattern.
Now you need to place the figurine in a warm place for 24 hours. After drying, the figurine can be painted with gouache or acrylic paints and varnished.
The magnet itself needs to be glued on the reverse side with good glue, for example, “liquid nails”.
Instead of cutting out figures from salt dough, you can mold them. Kitchen themes are especially popular: dishes, food, delicacies, fruits, berries. After painting, such sushi or cakes look very natural.
Decor using decoupage technique
Crafts made using the decoupage technique look very beautiful. You can transfer images to any surface - plastic plates, wooden boards, boxes. For example, on the bright holiday of Easter, you can make a talisman for your apartment.
You will need:
- half a box of Kinder Joy sweets (any similar egg will do);
- your favorite image on thin paper (a napkin is best);
- gypsum;
- PVA glue;
- magnet for crafts;
- acrylic paints.
Dilute the plaster with water and pour it into a plastic box from Kinder. After complete drying, remove the item - it is ready for use. If there are any unevenness on the surface, they can be easily smoothed out using a nail file or sandpaper.
You need to cover the workpiece with any color. While it dries, the elements you like on the napkin should be cut out and glued to the egg using PVA. You can paste over either individual patterns, creating a composition, or completely cover the surface with paper.
Transparent paint or varnish should be applied to the finished craft - this way the image will be fixed. All that remains is to glue the magnet on the back side. The craft is ready.
As an additional decoration, you can paint individual elements on the craft with acrylic paint - curls, dots, stripes and other appropriate decorations.
Using the decoupage technique, a composition made of round magnets looks good. For production you will need thick cardboard from which templates are cut. A beautiful image is glued to the front side, and a disk magnet is placed on the back side.
All pictures must be in the same style. For example, for the New Year you can use images of Christmas trees, Santa Claus, gifts, etc. Compositions with flowers will look beautiful on the Eighth of March.
Toy refrigerator decorations
For the simplest crafts, you can use toys. Even children will enjoy making them. All you need for this is a small round magnet, a toy you like (either a small soft one or a plastic one will do) and superglue. When the glue dries and the magnet is securely fixed, the craft can be hung.
To create a general style, you can cover the surface of the toy with paint. It is convenient to use a spray can - the spray will spread evenly and easily over the object.
Decoupage glass vase in shabby chic style
A feature of this style is the artificial aging of the object.” Old chic" - these are abrasions; they are the ones that betray romance and some thoughtfulness when looking at the vase.
We choose a vase of an unusual shape; the more interesting the shape, the more original the object is. The technique of execution has no restrictions.
In addition to napkins or decoupage cards, you can add other accessories, for example: rope, beads, and sometimes putty. For the shabby chic style, we choose better floral patterns, but in pastel colors.
Flowers should not be bright. The paints should also have a muted color, this makes it easier to age the craft.
Popular articles 4 designs from a CD can
Then we carry out the work using the same technique. But when the drawing from a napkin or decoupage card has been glued, then we will do the first stage of aging. You need to partially sand the surface, and then open it with varnish.
We paint the surface with varnish several more times and periodically wipe it with sandpaper. The pastel look and natural wear will make the vase look antique in your interior.
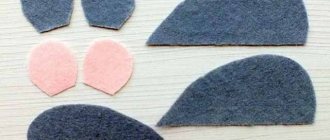
Fridge magnet “Teapot”
If you don’t like the option of a notebook with a heart, to make a magnet for the kitchen using the decoupage technique, you can choose a different shape, for example, a teapot or cup.
To work you will need:
- packaging cardboard
- gouache, napkins with small patterns
- scissors, PVA glue, universal glue
- flat brush, sponge
- magnet
- notepad
- strip of colored paper 1×6 cm
- small pencil
Progress
Enlarge the template 2 times and cut out the silhouette of the teapot from packaging cardboard.
Using a sponge, prime the workpiece with very light paint (white, yellow, pink, lilac or cream) and dry thoroughly.
Tip: to prevent the product from being deformed during painting, cut out 2 identical parts, glue them together, and then decorate.
Cut out or tear off a suitable design from a napkin, separate the top layer and stick it onto the entire surface of the teapot, dry it.
Tip: for a teapot it is better to use napkins with small patterns - berries, flowers, butterflies.
Using a sponge, apply contrasting paint along the very edge of the teapot and dry. After this, varnish the teapot with PVA glue and dry thoroughly again. Glue the magnet on the back side with universal glue.
From a strip of colored paper, folded in half, make a loop around a pencil, glue the free ends together and glue it to the teapot, as shown in the picture, ends down. Close the ends of the loop by gluing a notepad. A useful notebook for the refrigerator is ready!
Source
Neodymium magnets
Crafts made from neodymium magnets are distinguished by their durability and ability to hold heavy objects. Moreover, you can use very small magnets. For example, to prevent the hook on which a ladle or cutting board hangs from coming off, you will need a neodymium magnet no larger than a 1-kopeck coin. Following the instructions in the master class, it will not be difficult to make a useful and beautiful craft for the refrigerator. Have to take:
- neodymium plate magnet;
- tin, glass jar;
- strong glue (“Dragon”, “Titanium” or glue gun).
Before production, the jar should be degreased. Using glue, a magnetic plate is connected to its wall. The craft is ready.
If desired, the jar can be painted, decorated with scrapbooking, stickers, and colored glass. In the middle you can place useful things that are often used in the house. For example, put threads, scissors, pens, paper clips inside. Various spices will look beautiful in glass jars hanging on the refrigerator.
Crafts made from flexible magnets
A composition panel will help create a cozy atmosphere in the kitchen. Almost everyone loves coffee, or at least its aroma, so a coffee craft will be a wonderful decoration not only for the refrigerator, but also for the entire room.
There is room for imagination here - you can choose a template from the Internet or create it yourself, pasting coffee beans, cinnamon, bagels and other delicious things on top.
Even children will be happy to join in the process of creating this masterpiece. Having created the desired composition, flexible magnets for crafts should be glued to the back side of its parts. The panel will fit tightly to the refrigerator.
It is difficult to imagine a wider field for the manifestation of imagination than the creation of magnets. Any creative technique known today will be useful in their production.
Originally posted 2018-03-03 06:57:19.
Content
- What materials will you need to make a holiday magnet?
- New Year's refrigerator magnet: what to make it from
- How to make a souvenir tiger magnet with your own hands?
Winter holidays are a great occasion to meet at the table with family and friends or organize a corporate party for colleagues.
Regardless of whether it is possible to gather many people in one place, everyone wants to pay attention and present a memorable souvenir. An ideal option for congratulations is a souvenir tiger magnet (according to the Chinese horoscope, 2022 is the year of the black water tiger). Make your own holiday souvenir! It takes very little time; even a non-professional can do it in an hour or two. You can do creativity alone, it is relaxing and calming. Or you can involve the whole family in the process; the children will certainly support the idea and make magnets for New Year’s decorations not only for relatives, but also for classmates and teachers.
Are you a creative artist professionally? Buy supplies and conduct a master class. On the eve of the holidays, the event will be especially relevant. Homemade souvenirs are an effective sign of attention; you can always personalize them and add special details. This is evidence that the item was made with love and it is really important to the giver what exactly to present.
New Year magnets 2022 are easy to make from scrap materials. Even if something is missing to realize your idea, you can buy additional paper, felt, and beads at any stationery store, and order a high-quality magnet base on our website. We will tell you more about the types of magnetic materials and how to make souvenirs with your own hands below.
Polymer clay magnet “Sandwich”
Materials:
- Polymer clay brown, yellow, light green, white.
- Toothpick.
- Black beads.
- Stationery knife.
- Transparent glue.
- Knead the brown polymer clay and roll it into a layer 0.5 cm thick. Give it the shape of a piece of bread. Take a toothpick and use the tip to make many non-through punctures, imitating the porous structure of bread.
- To make a lettuce leaf, take plastic of the appropriate color, knead it well in your palms and make a very thin cake. Make the edges of the cake wavy. Make a few folds on the sheet. Place it in the center of a piece of bread.
- Take yellow clay and roll out a layer 3 mm thick. Trim the edges with a knife. Holes in a piece of cheese can be cut with a felt-tip pen cap and the tip of a knife. 3-4 pieces will be enough. Place a piece of cheese on a slice of bread, next to a leaf of lettuce.
- Now let's start making a piece of egg. Take white plastic and mold an oval cake. Place it on a piece of bread, next to the cheese. Make a yolk out of yellow plastic, place it in the middle of the white and press until it flattens.
- Place the shaped sandwich in the oven.
- After the craft has cooled, grease a lettuce leaf with transparent glue and sprinkle some black beads on it. Use the tip of a toothpick to hide the holes on the beads, placing each bead on its side. The black beads in our sandwich will imitate black caviar.
- Glue a delicious sandwich to a magnet and decorate your refrigerator with it. You don't have to varnish it.
Method one: image
Material you will need:
- interesting drawings (pictures cut out from magazines);
- glue;
- magnets in the shape of a circle with a diameter of 1.25 to 1.75 cm;
- glass circles (must match the size of the magnets).
All you need to do is glue a picture to the magnet and a glass circle on it. Glass circles are sold in craft stores.
If a magnet is visible through the picture, it would be advisable to add another detail. Namely: prepare a circle of the required size from white cardboard and glue it under the drawing.
General recommendations for beginners
- To make refrigerator magnets, you can use three types: ferrite, neodymium (super magnets) and vinyl (rubber).
If you want your magnetic crafts to hold only light and small sheets of paper, business cards, etc., then you can use ferrite (regular graphite-colored magnets, which are most often used for souvenir products) or vinyl. The latter is a flexible vinyl material with an adhesive base, which has a low adhesive force, but can be cut into segments of different shapes and sizes. An example of the use of a flexible magnet is presented below.
If you want a magnet to hold heavier things, then to make crafts you need to use neodymium magnets (super magnets), which have 10 times greater adhesion force. So, for example, to make a magnetic hook for a ladle or cutting board, you will need one magnet the size of a 1-kopeck coin. Keep in mind that ideally the adhesive force of the magnet should be 2 times the weight of the craft and the object it will hold.
By the way, a neodymium magnet, unlike a ferrite one, does not lose its magnetic properties over time. Ferrite steel turns into a useless piece of iron after 8-10 years.
- Magnets can be hung not only on the refrigerator, but also on any metal surface, for example, on a magnetic organizing board, range hood or geyser.
In turn, the magnetic organizing board can be installed anywhere, for example, on a cabinet door
See material on the topic: 8 ways to decorate a refrigerator
Method three: magic clay
Making refrigerator magnets will not be difficult if you have the following materials at your disposal:
- magnets;
- polymer clay;
- ink;
- hot glue gun.
And these are the tools:
- Bakeware;
- rolling pin (or any other object that can be used to roll out clay);
- sandpaper (you can use a manicure file);
- stamps.
To make a souvenir, you need to roll out the clay to make a sheet approximately 5 millimeters thick. The pattern is applied to the material with stamps, and individual shapes must be cut out using clay molds.
Next, the workpieces must dry. This requires a day. You can use the oven. Next, polish the figures with sandpaper and glue magnets to them.
Ideas for making unusual and original magnets
You can decorate your refrigerator or freezer using unusual magnets and those decorative elements that are used to decorate them:
- felt refrigerator magnets with flowers or figures, geometric shapes of original design;
- products with family photographs or beautiful drawings, prints of children's hands and feet, logos of favorite brands;
- magnets with three-dimensional figures, letters or flowers made of polymer clay or salt dough, clothespins and toys;
- crafts made from natural materials, cones and chestnuts, leaves, twigs and pebbles or shells twisted in the shape of flowers;
- products made from paper and fabric flowers, themed and holiday decorations, wine corks and drops of epoxy resin;
- magnets made from colored caps from plastic bottles; you can fill them with epoxy resin and place beads, leaves or berries inside.
Popular articles Felted snowman
The variety of ideas is not limited to the proposed options; magnets can be of different shapes and sizes, flat and three-dimensional, color and black and white.
Method four: magnet in a bag
If you're worried about scratches on your refrigerator, you can easily prevent them by making a fabric magnet. A simple manufacturing technique will allow you to change the so-called pouch whenever you want.
All you need for this little masterpiece is:
- magnets;
- colored rags;
- threads;
- needle;
- scissors.
First you need to create blanks for magnets from a flap. The size of the workpieces should be approximately 3 times the size of the magnet. The edge of the fabric must be folded and stitched so that the stitches lie as close to each other as possible. As a result, you got a bag like this. Place a magnet inside, tighten the thread, tie it and cut it.
You can put a little cotton wool or foam rubber between the magnet and the fabric on the front side. Then the product will gain volume.
New Year's magnets made of plaster - master class
The mold must be elastic so that the workpiece frozen in it can be easily separated. In this case, the mold is a saucepan from a set of doll dishes.
A blank for a magnet with a diameter of 6 cm and a thickness of 0.5 cm is obtained from a solution consisting of a tablespoon (without top) of dry alabaster and a dessert spoon of water. Pour water directly into the mold and add the powder, while simultaneously mixing the composition. Bring the solution to a homogeneous state.
The thickness of the solution should resemble sour cream.
Leave the solution in the mold until it hardens completely. Alabaster hardens quite quickly, but it is better to leave it for 15-20 minutes to be sure that everything is completely frozen.
We squeeze the mold with the frozen alabaster on all sides so that the workpiece moves away from its walls. In this case, a thin layer of solution on the walls of the mold crumbles, and may crumble a little along the outer circle of the workpiece itself. We remove everything unnecessary. The workpiece detached from the walls is quite easily removed from the mold.
We smooth out any unevenness using medium-grit sandpaper. Fine-grained sandpaper quickly clogs, while coarse-grained sandpaper leaves scratches on the surface.
The pasted pattern of the napkin looks brighter on a white background, so we paint the front side of the future magnet with white acrylic paint using a piece of foam rubber. The reverse side of the workpiece does not need to be painted.
Sand the painted surface with fine sandpaper. We dilute PVA glue in half with water and stick the selected design on this side. When working, it is better to use a soft brush so as not to tear the wet napkin.
We paste a piece of napkin with a pattern, starting from the center. Use a brush to place a wet spot, which we expand from the center to the edges of the circle, constantly wetting the brush in the adhesive solution
You need to carefully smooth the napkin with a brush, only lightly touching its surface.
It is better to tear out a design from a napkin rather than cut it out, then the transition from the napkin to the surface on which it is glued is better smoothed. The napkin used in this work has a pattern close to each other, so the pattern had to be cut out. Now you need to get rid of the transition step formed during this gluing.
This can be done on a still damp napkin using a toothpick. Using its sharp tip, we smooth out the transition steps and remove excess.
After the glue has dried on this side, similarly glue a piece of napkin onto the back side of the workpiece. Dry everything well. We paint the end of the workpiece with gold acrylic paint, applying the paint using a piece of foam rubber. Using an old toothbrush, spray the same paint.
We coat the workpiece with varnish on both sides in several layers. The more layers of varnish are applied, the glossier the surface will be. But before applying the next layer of varnish, the previous one must be completely dry. If acrylic varnish is used, this process can be completed fairly quickly. Since the magnet is New Year's, the extra shine will not hurt it. Therefore, after the first layer of varnish, we dust off the still sticky surface with manicure glitter, and then apply the remaining layers of varnish.
All that remains is to glue a small magnet on the back side of the workpiece using super glue. This is the kind of holiday magnet we got.
A refrigerator with plaster magnets hints at the holidays. And if you have patience, you can please all your loved ones with these New Year’s souvenir magnets made of plaster on the eve of the holiday.
DIY New Year's coffee magnets. A souvenir for everyone!
Good mood to everyone! Do you feel that the New Year is already somewhere close! And the closer we are to January 1, the brighter the aromas of the holiday are felt. Fresh needles from Christmas tree markets, just brought from the store and immediately eaten by a tangerine. But here comes the smell of coffee (perhaps even with cinnamon): fresh, hot, so cozy, inspiring...
Perhaps it’s time to continue to expand on the topic of New Year’s gifts and souvenirs! And on the agenda we have coffee magnets, Christmas trees and horseshoes. These fragrant beauties are not just a cute decoration for the refrigerator or something, they are a whole repository of New Year's mood. And also a very cool, albeit modest in size (but most importantly, with a soul!) present that many people can make.
Magnets made from coffee beans are a very convenient option for New Year's souvenirs. With little time and money spent on purchasing materials, we get truly handmade and unique gifts that will be appreciated by your guests, family, friends, and especially those who cannot imagine a day without a cup of coffee☕. Although, from experience, even non-coffee lovers are very pleased to receive such a thing.
The manufacturing process itself is no less pleasant. What a aroma it is while the grains are being selected! Clay Moment doesn't count
Today I will show three options for making New Year's magnets from coffee beans. And you, of course, can come up with your own design. Waiting for us:
But first, let's look at the materials:
- millboard;
- brown (and also white) acrylic paint;
- coffee beans;
- glue Moment Crystal or tar glue;
- leg-split;
- magnet;
- decor: burlap, metal balls, bells, star anise, etc.
- acrylic contour “Gold”.
And also a stationery knife, pencil, ruler, sponge.
A few words about the choice of materials
The cardboard should be thick, gray, like for cardboard. The paint is preferably artistic, glossy, of good quality (if the paint is construction, after drying the surface must be protected with varnish).
For a magnet with decoupage, we will also need acrylic varnish, a napkin with a small motif, and a flat brush.
As for glue, you can use both Crystal Moment and hot melt glue. I prefer the first, despite its smell, because... Although hot-melt glue is more pleasant to work with, after hardening it becomes more noticeable among the coffee beans, and the beans themselves sometimes fly off.
Christmas magnets made from coffee beans
So, first, let's prepare the groundwork. For all types of New Year's magnets from coffee beans, it is done the same way.
We draw Christmas trees and a horseshoe on cardboard. Using a stationery knife, cut them out.
Next you need to tint the surface on both sides. To do this, we use a sponge and acrylic paint and our favorite technique of a smacking brush))) We'll have to wait a while. Until the paint dries thoroughly, first on one side, then on the other.
Attention❗ We paint one of the Christmas trees (which is for decoupage) completely only on one side. Next I’ll show you how much.
Coffee magnet Christmas tree with burlap
We will decorate the first coffee magnet - the Christmas tree - using burlap. We cut out a triangle from this material, slightly smaller in size than the base. Using the “Crystal” Moment, we glue it onto the cardboard.
Lubricate the stump with the same glue on both sides and, starting from the bottom, wrap twine around it. We don't cut it yet.
We apply glue around the perimeter and carefully fix the twine around our coffee tree.
It's the turn of the grains. I like to alternate coffee beans on magnets so that it looks natural, somewhere you can see a beautiful groove, somewhere you can see a rounded back. We select the grains according to size and gradually glue them. It’s better not to spare glue here.
All that remains is to add some finishing touches, namely a beautiful star anise and tinting. We tint the twine along the edge and the stump with brown paint, and then go over the top of the star and the stump a little with gold paint.
Magnet - a horseshoe made of coffee beans
Next we'll look at creating a fragrant horseshoe. This coffee bean magnet is made no more complicated than the previous one, by analogy and even simpler.
From burlap we cut out two small pieces in the shape of a horseshoe (the photo shows one of them). Along the perimeter of the horseshoe we glue a thread of twine, as well as pieces of burlap.
We select and glue the coffee beans, closing the gaps with paint.
We knit two metal decorative bells. We make a small neat bow from twine (there is a master class on this topic here). And we glue all this from below using either hot melt glue or the “Crystal” Moment.
The horseshoe magnet made from coffee beans is almost ready!
Coffee magnet Christmas tree with decoupage
Here’s another beautiful idea for a New Year’s coffee magnet – decorate it using decoupage. In the article Soulful Coffee Magnet the creation of an interesting little thing designed using this technique (if you haven’t seen it, take a look ↑, don’t be lazy). Here we are interested in New Year's themes.
So, remember, at the beginning of the master class I talked about tinting the base on only one side. What about the other one? We tint the other side only along the edge. And after drying, cover the corner on which the drawing will be pasted with white paint.
We tear out the desired motif from the napkin, and then separate the top layer. We place it on the white part.
Now let's take the varnish. We drop a decent drop in the center of the motif and very quickly spread it over the surface to the edges.
After the varnish has dried, you can slightly sand down any uneven spots on a napkin if they suddenly appear. And then we apply brown paint so that, firstly, to cover all the white gaps, and secondly, to give a neat look to the edges of the napkin. To do this, use a sponge to touch the napkin itself, creating a rounded outline. Let it dry.
Before gluing the coffee beans onto the future magnet, let's add a few accents using an acrylic outline. I made a spiral on the stump and circled it in dotted circles. After this, cover the surface with another layer of varnish.
All that remains is to glue the grains and add a few small beads - balls.
Another New Year's magnet made from coffee beans is almost ready! Almost - because the most important touch remains - the magnet itself.
We place the magnets in the center of our Christmas trees and horseshoes (from below), glue them using the “Crystal” Moment.
And now it’s definitely ready! Let's consider:
In the second photo you see another Christmas tree coffee magnet, like a rocker one with a guitar. But the branded magnet 16+))) ⬇
In general, as you can see, there are options for every taste and color! And for one aroma – the aroma of coffee!
I hope you found it useful and interesting today! New Year's theme is one of inspiring ones. So why give store-bought magnets with standard animals when you can make your own unique masterpiece! Try it! I have collected even more New Year’s ideas with soul for you in this article: Ten ideas for New Year’s gifts .
And if you are partial to twine, welcome to a special review of ideas and master classes on twine →: Christmas decorations made from twine .
Good luck to you, great inspiration and joy from the process!
Master classes: DIY refrigerator magnet
Simple and bright DIY refrigerator magnet
What you will need:
- round magnets,
- glass or plastic circles of the same size,
- glue,
- interesting pictures (you can cut them out from magazines or draw them yourself).
Making such interesting magnets will be a breeze. You just need to glue the selected picture to the magnet, wait for the glue to dry, and glue the glass circle onto the picture.
Once the glue is completely dry, your magnet is ready.
DIY living plant fridge magnet
What you will need:
- magnets,
- wine bottle corks,
- glue gun,
- knife,
- Earth,
- small plants,
- screwdriver.
To begin, you will need to make a small hole in the top of the cork using a screwdriver. Next, we expand this hole using a knife (very carefully, trying not to catch the walls of the cork).
Attach the cork to the magnet using a glue gun.
After this, you need to carefully pour soil into the resulting depressions and plant the plants. This way, magnets with live plants will appear on your refrigerator. Don't forget to water them regularly. As soon as the plants noticeably increase in size and no longer fit in the plugs, transplant them into pots. And in the traffic jams you will need to fill up other soil and plant new plants.
DIY “fabric” refrigerator magnet
What you will need:
- magnets,
- needle,
- pieces of fabric,
- threads in color.
Take a piece of fabric and cut a circle out of it, the diameter of which will be 3 times larger than the diameter of your magnet. Now you need to sew a “case” for the magnet. Fold the edge of the fabric piece and sew it. You need to put a magnet in the resulting “case” and carefully tighten the fabric with thread.
Tie a knot at the end of the thread and trim off the excess.
This magnet will look great on your refrigerator. A fabric “cover” will protect your refrigerator from scratches. And if you wish, you can change it without much difficulty.
Do-it-yourself refrigerator magnet trailer
What you will need:
- magnetic tape,
- acrylic paints,
- wooden clothespins,
- thin brush,
- glitter (optional).
Making such magnets is quite simple. You need to decorate the clothespins using paints and a brush (you can make the same design on all the clothespins or paint them with different colors)
Popular articles Home decoration for New Year 2022 - DIY decor ideas
If you want your magnets to be bright and eye-catching, then use glitter. You need to glue magnetic tape to the back of each clothespin.
Your clothespin magnets are ready. They will help you neatly capture photos or notes.
DIY polymer clay refrigerator magnet
What you will need:
- magnets,
- polymer clay,
- rolling pin (can be replaced with a glass jar),
- Bakeware,
- stamps,
- sandpaper,
- ink pad,
- glue gun
First you need to roll out the polymer clay using a rolling pin. You should have a layer of clay about 0.5 cm thick. Use stamps and apply various patterns to this layer in a chaotic manner (so that they do not overlap each other). If you have an ink pad, you can give your designs the color of your choice.
After this, using baking molds, cut out various blanks for future magnets from the clay layer.
Read the instructions written on the polymer clay package. Depending on what is indicated there, leave the pieces to dry or bake them in the oven.
When the blanks are ready, carefully sand them with sandpaper and glue magnets to the side that does not have a pattern. Let the glue dry and you can use ready-made polymer clay magnets.
DIY wooden refrigerator magnet
What you will need:
- small magnets,
- tree branches,
- sandpaper,
- wood saw,
- Super glue,
- drill and wood bit.
You will need to saw the branch into pieces about 2.5 centimeters thick, then sand all sides of the workpiece. Using a drill, make a small hole in the center of each piece for the magnet. It must fit completely into it. Apply glue to the magnet and insert it into the hole. After 6 hours, when the glue is completely dry, you can hang the magnets on the refrigerator.
DIY Christmas magnets
Such magnets are not my invention, but I decided to tell you in detail how I knitted them. I made sure that there were no knots on either the front or back side, since these Santa Clauses can be used not only as magnets, but also as Christmas tree decorations, decorating the Christmas tree with them!
For work we will need:
1. Threads - cotton (“Iris”, “Pekhorka” or others), 2. Hook (I have No. 1), 3. Scissors, 4. Corrugated cardboard (or any other cardboard for creativity), 5. Double-sided tape, 6 . Magnetic tape
To lift, we knit 3 chain stitches = 1 stitch, and we knit another 12 double crochets into the ring.
Leave the white thread for a while, insert a hook into the last 2 loops of the 13th stitch and pull the pink thread
We knit 6 double crochets with pink thread, “knitting” the white and pink tail of the thread inside, as in the photo
We close the circle with a connecting stitch (in the 3rd chain loop of the first white stitch)
First we pull the white thread (tail), then the pink one, pull it as tightly as we can with the knitted element, after which the tails can be carefully cut off
Turn the knitting and knit 2 double crochets into each pink loop of the previous row, 14 double crochets in total, leave the “tail” of the pink thread about 1.5-2 cm and cut off the thread