Recently, decorative items that are made from recycled materials or from materials that are conventionally called garbage, for example, cardboard boxes from appliances, have been in fashion. On the other hand, it has become fashionable to create various figures and models of equipment from paper.
In this article we will try to create some interesting ship models from cardboard. For some of these models you will need ready-made templates, and some products can be created without diagrams, using your imagination.
At the end of the article you will definitely find a video tutorial that will help you consolidate your knowledge and create an interesting product from available materials. Let's not waste time, prepare the materials and start creating.
Templates
Let's first try to create a ship using templates. They are easier to work with. What you will need:
- thick cardboard (you can use an old box);
- scissors;
- pencil;
- ready-made template;
- glue or tape;
- colored paper and other decor.
First you need to print the template and transfer it to the main material. By the way, if you are using cardboard that is not too thick, you can print the template directly on it.
You should get something like this:
Next, you need to dilute a little PVA glue with water, cut plain paper into pieces and dip them in the solution and glue them to the base of the ship. Remember the papier-mâché technique. It is better to connect the ship parts themselves using tape.
All that remains now is to decorate the blank with the prepared decor. This can be colored paper, wrapping paper, fabric. The ship can also be painted with ordinary watercolors.
You also need to make a mast for the ship. You can use an ordinary twig and several round pieces of thick cardboard.
Every boat must have a flag. For it, use fabric and applique made of paper or material. The sail can also be made from cardboard; use toilet paper rolls.
Making a big ship
This option is suitable for young children who love exciting games. For such a ship you will need a large box. This could even be packaging from under a refrigerator or from a large TV.
First you need to connect the valves of the box and make a sharp bow of the vessel. On the sides you need to cut out several round timbers to make improvised portholes. Use a thick stick and fabric to make a flag. Use paints to decorate the ship.
Don't forget about details such as the anchor - it also needs to be made of thick material and decorated. A large do-it-yourself cardboard ship is ready to sail across the endless expanses of the apartment.
We use matchboxes
Let's call this modeling, because we will create a whole ship from several matchboxes. What you will need:
- cardboard;
- glue;
- matchboxes;
- wooden skewer or thick paper;
- colored paper;
- markers;
- scissors.
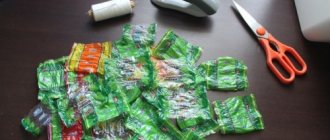
First you need to glue two matchboxes together with the short sides. Glue another box on top in the middle.
Now you need to cut out a rectangular piece of paper and glue it to the structure on top.
Now we need to cut out a strip from thick colored cardboard, with which we will form the bow of the ship.
Now you need to cut out a piece of cardboard that will correspond to the contours of the ship, look at the photo:
Now the bottom and top of the ship need to be fastened with glue. Next you need to make the mast. You can use a wooden skewer or roll up an A4 sheet very tightly and secure the tip to prevent the sheet from unwinding.
A hole needs to be made in the top matchbox of the ship so that the mast can be inserted. Don't forget to use glue.
Now all that remains is to cut out the sails from colored paper, paint them and attach them to the mast.
The matchbox ship is ready! It can be made wider and higher if you use more matchboxes. If you use very thick cardboard for the bottom of the ship, then it is quite possible to float it on the water and participate in competitions for the title of the fastest boat.
DIY cardboard spaceship
We suggest using a fairly simple option that will allow you to literally create a 3D model. To do this, you need to cut out several identical parts from cardboard, but of different sizes. The parts need to be fastened together, but either a thin piece of foam rubber or a small piece of thick paper must be placed between them. It will look something like this:
- Or like this:
- An entire space station can be made using cardboard rolls from toilet paper and tape.
- Use silver foil, a compass, a black marker and a pencil to give the spaceship a realistic look.
Tips for working with cardboard
Cardboard is a fairly convenient and easy-to-work material, but if you know a few nuances, the work will seem even simpler, and the product itself will turn out neat:
- When working with very dense material, use fairly sharp scissors, or even better, a stationery knife;
- before bending the cardboard parts, it is better to draw along the dotted lines with the non-sharp side of scissors or an old pen that does not write, then the material will bend neatly and evenly;
- Not in all cases you can use a glue gun. For example, if you are working with thin material, then it is better to use office glue or PVA;
- work in a room where the humidity is not too high, otherwise your products may delaminate or parts may not stick together;
- the room should be light, it is advisable to have a window that can be opened and ventilate the room;
- We also always advise you to work only in a good mood.
- How to make a ship out of cardboard with your own hands - a few more interesting options
- We would like to offer several more interesting and beautiful options for ships that you can make with your own hands.
- In this case, a milk carton, cardboard boxes and a sleeve are used.
- And this is a luxury boat made from an ordinary cardboard box.
With a little practice and imagination, you can create such a beautiful pirate ship made of cardboard with your own hands. We always advise you to involve children in creativity. They will be especially pleased to know that they are creating a boat just for themselves. At the same time, you can think about a pirate costume, and also make a spyglass, a hat and a cardboard knife out of cardboard.
Such participation of children in creativity helps to develop their imagination, attentiveness, perseverance, and the desire to create something with their own hands for themselves. Be sure to involve children in cleaning too.
Explain to them that after themselves they need to fold all the materials, put them in their places, and also need to clean the work area so that later they can get back to creating.
And as usual, we want to share with you an interesting video master class. This will be a DIY ship made of cardboard with a step-by-step story. Don’t be alarmed if you don’t know English, because the video shows all the stages of creating a beautiful vessel very clearly and in detail:
Source: https://zhenomaniya.ru/hobby/prochee-rukodelie/kak-sdelaty-korablik-iz-kartona-svoimi-rukami
Master class on making crafts from waste material “Ship with scarlet sails”
Potapova Elena Anatolyevna
Master class on making crafts from waste material “Ship with scarlet sails”
Good day, dear friends and colleagues. Today I bring to your attention a master class on making a boat from waste material .
This master class will be of interest to: educators, additional education teachers, as well as parents for joint creativity with their children.
Purpose: visual material .
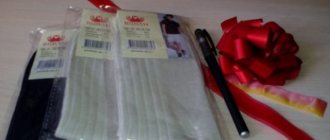
Materials for the master class : polystyrene foam, a cardboard light bulb case, a set of colored paper, a simple pencil, a ruler, PVA glue, scissors, a skewer, a toothpick, a needle and thread.
Master class stages :
1. At the preparatory stage of the master class, we prepare the deck - first we round the edges in the bow, and in the rear we cut the edge at an angle.
2. At the next stage, we will prepare the cutting, cut the right edge at an angle, and glue it on all sides, for this we take a sheet of white paper.
3. Using a simple pencil, draw the cabins (three circles, and cut them out along the outlined outline.
4. Glue the finished part to the foam.
5. Take a black sheet - draw an anchor and cut it out. Glue the anchor to the base of the ship .
6. Draw 4 sail and cut them out. We transfer the sails to felt and cut them out.
7. At the final stage, we make a hole in the cabin and insert a mast (skewer)
.
the sails one by one on a skewer, starting with a large piece.
Then we take a rectangular sail . We sew the bottom right edge of the workpiece and insert a toothpick there.
Sew a thread to the top corner.
We insert the skewer into the front of the ship , and pull the sail to the base of the mast , fixing it.
Our boat is ready for a long voyage.
Thank you for your attention!
Master class on making crafts from waste material “Dandelion” Today I would like to present to your attention a master class on making a “dandelion” from waste material or simply ordinary household material. Master class on making crafts from waste material “Chicken” Master class on making crafts from waste material “Chicken”. 1. For work we will need: egg packaging, PVA glue, feathers. Master class on making crafts from waste material “Little Frog” Good day, dear friends! I bring to your attention a simple master class on making crafts from waste material “Little Frog”. Master class on making crafts from waste material “Ice Cream” Good afternoon, dear colleagues! Summer has come and the weather pleases us with warm and even hot days. Well, what would summer be without everyone’s favorite one? Master class on making Christmas crafts from waste material Christmas is one of the most important holidays of the year. It snows on Christmas Day, falling like God's mercy. It's snowing - and there's magic on this day. Master class on making “My Family” crafts from waste material Good day, dear colleagues! Today I want to offer you a master class on making “My Family” crafts from all that. Master class on making a “Tractor” craft from waste material In addition to building materials and paper, waste material is also used in kindergarten for construction. When teaching children to design. Master class on making crafts from waste material “Wood” Good evening, dear colleagues! Today I want to bring to your attention a simple craft made from waste material - “Tree”. Master class on making crafts from waste material “Turtle” Hello colleagues, friends and guests of my page. I bring to your attention a master class on crafts made from waste material “Turtle”. Master class on making crafts from waste material “Traffic Light” For the traffic rules corner and for classes, I decided to make a traffic light. Goal: To equip preschoolers with basic knowledge of the basics of life safety.
Source
Birthday in a pirate style - a DIY cardboard chest
YO-HO-HO! Do you love pirates?
My son loves them very much and decided to celebrate his fourth birthday in this style.
We spend the summer at the dacha, but since it is not located on the seashore, it was decided to transform the site into a small pirate cove!
The morning began with turmoil, while the main pirate was sleeping, work was in full swing: the trampoline was turned into fishing nets, they were looking for a place to moor the ship, hanging flags, pulling the sails, and goodies were placed on the veranda - the hold.
When the entire pirate crew had gathered, they were given pirate accessories (hats, sabers, belts, bandanas)
Then the team members went in search of the treasure. They were faced with difficult trials, which the team coped with honor.
After completing the tasks and successfully finding the treasure, the pirate team went to celebrate their victory.
- We began to prepare much in advance to purchase everything we needed in Moscow.
- First of all, I started preparing the decorations and, I want to say, it took quite a bit of time. What we had:
- imitation of a pirate ship from a refrigerator box, painted with regular gouache
- Cardboard anchor + gold paint.
- Flag - cardboard primed with black paint + Jolly Roger cut out and glued on.
- A rope is a thick rope, folded in half and twisted.
- Cardboard steering wheel. The process of its creation
Paper sailboat
Hello to all paper modeling lovers! We suggest gluing together one of the light paper sailboat . Creating a three-masted sailboat will be an interesting activity for several hours.
The difficulty level of the model is average, however, even a beginner can glue it together. The main thing is to carefully read the instructions and, in order not to get confused, glue the parts sequentially.
Paper sailboat - tips for making
- To print out diagrams of sailboat parts, you can use either a black-and-white or color printer. This won't really affect the appearance. If something happens, you can color the sailboat with pencils.
- The diagrams can be printed on thin cardboard or a sheet of whatman paper. However, if you decide to print the diagrams on photo paper, then your sailboat will be able to float in the water for a while, and then, of course, become limp.
- To cut out parts, use sharp cutting tools, scissors or a utility knife. Then the parts will have smooth and neat edges.
- To create curved parts, use a pen or pencil to wrap the paper around it and give it a rounded shape.
- Make the masts of the sailboat from paper tubes created from paper wrapped around a pencil.
- When making folds of parts, use a drawing ruler and a sharp sticker. Place a ruler along the bend line, draw a sticker along it so that an indented line remains and bend it.
- You need to cut and glue the parts sequentially, this will prevent you from getting confused when making a sailboat.
- When gluing parts, try to use a moderate amount of glue.
- While gluing, use tissues to dry your hands, otherwise clean paper may show marks from dirty fingers.
Paper sailboat parts diagrams
Paper sailboat - parts diagram No. 1
Paper sailboat - parts diagram No. 2
Paper sailboat - parts diagram No. 3
Paper sailboat - parts diagram No. 4
To make gluing a paper sailboat easier, we suggest downloading instructions
For dessert, we suggest watching the funny cartoon “Three Heroes and Godzilla.”
Why haven't you glued it yet? Well, it's in vain...
We will be grateful if you click on the following social buttons!
How to make a boat from scrap materials | 50 photos of ideas for making boats
What boy doesn't like to launch boats? Website “Mom can do anything!” I have collected for you 50 ideas with photos on how to make a boat with your own hands from scrap materials.
Paper boat
We all made paper boats as children. These are easy to make, and the material is always at hand. And if you take not just paper, but for example packaging from sheets for a printer, then the ship will last on the water for several hours!
Plastic bottles
In the modern world, plastic is used everywhere and finding a similar bottle for making a boat is not difficult.
A shampoo bottle is also useful for making a sailboat. Pierce it with a wooden skewer, attach a paper sail and your ship will be unsinkable.
Vegetable ship
Vegetables can also be considered improvised materials and it is just as easy to make a craft from them.
Cut out the middle of the zucchini, scoop out the pulp, insert a stick and use a piece of paper to make a sail. Add details: cut small windows, make a sailor from carrots and potatoes.
A boat can be not just a craft, but also an option for serving a dish. Surely the kids will want to eat this one :)
Craft: ship made of sticks
You've probably accumulated a lot of Popsicle sticks over the summer. It's time to make crafts out of them. Wooden sticks will be an excellent building material. Paint them in different colors and start making them.
If you don't have Popsicle sticks, just go to your nearest park and collect small twigs. Fasten them together with a rope, add a sail and the boat is ready.
It's autumn and that means it's time to make boats with sails from leaves. They can be easily attached using a heat gun or a piece of plasticine. Here are some ideas:
Very beautiful and comfortable boats are made from tetra pack packaging. You can easily put your children's favorite toys in them.
And this is a detailed diagram for making a pirate ship from kefir or milk packaging. It is in English, but generally understandable.
A large cardboard box can easily be turned into a ship on which your child will be the captain.
From a smaller box, make a sailboat for his toys. You can turn any unnecessary object that can float on the water into a boat. For example, coconut shells. Place a couple of sheets of paper on a wooden skewer and secure it inside the shell.
- You can also make small boats from Kinder Surprise eggs and walnut shells.
- Add a spectacular sail to your paper ship for great beauty.
Wine corks are an excellent material for making small rafts. They do not sink and swim well, and are also very small and can even fit in a jar.
Egg trays turn into spacious ships. In their recesses you can easily place both Kinder Surprise toys and cute little animals.
A ship can be made from almost anything, even ice. Pour water into an ice container, insert the sticks and place in the refrigerator for a couple of hours. Make two holes in a sheet of paper with a hole punch, take out the boats and put the sheet on a stick, the sailboat is ready. A few more ideas for making a ship from scrap materials:
You may also like
Source: https://mamamozhetvse.ru/kak-sdelat-korablik-iz-podruchnyx-materialov-50-idej-s-foto.html
Paper boat
The fastest and easiest way to make a boat is considered to be the origami technique - for such a ship you will only need a couple of minutes of time and one notebook or newspaper sheet.
To make it you need to follow a few simple steps:
- Take a rectangular sheet and fold it in half. Mark the middle along the fold line and bend the sides so that the sheet takes the shape of a triangle;
- Bend the protruding parts of the sheet under the triangle upward on both sides;
- Tuck the resulting corners one by one behind the triangular base of the future boat. As a result, you should end up with a triangular craft blank;
- Straighten the workpiece so that it resembles a hat, empty inside. To do this, take the opposite corners of the base and bring them together - you will get a square-shaped workpiece;
- Bend the bottom corners of the square up and give the workpiece a square shape again;
- Gently stretch the square to the sides by the upper corners. You should end up with a boat that just needs to slightly straighten the bottom, and it’s ready to set sail!
As you can see, there is nothing complicated in the origami method. To make a boat, you can use either a regular notebook sheet or scrap or colored paper. Using glue, you can attach decorations in the form of cut-out pictures or color the board with pencils.
But despite the advantages of this method in the form of ease of execution, it is not without its drawbacks: Paper boats are short-lived, they quickly get wet and cannot stay afloat for long.
How to make a pirate ship from cardboard boxes
- With a cardboard box you can go on any adventure.
- We will need:
- 2 large cardboard boxes (the thicker the better).
- Scotch.
- Cutter.
- Hot glue gun.
Since our box had a pattern, we turned it inside out. If your box is clean, then you don't need to do anything like that. Stand the box upright and cut 3/4 off one of the sides as shown in the picture.
Level the second cardboard box on the floor and cut off one side, leaving only three. The middle of the box is the bottom of the ship, the sides are the sides. Cut from the middle along the triangle from the top of the box. From the sides, also cut a triangle along the edges. The picture below shows what should happen.
Fold and glue the sides of the boat, as seen in the picture below, so that the sides are stronger.
Now glue the bow of the ship together with tape.
Place two boxes together and glue them together using tape and a hot glue gun. Our ship is almost ready.
We also cut out the porthole.
If you wish, you can make a sail from a piece of cardboard and a wooden dowel. To create a pirate flag, you will need a sheet of black paper. A skull and crossbones cut out of white paper is glued onto it.
Well, an anchor made from a piece of cardboard and rope will not be superfluous. And for the captain you can make a spyglass from a cardboard tube.
Let's sail towards adventure!
Source: https://smekalo4ka.ru/2019/09/13/kak-sdelat-piratskiy-korabl-iz-kartonnyh-korobok/
Postcard for February 23rd in the form of a suit
A greeting card is perhaps the simplest thing that is suitable for display at school, and for congratulating dad, grandfather or older brother on Defender of the Fatherland Day. Why do we propose to design it as a men's suit? Because such a card will look unusual for such a holiday, elegant and emphasize gender. We think that all men, regardless of age, will be pleased to receive (especially from a daughter or granddaughter) just such a postcard.
You choose the color of the shirt and jacket yourself, but remember that with light jackets, the shirt should be darker and vice versa. As for the tie, mothers should tell their children that its color should match both the shirt and the jacket and not be flashy, but fashionable.
For a postcard like the one in the photo, we will need:
- colored cardboard in black and red and a sheet of white office paper;
- scissors, glue stick and hot glue;
- a simple pencil;
- 6 small black buttons and a thin ribbon for tying the card.
Bend a black sheet of cardboard on both sides - these will be the sides of the jacket.
Fold a sheet of office paper in half and inside write wishes and congratulations on the holiday to the person to whom the card is intended (it is quite possible that it is a labor or physical education teacher). Glue the piece of congratulations to the “jacket” so that the message can then be easily opened and read.
We make a collar for the shirt. Cut out a rectangle with sides 15x4 cm from white paper, bend the edges of the rectangle towards its middle to form a trapezoid and glue the collar to the middle of a large sheet so that part of it protrudes beyond the edges of the sheet.
Cut out a tie from red cardstock. Its length should be approximately 20 cm. Glue the tie to the collar and glue the collar so that the folded sides cover part of the tie, forming the corners of the collar.
Next, decorate the jacket with buttons, which you glue to it using a glue gun or Moment glue. Cut it out of black cardboard and glue a pocket and a handkerchief made of red cardboard (two triangles) onto the jacket. Don't forget to fold back the top corners of the jacket sides.
All that remains is to tie the buttons with a ribbon (braid) to close the card.
Another very interesting version of a postcard with a moving airplane, which is suitable for a school exhibition, look at the video.
DIY ship out of a box
Children of any age can make interesting and unusual crafts from a box with their own hands. At the same time, the higher the level of their skill, the more neat and beautiful the craft is, and the more complex tasks they can perform.
For beginners, a cardboard ship would be a completely suitable idea. Making a ship out of a box with your own hands is quite simple because the main part of the ship - the deck - is already made. It is enough to give it the necessary resemblance to a real water transport - and the craft is ready.
In such a ship you can go on a real voyage around the apartment.
DIY ship out of a box
We turn the box into a boat as follows:
We cut out a round hole in one of its side walls - a porthole. To do this we use a stationery knife.
Cutting out the porthole
We paint the hull of the “ship” in suitable marine colors. Striped white-blue-blue boats look beautiful, but this is a matter of everyone’s taste.
Blue and cyan paints for coloring a ship
Paint the ship blue
We make a steering wheel from white chenille or ordinary wire. To do this, we connect the ends of the segment, forming a circle from it, to which we attach short straight pieces of wire. It is easier to work with chenille wire because parts made from it do not slip. You can cut a steering wheel out of cardboard or mold it out of plasticine - all options are good in their own way.
We make a sail from a piece of fabric and a cocktail tube. You can make a variety of sails using not only fabric, but also paper, polyethylene and various other materials. In this case, the main thing is to give the child the opportunity to use his imagination.
To create a ship deck, you can tape a piece of cardboard inside the box. Now the box looks like a ship not only on the outside, but also on the inside.
Secure the deck
We connect the elements of the ship, the paint on which by that time had most likely already dried. We attach the parts to the deck using polymer glue or wire.
The ship is ready out of the box
Ready!
Let's now draw a pirate treasure map. To give it an antique effect, we can tear it at the edges and dirty it a little with a black shoe sponge.
Pirate map with antique effect
All that remains is to recruit a truly brave team, and now our DIY cardboard ship is ready to sail. There is nothing more interesting for children than inventing games with such voluminous, and even more so, homemade decorations.
Source: https://montessoriself.ru/korabl-iz-korobki-svoimi-rukami/
Necessary materials
The photo of a ship made of wood, made by yourself, shows that the following materials can be used for its manufacture:
Tree. It can be represented by such soft and non-fibrous species as cedar, linden, and walnut. Area of application - creating the main parts of a ship or small detail elements. Requirements for wood - evenness of surfaces, absence of knots and defects.
Plywood. The most popular material for shipbuilding. Usually the balsa or birch type is used, since they give the least amount of chips when sawing. The standard sheet thickness is considered to be 0.8 - 2 mm.
Veneer. Externally, these are thin plates of natural wood of valuable varieties. Used to decorate surfaces made of cheap materials.
Also, when creating models of merchant and military ships from wood with your own hands, you cannot do without such fasteners as thin chains, laces, threads, small nails made of brass and copper, etc. gizmos.
It’s also worth purchasing high-quality wood glue, sets of cardboard and tracing paper. Tiny detailing elements are made from metal casting or polymer clay.