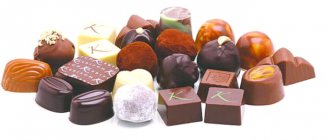
New Year is a fabulous holiday, which makes it possible to give and receive gifts or various amenities. We are not necessarily talking about expensive things. Relatives and friends will be delighted with a Christmas tree made of candies, made with your own hands with love and soul. It will decorate your workplace or holiday table, and a week later it will serve as an indispensable treat for tea. To make it you will need candies and any New Year decorations that your imagination is capable of. Step-by-step instructions will make the work easier and warn against unsuccessful crafts.
Glittery Christmas tree in a hurry
For people who love everything stylish and extraordinary, you can make a beautiful gold or silver Christmas tree. To do this you will need a sheet of cardboard, a glue gun, New Year's beads, foil, and candy. The office supply store sells thick paper with a shiny coating in different shades. If you can find it, the craft will take less time.
Snowmen from candies for the New Year 2020
Making a snowman from candies is not difficult if you know all the stages of the work process and prepare everything you need in advance...
If you don’t have such cardboard, you can make the base yourself by painting it with regular gold or silver spray paint. The next must-have item for decorating an elegant Christmas tree is beads. They are sold in any stores where New Year's toys are available. The color must be matched to the shade of the craft. You will need to use beads to cover the empty spaces on the base between the sweets.
And the main component is candy. They must be in gold or silver foil, in the shape of a cone. For crafts, you will have to look for ones that are slightly elongated and not rounded on the sides. Otherwise, it will be difficult to glue them to the base, and the appearance of the tree does not seem to be as decorative as it was intended. The quantity is determined depending on the size of the base, so it may vary - on average 200-300 g.
Instructions:
- Cut out a semicircle of a suitable size from shiny or regular cardboard. To understand in advance how tall the Christmas tree will be, you need to measure the radius - the distance from the middle of the flat side to the highest point of the semicircle. Glue the edges of the base with double-sided tape or glue to form a cone. If the cardboard is ordinary, then it must be painted with gold spray paint. It dries very quickly.
Attention! Candies in foil are slightly more compact than those wrapped in regular paper or plastic wrapping. This means that the Christmas tree needs more of them. In order for the cardboard to withstand the weight and not deform, you cannot make the cone too high - 20-30 cm will be enough.
- Prepare the glue gun - heat it until the rod begins to melt. Apply a drop of glue to the cardboard cone and immediately press the top of the candy in foil onto it. It's better to start from the bottom of the base. Finish the first row.
- Next, attach the candy to the cone to understand at what height to stick the next one. Each top row should cover the bottom row by 2-5 mm, so there won’t be too much free space between them.
- When the entire base is filled, you need to make the “top”. In the classic version, this is a star. You can create it from the same cardboard, gluing foil on both sides in the color of the entire craft, or sprinkling it with glitter. Cut out two identical stars from paper, glue them together, after placing a toothpick in the middle so that it extends beyond the cardboard. Insert the resulting “top” into the top of the tree and secure it with a drop of glue.
- To hide the gaps between the candies and complete the Christmas tree, you need to decorate it with beads. To begin, apply a drop of hot glue at the highest point of the base cone and press the end of the decor to it. Carefully place the beads in each row of candies to the very bottom. Trim off the excess and secure again with glue.
The elegant and stylish New Year's golden tree is ready.
It can be used to decorate a fireplace, a holiday table, or be presented as a souvenir to a colleague, boss or friends. Such a gift will especially please those with a sweet tooth, because simply giving a box of chocolates is banal and boring. Beautiful ideas for serving fruit on the New Year's table
The festive table for the New Year should consist not only of delicious dishes, but also of decorations that will make it...
Instead of cone-shaped truffles, you can use candies with one flat side and the other convex, like Ferrero Rocher. They also easily stick to a cardboard base and look impressive in combination with gold New Year's beads.
Decoupage on champagne
The decoupage technique will allow you to decorate a bottle if you don’t have the ability to draw. A little preparation and you will create a whole collection of elegant New Year's containers. Decoupage is also called the napkin technique, since pictures are usually cut out from suitable napkins. So, for decoration you will need:
- bottles from which all labels and foil have previously been removed;
- white primer for decoupage or acrylic paint;
- matching themed prints cut from napkins;
- PVA glue;
- tassels;
- finishing varnish.
Decoupage technology is simple. Prepare all the necessary materials in advance so as not to be distracted during the manufacturing process.
- Cover the surface of the glass with prepared primer or white paint and dry.
- Spread the napkin picture with PVA glue diluted with water in a 1:1 ratio.
- Using a wide brush, spread the design onto the bottle and smooth it out. Dry. You can use several different pictures.
- Additionally, the edges of the picture can be covered with a layer of paint - matching or contrasting. If the design is quite dark or bright, you can spray white paint on top to create an imitation of snow.
- After complete drying, the product must be coated with acrylic varnish for strength. This composition is odorless and absolutely harmless. The varnish also needs to be dried.
You can decorate the bottles with decorative details: hats with pompoms, beads, rhinestones, ribbons, pieces of fur.
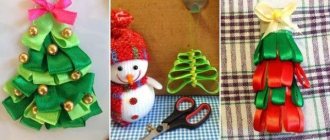
Christmas tree made of tinsel and sweets
Another craft option that is easy to do with children. For it you will need fluffy tinsel, thick cardboard, a glue gun, and candies in a wrapper with a long “tail” on one side. “Rain” will suit any color. For example, silver goes well with green chocolates, and gold goes well with red ones.
Instructions:
- To make the base, you need to cut a semicircle from thick cardboard. The size is determined by the radius of the template, which corresponds to the height of the future base. A Christmas tree using tinsel is not too heavy, so you can make it large - 30-40 cm and above. Glue the semicircle together to form a cone.
- To strengthen the base you need to make a bottom. Along the bottom of the cone, cut a circle out of cardboard with an allowance of 1 cm. Make cuts along the entire circumference at a distance of 5-7 mm, 1 cm long. Lubricate the outer side of the base of the cone with glue, bend and glue all allowances one by one. This way, the Christmas tree will gain additional stability.
- Glue one end of the tinsel to the bottom edge of the cardboard base. Make one row of decorative “needles” with it. At a distance of 3-5 cm, secure with glue so that the “rain” does not move. Leave the free end until the next step.
- The second row is to glue the candies behind the “tail” of the wrapper so that the lower part overlaps slightly with the shiny decor. You need to calculate the distance between sweets taking into account the gap from the first to the last. The tinsel will “hide” here.
- Transfer the “rain” from the first row to the third and secure. It should partially cover the “tails” of the candies. Also glue at the end of the row. Here you can no longer fix it around the circumference; due to the sweets, the tinsel will not move anywhere.
- Continue this way to the top of the tree.
- A star will help you complete the craft. You can buy it at a Christmas tree store or make it yourself. A simple and beautiful option is made from glitter foamiran or cardboard. The first is a soft material for crafts, and the second is regular thick paper. Both have a thick layer of glitter on one side, so the star doesn't require any additional decoration. Make a template, transfer it to the desired material and cut out two identical shapes. Lubricate them with glue, insert a toothpick in the middle and glue them together with the shiny surface facing out. When the star is dry, stick it into the top of the cone. The New Year tree is ready.
Attention! Any candy is suitable for this craft - square, rectangular, cone-shaped, round. Multi-colored wrappers and tinsel will look bright and fun. It all depends on your imagination.
MK No. 2
The second master class will describe the process of making a Christmas tree from sweets and tinsel. To work, you will need several sheets of white or green cardboard, about a kilogram of sweets, tinsel, tape, a stapler and PVA glue.
First of all, on a sheet of green cardboard you need to draw an even circle and divide it into four parts, then you should cut out the circle itself and one part, and the remaining parts should be twisted into a cone shape, thereby creating the base of the Christmas tree. You need to make the bottom row of needles from tinsel; to do this, measure out a piece from the tinsel that is equal to the diameter of the base, and glue it to the bottom wide edge of the tree. Next, you need to make the next row of candies, which need to be glued over the tinsel with a slight overlap. The next row should again be made of tinsel, and on top again you should make a row of candies. Thus, alternating a row of tinsel and a row of candies, it is necessary to decorate the entire base of the tree.
Marmalade Christmas tree
The smallest lovers of the New Year and everything fabulous will be delighted with such a beauty. All children love gummies of different shapes and colors, sprinkled with sugar or decorative sprinkles. For such a creative Christmas tree you will need a special foam base, which is sold in all hobby stores, toothpicks and the candies themselves. It is better if they are hemispherical in shape, but any will do, even bears, hearts and others.
Instructions:
- Since the marmalade is unpackaged and will touch the foam mold, it is better to wash it and dry it well.
- If desired, you can sort the candies by color or make a completely multi-colored Christmas tree.
- Break the toothpicks into two halves to make it easier to stick them into the foam base.
- Carefully place each marmalade on half a toothpick.
- Start assembling - insert the free sharp end of the toothpick into the foam to the base of the candy. It is better to do this starting from the bottom, gradually filling row by row. But you can also play with your imagination. For example, make a spiral display of two colors, or start from the top, filling the vertical rows, alternating different shades of soft candies.
- The craft is ready. To complement it, you can attach a bright bow from a decorative ribbon or the same classic star to the top.
Creative bottles for the New Year
And now, when you have already learned how to decorate champagne with ribbons, you can try and get creative. Use all available materials, natural materials, your imagination, the imagination of children, friends and go ahead and create! We will help you with this a little!
Please note that you can buy flowers ready-made, or you can also make them yourself. We have a lot of articles on the topic of creating flowers, be sure to read them!
Take a look at the first option. Lace and gathered wide ribbon are used here.
The combination of gold and red always looks luxurious. By the way, use yellow - this is the color of the coming year and it should bring good luck.
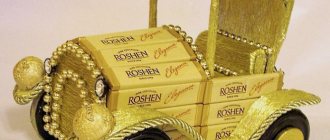
Christmas tree made of sweets and champagne
A great gift for colleagues, relatives or friends. Making it is no more difficult than the previous options, and such a souvenir will definitely bring more joy to adults than just a box of chocolates with alcohol. You will need to get a glue gun, cardboard, tape and tinsel. A bottle of champagne can be anything, but it is better to choose sweets in a bright shiny wrapper, wrapped only on one side.
SONY DSC
Step-by-step instruction:
- Cut a semicircle the height of a bottle from cardboard. Measure about 5 cm from the sharp end. Cut off this part, making a rounding parallel to the lower circumference of the future base. The result is a half-cone that needs to be glued together. Place the finished structure on top of a bottle of champagne.
- At the top of the neck, glue the end of tinsel of any color, make 1-2 turns down onto the cardboard base, gradually fixing each with a drop of hot glue so that the structure does not fall apart. The number of rows depends on the thickness of the “rain” and the desire of the author of the craft.
- When the tinsel has covered the neck and the top of the paper half-cone, you need to start gluing the candies. It is better to do this using the loose “tails” of the wrapper, slightly hiding them under the fluffy “needles”. Finish one row.
- Carefully hiding the “rain” between two candies, continue to screw it onto the base, periodically fixing it with glue. You can make 1-2 or more turns as desired.
- Glue the candies next. And so on to the very bottom of the bottle.
Champagne in the shape of a Christmas tree
For this craft we will need:
- green ribbon;
- green felt;
- beads;
- gold ribbon;
- glue gun;
- scissors.
You need to make a removable base from felt, in which you can later put champagne.
Next, the green tape needs to be cut into small pieces and the ends fastened, as shown in the photo:
Now many of these blanks need to be attached to a felt base. You should end up with a Christmas tree like this:
Incredibly beautiful Christmas tree made of sweets and champagne
It will serve as a fabulous decor not only on New Year's Eve. Making such a Christmas tree is more difficult than making one from tinsel, but the result is worth the effort. For the craft you will need not only the usual tools - a glue gun, scissors, green electrical tape, a piece of wire about 50 cm long, corrugated paper, a stapler, Christmas beads, satin ribbon, hard cardboard.
For the main decor, green floral thin felt and white organza are used. If such materials are difficult to obtain, corrugated paper of two colors will do. It is sold at any office supply store. And, of course, you will need a bottle of champagne and beautiful large candies, perhaps with a New Year's design.
Step-by-step instruction:
- Cardboard for the base is needed for the stability of the entire structure, which means it must be dense - it will do from some kind of box from household appliances. Draw on it and cut out a circle with a diameter of 20 cm.
- Unfold a sheet of corrugated paper onto a hard surface and place a circle on top. Cut out two templates - one clearly on the cardboard base, the second - 1 cm larger for the hem.
- Apply glue to one side of the cardboard circle and glue a larger piece of corrugated paper onto it. There should be equal allowances around the circumference, so you need to apply the parts strictly in the center.
- Apply glue to the edge of the circle on the opposite side of the cardboard and glue the free part of the paper, gently pressing it so that large folds do not form.
- Apply glue to the remaining side and glue a smaller circle of corrugated paper onto it. If there are any uneven spots, you can trim them with scissors. A neat and beautiful plain base for the future Christmas tree is ready.
- To keep the champagne bottle on the cardboard, you need to make a clamp for it. Wrap a thick wire several times around the glass bottom. There should be a gap of 2-3 mm between them.
- Hide the wire by wrapping it with green electrical tape or special tape from the florist store.
- Using hot glue, secure the wire ring in the center of the cardboard circle.
- Cut squares with sides of 8-10 cm from floral felt and organza or two colors of corrugated paper. The larger they are, the more magnificent the Christmas tree will be. You need a lot of parts - about 80-100 pieces. The quantity depends on the density of their placement on the champagne bottle. Moreover, some of the squares should be using white material.
- When the required number of parts have been cut, it’s time to assemble them into “petals”. If there are not enough squares, they can be cut at any stage of making the craft. Place one piece of material on top of another, moving it diagonally so that all 8 corners “look” in different directions.
- Fold the outer square in half diagonally. Then again - opposite corners inward. You should get a voluminous “petal”, all the free edges of which are directed in one direction.
- At the base, just above the hem, secure with a stapler.
- Some of the “petals” will be made using white and green material, the rest will be completely the same color.
- The transition on a champagne bottle from the neck to the expanding part should be decorated with a wide satin ribbon to create a “collar”.
- Retreat 1-2 cm from the very bottom of the bottom. Warm up the glue gun. Apply a drop to each “petal” and immediately press it against the bottle, since the glue hardens very quickly. The distance between them must be maintained so that the edges slightly overlap each other without leaving gaps.
- Having finished the first row, for a more reliable fixation it is necessary to once again secure the bases of the “petals” with a narrow satin ribbon. It must be glued over the corners of corrugated paper or felt with organza.
- The second row should consist of white and green “petals”. They need to be glued 1.5 cm higher than the previous ones. Additionally, secure the row with a narrow tape.
- When 2-3 rows of green squares are glued, you can proceed to decorating with candies. Grease the “tail” of the wrapper generously with glue and fix it just above the top. To make the Christmas tree look elegant, but not too pretentious, 4 large candies per row are enough. You need to glue them perpendicular to each other. If desired, the quantity increases.
- You need to add “petals” between the candies. Glue them additionally using a narrow satin ribbon, and only then proceed to the next row of green squares.
- So the “petals” need to be alternated with chocolates until there is no free space left on the bottle in front of the wide satin ribbon. It was pasted on at the very beginning in the form of a “collar”.
- The topmost row, which is already glued to the tape, must be fixed with the corner of the “petals” not at the top, but, on the contrary, down.
- To make the whole tree look impressive, you need to carefully glue the free edges of the top row with the previous ones. So, you get a fluffy top.
- Tie a beautiful large bow from a wide satin ribbon, cut its ends diagonally, and glue it in.
- You can complement the decor of the Christmas tree with multi-colored shiny beads. To do this, glue them to the bottle, carefully moving the “petals” apart in the desired areas.
- Place the finished craft in the central part of the base made of cardboard and wire. So, it will stand steadily.
- If the Christmas tree is intended for a New Year's gift, it must be presented effectively. For example, make a beautiful package of transparent cellophane for flowers, and secure it at the top with a bright bow.
Preparation
You can be guided by the taste preferences of the recipient of the gift. Accordingly, a bottle of champagne can be replaced with whiskey, lemonade, cognac and even children's champagne. In any case, it will turn out spectacular, and the principle of creation is practically no different. The only thing is that you may need a different amount of tinsel and sweets.
- Prepare everything you will need for the master class to make your own Christmas tree from a bottle of champagne and sweets. In addition to the ingredients, you will need tape (if you use wide tape, you will have to cut it into thin strips), scissors, double-sided tape and a cardboard circle. The latter should be larger in diameter than the bottom of the bottle. Attach the product with double-sided tape to the bottom.
Then cut a strip of ordinary tape, glue the candy to it by the wrapper and attach the structure to the bottle above the tinsel.
Repeat the same action with three or four more candies.
Then, using ordinary tape, the candies are reattached. They should hang above the tinsel.
Repeat the steps of attaching tinsel and candies to the very top of the bottle.
You can leave the area with the cork of the product open or take care of decorating it. A green satin ribbon works great. Cut a piece, roll it so that the diameter matches the diameter of the bottle neck. Secure the edges of the tape with thread or a lighter. You can also sew up the top of the resulting product to create a kind of cover.
Attach the resulting product to the neck of the bottle using tape.
All that remains is to take care of decorating the very top of the bottle. The easiest way to make a bright and spectacular bow is from a ribbon, for example, yellow. Attach it to the top of an impromptu Christmas tree and add thin ribbons. It looks very nice.
You can get creative and make a variety of Christmas trees using different rain showers and candies. The result will pleasantly surprise you, and the recipient of the gift will be delighted with the spectacular and practical gift. As you can see, following the recipe, it’s not difficult to make a New Year’s gift with your own hands. Bon appetit!
Recommendations for choosing sweets
For the New Year, you can not hold back your imagination and create fabulous crafts with your children or yourself for a gift. Most master classes on the Internet are presented on assembling Christmas trees with regular chocolates. If you get a little creative, you can come up with a special craft using those sweets that the future owner of the gift loves.
What to make a Christmas tree from:
- gummies and jelly sweets without wrapper;
- mini bars Twix, Nuts, Snickers, Mars, Bounty, Milky Way;
- wrapped caramels;
- Christmas candy canes;
- Chupa Chups and other lollipops.
The simplest New Year's dessert - “Christmas trees”
With the New Year holidays approaching, store windows are full of various decorative elements, toys, and…
To present ordinary sweets with taste, for the New Year you can make a Christmas tree from tinsel, sweets, satin ribbons, shiny plastic beads or other materials. If you don’t have the skills to create such crafts, then from the variety of step-by-step instructions it is better to choose one that is understandable and easy to follow. When your hand gets full, you can move on to more complex crafts.
Craft - Christmas tree from magazine pages
Craft - a Christmas tree from the pages of a magazine
Another of the unusual crafts is a “Christmas tree from a magazine”.
A magazine with at least 200 pages and glossy pages is ideal. The thick cover can be removed. And now patience and time.
- We bend each upper right corner of all pages towards us at 45 degrees.
- We turn all the lower corners that go beyond the borders up.
- We fold the remaining pages of the magazine in the same way.
- It turns out to be an accordion. When it comes to an end, we see an interesting Christmas tree that can decorate any office all year round.
DIY Christmas tree from a magazine
DIY topiary Christmas tree made from napkins: instructions, photos
How to make roses for a Christmas tree from napkins?
Christmas tree made from napkins
I would like to say right away that a Christmas tree made from napkins always differs from other crafts in its visual lightness and tenderness. Some people do not immediately understand what material it is made of. Fans of topiary will really like this option for creating a Christmas tree with their own hands. In order to make a topiary tree we will need the following materials:
- Napkins,
- Foam cone,
- glue gun,
- A decorated rod that will hold our Christmas tree (often they take an ordinary tree branch and disguise it under decorations),
- small pot,
- Gypsum (gypsum plaster will also work),
- Beads on a string or other decorations.
- We mix plaster with water, pour the mixture into a pot, strengthen the Christmas tree holder in it and place the cone of our Christmas tree on it.
- Using templates, we draw circles on the napkins and bending the edges, we make “mini roses” from each napkin.
- Next, we apply each decoration to the cone using a glue gun, filling the entire space.
- You can put a few of these “Mini Roses” on the top of our pot to compose our entire craft in style.
- We wrap tinsel (beads on a string) around the entire perimeter of our tree; anything that looks beautiful will do.
Our DIY napkin tree is ready.
Options for a Christmas tree made from napkins
Napkins for such a Christmas tree can be one color or you can take 2 colors and combine them beautifully. Including your imagination in this project will give excellent results.
If you are not a fan of topiary, then a Christmas tree from napkins can be made on a regular cardboard cone, completely repeating the process described above. another version of a Christmas tree made from napkins here .