Plasticine: a combination of simplicity and originality
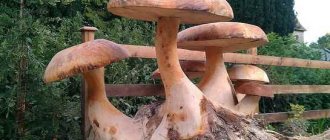
This mushroom is easy to make. It is enough to roll out a cylinder-sausage for the leg from light plasticine and roll a ball from brown or red plasticine for the future hat.
The leg should not be too long - thickening is necessary at the bottom for a more durable attachment. You can make grass at the bottom. To do this, take the green mass, roll it into a sausage, and then flatten it. Using a knife, a fringe is cut out, which is then wrapped around the leg at its base.
Closer to the hat you can make a skirt. To do this, wrap a white plasticine sausage around the leg, secure it and slightly flatten it, as can be seen in the photo of the mushroom.
A hat with grooves will look original. The rolled out pancake for the hat is turned over. On the inside, grooves are made using a toothpick, running from the center.
To make a double hat, just roll two balls from white plasticine. One of them is flattened into a cake, which is fixed on the leg. A white ball is placed on top of the pancake. A pancake made of red plasticine is placed on top of the ball and smoothly flows around it, connecting with the white lining.
Plasticine can also be used as a connecting element - a ball of plasticine is placed on a vertically fixed acorn, and a chestnut cap is attached on top.
The best homemade plasticine recipe • Homemade superhero
BEST Homemade Play-Doh - I've tried all the recipes and this is by far the best! Lasts 3+ months, the color does NOT stain your hands, and it's super easy!
I've tried at least 10 homemade play dough recipes over the years and some have been great successes and some have been flops. I feel like I've finally come up with the best recipe for the best homemade play dough and I'm going to share it with you!! It's pretty simple and involves ingredients you probably have around the house all the time (except maybe you don't have cream of tartar... maybe...). This recipe is quick, makes a lot of play dough, and play dough really remains good for a long time. This would be great as an activity for kids or as a home activity for kids. This is a really great indoor activity!
How to record video:
What to do to make homemade clay:
In a medium saucepan, add 1 cup flour, 2 teaspoons cream of tarter, and 1/3 cup salt (salt prevents sticking and helps preserve).
Then add 1 glass of water and 1 tablespoon of vegetable oil
Turn heat to medium/low and stir. It will be a little bumpy and that's okay.
Before it starts to thicken (this will happen quickly, so be prepared), you want to add any color of food coloring. If it becomes thick before you add it, it will be difficult to get an even color. Add coloring and mix!
Keep stirring, it will start to thicken. This may take anywhere from 30 seconds to 2 minutes depending on how hot your pan/stove is.
Now you can see it getting thicker, keep stirring and scrape the bottom of the pan.
Continue stirring and scraping the bottom
Once you notice that the dough is no longer wet, remove it from the pan.
As I said, the whole process shouldn't take more than a few minutes. this happens very quickly, and even faster when you make additional batches because the pan/stove is already warm.
Place the dough on wax paper and let it cool (about 30 minutes). Then take the ball in your hands and knead for a few seconds (for example, 30 seconds). Store in a ziploc bag or airtight container IN THE REFRIGERATOR. It should not dry out, but if you notice that it is a little dry, add a few drops of water and knead them into the dough. You can also add a drop or two of fragrant essential oil to make the play dough smell great!
I love all the colors!
Make sure you don't miss anything! Follow Domestic Superhero on:
Facebook | Instagram | Pinterest | Twitter
To receive NEW RECIPES straight to your inbox, subscribe to our newsletter!
BEST homemade plasticine
Compound
- 1 cup powder
- 1 mug water
- 2 tsp cream of tarter
- 1/3 cup table salt
- 1 TBS vegetable oil
- gel food coloring
Instructions
- Combine all ingredients except food coloring in a medium saucepan.
- Cook, stirring, over low/medium heat. Once it starts to thicken, add food coloring.
- Continue stirring until the mixture becomes much thicker and begins to clump around the spoon.
- When the dough is no longer wet, remove it and place it on wax paper or a plate to cool.
- After cooling (30 minutes), knead the clay for a few seconds.
PLAY!
- Store in an airtight container in the refrigerator!
Recipe Notes
The above will make you ONE big ball of play dough. I usually do this multiple times for however many flowers I want (so if you want 6 large balls, know that you will need 6 times the ingredients listed above, but you will need to make them separately).
Don't forget to order some cute playdough cutting toys to go with your new playdough! I love this Alphabet dough cutting kit
Items you may need for this recipe - Click to shop below:
Penoplex product
With the participation of parents, you can make an original composition from the material used for wall insulation. A simple instruction on how to make a mushroom will help you. A leg and a cap are cut out of two pieces of penoplex using a stationery knife. The surface is carefully leveled.
On the inside of the cap, a recess is made in the center for joining. A little glue is poured into this hole to attach the ceiling tiles. A leg is placed inside.
You can color the craft using gouache. For better adhesion, PVA is added to it. The leg is painted a light color, and the cap is painted a darker color, such as red or brown.
After the paint has completely dried, the surface can be coated with ghost nail polish. It is important that you do not make any mistakes in applying the paint.
Several mushrooms can be installed in a shoe lid. The material used to wrap flowers as a substrate is preliminarily placed in it. The composition can be diversified with natural samples - dry twigs, leaves, cones.
WEAVING A BASKET FOR MUSHROOMS STEP BY STEP:
1. The hoops are prepared as follows: the rod from the butt to the tip is pressed through the knee and placed in containers of a suitable size so that the resulting ring overlaps by 10-15 cm.
2. The hoops are left in this state for several weeks until completely dry.
3. The ends of the rod for the hoop are tapered “on the mustache” to a length of 10-15 cm, so that it is convenient to join them. The butt of the rod is planed from the inside, and the top from the outside.
4. The sections are generously smeared with glue, pressed against each other and secured with electrical tape (Fig. 1). After the glue has dried, we continue working.
5. The prepared hoops are inserted perpendicular to each other (one inside the other). The top part of the hoop (without the joint) will be the handle of the basket, usually this is the thickest and smoothest part. We place the junction of the vertical hoop at the bottom and then hide it in the braid. Where the hoops intersect, we connect them with a small nail or self-tapping screw to secure the structure and provide additional rigidity.
6. We fix the connection lock with long thin rods, tape or rattan. We place the braid rod at the crosshairs of the hoops diagonally, where we place the butt on the left, and place the tip of the rod behind the right side of the horizontal hoop. We draw the diagonal in the opposite direction, behind the future handle of the basket. Then we braid it around the hoop, with the diagonal lying parallel to the first (from top to bottom). Next, we braid the horizontal hoop on the left, while the fourth diagonal lies parallel to the second, from top to bottom to the bottom of the vertical hoop. We intertwine the hoops one by one. On the outside, you will get even diagonal rows forming a rhombus.
7. From the inside, each hoop should be tightly wrapped - turn to turn. The size of the diamond should not be small; it is a decoration for the basket, a strong lock and the basis for setting the edges of the frame.
Mushrooms from dough
To work, you need to prepare the dough. You will need half a glass of finely ground salt. Hot water is added to the glass with salt and the whole mass is kept in this form for an hour. After this, the solution should be poured into a bowl and add 2 tbsp. PVA glue for fastening strength, as well as flour. A novice master will be required to knead a thick dough.
The stem of the mushroom needs to be formed around the base in the form of a foil rod. The hat can also be wrapped around foil, or you can sculpt it without it. To secure it to the leg, treat the attachment points with water. The molded mushroom craft from salt dough is sent to the oven and dried over low heat for 10-13 hours.
If the composition is very large, then first the stem is dried for an hour and the cap separately, which must then be fixed hot on a support. After fastening, the entire structure goes into the oven. It is recommended to dry the extracted mushroom naturally, for example on the balcony.
- What does a sword mean to a man?
A variety of engraver attachments for every taste and color
- A still life with roses will delight you longer than fresh flowers
The final stage is coloring. In addition to the mushroom, you can mold other shapes or decorate the composition with natural materials.
Liu Sha Bao - How to make this wonderful dessert with salted egg
You will be mesmerized by the lava filling that flows out when you tear into this Chinese custard bao (Liu Sha Bao).
The filling is slightly sweet, creamy, and most noticeably slightly salty, sandy and lava-like in a salted egg yolk puree. The molten lava filling is the signature feature of this unique Cantonese dim sum.
This custard bao is called 黃金流沙包 in Chinese. It is also translated as Liu Sha Bao / Liu Sa bao / steamed salty custard buns / molten lava bun / creamy custard bao.
This recipe is partially based on the work of Chef Zhu Limi with my interpretation. The filling is like thick lava. There are many Chinese Dum Sum restaurants that serve custard bao with a thinner filling . I have a recipe for a more pourable filling in the next section. However, this less smooth recipe is much more flavorful.
Note: This post may contain affiliate links. Please read my privacy policy for more information. I may earn a commission for purchases made through links in this post.
Prepare the custard
The amount of each ingredient is critical to achieving this texture.
Here are the steps:
- Separate the salted egg yolk from the white. Remove as much egg white from the egg yolk as possible. Steam the egg yolk for five minutes or depending on the heat used. Make sure the yolks are fully cooked to get a sandy texture.
- Mash the boiled salted egg yolk with a cleaver blade or fork.
- Take a regular hard-boiled and mash just the yolk. Set aside.
- Measure out the required amount of oil in a bowl.
- Add the powdered sugar to the melted butter and cream both ingredients to form a buttercream.
- Add milk powder and custard powder . Mix well.
- Finally, mix the above with the egg yolk puree. Stir until no visible pieces of egg yolk remain. You may consider using an electric mixer if the quantity is large.
- At this point the mixture is too soft to use as a filling. So place the mixture in the refrigerator until it becomes semi-solid, which can take anywhere from half an hour to one hour.
- When it is firm enough, remove it from the refrigerator and divide the filling into equal parts of 15 to 17 g each.
- Using your palms, roll each piece into a ball shape. If you are not going to use it right away, store it in the refrigerator. Let it cool until you can easily handle it before using it as a filling.
Note: Salted eggs are very popular among the Chinese. Learn how to use salted egg yolk to make traditional lotus paste mooncake.
Alternative filler, more liquid.
I like the thicker, dirt-like texture that I can describe as “molten golden sand.”

