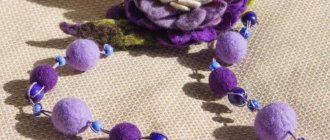
Unusual handmade jewelry always attracts attention, especially if made carefully and tastefully. Materials for crafts can be very diverse, for example, paper. Typically, such products perfectly complement an ethnic style outfit. Monochromatic and variegated, of various shapes and colors, they attract attention and make their owner stand out from the crowd.
In addition to adults, you can also make paper beads for children with your own hands. This is a great addition to a baby's summer outfit or to a New Year's carnival costume. Creating jewelry with your child is an interesting activity that teaches the child to work and develops creativity.
There are many techniques that allow you to make paper beads with your own hands. Below are the most affordable and popular options.
Beads made using papier-mâché technique
Materials: tissue paper, toilet paper or any thin and loose paper, toothpicks, fishing line, ready-made lock (you can do without it), acrylic paints, colorless varnish (optional).
Difficulty level: easy
- Soak small pieces of paper in warm water until completely swollen and fibrous. The water should only slightly cover the paper.
- Drain off the excess water and grind the resulting mass (papier-mâché) in a blender until smooth.
- We separate small portions from the resulting mass and form balls or cubes of the required size.
- We pierce each ball/block through the center with a toothpick and leave it there until completely dry.
- The drying process should be carried out naturally and should not be accelerated by artificially increasing the temperature. Future beads may become deformed or crack.
- Next, we paint each detail (you can apply a pattern, a transition from one tone to another). If you plan to paint in the form of a pattern, the next layer is applied to the previous one only after complete drying.
- If desired, the resulting beads are coated with colorless varnish. This will add shine and extend their service life.
- The blanks are removed from the toothpicks and put on a fishing line.
- The ends of the fishing line, if desired, are fastened with a lock or tied with a neat knot, which is hidden in one of the beads. If you do not plan to use a clasp, calculate the length of the beads correctly (they should fit freely over your head).
Hawaiian lei
No true Hawaiian party is complete without colorful decorations. Even adults are delighted with them, what can we say about children? Together with them, we suggest making Hawaiian beads with your own hands, for the manufacture of which we will use not real flowers, but colored napkins and paper.
So, let's make children's beads from corrugated paper!
- Prepare your materials. Measure two strips of paper 45x4 cm. Each flower consists of two such pieces.
- Place the pieces together and gradually twist them in a spiral, forming folds. Pinch the ends to prevent the workpiece from unwinding.
- In total, you will need 12 flowers for the lei. When all the elements are ready, lay them out in the chosen order to make sure the resulting composition is harmonious.
- Prepare floss to match. To assemble the lei, tie a double knot around each flower.
- Fluff the flowers to give them volume.
Lei beads for a children's Hawaiian party are ready. Using the same pattern, you can make not only beads, but also garlands of paper flowers to decorate your room!
Beads using the twisting technique
This technique involves a more complex execution and requires some experience. But as a result, real masterpieces are created, reminiscent of ornate small shells or ornamental stones.
Materials: thin but durable plain or colored paper, bead templates, toothpicks, fishing line, acrylic paints (you can do without them if the paper is colored), colorless varnish, a ready-made lock (you can do without it), PVA glue, brush, scissors, pencil.
Difficulty level: Some skill required.
- Using the template, we transfer its contours onto paper manually or print it on a printer. The number of copies of the template corresponds to the number of beads. You can use different templates in one product and independently determine the quantity and sequence of stringing of future blanks.
- We cut out the beads along the contour of the blank.
- If the paper is colored, place the paper on the table with the colored side down.
- Using a toothpick, carefully wind (twist) the workpiece. It takes some skill to make the twist tight and even. Depending on the contours of the template, you can get a wide variety of shapes of bead blanks.
- Carefully glue the paper edge of each piece with PVA to the bead.
- If the beads are made of white paper, we color them using paints, you can choose options for natural stones, etc.
- After drying, coat with 1-2 layers of varnish.
- Remove the beads from the toothpick and string them onto a fishing line.
- The ends of the fishing line are secured with a lock or tied with a strong knot.
Thus, in addition to beads, you can make a set by adding a bracelet or earrings.
How to make beads from paper? Step-by-step instruction
To create beads, weekly or monthly product catalogs from any supermarket are suitable. These magazines are printed on lightweight, thin paper that is very easy to convert. It is not a pity to cut such publications, since they have a short shelf life. The more colorful the magazine pages are, the more fun the beads will be.
When cutting variegated ribbons, there is no need to follow the sequence of colors, unless there is some specific color idea. The resulting pattern is impossible to predict: the stripes will appear chaotically, haphazardly, reminiscent of the country style, which is successfully used in the interior. Therefore, if you have enough time and patience to create a large number of large beads, you can use them to assemble curtains for a doorway. You just need to string the beads on a stronger thread or fishing line.
Autumn beads
With the onset of autumn, kindergartens and schools often give tasks: you need to bring a craft made from natural materials. Cones, berries, nuts, rowan berries, leaves, acorns, chestnuts are used, and everything that is in the forest and garden can be used in work. We offer you several master classes on creating beads, and we will start with rowan beads.
Rowan beads
At the age of 4-5 years, a child will already be able to repeat the actions of his mother and make such original autumn beads in folk style. We recommend purchasing tapestry needles (embroidery) for this purpose: they have a slightly blunt tip, so the risk of pricking is much lower.
It is best to harvest the material in late summer or early autumn, when the rowan berries are already ripe and bright, but have not yet had time to soften. Sort them through, removing branches and cuttings: you only need the berries themselves.
Thin threads are not suitable for stringing: choose strong, medium-thick ones (for example, two-fold nylon threads have proven themselves to be excellent).
The length of the thread depends on the size of the beads: it is advisable to take such a length at once so that you do not have to lengthen it. The knots will interfere with your work, so measure the required length, add a few centimeters to the fastener and get to work.
The berries should be strung lengthwise in the direction of growth of the cuttings. Tie a knot at the end of the thread, and string a few berries on the other side. Carefully move them closer to the knot: do not rush, so as not to damage the rowan.
You choose the length at your own discretion, but let us note that beads with 8-10 turns look very impressive. Don’t be alarmed if after a few days the beads seem too loose: the berries will dry out a little, so you just need to tighten the thread and cut off the excess thread.
Unfortunately, over time, rowan will still dry out and lose its smooth surface texture and bright color. However, even in this case, the decoration looks very original and distinctive. If you want to preserve eco-beads made from rowan for as long as possible, we recommend opening the beads with wood varnish and drying them thoroughly.
By the way, beads are made using the same principle from rose hips, small wild apples, and even from waste material. Even the younger group can handle it!
Chestnuts, nuts, acorns, beans and date pits
Baskets made from chestnuts look creative if you alternate them with pieces of wood and beads.
Acorns on a felt cord:
Don’t forget about other gifts of nature: look how interesting beads made from ordinary beans or lentils look! You can use both natural and dyed in different colors.
This necklace is made from date seeds. Real African beads worn by a native! Agree, they are ideal for a black woman’s costume, in which the child will go out with a group of friends to the chunga-changa dance!
From buttons
You will need a handful of buttons and two pieces of strong thread at least 90 cm long. Let's get started:
- Tie the two ends of the segments with a simple knot. Attach a carabiner clasp to one side or make a loop. If the second option is chosen, then at the second end you subsequently need to tie a button, which will act as a fastener. Now we will string the buttons selected for the beads and fasten them at a distance of approximately 0-1 cm from each other.
- Thread both pieces into the same hole of the larger button, facing each other.
- String small buttons on either side of the big one.
- Pass the free ends of the threads into the remaining holes of the small buttons, and then into the free hole of the large button. It should look like in the photo.
- Move the resulting element towards the starting knot and tighten it tightly. Tie a simple knot, keeping the buttons in place.
- Do the same thing 10-14 more times, retreating about 1 cm from each set of buttons, or do it closely.
When everything is ready, you need to assemble the beads from the buttons together. You can even do without a fastener by simply tying the loose ends of the threads.
Note to creators: if the holes in the selected buttons are large enough, then instead of regular thread you can use waxed or leather cord.
Large buttons and beads that can be fixed between them look great. This option opens up a huge scope for imagination!
Simple weaving pattern
To create beaded jewelry, use patterns, which are a great guide to the art of weaving.
The simplest scheme is rings, which is recommended for beginners.
- Eight beads need to be strung on a fishing line or thread, after which the thread is folded into a ring and the end of the fishing line is passed through the first and sixth beads.
- Six beads are put on, and the algorithm of the first step is repeated again.
- From such rings you need to weave a product of suitable length.
The beads need to be arranged in advance into convenient containers to make it easier to pick them up with a needle. Using all kinds of weaving patterns, you can use any option and create your own unique decoration that will be unique and stylish.
Children's pompom necklace
To create it, follow the instructions in the photo step by step. Let's get started.
Wrap the thread several times around the tines of the fork and tie in the middle with a tight knot.
Remove the winding from the fork, carefully cut the side loops with scissors, trim the protruding areas with scissors to form a ball.
Using the same principle, make the required number of pom-poms. When everything is ready, simply string the fluffy balls onto a string. Even a young schoolgirl will appreciate beads made from pompoms!