General rules for crocheting toys: tips for beginners
Various patterns of crocheted angels
When a needlewoman is just starting her journey of making soft toys through knitting, she needs to follow some recommendations that will help avoid problems and mistakes in her work:
- You should not use too textured or embossed types of yarn at first. An uneven thread surface can detract from the appearance of each loop. Before you start working directly, you should try knitting a little to evaluate the result.
- When choosing a tool for work (hook) and material (yarn), you should adhere to the following recommendation - the hook number should be one less than recommended in the instructions for the yarn. The knitting will then be dense and more accurate.
- As a filler for stuffing the inside of a soft toy, you should use padding polyester or holofiber. It is better to exclude cotton wool and finely cut foam rubber, as they are unevenly distributed and clump over time.
- When finishing work on each detail individually or on the entire toy, you should firmly fix the thread and hide the ends inside the craft, tightening the resulting element with a thin hook.
More skilled craftswomen use knitting needles when working on a soft toy. But a novice needlewoman can also use this tool when making some craft elements.
To immediately get a full picture of what exactly the toy will turn out to be like in the end, you should initially draw an approximate sketch, select the necessary accessories, yarn color and textile inserts.
Selection of yarn and manufacturing features
Crocheted angels always look tender. In order not to disturb such harmony, it is worth choosing the right yarn. There are several special recommendations for each individual case:
- The New Year figurine is usually a visual silhouette of an angel. This type of toy is used to decorate a Christmas tree or interior, so cotton thread is recommended as the main material.
- To make a Christmas angel, you should use cotton thread with silver or gold lurex. You can choose different thread thicknesses.
- If the toy will be knitted for children's games, then it is advisable to use children's acrylic. It is better to take a thin thread to form a neat pattern. Thanks to the use of acrylic, you can get a three-dimensional toy of the desired shape.
- For an “airy” finish, you can use grass yarn and other types of decorative yarn and thread.
Example of materials for work
A lot of attention should be paid to the color of the yarn. It is better to choose yarn of pastel colors and shades to convey all the tenderness and grace of the symbolic toy.
Knitting rules
There are several options for how to crochet an angel. In any case, it is worth using a detailed master class, which will describe all the stages and include all the knitting patterns. The ideal option is a lesson that describes in detail the steps of creating a three-dimensional angel, which can become an excellent toy for a child or interior decoration. This will be a doll angel.
Three-dimensional figurine of an angel
Hands and wings
The shape of the hands in this model is the simplest - there is no need to knit each finger in detail. It is enough to make a visual separation between the main hand and the hand. How to tie your hands correctly:
- The hand is knitted from the bottom up. Form an amigurumi ring and knit 6 single crochets into it.
- In the next row, make an increase - 2 sc in each loop.
- Next, knit 4 tiers without changes, 12 loops. This will help prepare the base for shaping the wrist.
- Then decrease 8 stitches through each sc. The result should be a widened lower arm.
- Knit another 11 rows without changes - in each tier there are 8 single crochets.
- Finish work. Fasten the thread and cut it.
Example of finished hands
After the hands are ready, you can start knitting the wings. You should not take too complex or delicate patterns, since “grass” yarn is used as the main material. The texture of such a thread will still hide the entire openwork. The wing can be knitted according to the pattern shown in picture 5.
Scheme for making wings
Both arms and wings are made in sets of 2. When these elements are ready, they should be put aside until assembly. The arms need to be lightly filled with holofiber so that they can then be bent.
Ready-made wings from “grass” yarn
After sewing to the base of the body, the limbs are usually crossed over each other and stitched together for complete fixation. But you can leave the location unchanged.
Torso
It is best to knit the body, as well as the head, using the amigurumi technique. Then you will get a beautiful pattern with a smooth transition to the main part of the product. Knitting is done from bottom to top:
- Form an amigurumi ring and tie 6 single crochets around it.
- In the 2nd row, increase the number of loops by 2 times - in each sc of the previous row, knit 2 sc. You will get 12 loops.
- In the next row, increase through 1 sc. The result should be 18 RLS. This is the basis for obtaining a stable base of the torso.
- In each subsequent row, make the same additions (2 sc in 1 loop), but now after 2, 3, 4, 5, 6, 7 loops, respectively. As a result, there will already be 54 columns in the 9th row.
- Knit the 10th tier without changes - 54 single crochets. Secure the shape of the base of the body.
- In the 11th, add 6 more single crochet tables (through 8 cells).
- Knit the next 4 tiers without changes - no additions or decreases are made. Thanks to this part, the length of the torso will be formed. You can increase this number of rows, then the figure will be more elongated.
- Then after 1 row a decrease is made. In each tier you need to decrease 6 RLS every 8, 7, 6, 5, 4 loops, respectively.
A body made according to the presented diagram
To ensure that the toy stands tightly and evenly on a shelf or table, a cardboard circle can be glued to the base of the body, and a small stone can be placed on top for weighting.
In this way, the torso is formed and the last rows prepare the transition from the torso to the head - the neck. Having finished knitting at this stage, it is worth stuffing the body with holofiber.
Head
In principle, the production of such a figurine is the simplest method - the body and head are solid and do not require assembly in a given place. As a result of this method of knitting, the angel, of course, will not sit, but will stand like a figurine. Explanation on how the head is made:
- After decreasing when making the body, 30 loops remain. This is how you need to knit 5 rows.
- Then make an addition every 4 cells - you get 36 RLS.
- Then, in the next 3 tiers, add 3 sc each through 12 loops.
- Next, knit 3 tiers without changes - 45 stitches.
- Then you need to decrease every 6, 5, 4, 3 loops, respectively, in each subsequent tier.
- Then decrease again until 6 stitches remain.
- Finish knitting.
Making and decorating the head
Next, decoration is done - sew on the eyes, nose, ears. This can be done in accordance with the presented diagram. Then the assembly is done.
White and pink angel
Beautiful crochet angels look great in the interior. Especially at Christmas. In this master class we will crochet an openwork Christmas angel.
To knit an angel we will need:
- White and pink yarn (“Pekhorka” high-volume);
- Hook;
- A little bit of padding polyester;
- Needle.
To knit the head, cast on 2 loops and knit the first row in 1 loop. We knit only 6 single crochets. Then we knit 2 stitches into each of these 6 loops. And in the next row we knit a single crochet into a loop. Next time we will perform 2 columns. So let's knit this row. Next, we will knit 3 more rows in a circle. And we will make reductions to narrow it. We knit a stitch and knit the next 2 together. So let's complete this entire series. We will randomly make 2 more decreases. photo 1
Now we move on to knitting double crochets. We knit a row of such columns. There are 2 stitches in each loop. photo 2
Then we knit 3 loops and 2 more. We skip 1 loop at the base. Next we knit a double crochet. And again we do 2 aerials. We skip the base loop and knit a double crochet. That is, we knit double crochets through a loop. And between them we perform 2 air loops. photo 3
In the new row, under each chain stitch we knit 3 double crochets. And then we make 1 chain stitch and again knit 3 stitches under the next stitch. photo 4
The next rows will be the same. We also knit 3 double crochets under each chain stitch and make 1 chain stitch. We knit only 5 rows. photo 5, 6
Let's tie the dress with pink yarn. Attach a thread under the chain loop and knit 3 double crochets under it. And in double crochets we knit 1 single crochet. photo 7
To tie the wing, we will make a sliding loop. And we will make 4 double crochets into it. The first column will be 3 air loops for lifting. Between each column we will make 1 air loop. photo 8
Now, in the space between the stitches, having unrolled the knitting, we will make 2 double crochets, 1 chain stitch and 2 more double crochets. photo 9
Unroll the knitting again. And we recruit 4 air. We knit a single crochet under the chain stitch of the bottom row. And we repeat. We knit the last stitch into the outer double crochet of the bottom row. photo 10
And we will make a binding with pink yarn.
We knit 2 single crochets into the arches, 3 chain stitches and 2 more single crochets. photo 11
We knit the second wing for the angel. And we sew them on. photo 12
Let's make a short chain of air loops with pink yarn. And we’ll tie it like a headband. Crochet angel is ready!
Interesting diagrams describing the process
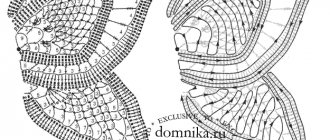
There are several more schemes on how to knit an angel. Such models can be flat. At the same time, a knitted angel can serve as decoration for a Christmas tree. To make such a toy, you need to use a detailed MK. The step-by-step algorithm of work is presented in the crochet pattern in picture 9.
Scheme for making a flat angel
There is also an option for making a crochet angel, the diagram and description of which are presented in picture 10.
Openwork crochet angel
The diagram for making the angel figurine in picture 11 is suitable for both experienced and novice needlewomen.
The principle of forming an angel
Each scheme involves the production of an openwork base. You can get a beautiful pattern thanks to combinations of double crochets, single crochets, cuts and increases. Usually, in all presented options (patterns), knitting begins from the head.
An additional advantage of knitting from the head is that it does not require complex assembly. It is enough to sew the assembled parts and parts of one finished base.
Abbreviations and symbols for loops in instructions
To make it easier to read the descriptions, you need to know what the letter abbreviations mean.
| Action | Designation |
| Air loop | VP |
| Single crochet | STBN |
| Double crochet | STSN |
| Double crochet stitch | STS2N, STS3N, STS4N (the number indicates the number of yarn overs) |
| Connecting loop | JV |
| Half column | PST |
Further in the article you can consider several master classes on crocheting angels.
Crocheted angel. Description of work
Naturally, any work for a true professional is a pleasant pastime. But don’t forget that professionals once did this work for the first time.
It’s the same with needlewomen. If this work is done regularly, in addition, new patterns are studied and products are crocheted according to them, then crocheting an angel for such a craftswoman is not a problem. It will be more difficult for beginners, but the main thing is desire. If it is, then any work will definitely succeed.
What I love to knit before Christmas is a cute amigurumi angel... Voluminous? Or maybe you want to knit a flat one, and, after starching it tightly, hang it on the Christmas tree? Or maybe it will be a crocheted doll - a playful baby with wings dreaming of an early Christmas?
For you - a description in Russian and a useful video for creating a step-by-step snow-white Christmas angel. We hope you enjoy it.
Crochet angel
A toy knitted with your own hands has some kind of magnetism. It can not only warm you up on cold winter evenings, but also become a decoration for any holiday.
A knitted angel is a very painstaking work, but the finished product will be your pride, and will undoubtedly appeal to all your friends.
A knitted openwork angel can be hung on a Christmas tree or simply used to decorate the interior.
The angel crochet pattern may be familiar, which was previously used for knitting napkins. Then the work will go faster.
To complete the work you need:
- thin cotton threads;
- thin hook;
- scheme.
If the main details of the angel are knitted, they must be starched, otherwise it is very difficult to understand what it is. For such work you will need starch and water, but before starching, all parts must be washed in warm soapy water to get a perfectly white color.
Gallery: crochet angel
How to starch correctly
To properly prepare a solution for starching knitted angel parts, you need to take 2 tbsp. l. starch and dissolve them in a small amount of cold water. Then, the resulting mixture must be poured into an enamel bowl with warm water, in the amount of 0.5 cups, put on fire and heated.
Bring the mixture over low heat until it thickens so that it has the consistency of jelly, and remove from heat. We lower the connected parts of the angel into the hot solution, separately. Soak them thoroughly there and leave until the starch cools completely.
Only then do you need to take out all the parts, carefully squeeze them out and give them the desired shape - and then dry them.
Starched and completely dry parts should be ironed and only then sewn.
Next are several diagrams and descriptions for crocheting an angel, and a detailed master class. But only each person has his own angel, and the knitting pattern will remain only a sample, an example. Use patterns, combine knitted details, experiment, and you will definitely get your own, unique, unlike anyone else angel.
Progress
Head.
The angel needs to be knitted from the top of the head; to do this, you need to knit a chain of air loops and enclose them in a ring. Then, the chain is tied in a circle, with each row you need to increase the number of loops. Next, the work is done in reverse order. To get the shape of the head, you need to reduce the number of loops with each row.
When the number of loops in the row is equal to the number of loops in the air chain, we can assume that the angel’s head is ready. All that remains is to fill it with padding polyester, but there is no need to break the thread.
Torso.
Knitting continues because the thread does not break after knitting the head. The shape of the body is a cone, which can be knitted in any pattern acceptable to you.
Experienced craftswomen can experiment and come up with something unusual, but for beginners it is better to take the simplest pattern of a knitted openwork pattern.
For knitting the body, regular double crochets are suitable, which need to be knitted from the beginning of the cone to the end.
At the end of the work, the result was a blank resembling a bell with a head.
Sleeves, arms, wings.
Now you need to knit the sleeves and arms, the main thing is to place them symmetrically. Angel wings are knitted separately, similar to angel wings. There is no need to sew them on.
Shaping the toy.
Washed and starched parts, dried on special forms, need to be sewn. The work is done very carefully, since the parts are already ironed. You can use glue to connect some parts.
You can decorate your head with hair, eyes, lips. Attach bright ribbons to the angel's dress. In general, then everything needs to be done to your liking.
Using such a simple master class on crocheting an angel, you don’t have to use patterns. The first work can be done according to the description, but for the next one you will have to make your own adjustments so that the knitted model turns out to be unique and inimitable.
Christmas angel master class
Knitting begins from the head, as described by the previous angel. The cavity of the ball is filled with padding polyester, and as in the previous version, the thread does not break.
After two air loops that will connect the head and body, knitting of the neck begins, which turns into a beautiful openwork body:
- row: double crochets, knitted two in each loop of the previous row. At the end of the row there is a connecting loop.
- row: two chain loops at the beginning of the row, then in each loop of the previous row we knit two double crochets, just like the previous row. At the end of the row there is a connecting loop.
- row: five chain stitches are knitted, a double crochet is made, then the hook is inserted into the next loop of the previous row, only into the front half of the loop, and a double crochet is knitted. This pattern is knitted until the end of the row, only instead of five air loops, in the future, only two will be knitted. (The back half of the loop will be used for knitting a skirt - description will follow)
- row: single crochet, and 4 double crochets and one single crochet are knitted here. This is repeated 6 times. What happens next will be a little different. Single crochet, two chain stitches, and single crochet at the same point. We repeat this rapport 5 times. Then repeat the rapport as the first: single crochet, 4 double crochets and single crochet at one point. We repeat 6 times, and at the end of the row we knit five repeats: a single crochet, two chain stitches and a single crochet at one point. We connect the first and last loops of the row with a connecting loop. We tighten the thread and cut it off.
We got a head, neck and part of the body with wings. Next, a skirt for the angel is knitted. The lower parts of the loops are used. Between the wings, 7 single crochets are knitted, this creates the front and back of the skirt.
- row: we tie a thread and knit seven single crochets, then we skip 4 loops of the previous row, and in the fifth we knit a single crochet (at the same time, there is no need to knit any chain of chain loops), and 6 more such pieces, so that there are 7 At the end, we connect the first and last loops of the row.
There are 14 loops in the row. From these, knitting of a skirt begins. You can choose any pattern you like best. Having received the desired length of the skirt, the work can be completed.
To make the angel more attractive, you can tie the bottom of the product with a golden thread, using a single crochet pattern.
You can decorate the finished angel with a ring, the description of which was in the previous master class. The ring is sewn to the back of the head.
You can attach a thread to the finished angel and use it as a decoration for the New Year tree.
How to crochet an angel: tools, preparation
A toy made with your own hands always attracts attention. It allows you not only to warm up on a cold winter evening, but also to decorate any holiday. Knitting an angel is quite difficult, but if you successfully complete the job, it will become a source of pride for you and you won’t be ashamed to show it to your friends. Knitted angels can be hung on a Christmas tree or simply decorated with them in the interior.
By the way, the knitting pattern is somewhat reminiscent of a napkin. If you have already tried knitting them, it will be much easier for you. To work, you will need a thin hook, cotton thread, and a pattern.
After completing the knitting of the main parts, you need to starch them so that the wings stand and all the parts look as they should. Otherwise, it won't even be clear what you did. In addition, you need to wash them in warm soapy water to get the perfect snow-white color.
Festive Christmas Spirits
The modern world of knitting is rich and diverse.
Some while away the long winter evenings by knitting a scarf or mitten gloves, while others, before the New Year holidays, decide to please their family and friends with handicrafts. Crocheted angels are very suitable for this; diagrams and descriptions of which can be found both in printed publications and on the Internet. According to craftsmen, even a beginner and not very experienced person can knit an angel with knitting needles; the main thing is to follow the tips and patterns. Angels are the brightest and most mysterious creatures. Nothing is known for certain about them, but they have always been and are considered protectors of people and the embodiment of light and goodness. It is an openwork angel given for New Year, Christmas or Valentine's Day that creates a festive mood and gives a piece of magic not only to children, but also to adults.
What kind of things do these Christmas guardians look like? They can be in the form of children, men or long-haired girls dressed in light clothes. To knit such fairy-tale creatures, it is recommended to use light tones of yarn:
- white;
- lactic;
- ivory;
- soft coffee;
- Beige;
- golden;
- silver.
It is these colors that give the product lightness and tenderness. It is also worth remembering that the thinner the thread, the more difficult and painstaking the work on creating an angel, however, the more airy and graceful it will turn out.
Flat angel diagram
There are various patterns and descriptions of crocheted angels. Beginners are recommended to start creating flat angels.
In this case, the craftsmen conducting master classes recommend that beginners have:
- Soso yarn;
- hook number 2.
Knitting, as the diagram and description of the crocheted angel shows, begins with a head, which can be either knitted or created by tying a wooden ring with yarn. Starting from the center of the head, you need to knit in a circle and smoothly move to the halo, which for this flat angel is done with picot chain stitches. The upper part of the Christmas decoration, namely the body to the dress and the wings, is knitted in continuous fabric. Next, they begin to create a dress from threads in which the angel is dressed.
After finishing the product, it is recommended to tie it with openwork knitting. To keep the Christmas spirit in shape and not look sluggish on the tree, you can starch it or treat the product with a PVA glue solution.
Other options for knitted angels
DIY angels
See also:
Crochet Christmas balls
and knitting
In order not to forget the address of the page and share with friends, add to your social networks: Do you want to know news about competitions or master classes?
Tags: Angels, DIY Christmas tree decorations, New Year's crafts, Christmas crafts
Attention! It is better to write urgent questions in the comments on the website (form at the bottom of the page) or, better yet, directly by email. There are no notifications about comments from the VKontakte form! This form is more for feedback. 
Discussion: there is 1 comment
- Lara:
December 6, 2016 at 04:57 pmYou can create a whole round dance of such angels!
Answer
Create your own pattern
As a crochet pattern of angels with a detailed description, you can also use various circular patterns of varying complexity. To turn a regular table napkin pattern into a real Christmas symbol, you need to do the following:
- calculate the number of repeats (repeating patterns) in the motif;
- start knitting according to the pattern;
- in row No. 1, knit only half of the loops indicated in the diagram;
- turn the fabric over and start knitting row No. 3 (this manipulation will help create a neat semicircle);
- knit as many rows as required so that both wings become clearly distinguishable;
- visually divide the pattern into 3 parts and then knit only a third of the middle.
Three-dimensional figurine with wings
How beautiful and original the three-dimensional figurines of angels look, which can not only be hung anywhere, but also placed, for example, as a holiday decoration on a table or added to a New Year’s composition. The following three-dimensional figure is especially popular among beginners in crocheting, for which you will need:
- hook 1.4;
- "Iris" threads;
- padding polyester or other filler.
First, according to the pattern, the head of an angel is knitted.
To give it the required round shape, it is stuffed with padding polyester or other filler. Next, the cape, hair, arms, wings, and halo are created separately from 100 percent white cotton. After all the parts of the future holiday figurine are ready, they are sewn together with thread of the same color. Crochet angel patterns with a similar description are quite often found on the Internet. The finished angel, which is still soft and unstable, is soaked in a sugar solution or other fixative and dried on a plastic or glass glass to acquire its shape. Sometimes it is recommended to dry a knitted product on cardboard rolled into a cone. In this case, it is necessary to wrap the pressed paper in cellophane so that the light figurine with wings does not get dirty and lose its color, and only then put the angel on the form and dry it.
Crochet voluminous Christmas tree
A three-dimensional Christmas tree should be knitted in the direction from the crown to the base. Thanks to this method, you can make a Christmas tree of any height, depending on the number of rows. In order for the product to keep its shape, you need to prepare a cardboard base.
To manufacture the product you will need the following materials:
- Cotton yarn “Gogo” (green and white).
- Hook No. 2.
- Scissors.
- Cardboard cone according to the size of the product.
- Glue.
Knitting pattern, features
The fluffy Christmas tree is knitted in the round. In the master class, the main part of the tree will be green, the trim will be white, reminiscent of snow. The finished product can be given a clear shape and stability due to the cardboard insert.
Knitting instructions step by step
- A chain of 5 air is assembled. n. It closes itself in a ring.
- 1st row is 12 tbsp. with n., which are knitted in the round.
- From the 2nd row the increase begins: 3 air. p. for lifting, 1 tbsp. s n. in the 1st loop, 11 st. s n.
- 3rd level: adding 1 tbsp. s n. in the 5th and 9th loop.
- Subsequent rows are performed according to the scheme: alternating the addition of 1 tbsp. s n. in the 1st loop on even rows and 2 sts. s n. - on odd numbers.
- Adding volume: embroider using the spiral method around the tree, 1 level in 2 tbsp. s n. in each loop. To get beautiful ruffles, you should knit with a chain stitch.
- The ruffles made are tied with 1 row of stitches. without n., white yarn is used.
- Depending on the height and width of the tree, a circle is cut out of cardboard and 1/3 is removed. The figure is rolled into a cone and fixed with glue (or tape). The cardboard is inserted inside the Christmas tree.
Fixing solution
In addition to the sugar solution, the old proven method of starching the product is used to stiffen the thread. In this case you will need:
- 2 tbsp starch;
- water;
- enamel container.
To create a fixative, you need to dissolve 2 tablespoons of starch in cold water.
Then pour the resulting mixture into an enamel container, which already contains 0.5 cups of heated water. Next, the contents of the dish are heated until the starch thickens completely. After which all the details of the figurine are soaked there and kept in the solution until it cools completely. After “bathing” in starch, the parts of the future Christmas decoration are well wrung out and dried separately, each stretching on its own shape. After the angel parts have dried, they are carefully ironed and sewn into the product.
How to starch an angel?
How to starch an angel?
Before starting work, you need to prepare a solution. For it you will need 2 tablespoons of starch and a little water.
After this, add half a glass of the mixture to a saucepan with warm water and put it on the fire. Bring the mixture over low heat until thickened and remove from heat. Wet each piece individually and leave until everything cools down. Only after this can the parts be taken out, pressed out and shaped.
When the parts are completely dry, they need to be ironed and only then sewn together. It is worth saying that you can experiment with the schemes, come up with something of your own, combine them, and so on. Try it, and then you will get your own unique angel.
Alternative patterns for wings
Just as for the figurines of the celestial beings themselves, you can use any circular crochet patterns, so for the wings, patterns such as:
- a pineapple;
- heart;
- butterfly wing.
When creating Christmas angels, the amigurumi technique, popular both among Russian crochet lovers and among foreign representatives, is often used. With its help, both three-dimensional figurines of various fairy-tale creatures and other products are created. The advantage of this knitting method is that it allows you to adjust the diameter of the hole in the center.
In order to knit a proportional angel, you need to clearly calculate and measure everything before starting work. Typically, experts who share advice on a similar topic describe in detail how long the product is. Beginners should remember that the longer the thread in the skein, the thinner it is and the more difficult the pattern will be.
Festive angel figurines will be an excellent gift for any occasion, be it Christmas, birthday or wedding.
Having mastered such crochet techniques, you will always have at hand countless options for both children's toys and decorations, and interior decor.
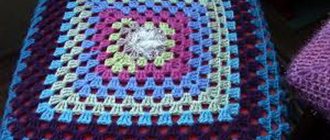
Angel knitted with a granny square pattern
Hands
When 1 loop remains at the end of knitting the ball, you can proceed to creating handles. Cast on 14 ch, then make 1 st in the 8th loop from the beginning. b/n, tie 7 ch. Connect to the beginning of the chain. Do the same for the second handle.
Nimbus
Now there will be a master class on knitting a halo for a toy. 1 p.: 20 v.p.; 2 p.: rise, 1 tbsp. b/n, in the next 2 loops knit 2 tbsp. b/n, and then in each - 2 ss2n. Knit 2 ss3n into 3 loops, then make 2 yarn overs, etc. in mirror order. Connect the ends of the headband, leaving threads so that it can be sewn to the head.
Granny squares
A master class on creating a granny square will teach you how to create this simple but beautiful knitted pattern. You will need 3 squares. The classic granny square is knitted like this: 6 ch. - into a ring; 1 r.: 3 ch, 2 tbsp. s/n, 2 vp, 3 tbsp. s/n., repeat twice; Rows 2-4: knit under v.p. 3 tbsp. s/n, and between them make 2 vp; The corners of the square are obtained like this: 3 tbsp. s/n, 2 vp, 3 tbsp. s/n. Tie 2 colored squares with white yarn and connect them. Sew all the details.
The knitted crystal angel for the Christmas tree is ready!
A spiritual being with supernatural abilities, communicating the will of the Almighty - this is how we imagine an Angel. The image familiar to us appears in the form of an anthropomorphic creature in a white outfit and with wings on its back. You can buy such a figurine in a store, or you can take it and make it with your own hands, especially since we have the diagram in our arsenal.
Today it is fashionable to decorate your home with various interesting things. You will independently select the color scheme for the toy, which you can easily place somewhere in the interior in the future.
To create an angel, use natural threads, warm, gentle, pastel colors that can add comfort to your home environment and become a family talisman. Crafting with your own hands means bringing your own energy into a toy, so you should start working only in a good mood, although even if the craftswoman is in a bad mood, her favorite hobby will help distract her and create a favorable environment for a long time.
Openwork weightless angel
Knitted toys have some special magnetism; they charm and warm. And this sweet, airy angel will please everyone who sees him. It is not difficult to knit it, and such work will bring a lot of pleasure. A master class with a detailed description will make it easier to knit this delicate and lightweight decoration for the Christmas tree or just for the interior.
Materials
This cute Christmas angel can be knitted with white yarn, a product in a soft blue color will look good. Iris yarn is best suited; you should not take synthetic yarn, but rather linen or cotton. You also need a crochet hook No. 1 - 1.5. You will need padding polyester or any other filler, pins, PVA glue, cling film, plasticine, and decorative tape.
Head
These cute Christmas angels are crocheted from the top of the head. You need to start with a chain of air loops enclosed in a ring. The chain must be tied in a circle, increasing the number of loops. And thus form a knitted ball (this will be the head), and when it is almost ready, it must be stuffed with padding polyester. Reduce the number of loops to the initial cast-on edge. There is no need to break the thread.
Torso
Knit the body without tearing the thread from the head. A detailed master class is not needed here, since you need to make the body in the shape of a cone using any arbitrary pattern. Experienced needlewomen can use their favorite patterns or come up with something unusual, and beginners can be advised to knit double crochets.
Sleeves and arms, wings
The Christmas angel is almost ready, now we need to make knitted sleeves and arms. It is important to place them symmetrically. Separately make knitted wings in the shape of a butterfly (no need to sew them on yet).
Shaping toys
Take plasticine and mold it into a cone that will fit the size of the tied torso. Wrap the prepared cone in cling film. Place the angel's body on this base and securely secure it with pins at the bottom. Take glue and generously lubricate the body of the toy with it. Be sure to saturate your head, but there is no need to be zealous. Also moisten knitted arms and sleeves in glue and give them the desired shape. Do the same with the wings, only you need to fix them with pins, leveling them on a piece of film.
When everything is dry, all connected parts can be connected. Sew on the wings, additionally securing them with glue. When the toy is completely dry, you can tie a decorative cord to the back of the angel and hang it on the Christmas tree or in another place.
Such a simple master class is convenient because every knitter can choose what she likes best, use her favorite patterns and patterns.
Crochet fillet white herringbone
Loin knitting is a combination of stitches and loose loops in which a pattern resembling lace appears on the product. A Christmas tree in the style described can be used as a decorative table napkin; its size is 30 by 28 cm.
A crocheted fillet Christmas tree, the diagram and description of which will help beginning needlewomen, can be made with your own hands from the following set of materials:
- Fine white cotton yarn.
- No. 0.9 – 1 hook.
- Scissors.
- White thread and needle.
- Bell with ribbon for decoration.
Knitting pattern and features
The white Christmas tree consists of identical fragments; they need to be connected several times. The parts must be made according to 1 pattern and be the same size, otherwise the shape of the tree will be distorted. There are 37 of them in the master class, but it is permissible to reduce the number to simplify knitting. The expressive herringbone pattern is emphasized by the openwork trim along the outer edge.
Schematic representation of the main elements, assembly and tying of the Christmas tree:
Knitting instructions step by step
- At first 6 air. n. in a vicious circle.
- 1st row: 3 p.s. and 3 air. p. – repeat 6 times, combine tier st.
- 2nd row: for free air. p. knit 3 tbsp. with n., 2 air. p. and 3 tbsp. s n. Make 36 more of these polygons.
- The parts are connected to each other on the side using Art. without n., which are knitted in each st. s n. another row. First, the horizontal tiers are prepared, then they are stitched vertically. In the final version there are 8 rows: on the lower level there are 8 parts, on the upper level - 1. Along the bottom in the center of the st. without n. the trunk is attached.
- The strapping is carried out on the sides. Starts at the bottom right corner, goes through the top and ends at the bottom left area of the tree, the bottom and trunk are not tied. It consists of: air. p., 4 tbsp. s n. to the 6th air. n. For all strapping st. s n. picot is made: 3 air. n. + connecting st.
- Form knots at the ends of the threads and trim the tails.
- The craft is treated with starch, at this point you can adjust the shape of the tree. It needs to be left to dry.
- The bell is sewn on top.
Mexican crochet angel
A crocheted angel (patterns with descriptions are presented later in the article) in the Mexican style should be colored. The head is knitted from light brown threads. The dress should be dark blue. Green, orange, pink and blue thread scraps are suitable for knitting collars and ruffles.
Head, collar and body
How to knit:
.
- 4 VP close into a ring/
- Knit 8 pst, passing 2 pcs through 1 loop.
- By analogy, knit 16 PST.
- Knit 2 rows of 24 psts each.
- Fill the workpiece with filler.
- Knit 16 PST with decreases.
- Knit 8 PST with decreases.
- Next begins knitting the body. 16 PST through 1 loop, 2 pcs.
- 3 VP for lifting, connect the last column of the joint venture with the beginning of the row of the adjacent column.
- Knit 16 STSN.
How to knit a collar: Alternate arches of 3 VP with 1 SC, changing the color of the thread in each new row. There should be 6 rows in total.
Continuation of knitting the body:
- 32 STSN, passing them through 1 loop, 2 pcs.
- 2 rows consisting of 32 STBSN.
- Alternate 1 DC and 2 DC from 1 loop.
- 22 STSN.
- Alternate 1 STSN and 2 STSN coming out of 1 loop
The last row to knit is 15 DCs.
Dress, frills and wings
How to knit:
- Knit a row of alternating 1 DC and 2 DC starting from 1 point.
- Row of 22 STSN.
- Knit a row of alternating 1 DC and 2 DC, coming from 1 point with increases. There should be 33 columns.
- By analogy, knit the next row, increasing the number of stitches to 50.
- Knit 50 DC.
- Knit a row of alternating 1 DC and 2 DC, coming from 1 point with increases, increasing the number of columns to 67.
- Knit a row of 67 DCs.
Frills need to be knitted alternating arches of 3 VP and 1 STBN, changing the color of the thread in each new row. There should be 6 rows in total.
How to knit wings: 5 VP, close into a ring. Tie half of the ring 7 STSN. Next, knit the fabric with 3 decreases in each row. Knit 12 rows. Change the thread and knit the last row with arches of 5 VP, alternating them with 1 PST. By analogy, tie the other wing.
The product must be soaked in a sugar solution and left until completely hardened. After drying, the angel needs to make hair from dark brown or black yarn.
Simple angel knitting description
Angel with bells (model 1). Height: 12 cm. Materials: “Iris” yarn (100% cotton), 15 g white; a little green; white small beads; narrow green satin ribbon; suitable shape; a little padding polyester; hook No. 0.9.
Description of work
Head: use a white thread to make a chain of 5 sts. p. and close in a circle using the connection. Art. 1st r.: 1st century. lifting point, 7 tbsp. b/n into the resulting ring. Each row ends with a connection. Art. 2nd r.: 1st century. lifting point, 11 tbsp. b/n in Art. b/n of the previous row from the hook. 3rd row: 1 in. lifting point, 15 tbsp. b/n in Art. b/n of the previous row from the hook. 4th p.: c. lifting point, 19 tbsp. b/n in Art. b/n of the previous row from the hook. 5th row: 1c. lifting point, 23 tbsp. b/n in Art. b/n of the previous row from the hook. 6th-7th row: knit st. b/n straight. 8th row: knit as the 4th row. 9th row: knit as the 3rd row. 10th row: knit as the 2nd row. Fill the head with padding polyester .12th row: knit st. b/n directly. Tighten the remaining loops with thread. Cut the thread.
Body : use a white thread to cast on a chain of 6 sts. p. and close the connection in a circle. Art. 1st p.: 1st century. lifting point, 8 tbsp. b/n into the resulting ring. Row finish connection. art. 2nd r.: 3 c. lifting point, 1 tbsp. s/n in the 1st century. p. lifting, 2 tbsp. s/n in art. b/n of the previous row from the hook. Row finish connection. Art. Next, continue work according to scheme 1 to the 5th row inclusive. In the 6th row, when knitting the body, skip the “wings”, connecting the front and back parts of the bodice. st. Continue working according to scheme 2 up to the 17th row inclusive. Cut the thread.
Bell (3 pcs.): Use a green thread to make a chain of 5 sts. n. and close the connection in a circle. Art. 1st r.: 3 c. lifting point, 9 tbsp. s/n into the resulting ring. Row finish connection. Art. 2nd r.: 3 c. lifting point, 9 tbsp. s/n in 9th century. s/n of the previous row. Row finish connection. Art. 3rd r.: 3 c. p. (1 v. p. rise + 2 v. p.), * 1 tbsp. b/n in the next article. s/n of the previous row from the hook, 2 in. p. *, repeat from * to * 8 times, 10 times in total. Row finish connection. Art. Knit beads in the last row of the bell.
Assembly : sew the head to the body using a needle and thread. At the top of the head, make a loop from c. p. Starch the angel heavily, put it on the form and leave until dry. Carefully remove from pan. Sew on ribbons and bells.
Crochet air angel
A crocheted angel (patterns with descriptions can be changed by decreasing or increasing the number of loops to get a figurine of a different size), crocheted using this master class, can be done even by novice craftsmen, because the pattern is quite simple.
Head
How to knit a head:
- Close 4 VPs into a ring.
- Knit 10 SC through the ring. Knit STBN.
- In the 1st and 2nd rows knit STBN, with 2 increases.
- In the 3rd row you need to double each column.
- Work 7 rows of STBN.
- Knit a row with decreases. The number of columns should be reduced to 10.
Work the neck from 3 rows of STBN.
Dress
How to knit a dress:
- STSN, doubling each column.
- STS4N, doubling each column.
- STBN.
- STS4N, doubling each column.
- STBN.
Knit another 4 rows like rows 4 and 5, alternating them.
Wings
How to knit wings:
- Score 4 VP.
- A row of 3 arches consisting of 4 VPs.
- Above each arch, knit new arches from the same number of loops. By analogy, knit 4 more rows.
- Next, knit, decreasing the number of arches by 1, until there are 2 arches left in the row.
By analogy, you need to connect the second wing.
All parts need to be starched and dried. After drying, sew with white threads.
Beautiful crochet bells with patterns
For knitting bells, the best cotton thread is about the thickness of “iris” (50 g 320 m), you can take this brand and similar ones.
Hook with the number 0.9 - 1.15, respectively.
You need very little yarn for one piece, so different leftovers will come in handy, and not necessarily white. The bells will look very stylish and beautiful if you put a golden thread in some rows. You can also do colored embroidery on the finished product.
So, look at the pattern and knit, starting from the center in a circle. As a rule, there are few rows and the work progresses very quickly.
Then we need to give the toy rigidity. To do this, make a starch solution and immerse the knitted piece in it for 5 minutes, and then squeeze it out.
Further, to maintain the desired shape, the bell can be pulled onto a balloon, a ball of thread of a suitable size, or, in general, onto any object with a rounded top, for example, a bottle of perfume. The main thing is to fix the head of the bell and straighten the “skirt”. You can leave it in this state until it dries completely, or you can remove it immediately; the shape will remain.
And finally, be sure to complement the bell with bows, braid, pom-poms, beads and other decorations.
Well, now the diagrams: some are from different needlework magazines, others I found on the Internet, hand-drawn, the authors are unknown to me.
Crochet angel, design Joan Glass
Knitted from Yarn Art Violett yarn (282m/50g) with crochet number 1.3.
Angel Crystal crochet
Angel size 22 cm.
For knitting you will need:
- one ball of 300 m of white thread
- hook No. 7 (US size), in our system it is No. 1.5
- some head filler
- plastic rod 30 cm (preferably wire) for hands
- starch
- conical form for starching
- glue
Schemes and description of the angel:
Crochet angel, diagrams and descriptions from the Internet
Crochet heart angel, master class from Galy from the Country of Masters
Let me make a reservation right away - I didn’t come up with this (I only gave the heart to him). This angel is from Valya Valentina magazine. Unfortunately, the author of the work is not indicated in the magazine and I don’t know who to thank for the wonderful angel. Let's start slowly. I used “Snowflake” cotton threads and a 0.7 mm hook.
Description and patterns of knitting an angel
Angel Constance crochet
Master class from Ekatrina Novoselova.
For work we will need: Threads Rose 100% Cotton and hook 0.8.
Description and diagrams of the angel at the link
Simple crochet angel
Angels crochet pattern
Openwork crochet angel, master - class!
For knitting you will need:
- Cotton threads (Iris or Snowflake)
- Hook 1.25
- Beads and decorative elements (mine is a heart held by an angel.)
- Wire
- Sugar syrup and starch paste.
- Glue gun or super glue.
- Angel starch mold (I use a piece of linoleum)
Crochet angel diagram and description
Crochet angel from zelyonka
Master class and diagrams at the link
Three angels according to one scheme
Angel crochet pattern
Openwork angels with diagrams and descriptions
Angels crochet patterns
Mexican crochet angel
Schemes and description of a crochet angel
Crochet air angel
You will need: the remains of white Iris yarn (100% cotton) and a hook No. 1.4, a little padding polyester.
Angel crochet patterns
Crochet Christmas angels
Angels are connected without assembly.
You will need:
- cotton thread No. 10, white 640 m, pink 18 m, green 18 m.
- 4 white beads with a diameter of 6 mm
- 76 cm of white twisted cord with a diameter of 1.3 cm
- 1.8 m satin ribbon 0.3 cm wide
- artificial flowers
- filler
- paint brush
- White paint
- scotch
- starch solution
- food film
- foam mold 5*13*25 cm
- a piece of thick cardboard measuring 41 cm
- stainless steel pins
- wooden ball 3.8 cm in diameter with a flat bottom
- glue gun
- hook No. 1.8cm
Crochet angels patterns and description:
Many angels with diagrams
Crochet angel, design Joan Glass
Knitted from Yarn Art Violett yarn (282m/50g) with crochet number 1.3.
Crochet angels with patterns:
Angel Crystal crochet
Angel size 22 cm.
For knitting you will need:
- one ball of 300 m of white thread
- hook No. 7 (US size), in our system it is No. 1.5
- some head filler
- plastic rod 30 cm (preferably wire) for hands
- starch
- conical form for starching
- glue
Schemes and description of the angel:
Crochet angel with blue flower
angel crochet patterns: