People have always strived for self-expression and individuality. This was manifested in the creation of unique household items and decoration of the surrounding space. Knitting in the interior allows you to make the design of your home special, highlight its advantages and highlight accents. Knitting can be done using technical devices, but crocheting can only be done by hand. For this reason, such products have great value and cost.
Sofa with knitted pillows Source roomester.ru
Knitted furniture
The simplest version of this product is a regular ottoman. This item can be made in various shades, shapes and textures. A hand-made pouf will add originality to the interior and become its highlight.
Chairs with knitted seats Source roomester.ru
Made from thick yarn and made in one color, this piece is perfect for a minimalist-style room. And thinner and brighter threads will create a boho atmosphere. Even laconic high-tech can be beautifully combined with a knitted ottoman if it is made in original shapes and patterns.
Interior with knitted ottomans Source roomester.ru
An ordinary sofa can be turned into an original piece of furniture if you knit an interesting cover for it with your own hands. Such a product will become a bright accent and emphasize the overall design of the room. This option is especially relevant for the loft direction.
Ottoman near the chest of drawers Source roomester.ru
Bookmarks
The best birthday gift for those who like to read paper books is a bookmark, so we will now look at how to knit it, as well as ideas about what it can be and how to knit it quickly in 5 minutes.
The size of a bookmark for a regular A5 book is 23 - 25 cm, for a large A4 - 33-35 cm, so take this into account when knitting, ask your birthday boy or friend to whom you want to give a gift what books he likes to read.
But there is another option for a bookmark, when it is tied to a paper clip, then the length of the bookmark is not important.
Ideas
Consider: the size, color and style of the bookmark.
For example, for the Bible we knit a cross, for a boy it’s a smiley face or one-eyed eye, for a girl it’s flowers and hearts. Moreover, one flower and a bouquet at once look impressive.
The braid will suit any book and will look impressive in dark and light colors; it is important to make it long enough so that the tail hangs out of the book and the bookmark is really convenient to use.
Master classes in training videos
Home textiles
Some styles allow the use of a large number of knitted items at the same time. Such directions are eco and ethno. In such interiors, wool pillows, a warm blanket and a hand-made carpet coexist perfectly. Sets of items will look great; you can also use individual elements. At the same time, it is necessary to maintain balance and maintain a sense of proportion, otherwise the room may look too overloaded with knitted items.
Two knitted pillows Source roomester.ru
Tack
Simple crochet potholder
There is no point in talking a lot about potholders. They are a crochet classic. But if you are interested in a simple and quick option, choose potholders whose base is a simple circle or square. For example, as when knitting the “Piglet” potholder.
Lace
The shabby chic trend is strongly associated with lace fabrics and elements. Lace can be present on curtains, tablecloths and napkins. This gentle romantic style goes well with grandma’s rugs and other cute details of a rustic interior. Irish lace will perfectly complement the Provence style and add a special warm atmosphere to it.
Pink rug Source roomester.ru
To give the room a homey feel, you can use floral patterns. There are many interesting options for every taste that can be adapted to different designs. It is enough to apply a little imagination - for example, a knitted floor lamp will look especially interesting, creating fancy shadows on the wall, and covers for a tea set will definitely surprise guests with their originality. An unusual solution is openwork book covers that will attract attention and arouse interest in the contents of the books.
Rugs over the sofa Source roomester.ru
Photo and video master classes
- Flowers
- heart
- Leaves
- Brooches
- Bracelet
- Toys
- Patches
- Birdie
- Fish
- Bears
Knitted items for the dining room
Using a hook and threads you can create many interesting details for the kitchen. These can be covers for dishes, napkins, coasters, potholders, towels and caps for teapots. Knitting in the interior of the dining room will emphasize the comfort of this room and highlight bright accents. You can knit beautiful festive tablecloths with patterns with your own hands, as well as make rugs and decorative elements. In small kitchens, stands can be replaced with compact pockets for cutlery. Such parts are fixed to the wall and pre-dried accessories are lowered into them.
Knitted coasters Source roomester.ru
Bracelet
Decoration for girls, what could be nicer and easier to make?
The bracelets we offer are easy to make; the first two videos of the master class will help you make them quickly and with a minimal set.
You will need:
- threads;
- the hook is thin so that it fits into the hole in the chain with thread;
- chain;
- a needle with a wide eye for the thread to pass through;
- accessories or fasteners and rings;
- round nose pliers or anything to help bend the rings.
- scissors.
Floor mats
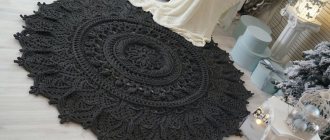
In modern apartments, traditional knitted runners do not lose their relevance. Such elements soften and enliven any interior, bringing homely warmth into it. The shape of products can be very different - from the familiar circles and rectangles to unusual asymmetrical things. A popular technique is patchwork. Round rugs are placed in the kitchen along the main line of movement, forming a beautiful sequence of products.
Mat on the floor Source roomester.ru
It is better not to use such options in the bathroom, since they react poorly to the presence of moisture and may lose their properties. But even in this case, a solution can be found. They will use plastic bags that are twisted into bundles and crocheted like regular yarn. Such items do not get wet, which is a significant advantage in the bathroom.
Interior with a rug Source roomester.ru
How to learn to knit
Any item can be knitted or crocheted. Handmade masters, as a rule, can do both, but prefer one or the other. We invite you to try both knitting techniques to find out which one is closer to you.
Set of knitting loops
There are different ways to cast on stitches with knitting needles. The following is considered traditional:
Facial surface
Knit and purl stitches are the basis of knitting. Having mastered them, you will be able to knit your first simple pattern - an elastic band. But first, an important nuance.
Any loop has a front and a back wall.
Life hacker
You can knit with one or the other, but the result will be slightly different. Therefore, the front loops are divided into classic (those that are knitted behind the front wall) and grandmother's loops (those that are knitted behind the back wall). Hooking and pulling the thread through the back wall is easier, especially for beginners.
This is how grandma's knit stitches are knitted.
And here is the classic method of performing facial loops.
Cast on stitches and try knitting several rows with knit stitches: granny stitches or knit stitches - your choice. This is stockinette stitch or garter stitch.
Purl stitch
Purl loops are divided into granny and classic according to the same principle. Watch the following video tutorial and you will understand how to knit granny's purl stitches.
Classic purl stitches.
Knit several rows in one way or another. You will get a purl stitch.
Elastic band 1×1
Once you've practiced knitting and purling stitches, you'll be able to make your first knitting pattern, the 1×1 rib stitch. You've probably seen it on sweaters and scarves.
Using the same principle, you can knit a 2 × 2 or 3 × 3 elastic band.
Katvic / Shuttesrtock
Closing the loops
To complete the knitting, the loops need to be closed. This is also done in different ways.
The Russian method is used most often.
The elastic method is usually used for elastic bands.
To close the loops using the Italian method, you will need a needle with a large eye.
Openwork covers for various containers
Banks, bottles, boxes, candlesticks and vases are often dressed in patterned covers. Provence and retro styles are perfect for such decor. An ordinary jar will turn into a real interior decoration if you knit a case for it with a folding collar. The combination of boxes of different sizes, which are decorated with knitted items using various techniques, looks interesting. Openwork covers on candlesticks will gently diffuse the light, which will serve as an excellent addition to the romantic atmosphere. The candles themselves can also be decorated with patterned items. Such compositions will be especially relevant at holidays and celebrations.
Covers for containers Source roomester.ru
Toy
When it comes to knitted toys, a picture of a huge beast made of yarn comes to mind. Now this is nothing more than a myth. You can crochet a toy of absolutely any size - from a few centimeters to several meters in height. The Christmas tree toy in the shape of a pig is a prime example of this.
Nowadays finger toys are gaining popularity. One product takes about half an hour and a minimal amount of yarn - there will be more than enough leftovers.
Crocheted finger toys
When knitting small toys it is important to be very careful. Look at these hippos - every stitch matters. Since the toy is small, every minor flaw is visible on it.
Multi-colored crocheted hippos
New Year decoration
On this magical holiday, you want to decorate your home with something original, express your individuality and give room to your imagination. The New Year tree can be decorated not only with balls and garlands, but also with original knitted figurines of funny animals and fairy-tale characters added to its branches. A good idea would be to place special pockets in which you can put gifts and decorations. If you were unable to purchase a large Christmas tree, then you can create a miniature tree from green yarn. Then the Christmas tree is decorated with wreaths, bells and satin ribbons of different shades. This way you can create a special holiday feeling.
Knitted decor for the New Year Source roomester.ru
Knitting patterns: basic elements
A set of basic knitting techniques is a kind of alphabet for knitters. It is impossible to read a single word if the letters are not learned.
Likewise, you should not start knitting patterns before you have mastered the basic elements:
- VPt : to form the first VPt you can use any convenient method.
Next, the base of the first VP is taken in the left hand and pressed with two fingers, the RbN is thrown over the index finger. Kr. inserted into the loop, grab the RbN and drag it through the loop. The rest of the VPts are performed similarly.
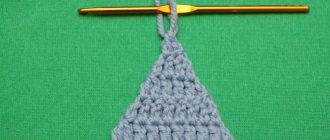
- PlSt is the simplest element that is formed when Kr. enters the Pt of the previous Rd, grabs the RbN and pulls this thread through the loop onto the Kr. A neat braid is formed on the working side of the canvas, and a stroke is formed on the reverse side.
There are also PlSt with N. Before entering Kr. in Pt of the base, you need to do N (movement of Kr. from yourself so that RbN is thrown over it). Then RbN is grabbed and simultaneously pulled through the loop of the previous Rd and through N. Such an element is obtained higher than StBN, but lower than StSN.
- StBN : for its formation Kr. must enter the Pt of the base, grab the RbN and drag it to the front side. Then Kr. grabs RbN again and drags her through 2 Pts.
- StСН : first the H is performed. Next Kr. it is necessary to enter into the Fri of the previous Rd, pick up the RbN and drag it to the front side. Then the RbN is picked up again and a new Pt is knitted together with the H. After the next picking up of the RbN, the last 2 Pts are knitted. Depending on the pattern, the columns may have 2 or more H (3, 4 and even 5).
- SSt : in fact, this is the same PlSt, but it performs a connecting function. If you need to compare 2 canvases or the end of a circular row with its beginning, then use PlSt, and in the descriptions it is called SSt.
- Crossed StSN. This element is formed by combining two StSN and one VPt. First, skip one PT of the base and knit a DC in the 2nd (it is tilted to the right). Then perform 1 VP and knit a DC, returning 2 PT of the base back (it is tilted to the left). Thus, the second St intersects the first.
- 2 sc, knitted together (st with a common top). This technique allows you to narrow the canvas, since the upper edge of the edge is shorter than the lower one. First Kr. insert into the 1st St of the base, grab the RbN and form a loop. Then, without finishing knitting the first sc, they begin to perform the 2nd. When in Kr. there will be 2 unfinished stbn, grab the rbn and drag it through all the loops.
- PShSt : this decorative element is very voluminous and requires more yarn than other techniques. On Kr. Throw on H, insert it into the base loop and form Pt on the front side of the fabric. This Pt is pulled to the desired height.
The actions are repeated the required number of times (3-9 repetitions), introducing Kr. in the same Pt of the base, and then simultaneously knit all Pts on the Kr.
- Unfinished StSNs are performed by analogy with two StBNs with a common top. The first DC is knitted until halfway, then the second one begins. At the final stage, the RbN is pulled through all the Pts to the Kr.
- Pico is a decorative element that is used to treat the open edges of a product or is included in openwork patterns. To form it, knit 3 VTs in a row, then introduce Kr. into the base of the first VPt and perform StBN. Thus, the VPts form a small arch or tooth.
- Knitting in the round is a technique in which each subsequent row is wider than the previous one. The circular road begins with the VPt turn and ends with the SSt.
- Rachy step is a type of embossed edge trim. These are classic StBN, made in the opposite direction. That is, the road is formed not from right to left, but from left to right.
- Turning loops are the second name for VPt lifting. If the road consists of StBN, then 1 pt of lifting is required, if from StSN - 2-3 pt. The number of PT turns directly depends on the height of the roadway. It must be taken into account that the lifting PT replaces the first St in the row.
You can learn to crochet from scratch only after all these elements have been carefully practiced and brought to automaticity.
Combination with different styles
Knitted decor is appropriate in any direction, since there are many ways of knitting and a huge number of types of threads and yarns. There is no need to limit yourself to making only tablecloths or napkins. You can combine various techniques and create not only decorative items, but also additions to existing things.
Cushion on the chair Source roomester.ru
Knitted items always add a feeling of comfort to a room. In the cubist style, small square ottomans for seating would look appropriate. Shabby chic or country style involves an abundance of knitted items and patterns of the corresponding theme.
Rug and knitted covers Source roomester.ru Table with plants Source roomester.ru Vases with covers Source roomester.ru
Rug near the chair Source roomester.ru
Pillow with flowers Source roomester.ru
Sofa with cover Source roomester.ru
Chests on the floor Source roomester.ru
Lanterns in the interior Source roomester.ru Ottoman near the chair Source roomester.ru
Covers for cutlery Source roomester.ru Stands in the shape of apples Source roomester.ru
Coasters in the shape of oranges Source roomester.ru
Sofa and rug Source roomester.ru Striped rug Source roomester.ru
Jars with hearts Source roomester.ru
Three candles next to a toy Source roomester.ru Bright toys Source roomester.ru
Fox toy Source roomester.ru
Knitted bunnies Source roomester.ru
Pillow on the chair Source roomester.ru
Selection of materials for crochet
Before you begin the practical part of knitting, you should familiarize yourself with the theory, as well as purchase materials and tools.
The tool in this case will be a hook. The main criterion for its selection is convenience. It is comfort during the work process that will ensure the degree of involvement in the world of creativity.
When honing your skills, you can try out tools from different manufacturers to understand how convenient it is to work with one or another.
- The hook and yarn must match each other. For beginner craftswomen, it is better to choose a thread of medium thickness.
- Working with yarn that is too thin or thick requires some knitting skills.
- The hook size for each type of yarn is most often indicated on the packaging.
- However, the tool number is a guideline, so you can purchase several of similar sizes.
- For example, with the recommended hook No. 3.5, you can try working with hook No. 3, No. 3.5 and No. 4.
Each craftswoman has her own knitting density. So, when knitting with the same yarn and crochet of the same size, the fabric of different knitters may differ in size and density.
The type of intended product plays an important role. For example, toys should be knitted very tightly so that there are no gaps through which the filling will be visible.
For such purposes, you should take a smaller hook than indicated on the label. Whereas a scarf or openwork shawl can be airy and slightly stretchable.
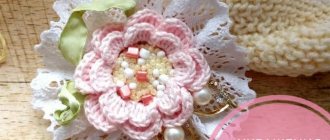
Making a brooch
The advantage of small decorative crafts is their versatility. Depending on the color scheme and style, brooches are suitable for both adults and children.
General recommendations for making small accessories:
- choose thin yarn and small hook;
- try to knit as tightly as possible;
- carefully hide the tails of the threads (so that they do not stick out or come out on the front side);
- carefully perform the wrong side of the product;
- firmly attach the clasp so that the brooch is fixed on the pin motionless.
Despite the cheapness of acrylic yarn, you should not use it for knitting brooches. Accessories made of cotton, microfiber, polyamide or nylon look much better. If you want to make a brooch from fluffy yarn, then you need to choose only high-quality material.
Soft kid mohair, angora, alpaca or a mixed thread containing no more than 50% acrylic or other artificial fiber are suitable. Decor made from hard, scratchy yarn with unpleasant-to-touch lint will not have the highest quality appearance.
There are several types of brooch clasps and all of them are suitable for knitted accessories. If you choose a pin on a flat base (with holes for fastening), then it will need to be sewn to the wrong side of the brooch. If the knitter comes across a pin attached to a convex metal bowl (without any holes), then the brooch and clasp will have to be connected with hot glue.
One of the easiest ways to create a brooch is to make a relief flower; for this you will need:
- 10-20 g of yarn (ideal yardage 550-600 m/100 g);
- hook No. 1 or No. 1,2;
- sharp scissors;
- medium size needle;
- and clasp.
You may also need a glue gun and silicone glue to secure the fastener. Sometimes the clasp is attached to a round piece of fabric, previously glued to the back of the brooch. Such a circle can be cut from fleece, velor or other fabric that does not fray when cutting.
How to knit a voluminous flower:
- Cast on a chain of air loops (CLL) at least 30 cm long. The longer it is, the more magnificent the flower will be.
- Knit 3 rows according to the pattern, trying not to stretch the stitches and loops.
- Cut the thread, tuck the tails of the threads at the beginning and end of the fabric.
- Wash the workpiece, let it dry flat, steam it with an iron (do not place the iron on the fabric, just bring it as close as possible and spray it with steam).
- Roll up a small fragment of the strip, make a few stitches with a needle so that the roller does not unfold. Then roll the entire strip into a large roll in several approaches. Hem each stage.
- At the end of the work, fold the edge of the canvas onto the wrong side of the brooch and fix it in this state.
- If the back of the product turns out neat, then you can simply sew or glue the fastener. In cases where the reverse side of the brooch needs to be covered, fleece or other thick fabric will come in handy.
It is necessary to cut a circle from the fabric (which will hide everything that the knitter does not want to show to others) and glue or sew it on the back of the brooch. Then attach a clasp to this circle.
It should be noted that the circle can be crocheted from the same yarn as the entire brooch. If the finished product is too soft and does not hold its shape, it can be dipped in a gelatin solution. Then the brooch should be squeezed well and dried, giving it the desired shape.
Another way to knit a brooch is to make an asymmetrical product without a specific shape. This can be a set of knitted circles of the same size, complemented with beads and sequins.
One large element combined with small ones also looks good. To connect the parts, you can use a backing made of thick fabric or simply sew all the parts and attach a fastener from the inside.
Crochet patterns for beginners will help you knit the simplest circle with single crochets (SC). Small pieces of yarn are useful for this type of decoration, so making brooches will help to recycle unnecessary leftovers.
