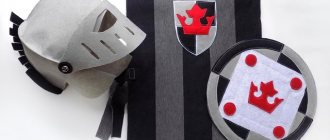
I made this DIY knight costume for protection in cardboard battle tournaments. I'll tell you how to make armor from cardboard.
As a reference, and to determine the correct names of Viking armor pieces, I used the following sources:
link link link link
Basic tools:
- cardboard
- scotch
- vegetable tanned leather 6-7 ounces thick (see infographic for how to convert thickness to mm)
- knife or leather scissors
- strip cutter (can be replaced with a knife and ruler)
- edge cutter
- wooden slicker
- round punches – loose or revolving
- rivets - you don’t have to use copper ones like I did, you can use regular ones. 53 pieces as in my case, or you can change the number as you wish.
- rivet installer
- hammer
- and the most important thing is a dome-shaped shape on which we will make a helmet pattern.
Working with paper
You can also make a helmet for a young Viking from paper; cardboard is most often used.
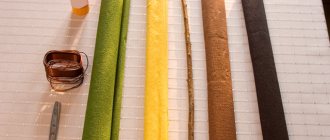
Take one large cardboard box, multi-colored tape in white, brown and gray, a knife, a glue gun, a measuring tape and use polystyrene foam for the horns.
From the box we cut out a strip 10-15 cm high, and the width is the circumference of the head. On one side we form cloves. Using this technique, the helmet will appear dome-shaped.
Glue the cloves in the center using a glue gun.
Wrap the workpiece from below with gray tape.
Cut out two pieces of cardboard in the form of a tiara, as shown in the photo below, and glue their edges together.
These blanks serve as the basis for the horns and therefore we attach them to the helmet using a glue gun on the sides.
Take another rectangular piece of cardboard and draw a face on it, namely eyes, as shown in the picture.
Cut it out.
Then we draw the bridge of the nose and glue it to the workpiece.
We glue the dome and the front blank together.
Draw the back part from the rectangle, cut it out and glue it to the helmet.
We also draw another piece, cut it out and glue it to the back.
We cut out a couple of strips and glue them to the top of the dome.
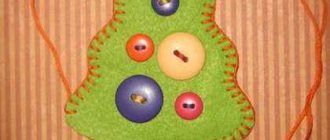
Related article: My crochet
We cut out the horns from polystyrene foam and attach them to the base, pointing down.
We cover the base of the helmet with gray tape and the horns with brown tape. We also glue it on the inside.
This helmet, almost like a real Viking’s, is ready.
DIY Viking costume
A boy's outfit should be not only beautiful, but also comfortable. Therefore, it is very important to make it from lightweight components that will not limit the child’s freedom of movement.
The base of the costume is not that difficult to make. You need trousers, a shirt and a cape. A shirt can be made specifically for a suit, but a regular light-colored shirt will do just fine. The bottom and sleeves can be decorated with braid; it will turn out quite believable.
Pants can also be sewn using a regular pajama pants pattern. But to create a costume, ordinary dark pants, which are in the boy’s wardrobe, are suitable.
The final touch to the Viking costume is the cape. Fur fabric should be hemmed by hand and an additional button with a hook should be sewn on. If desired, the suit can be complemented with appropriate shoes. The most suitable option would be boots. For this, ordinary boots or slippers covered with artificial leather are suitable, but in this case the tops are sewn separately and worn over the slippers.
If you wish, you can create a Viking costume for a girl. Its components are the same as in the outfit for a boy, the difference is the bottom. Instead of pants, you will need a skirt. The finished skirt can be sheathed with pieces of leather or made of artificial leather.