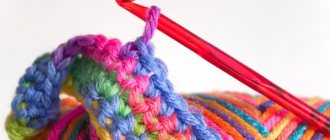
To decorate clothes or just as a souvenir, you can crochet original butterflies.
We offer you knitting patterns for three cute butterflies. Knitting them is not at all difficult and very exciting.
Start knitting a butterfly with its body and head.
When knitting the butterfly antennae, make spirals of 10-12 chain loops at the ends, knitting 2 single crochets into each loop.
The wings of the butterflies shown in the photo are knitted in rotating rows from the black dot in the knitting pattern.
The sequence of making butterflies was shown in detail in the diagrams of the directions of knitting the upper and lower wings. Start by knitting the top wing, and when completed, knit several connecting stitches to go to the starting point of the bottom wing.
Knit the bottom wing, joining the stitches of the penultimate row of the top wing with connecting stitches.
When decorating the tight contour of the butterflies shown in the photo with “crawfish” loops, grab only the front half-loops of the single crochets of the previous row, this will slightly raise the edge and make it more voluminous.
In butterfly 2, the inner part of the upper wing, formed by an oblique mesh, is tied along the contour with “crawfish” loops, which should be knitted on the upper half-loops of the columns of the previous row.
Use the lower half loops to continue the main pattern.
A similar technique was used when knitting both wings of butterfly 3.
The usual jagged edge, usually formed when knitting “crawfish” loops, thanks to the tightly knitted columns of the previous row, has the appearance of a rope laid along the edge of the wings.
Knitting pattern for the front and back wings of a butterfly 1.
Pattern for the direction of knitting the front and rear wings of the butterfly 1.
Knitting pattern for the front and back wings of a butterfly 2.
Knitting direction pattern for the front and rear wings of a butterfly 2.
Knitting pattern for the front and back wings of a butterfly 3.
Pattern for the direction of knitting the front and rear wings of the butterfly 3.
Pictures with diagrams are enlarged.
Materials from the magazine “Duplet” were used
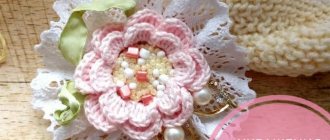
Crochet decor “Butterfly”
Bright multi-colored light-winged will guarantee a summer mood and rosy weather in the house. The knitting technique is suitable for both beginners and experienced needlewomen.
The size of the finished product is 19 cm by 19 cm. It can be used to decorate both clothing and the interior.
To work you need to prepare: 50g of cotton thread in yellow, orange, green and fuchsia, as well as a corresponding hook.
We will knit in parts - separately the wings and the middle. And then we’ll sew everything together into a single product.
Description
We start knitting from the middle. We take yellow yarn, cast on a chain of 10 chain stitches and knit further as the diagram shows. We make the first row yellow, the second – green, and then tie it with single crochets, two stitches in each previous loop.
Scheme
For the upper part of the wing, we cast on 6 air loops from yellow thread. Then we connect them into a ring, and then knit according to the diagram. The first and third rows should be yellow, and the second, fourth and fifth rows should be orange.
We also start the lower part of the wing with 6 air loops, but in fuchsia color. We close the chain into a ring and continue knitting according to the pattern. In the third row, change the color to yellow.
Both parts of the wing need to be sewn, and then tie each with its own color, 2 single crochets in each loop of the previous row. The second wing is done in the same way. Connect all the elements of the butterfly.
Make antennae from the wire, which you then wrap with green thread. Cut the working thread and then hide it on the wrong side.
The winged flower is ready and will now always please the eye.
Step-by-step knitting algorithm taking into account the model
To crochet a butterfly, you need to choose a knitting technique, color and size. There is a wide variety of models; any of these butterflies can be easily knitted by following the master class, which provides a detailed description of the work process.
Classic flat figure
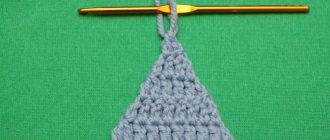
Flat crocheted butterflies are openwork figures with four tightly tied wings. This is a quick way to knit a statement piece for applique. Made with thread in one or two colors. Work begins with 5 VP, which closes in a ring. Further:
- We knit arches into this ring alternately: from 5 Vp, from 10 Vp, from 10 Vp, from 5 Vp. These are 4 wings (2 larger, 2 smaller).
- Let's start tying the small wing. In an arch of 5 Ch we knit: 1 pSt, 1 St, 1 St, 5 St2N, 1 St, 1 pSt.
- Let's move on to the big wing. We knit in an arch of 10 Ch: 1 pst, 1 st, 1 st, 1 st2n, 1 st3n, 1 st4n, 7 st5n, 1 st4n, 1 st3n, 1 st2n, 1 st, 1 st, 1 pst.
- Then we knit the second large wing in the same way as the first.
- And the second one is small similar to the first one.
- Then you need to make the harness and antennae. Here you can use contrasting threads, or you can knit with basic ones. We perform the binding in half-columns in each column of the previous row. When we reach the junction of the large wings, we begin to knit the antennae.
- Antennae: make a chain of 10 chains, then knit a half-stitch into the fourth loop from the hook and use half-stitches to return down to the wings. In the same way we form the second tendril.
- We continue tying until the end of the row. The product is ready.
Napkin with voluminous butterflies
The napkin is a round cloth made using the fillet knitting technique, framed along the edge with three-dimensional elements in the form of butterflies with four wings. First we knit a napkin:
- We knit a ring of 9 ch.
- Make 4 ch and knit 19 dc, between which we knit 1 ch.
- Second, third row: double crochets, 2 ch between them.
- In the fourth we make increases: from each stn of the previous row we knit 2 dc, 2 ch between them. There are also 2 chains between pairs of columns.
- We knit the fifth and sixth rows like the second.
- We knit the seventh row like the fourth, but between all the columns there is 1 ch.
- From the eighth to the thirteenth - we knit as the second.
- In the fourteenth row we make an increase: every 4 single sts we knit double sts. Between all columns 2 Ch.
- We knit the fifteenth row like the third.
- The sixteenth is an increase similar to the fourteenth, but every 5 StN.
- From the seventeenth to the nineteenth we knit as the third.
The napkin is ready. Now you need to knit 10 butterflies and sew them evenly onto the openwork edge of the napkin. First we make a ring of 6 Ch, then a description by row:
- 8 groups of 3 dc in a ring, 4 ch between them.
- We turn the knitting and continue in the other direction: in each arch we knit 5 dc, 5 ch, 5 dc.
- Between groups of 5 sts of the previous row we knit 1 st, in each arch we knit 7 sts, 2 ch, 7 sts.
- We finish by tying the edges with columns.
The result is a flower with eight petals and folds along the edge. We bend it in half. We get a two-layer butterfly with four wings.
Openwork items look best sewn onto a simple, uniform crochet pattern.
Amigurumi toy
For a cute amigurumi butterfly you will need to knit several parts: a head, antennae, a body and two wings. Then they are connected. The details are knitted in a spiral, the rows are not closed.
Head (main color):
- Amigurumi ring, we knit 6 tbsp into it.
- We make an increase: in each St we knit 2 St.
- We alternate single Sts and increases every other.
- Increase after 2 Art.
- Increase after 3 Art.
- Increase after 4 Art.
- From the 7th to the 12th row we knit without changes.
- Next, we begin to reduce one loop at a time in the same way as increasing.
- We make cuts until there are 12 stitches left in the row.
- We stuff the head with filler, embroider or glue eyes.
Mustache (primary color):
- The beginning is standard: an amigurumi ring, 6 Art.
- We make an increase - one St (there are 7 Sts in the row).
- Without changes.
- Subtract one St.
- Decrease one st (5 stitches left)
- Change the thread to white and knit 3 rows without changes.
- We make 2 such antennae.
Body (primary color):
- Amigurumi ring, it contains 4 tbsp.
- Increase after one Art.
- Same as the second one.
- Increase after 2 Art.
- Increase after 3 Art.
- Increase after 4 Art.
- Increase after 5 Art.
- From the 8th to the 13th row - no changes.
- From the 14th row we begin to decrease 1 loop every 5 stitches.
- In the 15th row - after 4 stitches
- In the 16th - after 3 Art.
- 17th row - decreases in each St.
- We stuff the body with filler.
Wing:
- First detail (white color). Making an amigurumi ring. We knit 6 tbsp into a ring.
- Increase: in each st we knit 2 sts.
- We make an increase after one Art.
- We make an increase after 2 tbsp.
- Increase after 3 Art.
- Second part (white color). Similar to the first wing part, but we make only 3 rows.
- We connect both parts with the edges to make something like a figure eight, and tie them in columns with thread of the main color.
- We sew all the details together. The toy is ready.
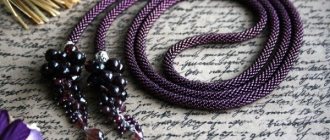
Accessory for men
A simple accessory consists of two parts - the bow itself and the bridge in the middle. Both are knitted “tube”. The knitting pattern for the parts is the same. The size of the butterfly is chosen at the discretion of the craftswoman. Work algorithm:
- For the base, we knit a chain of air loops of such length that when folded in half, the height of the finished product is obtained. Then we close the chain into a ring and form a “pipe” in dense rows to the desired width of the butterfly. We close both edges of the “pipe” with columns.
- For the jumper we do everything similarly, only the diameter of the “pipe” will be small. After it is ready, we wrap the jumper around the base, gathering a bow with it, and sew it together. It makes sense to secure it to the base so that the middle does not move to the side.
- This bow tie is put on using fabric, rubber or knitted braid.
The secret of the elegance of a men's bow tie is a very fine knitting, which produces a dense, ribbed fabric. To prevent the butterfly from fuzzing, you need to take smooth mercerized cotton.
Fire crochet butterfly
This type of butterfly will perfectly complement your autumn wardrobe or add color to any other item. The color of the butterflies is bright, contrasting, it is impossible to take your eyes off it.
To work, you need to prepare cotton yarn “Iris” of different colors, as well as a hook number 1.25.
We start knitting from the central part. We cast on a chain of 17 air loops with gray thread, the last of which is a lifting loop. Next, knit the middle and mustache, as the diagram shows.
Let's move on to knitting a small wing. We attach a thread of a different color to the body. We cast on 12 air loops, make a connecting stitch in the 6th air loop of the chain from the hook.
We collect 7 more air loops, and then connect the chain with the next half-column of the body. We continue knitting according to the pattern until the third row. In the fourth row we change the color of the thread. We knit the wing further.
For the large wing, we again attach the thread to the body, cast on 14 chain loops and make a connecting stitch in the 6th loop from the hook. Then we knit 9 air loops, which we connect to the next half-column of the body. Next we knit according to the pattern until the third row, after which we change the color of the thread.
We continue to work according to the scheme. When the product is ready, cut the thread and then hide it on the wrong side.
Decoding circuits for beginners
In order to correctly read butterfly crochet patterns, the needlewoman must be familiar with the symbols that are used in them. There's nothing complicated about it. The main thing is to remember the basic knitting techniques.
| Name | Abbreviation for circuit description | Symbol |
| Air loop | VP | Circle or dot |
| Half column | pst | Short vertical bar |
| Column | St | Plus |
| Single crochet stitch | StN | A long vertical line crossed by one horizontal line |
| Double crochet stitch (loops with three, four, five crochets are designated in the same way) | St2N | A long vertical line crossed by two (three, four) transverse sticks |
| Arch of 5 air loops | 5 Vp | The arc under which the number of loops stands |
Beautiful crocheted butterflies are small in size and require careful execution. You need to work slowly, then the finished item will certainly give you a summer mood and a bright touch in your clothes or interior.
Crocheted openwork butterfly
A delicate, openwork butterfly can be not only a decoration for clothing, interior design or a product. It can be used as a motif in making tablecloths, napkins, bedspreads, etc.
It is often knitted from cotton or other thin thread. The hook for the yarn should be selected according to the number.
We start knitting from the central part of the butterfly. On the diagram this place is indicated by an arrow.
We dial 1 air loop. + 3 initial air loops. and knit up to the 15th row according to the pattern. In each row, the first loop must be replaced with the same amount of air. lifting loops, which is indicated in the diagram.
In the fifteenth row we knit the antennae using air and other loops. Then we move on to knitting the wings. To do this, we fasten the thread in those places that are marked with a double arrow in the diagram, after which we knit according to the pattern from row 1A to 5A.
Row 6A should end before the wavy line. We turn the product, knit rows of the upper part of the wing (7A-17A).
Now let's move on to the bottom of the wing. We fasten the thread at the end of row 6A and knit rows 1B-7B. We make the second pair of wings in a similar way.
When the product is ready, cut the thread and then hide it on the wrong side.
Application options
The product can be used as a main and additional element. It all depends on the type of pattern, yarn and choice of hook. Most often, openwork motifs are used:
- For creating napkins and tablecloths. Butterflies in this case can be an edging for work. No need to choose complex openwork knitting. It is enough to make the center of the napkin dense and decorate the edges with butterflies.
- As an item of clothing. Here you can use both original individual jewelry in the form of brooches, hairpins and scarves, or introduce this element into the image.
- In the manufacture of carpets. The technique has become popular recently. It is based on the usual patterns for butterflies, but for its implementation, dense and thick yarn is used to make the rug dimensional. The ideal option would be knitwear.
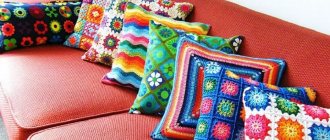
Handicrafts with butterfly elements create beautiful pillows, blankets and window curtains, and make interesting coasters and potholders. In fact, the use of knitted motifs allows you not only to make the item original, but also adds homely warmth and comfort. Every woman can decorate herself and her home; you just need to want to realize your fantasy in beautiful patterns, and the result will not take long to arrive.
Originally posted 2018-08-29 10:50:48.
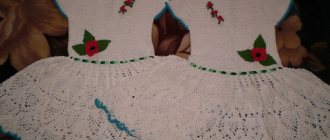
Crocheted butterfly in the form of an openwork napkin
Now we will knit a butterfly that will decorate the interior of any room. These napkins create a special coziness in your home and protect furniture from dirt or minor damage.
To work, we need to prepare 50 grams of white cotton thread, as well as a hook number 2.5.
The size of the finished product will be 28x18 cm
The butterfly consists of motifs that we will knit according to the pattern, and then, in a certain sequence, we will connect everything into a single whole.
We start, traditionally, with the body, then we make the upper part of the wing, which we attach to the body in the last row. After this, we knit the lower part of the wing and attach it to the upper part and body.
We knit the second pair of wings in the same way. We complete the product with a pair of charming mustaches. We cut the working thread, and then carefully hide the rest of it on the wrong side.
Selection of materials
Not only the complexity of the work, but also the quality of the product depends on the materials and tools. For motifs that will be used separately, it is better to choose dense yarn with a smooth base. In this case, cotton will be ideal, because after knitting the product must be starched so that the butterfly becomes embossed and retains its shape. It is not necessary to carry out the procedure with double motifs, since here their softness and fluffiness add beauty.
For knitting, it is better to use a hook that fits the threads. For thick yarn these are large tools, and for thinner yarns - small ones. Some needlewomen use hooks with a large head for cotton threads, since this makes the links more visually noticeable. Due to such knitting, the tension of the threads is deformed, and then the parts of the motif will look asymmetrical to each other.
Beginning craftswomen must first make a butterfly pattern so that the resulting result fully corresponds to the expected dimensions. If the product will not be used as an item of clothing, then you can begin the process without prior preparation.
Materials and tools
The main thing you should pay attention to when choosing yarn for crocheting a butterfly is how it holds its shape. There is no need for softness and a flowing effect here, otherwise the wings will quickly sag and the tied butterfly will become unrecognizable
Therefore, wool, pile fibers, and viscose are not suitable for it at all. If you need to supplement the finished product with decor from just such yarn, it is better to add it to the main thread, which will help the wings not to lose their shape.
If the butterfly is to become an element of children's clothing or a toy (for example, a module over a crib), then it should be made of a stiffer yarn in order to have a voluminous appearance. Acrylic, cotton (plain or mercerized), linen, bamboo, and microfiber are best suited for such products. When knitted tightly, they hold their shape perfectly and will last a long time if you care for them properly. Examples of yarn for knitted butterflies:
- Pekhorka “Lacy”;
- YarnArt Lily;
- YarnArt "Iris";
- Trinity "Astra";
- Kamtex "Amigurumi";
- Camtex "Flax";
- Alize Cotton gold hobby;
- Alize Bamboo fine.
The choice of hook depends on the diameter of the yarn and its stiffness. It is not difficult to select the size of the tool for the thread - to do this, you need to put the thread inside the recess of the hook and make sure that it does not stick out or fall in, but fits exactly in diameter
In addition, you need to pay attention to the material from which the hook is made. Steel ones with a comfortable handle are preferable, since they do not cling to the fibers of the yarn, do not electrify it, glide well, do not bend or break.
YarnArt Lily
Alize Cotton gold hobby
Pekhorka “Openwork”
Trinity "Astra"
YarnArt “Iris”
General diagram of the product
Regardless of whether a small crochet butterfly is made or a large one, the same general pattern can be used.
The peculiarity may lie only in the manufacture of insect wings - they can be piecework in pairs or be separate parts. The “torso” in any case will be a solid structure.
Knitting pattern
Wings are the main detail that decorates the product. They can be solid, but knitted from threads of different colors. But I suggest choosing an openwork pattern, which can represent diverse “designs”. I use this scheme:
To knit beautiful wings, a detailed master class is selected, in which all stages will be described accurately and in detail.
Upper wings. Assembly of the finished product
How to knit the upper wings of our openwork butterfly? The diagram and description are quite simple. We use orange thread. We collect 7 VPs, skipping the first two of them. In the third we knit 1 sc, then 2 hdc and 1 dc. In the last loop of the chain we perform 7 C1H. We turn the workpiece and continue working on the other side. We make 1 C1H, 2 PPSN and 1 RLS. We finish with a connecting loop (in the second initial VP).
In row No. 2 we work like this. We make 2 VP, 1 RLS in the second VP of the previous row, 10 VP. We skip 7 base loops. We knit 1 C2H, 5 VP, 1 C2H, 5 VP, 1 C2H - in one loop. Again we collect 10 VP. We create 1 RLS in the second VP of the previous row and close it.
In row No. 3 we make 2 VP and 1 RLS in the same loop. We knit 10 sc and 1 hdc into the arch. At the top of the double crochet stitch of the previous row, make 1 hdc. In an arch of 5 VPs we create 1 PPSN and 5 C1H. At the top of the second column we knit 3 C1H. In the next arch - 5 C1H and 1 PPSN. In the third column we perform 1 PPSN. In an arch of 10 VP we knit 1 PPSN and 9 RLS. We create another 1 sc at the top of the column of the previous row, and the last one - in a chain. We finish knitting a row of joint ventures.
The first upper wing is almost ready. All that remains is to tie it with columns and make a picot from 5 VP. Having made the second wing by analogy with the first, we proceed to assembly. We connect all the parts of the product together. Sew the body to the wings.
Using a small piece of brown thread, we decorate the butterfly's head with antennae. We hide the ends of the yarn. This is such a beautiful and delicate crocheted butterfly we got.
Was the master class easy and useful? We hope so! I wish you creative success!
Simple option
This master class will tell you how to crochet a simple butterfly. Such an accessory can be attached to both a hair band and a neck band, sewn to a ribbon and decorated with hair, glued to a ring and attached to curtains. It all depends on where you want to adapt such a butterfly.
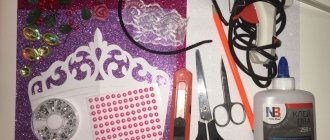
What we need to knit such a decoration: 20 grams of yarn of the selected color Magic Fine 49% wool and 51% acrylic. Hook No. 2, beads for eyes, thin wire and padding polyester.
We knit a pattern using the pattern and making single crochets.
We start knitting from the body: we make 5 air buttonholes using a hook, forming a ring. In this ring you need to make 7 single crochets. When 6 cm is already knitted, the body of our butterfly will need to be stuffed with padding polyester.
We continue to knit, but in the next row we need to make a decrease by 2 columns, and those buttonholes that remain must be tightened with thread.
In order to make the head, you should step back one and a half centimeters from one edge of the body and wrap it with thread.
We make antennae: take the wire and cut off 12 cm from it, then fold this piece in half and, where the bend is formed, attach it to the head.
Now we need to tie the wire with the help of air loops - we make a chain, while we bring out the hook from different sides, and when the wire comes to the end, then at the ends we need to tie balls from 4 air loops.
Then we return back to the head of our butterfly, while making connecting posts along the entire length of the antennae. We do the same work with the second one.
Now we knit the wings: take the knitting needles and knit a pattern based on the provided pattern. First row - 3 buttonholes. Knit the second wing in the same way. But to make small ones, you need to knit according to the same pattern, but at the same time look at the photo of the butterfly itself and make the appropriate shape. All that remains is to fasten everything together, and our moth is ready.
Such work will not take much time, even for those who have not yet tried to use two tools at the same time, such creativity will not seem difficult.
Two-colored moth
Butterflies almost always have several colors on them and therefore this master class provides a detailed description of how to make such a beauty with step-by-step photos. This kind of work will help everyone cope; even for beginners, such a task will be easy and will bring a lot of pleasure.
What you will need: threads of two colors - acrylic, hook number 2, scissors.
We need to cast on 5 air buttonholes, which we close into a ring using a connecting column. Now we need to cast on 3 chain buttonholes for lifting, then we knit like this - 2 chain buttonholes, 2 double crochets and repeat this 7 more times. The row should end with a double crochet, close it and again knit three chain stitches to form a rise.
We knit the next row like this: insert a hook under the two chain buttonholes of the previous row and knit 2 double crochets, then 3 double crochets and the same number of double crochets, and so repeat 7 times, then close.
Next, we knit a chain buttonhole to form a rise and now we knit under 3 chain buttonholes of the previous row - 6 double crochets, a chain buttonhole, again 6 double crochets, and between the arches of the previous row we knit a single crochet and so on 8 times and finish the row. And we tie the last row with single crochets.
You should get a flower as shown in the photo. Now we have to fold this product in half, and here we have our butterfly. But our insect still needs to make antennae and a body.
We knit 10 air buttonholes for the body, and then 9 more to form antennae, and now we knit a half-column in the second buttonhole from the end of the row.
Using connecting columns we make one tendril, and then make the second one in the same way.
When the antennae are finished, we begin to knit the body using single crochets. The photo below shows what kind of body with the antennae of our butterfly should turn out.
Note. We leave the working thread so that it can be used to attach the body to the butterfly. Butterflies can be of different colors, it all depends on the imagination of the needlewoman.
Butterflies can be of different colors, it all depends on the imagination of the needlewoman.
Video on the topic of the article
This article provides a video selection of lessons on how to crochet an interesting butterfly in various colors.