Any, even very beloved, things are short-lived. So my cycling gloves, which served faithfully for many years, broke one not-so-wonderful day. I really didn’t want to go to the other end of town to get new ones, but I had the right leather, tools and materials at hand. The thought has matured: why not try to sew gloves yourself?
Planned and done. In this article we will tell you how to sew short leather gloves.
- Constructing a pattern of short gloves Calculating the size of the pattern: Men's gloves
- Ladies gloves
R-Craft › Blog › How to make a plate glove with your own hands
Hi all!
As always, according to the good old tradition, at the end of the post there is a video with a more detailed description of the process! Well, in the meantime, I decided to continue the theme of knightly armor and make myself a plate glove. They look very cool and this time I will make it from metal. And the donor will be the front panel from an old Soviet washing machine)
I'll start from the very beginning - I'll sketch out a template for my hand. To do this, I put my palm to a sheet of paper, outlined it, marked the spaces between the fingers, and drew three lines along the hand. It was decided to make this part of the glove out of three parts, so I outlined the first one, adding one and a half centimeters to the edges for the bend and some roundness. I cut out the first part, then cut out the second, again attached it (now the second part) to the paper and added a little on top so that the plates overlapped each other.
I cut out all three parts and assembled them with self-tapping screws and press washers to make sure that everything articulates properly. It's easier to fix a jamb on a paper template than on a piece of metal.
Everything works fine, I will finish drawing the next parts along the way, as soon as I assemble this piece. I will assemble it from the front panel of the Siberia washing machine. Here the metal is a little more than a millimeter thick, which is ideal.
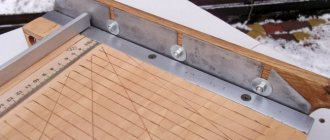
I removed the paint and a little rust with a flap disc, attached a template and cut it out with a grinder, since it is not convenient for cutting the inner radius, then in this place I modified it with a grinding disc for the UMS.
There was no chisel, so it was replaced by a strip of three-piece metal, slightly sharpened on one side, but not too much; I’m going to use it to push through the metal, not to cut it. In general, I placed the spare part in a longitudinal line on the gap in the workbench and stamped all three lines on all three parts.
He slightly bent it back, and then rounded it on a piece of pipe with a mallet.
I tried on the resulting parts on my hand. I drilled the holes for the rivets according to the template, but due to the fact that the thickness of the paper is less than the thickness of the metal, they did not match a little, but not critically, I just modified it a little with a needle file. And for the future I learned that it is better to drill in place.
To protect the knuckles, you need a piece of plywood with a hole to emboss these same knuckles.
Well, you need to take a piece of metal for it with a reserve. I don’t have a hammer with a round head, so instead I put a furniture bolt with a hemispherical head in the right place and hit it with a hammer, having previously marked it along my knuckles. Instead of a furniture bolt, you can use a ball from a ball joint or steering rod.
When everything was minted and forged, I cut off the excess and sanded it off with a grinder.
Next, I marked the wrist protection in place, placing a piece of paper on my hand and covering it with the finished plate. And I cut it out of metal as soon as I was sure that everything was the right size. I also curved a cavity in it under the bone so that it would sit more comfortably and would not put pressure.
Source
Cut of short gloves
Before cutting out parts from leather using a pattern, you should try the pattern on your hand to make sure that the dimensions are correct. The seam along the line of the thumb and index finger should meet.
If all is well, we move on to transferring the pattern to leather. Do not forget that there are 2 gloves and you should trace both blanks.
We lay it out to its full width and trace the template on the wrong side of the material with a ballpoint pen (you can use soap or a special fabric marker).
The skin should lie flat, not be stretched or, conversely, gather into folds.
Carefully cut out our future gloves. We fold it, check that nothing protrudes anywhere, and that the lines converge on the hand as expected.
After this, we mark 3 parts that will be sewn between the fingers. All three are different lengths:
- part between index and middle finger – 2×5cm (1)
- the part between the middle and ring finger – 2×4.5 cm (2)
- part between the middle and little fingers - 2×4.7cm (3)
We cut out 2 pieces of each part.
A complete set of blanks for gloves is ready.
Collecting materials
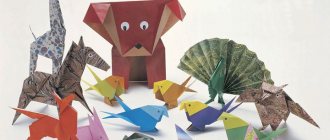
First of all, you need to collect all the materials that may be useful when creating origami paper claws:
- Paper. It is quite possible to use the most ordinary A4 stationery paper. If desired, you can use a thicker canvas, such as whatman paper. It is a little more difficult to bend, but the resulting structure made from such paper will be stronger and more reliable. Each type of paper has certain pros and cons, so it is necessary to select the appropriate option for a specific type of product.
- Ruler. Necessary for taking measurements and creating notes so as not to get confused in complex assembly diagrams.
- Pencil, glue, scissors. A basic set of tools that are necessary for any work with paper.
- Paints. Used optionally, only if it is necessary to paint the claws, thus giving them a more realistic look.
Leading manufacturers
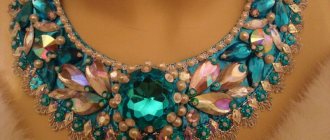
A chainmail glove is a cut-resistant product.
Leading positions in the field of product manufacturing belong to the following companies:
- Best Value Textiles. One of the leading manufacturers of food safety products. The company's product range includes aprons, towels, and gloves that protect hands from injury - burns, cuts, etc. The company's products are characterized by high quality, reliability, increased strength, and long service life;
- Microplane. An American company that produces high-quality kitchen accessories, including chainmail gloves. The brand's products are made using modern technologies. They are characterized by increased strength, reliability, wear resistance, and long service life;
- San Jamar. A company specializing in the production of accessories for the food industry. The company's products also include chainmail gloves. They ensure safety while cooking. They are characterized by ease of use, reliability, long service life, and affordable price;
- Diaclone. This is a Russian company. Specializes in the field of medical devices. The product line also includes chainmail gloves. In this case, these are specialized products recommended for use by surgeons. They are used during operations. Gloves protect the doctor's hands from accidental cuts. They are durable, easy to use, and sterile.
Claws using papier-mâché technique
You can make claws out of paper in several ways, but they are most realistic if they are made using the papier-mâché technique.
At the same time, a monster costume will cause much more delight than a ninja outfit, even if the hero is armed with bladed weapons and all the necessary accessories. And all because he has ordinary nails, and the monster has real, terrifying claws.
In order to make such an unusual craft you will need:
- toilet paper;
- putty for drywall;
- PVA glue;
- flour;
- wire or plastic rings;
- sandpaper;
- paints;
- varnish
You can make the main weapon of a monster as follows:
- Plastic rings are selected precisely according to the size of each finger, or their likeness is made from the most ordinary wire.
- Toilet paper is torn into very small pieces and filled with fairly warm water.
- Squeeze the paper pulp out of the water and measure out the required amount.
- Putty, flour are added to the paper pulp and glue is poured.
- Mix all the newly added ingredients together. If necessary, add a small amount of water.
- Each claw is modeled from the resulting paper pulp, sticking paper onto rings and creating the required shape. At the same time, they try to make the size a little larger, since the paper will shrink noticeably when drying.
- The material is given time to dry. This requires at least 36 hours.
- Only after the products have dried are they carefully sanded with sandpaper, thereby adding even more realism.
- The sanded products are covered with glue and left to dry for four hours.
- After this, the claws are covered with white paint and given time to dry.
- Next, bronze paint is applied, and time is also allowed for it to dry.
- Finally, the products are coated with varnish.
The process of making claws in this way is very painstaking, but it is in this case that the desired result can be achieved. Real monster claws are made from ordinary paper.
To make your own claws, you can use not only paper, but also cardboard, plasticine, metal or wood. It all depends on who this carnival accessory is intended for and what effect should be obtained. If a costume is being prepared for a children's party, then paper will be the ideal material; products made from it are the safest and simply cannot injure anyone. Teenagers can make such an unusual costume detail from cardboard. It is more durable and can remain intact until the very end of the party. Only adults can use metal or wooden claws in addition to the suit, but even they need to be as careful as possible so as not to injure themselves and others.
Master class No. 2
1. Place a rectangular sheet of paper in front of you (vertically). Then fold the top right corner. The upper left part of the sheet should thus form a triangle.
2. Fold this triangle towards you. Its top should coincide with the lower left corner of the sheet. Then fold the right side of the sheet so that it becomes a square.
3. Fold the square in half diagonally and place it in front of you.
4. Fold the resulting triangle in half again to mark the middle. You can also draw a guide line with a pencil, drawing it from the top point down to the middle of the long side of the triangle.
5. Fold the left half of the triangle inward three times to form a narrow triangle. Press the folds well.
6. Tuck the tip of the paper as shown in the picture. Straighten the triangle protruding from below and place the paper claw on your finger.
Special paper
You can buy origami paper or make your own. To do this, we need to take an ordinary sheet of A-4 paper, bend its corner to the opposite side and cut off the protruding part. We will get a square.
Fold our square in half.
Now you need to fold the workpiece diagonally and iron the fold line well.
And then we bend the vertical gap, now we will place our claw so that its sharp part faces to the left. Next we turn a smaller angle towards the claw and turn it back.
We hide the right tip in the resulting pocket. The formed pocket will be the place for our finger.
We work with plain paper
1) Take thick colored paper and place it with the colored side down, placing it horizontally.
2) Fold the top left corner to the bottom right corner of the paper, ironing the fold of the paper well.
3) Now bend the left corner to the opposite side. We get a rectangle, only without one corner.
4) Bend the top of the workpiece down. Then we align the edge with the diagonal, and we get a square. Let's place the sheet so that the upper corner of the future triangle looks up.
5) Fold the square diagonally, and we get a triangle.
6) Bend our triangle in half. Iron the fold line well.
7) Bend the left side of the triangle towards the middle. We bend it back, and now bend both sides again to the center line.
9) Now we bend the lower part, the one that protrudes, up. Open the resulting hole with your finger and tuck the protruding part into it.
10) Then open the smaller triangle, which is located in the middle of the folds, and insert your finger into it.