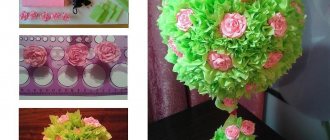
Topiary is an art that became popular in the mid-20th century. Cute trees decorate holiday tables or simply use them as interior decoration.
The materials you can use are artificial flowers, plastic, napkins, as well as natural plants. Size, shape, style, color - all this is left to the imagination of the master who has to do the work. Below you can find a detailed master class.
Materials and tools for creating topiary
Before you start work, you need to collect all the material and tools. Beginners should definitely have on hand:
- You can use a simple foam ball as a base. This is a classic option where the barrel and other components will be attached.
- Sticks, clean brush.
- Paints - gouache.
- Glue.
- Varnish.
- The basis for the trunk can be petals from cones.
Before you start making topiary for the holidays, it is advisable to study all the nuances and details. Many craftsmen have professional tools - brushes, paints, various fasteners and pliers for parts.
An artificial grass topiary will be a great addition to any area.
Master class: topiary made of artificial flowers
Using artificial flowers is almost a guarantee of a good result. There are a variety of them, at different prices. When selecting materials and creating a composition, use the rule of the color triangle. In the case of color design, this rule recommends using only three colors (white, gray and black do not count, all others count). If you look at the photo below, that is exactly how many colors (not shades), including green, you will see.
This could be the result. In the second case, the color of the butterfly is matched to the color of the pot
If we talk about composition, then only one part can be the “leader”. The second and third should take up much less space and attract much less attention. In the case of topiary, this means that the crown has the greatest “weight”, the second largest load is the pot/base, and the least significant and inconspicuous is the trunk.
Preparation of material
You shouldn’t buy the cheapest artificial flowers for topiary - they look the part. To begin with, you can choose ones that are not too expensive, but that you like in appearance. It works best if the flowers are small in size. Large flowers are not easy to deal with. Need experience.
Choose by appearance and color
There are also some rules regarding color scheme that will help you at first:
- Choose colors that are not contrasting, but similar shades.
- You will also need white flowers or the same shade, but pale. These paler ones can come in several shades. And, as a rule, there are more of them than bright ones.
- In addition to the “primary” colors, “background” colors may be required. Background flowers are smaller ones, which are also used to fill space when arranging bouquets.
- Need more greens. Partially it is available in artificial flowers, but leaves and greenery of a different shape may be required.
It will be cheaper if you buy not individual flowers, but ready-made compositions or bouquets. It's important that you like them. In this case, you will need to disassemble the compositions into separate fragments. If there are different colors, sort by color along the way.
There are two options for preparing flowers for creating a topiary. The first is to leave the longest legs so that you can then cut them off as needed. Take garden shears or wire cutters and nip off the stems close to where they join into the bush. The second option is to remove the flower heads before the first joint. Then insert toothpicks into them (coat them with glue). This option is good if you plan to make a compact crown.
Preparing flowers - it is convenient to use garden shears to trim the stems
In most cases, artificial flowers come with leaves. You can leave them like that, or you can remove them and use other greens. If you decide to leave the leaves, it is better to move them closer to the flower. The composition should be compact, with dense filling.
Crown assembly
To begin with, it is best to paint the ball green. This is if there is a lot of greenery. Acrylic paint is suitable - it applies well and dries quickly. Can be applied with a brush or small sponge. After the paint has dried, you can begin assembly.
Making topiary from artificial flowers
If you want to get a natural looking topiary crown, like a living bouquet, start by filling it with greenery. This will make it easier to understand where and how many colors to add. Do not strive for all elements to be the same length. The slight difference gives it a special charm.
Insert the brightest flowers first, then add background flowers and greenery. There are no rules, as you understand. Be guided by your ideas about beauty. If you don't like the result, you can remove some or all of it and try again. This is what is good about foam compositions - they can be remade several times. It's more difficult with glue.
We added blue and reduced the number of white flowers. The result is no worse))
For example, you see in the photo above two slightly different options. In one, only white ones were added to the main colors, in the second there are also small blue flowers. You can try adding pale pink or pale lilac. In general, experiment.
Base for topiary
Finding a large foam ball is not so easy, so the craftsmen found other options that will allow them to get the job done quickly and accurately. Here are several options for a topiary ball:
- Make a base from paper, water and glue. The technique is called papier mache. You can find instructions in the public domain.
- A small cardboard box can also replace it.
- A ball of thread stuffed with padding polyester.
- Polyurethane foam ball.
- Knitted threads pre-impregnated with glue.
There are a lot of ways to make a base; all that remains is to choose the most suitable option.
Topiary made from napkins
Making crafts from scrap materials is fun and easy. You can include children in the activity, since the creation uses safe devices that cannot harm the baby. Brief instructions for topiary made from napkins:
- First you need to take care of the foundation. How and from what it can be made was described above.
- Next, you need to find wooden skewers or sticks on which the finished flowers will be glued.
- Napkins - it is advisable to choose plain, bright and different colors.
- Glue, brush, tape may also come in handy.
The manufacturing method is simple; you need to make a large number of flowers from napkins. One option: fold each sheet into a triangle and roll it up. You will get roses, the ends of the paper are glued and dried. Next, each part is attached to a skewer, which is stuck into the base.
Topiary made of satin ribbons
Atlas is regularly used for crafts; it is an excellent material that is accessible to everyone. The process of making topiary, in this case, will be similar to the quilling technique. What should be done:
- The barrel is made from a clean and neat stick.
- Small details are created using the quilling technique. Each ribbon is carefully twisted into a flower; it is better to use double-sided tape to secure it.
- The parts are attached with glue to a stick, which is inserted into the base.
At the end, add other decorations if desired.
Wisteria beads
Wisteria is a very beautiful tree with flowers flowing to the ground and having a gradient color. Check out our tutorial on beading wisteria.
You will need a lot of beads (transparent, pink, light pink, white, purple, green), wire, plaster.
First you need to make flower clusters. We start weaving with a purple loop like this.
Then we’ll make a few more loops at equal distances.
Then you need to alternate beads to create a gradient effect in the future. The lower ends will be dark, and towards the top they will become lighter.
Then twist the two ends of the looped wire together and you will get one branch. Make several of these blanks; the more there are, the more magnificent your tree will be.
Related article: Crochet napkin with butterflies + diagram
Now let's weave the leaves. Take green beads in two shades and weave in a similar way as you see below.
Connect the branches from the leaf with the branches on which the flowers grow and intertwine the resulting branches with each other. Reinforce the trunk with a layer of wire.
Make a plaster tree stand using any mold.
All you have to do is decorate the stand and your beautiful tree is ready.
Corrugated paper topiary
Bouquets of flowers are often wrapped in similar paper. Therefore, after the holiday, it is recommended not to throw it away, but to use it for creative purposes. Instructions:
- Take a foam ball - this is the upper base.
- You need to prepare the pot in advance.
- Next, neat roses are made from paper and placed on the base using hot glue.
A wooden skewer or stick is used as support. Its characteristics will depend on the weight of the upper structure.
DIY crafts from physalis
Physalis is a common plant in the middle zone, which in the fall is decorated with bright scarlet flowers, inside of which yellow berries the size of cherries gradually ripen.
Despite their fragility, flowers are stored for quite a long time, so they are actively used for handmade and interior decoration. To create compositions and crafts from physalis with your own hands, you need to take care of collecting material in advance. There are no special requirements for this procedure - just cut off the flowers you like most from the bush, and then dry them in a dry, dark place in a vertical position.
What can be made from physalis?
Physalis or lanterns as they are often called are widely used in creating home decor items. Particularly popular are topiaries and wreaths made of physalis and other natural materials, as well as all kinds of garlands.
Crafts from physalis: Chinese lanterns, master class
To make a beautiful New Year's garland we will need:
- physalis flowers;
- scissors;
- glowing garland.
- We collect and dry physalis flowers.
- Using scissors, cut out the middle so that the flower itself remains intact.
- We put the prepared flowers on the garland.
- An unusual New Year's garland made from physalis is ready.
Autumn mobile made from physalis and natural materials
We are going with the baby for an autumn walk in order to collect the materials necessary for making crafts:
- physalis flowers;
- chestnuts;
- Pine cones;
- acorn caps;
- tree branches.
As auxiliary materials, we may need acrylic yarn for tying elements and small bells.
- We lay out the parts in front of us approximately in the order in which they will be located on the mobile.
- We tie them together using threads.
- A cute mobile made from natural materials is ready.
In addition to decorative items, physalis is often used to make decoctions and infusions, which are actively used in folk medicine. For this purpose, its fruits are mainly used, which are rich in organic acids, pectin, tannins and quercigin. It is believed that physalis can be used as a diuretic, as well as an analgesic and anti-inflammatory agent. It has also found its use in cooking - jams and compotes are made from physalis, and they are also consumed pickled and raw.
Candy topiary
This is a great way to surprise a work colleague or relative. Such a bouquet will definitely be remembered for a long time and will appear on all social networks of the birthday boy. Make the craft according to the following instructions:
- It is necessary to take any of the bases proposed above.
- Be especially careful when choosing a treat; regular long caramels are not suitable. It is necessary to take chocolate ones, decorated in a bright wrapper, preferably triangular in shape.
- Next, each candy is coated with hot glue on the bottom and placed on the base.
A beautiful pot is also used as a structure holder. Candy is heavy, so you need to fill the pot with something heavy, such as stones or sand, in advance.
Wedding topiary
The craft is in demand among future newlyweds. This is an ideal option for decorating holiday tables. Candies and napkins are not suitable in this case.
Experts recommend using high-quality artificial flowers to make your work look neat and expensive. For production you will need:
- Several reasons - it depends on the client’s request; they definitely use foam balls, they are more stable.
- Artificial flowers - purchased from a good supplier.
- Identical pots.
The manufacturing process is similar to the previous ones. To ensure that the flowers stick and can withstand the holiday, a hot glue gun is used.
It is advisable to do the work a day before the event.
We weave trees within frames
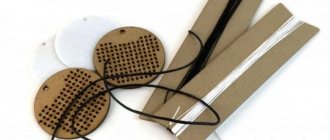
I love to weave: from beads, cords, threads. I found some frames in the bins without glass and a back wall and wanted to find a useful use for them, and at the same time weave them.
You will need:
- wooden frame;
- linen (jute, paper) twine or knitting threads;
- beads;
- PVA glue.
Tree with bare branches
Cut 15-20 threads from the twine (their number depends on the width of the frame). The length of each thread should be 4 frame heights.
1. Fold all the threads in half and hang them with a “lock” on the top crossbar of the frame (several threads can be hung on top of the side crossbars). Now on some threads you can put wooden beads that imitate fruits or leaves.
2. From all the threads up to half the height of the frame, braid braids - small branches of our tree. In this case, it is better to take the threads not in a row, but skipping 3-4 at a time, as if weaving chaotically.
3. Divide all the braids into three parts (again, not in a row, but letting them through 1-2) and braid thick tree branches from each part of the braid.
4. From three parts of threads, weave one braid - a tree trunk and temporarily tie all the bundles to the crossbars, leveling the composition by tensioning the threads.
5. Then, when all the bundles are secured, tie each bundle sequentially in this way: divide the threads in half, pass one part above the frame, and the other under the frame. Tie the paired threads with two knots on the wrong side, and secure the knot with PVA glue. At the bottom beam, cut the ends of the threads to a length of 3-5 cm, simulating roots, and at the side beams, cut off the excess ends.
Tree with crown
From the twine, cut an even number of threads, the folded length of which is 10 cm greater than the height of the frame. For example, for a frame measuring 15x21, the length of the thread is: 2x25 cm + 10 cm = 60 cm. In addition, you will need another thread, which should be three times longer than the previous ones.
1. Fold all the threads in half and hang them with a “lock” on the top crossbar of the frame. Hang the longest thread in the center, short ones on the sides (several threads can be hung on top of the side bars).
2. Gather all the short threads into a bundle and tie it with a piece of twine.
3. Lower this dressing down to the crossbar, pulling all the branch threads, and tie the bundle to the base.
4. Gather all the threads together slightly below the center of the frame and tie them with a long central thread.
5. Use the same thread to make a trunk, wrapping the bundle in tight turns, and fasten the trunk several times crosswise to the cross.
6. All that remains is to arrange the crown. To do this, weave different ribbons (you can knitting threads, strips of fabric, cords) between the branches in a checkerboard pattern, imagining their size, color and texture. Now you can decorate the tree as you wish (with beads, flowers).
So the frames came in handy, and we got pleasure from creativity! You can decorate the walls of your home with such impromptu paintings, and they will look perfect in your dacha. And if at school each student fantasizes his own tree, then the result will be a fairy-tale forest!
Topiary “Money Tree”
A pleasant activity for those who want to add a little symbolism to the interior of their home or give an unusual gift. You can use both real and counterfeit money, which can be purchased at any joke store. Master class on making a money tree:
- Take a base - you can quickly make it from polyurethane foam.
- Next, each bill is twisted into a flower or tube.
- Double-sided tape is used for fastening, especially if the money is real. If glued, a person will not be able to use them in the future.
The design is placed on a small pot, which is stylishly decorated with additional elements or simply a wish.
DIY dollar or money tree
If ordinary topiaries are called the tree of happiness, then crafts with banknotes are called money trees. How much they help you get rich is unknown, but they can look good.
For inspiration: money tree made from bills, coins
As in any other case, you can use a variety of banknotes or their analogues. The only difference from the previous options is that everything is glued. It is better to use a glue gun for this. Why? It's simple. It fixes instantly, but it is also easy to remove everything, remove the glue and re-glue it.
When using a glue gun, the foam ball must be painted, otherwise it will melt. It is better to use acrylic paint - it applies well and dries quickly. It makes no sense to achieve a uniform color, but you cannot leave unpainted areas.
You can make such a tree from real coins. But the crown will turn out to be heavy, so you will definitely need to fill the base with cement. Not even alabaster or plaster, but cement, because it is heavier. To avoid weight problems, we can use chocolate coin wrappers. Similar in appearance, minimal weight.
Topiary made from chocolate coin wrappers allows you to make the crown of the coin tree not very heavy
It is better to paint the foam ball. The color matches the selected “currency”. In this case, yellow or gold is more suitable. We start gluing coins onto the ball from the top. There is one coin in the center, four more around it. Then - layer by layer, closely or, better, with a slight overlap of one coin over another. In the form of scales. Let the crown dry and begin decorating the base.
Decorating the base of a topiary in the style of St. Patrick
Since the top turned out to be light, we can use a regular pot. This money tree is dedicated to St. Patrick's Day, so we use the traditional green color. Add some glitter and make a buckle out of a piece of paper with white glitter. Using black electrical tape we will draw a belt. Fast and easy. All that remains is to insert and secure the stick with glue and place the crown on it.
Topiary made of pine cones
After a walk in the forest, many people bring home a large number of real Christmas tree decorations. Children's competitions are often limited to ordinary crafts that everyone gets bored with. There is a solution, you can learn how to make topiary from cones. Instructions:
- For work, it is better to collect small cones of the same size.
- For the base, take a dense foam ball.
- Next, each cone is glued using PVA glue.
The teacher and judges will definitely like this hedgehog.
Trying to create a mystical Euwa tree with a job description
In James Cameroon's film Avatar, we all saw a beautiful tree that grants wishes - the Eiwa tree. It is made from purple-lilac beads.
This is how it will look at the end of our work.
For such a tree you need a lot of beads in purple-lilac shades.
Now we need to string the beads onto a long thin wire.
After this, we proceed to making the tree frame. We twist it from 12 pieces of thick wire, plaster the barrel with a solution of gypsum and PVA and dry it.
As soon as our trunk is dry, we will put our beaded threads on it.
When everything is ready, the tree will look like this.
You can use LEDs for lighting.
Our magical eiwa tree is ready. You can make your wishes.
To strengthen the skills of making trees from beads, we will make a blooming apple tree.
Autumn topiary
Everyone at least once in childhood collected a bouquet of autumn leaves. Variegated colors filled the houses and pages of books. Now there is another way to brighten up an autumn evening and fill your apartment with a pleasant smell. Master Class:
- The leaves and autumn flowers are quite light, so you can take any option suggested above as a basis.
- It is better to collect different leaves so that the bouquet looks bright and unusual.
- Each branch is carefully stuck into a round base.
There is a drawback, such a craft will not last long. However, this option can be used as a holiday table decoration. How to make a frame for a topiary - use plaster or sand.
The flight of fancy is unlimited
All the beauty of summer lies in the bright colors of fruits, and topiaries, collected with your own hands taking into account pleasant associations and preferences from a wide variety of components, will be a positive note in any interior if they are made taking into account the color scheme of the room.
The color scheme can be decided in warm colors, using the color features of fruit shades. Red apples or pears with a red side, oranges and pomegranates, figs and dogwoods, strawberries and cranberries.
It can be green with grapes, apples, lime, kiwi and feijoa or purple with grapes, plums, blackberries and honeysuckle. A variant of a variegated multi-colored composition with green leaves, smoothly transitioning from shade to shade is possible, it can also be sunny yellow - everything is in the hands of a creator and dreamer who is working on creating a topiary.
To create a tree of happiness with your own hands, a master class is needed only for the first time in order to understand how and with the help of what means of fastening and decorative components the process takes place. A master class is needed here to share the beauty created with your own hands and the whimsical imagination that inspired it.
After all, the choice of the form of the composition and its decorative elements for your own tree of happiness, or topiary prepared as an unforgettable and wonderful gift, always remains the personal choice of the master. The variety of beautiful things around us is just an additional incentive to use them in creating perfect and soul-pleasing works of art.
And if this is your own work, made with your own hands, and also a talisman for yourself or as a gift, the pleasure of making it will be especially pleasant.
Felt topiary
A large number of toys and useful household items are made from this material. Therefore, if there is some free felt left in the house, you can make a cute gift in a pot. Peculiarities:
- Flowers play a key role. Making them is not so easy, since the felt is not so voluminous. The equipment can be found in the public domain.
- Each flower should be attached to a round base using hot glue. The tape will not support the weight of the material.
To make the decor item look neat and unusual, you should add a little greenery. Leaves are also cut using scissors.
Autumn topiary from leaves and fruits
You can make an autumn topiary from artificial leaves, twigs with berries and fruits. Artificial leaves can be found in the same stores that sell artificial flowers. You can search in stores for decorators. You can also find something in construction supermarkets. There are usually departments for home decoration products.
Insert the leaves into the colored ball
The preparation of the material is similar. You trim some things, move others closer. The difference is that it is better to paint the ball brown. And so that it dries normally, put it on a skewer, and insert it into a piece of foam, for example. Don't forget to make a hole to install the barrel. And, when decorating the crown, keep it pointing down.
We begin to form the crown. Add red and yellow leaves and distribute them over the entire surface. Then comes the turn of the flowers. These can be any autumn flowers.
Autumn topiary plays with red and yellow colors
Then add some greenery, twigs with colored berries, and pine cones. You can add acorns, nuts, sprigs of pine needles, thuja. In general, whatever you consider necessary. It is important that you like the result. But do not overdo it with various details, as this forces you to look at the composition for a long time, which interferes with perception.
Shell topiary
A similar technique was used in ancient Rome, only instead of improvised objects and materials, it was used to maintain areas of palaces.
Gardeners did this, cutting various shapes from bushes. Therefore, topiary is not just a round decoration, but a whole art where there are no boundaries. Manufacturing Features:
- You won't be able to find shells that are the same size. Therefore, for the base you need to make a foam plastic figure of any shape.
- To make the process easier, small shells are taken from which patterns can be made.
- Many craftsmen use squares and triangles onto which elements are glued.
It is not recommended to work with children, as shell fragments can injure their hands.
To create a tree from beads we will need the following materials:
- pearl beads of different sizes
- White beads No. 10
- Wire thin and thick
- sequin leaves
- scissors
- nippers and pliers
- Coins
- stone
- floral tape
- masking tape
- acrylic bronze paint
- brown acrylic paint
- acrylic lacquer
- gold glitter
- birch wood slices
The first thing you need to do is draw a diagram of the future tree. We have 10 branches in total, the photo shows how they will be located. All branches are made of beads, and some have no beads (in the picture the designation is without beads). There are also symbols on the tree in the form of letters - I marked these where there will be photos of people - after all, we also have a Family Tree.
Coffee topiary
This option will definitely appeal to coffee lovers. The peculiarity is a pleasant smell throughout the room. It is unlikely that it will be possible to make coffee from such beans in the future, but the master will definitely receive positive emotions from the process. How to make topiary from coffee beans with your own hands:
- It is better to make an original table decoration on a foam base. In this case, the coffee ball will look beautiful from an aesthetic point of view.
- Each grain is glued using PVA glue.
- Next, the ball is placed on a skewer and into the pot.
The weight of the product is large, so the pot must first be filled with a putty solution.
Satin ribbon product
Topiary made from satin ribbons will be an excellent gift for loved ones and relatives. It looks gentle and luxurious and will fit perfectly into almost every interior.
Materials to make topiary from satin ribbons:
- Satin ribbons. It is recommended to prepare them in two different shades, the preferred width is 2.5 cm.
- Green fabric for decorating leaves. You can also use satin ribbon.
- Cup.
- Silver fabric for making balls.
- The tape is white, its width should be 1 cm.
- Sequins, beads and sequins.
- Tennis ball.
DIY topiary for beginners, instructions:
- For the first stage of work, you will need to prepare a tennis ball and make a small hole in it.
- Insert a dry wooden stick into the hole , the tip of which will be pre-lubricated with glue.
- You need to add alabaster and a little water to the glass. Mix the mixture thoroughly to obtain a mass of homogeneous composition.
- Next, insert the trunk of the future tree into the middle of the glass , wait until it hardens completely. At the same time, support the tree, otherwise it will lean to one side.
- Next step - making roses from satin ribbons. For this work you will need to fold the ribbon in the shape of a triangle and then twist it.
- You need to twist until a small piece remains. It needs to be folded to the base of the resulting rose and carefully sewn.
- It is impossible to count the number of roses needed for the job. In this case, it is worth taking into account the volume of the crown surface and the location of the roses on it.
- You can sew leaves on some roses. Take a square of satin ribbon, fold it into a triangle near the base, sew it with a seam, and tighten it.
- Now let's move on to making balls. You need to cut a square out of white tape, fill each of them with padding poly, and wrap them with thread. You need to make about twelve balls.
- At the next stage it is necessary choose the arrangement of roses. They can be attached to a tennis ball using decorative needles. After choosing the location of the balls and roses, you can glue them.
This is where you make your own topiary, and our step-by-step instructions end, but you even need to pay attention to the design of the pot .
To decorate it, you need to pierce holes in it, located at the same distance from each other. The distance from the edge line should be 2 cm.
Next, cut out a circle from silver fabric whose area exceeds the surface area of the pot. It needs to be put on the potty and attached using threads. They need to be passed through holes pierced in advance.
And the final stage of how to make topiary with your own hands for beginners is decorating the pot with sequins. Then he will look gentle and attractive.
Video master class on topiary made from satin ribbons:
Topiary made of satin ribbons. Master Class. Step by step
New Year's topiary
This work is done with children, there are no dangerous elements. Instructions:
- You need to find fir cones.
- You can complement the composition with balloons or candies.
- A ball of polyurethane foam is used as a base. Usually, this material remains after repairs and is not difficult to find.
Next, each branch is carefully stuck into the base. After which, it is placed on a strong stick and placed in a pot filled with a heavy solution. Fasteners are definitely needed, as it will harden for about a day. Next, the work is decorated with Christmas tree decorations.
