We sew a butterfly costume with painted wings from fabric
It is best to use a black gymnastic leotard (bodysuit) as the basis for the costume. If you don't have one, other dark clothing, such as a dress, will do. If desired, the bodysuit can be complemented with a black tulle petticoat. The most time-consuming, but also fascinating process is creating wings.
Materials
| Size | Material | Quantity | Price |
| 92 (2 years) | Lining fabric | 150 * 140 cm | From 180 rub. |
| Bias tape | 16 m | From 80 rub. | |
| Water-based paint and colors (yellow, orange) | From 200 rub. | ||
| Biflex | 150 * 20 cm | From 70 rub. | |
| Braid with loops | 80 cm | From 25 rub. | |
| Satin ribbon 7 mm | 4 m | From 15 rub. | |
| Sequins on a thread | 2 m | From 40 rub. | |
| Wire | 1m | – | |
| Total: 610 rub. | |||
| 104 (4 years) | Lining fabric | 150 * 160 cm | From 200 rub. |
| Bias tape | 19 m | From 95 rub. | |
| Water-based paint and colors (yellow, orange) | From 200 rub. | ||
| Biflex | 150 * 25 cm | From 85 rub. | |
| Braid with loops | 1m | From 35 rub. | |
| Satin ribbon 7 mm | 4 m | From 15 rub. | |
| Sequins on a thread | 2 m | From 40 rub. | |
| Wire | 1m | – | |
| Total: 670 rub. | |||
| 116 (6 years) | Lining fabric | 150 * 180 cm | From 220 rub. |
| Bias tape | 23 m | From 115 rub. | |
| Water-based paint and colors (yellow, orange) | From 200 rub. | ||
| Biflex | 150 * 30 cm | From 100 rub. | |
| Braid with loops | 120 cm | From 45 rub. | |
| Satin ribbon 7 mm | 4 m | From 15 rub. | |
| Sequins on a thread | 2 m | From 40 rub. | |
| Wire | 1m | – | |
| Total: 735 rub. |
Consistent action plan
Wings:
- Spread your wings.
- Drawing.
- Edge processing.
- Wing assembly.
- Attaching to clothing.
Boots:
- Open it up.
- Heel cutout.
- Edge processing.
- Sewing on braid, lacing.
Mustache:
- Making antennae from wire.
- Antennae wrapping.
- Attaching to hairstyle.
Complexity
Making such a costume is not the easiest task. It will take some skill and patience. But the image will definitely delight the child and surprise those around him.
Video instruction
Butterfly costume Collapse1Cutting the wings (00:06)2Chalk drawing (00:15)3Thinning the paint (00:18)4Applying the first layer of paint (00:24)5Drying (00:36)6Applying the second layer of paint (01:07)7Treating the wings with bias tape (01:25)8Draping the wings (01:36)9Attaching the wings to the ribbon belt (01:47)10Sequin trim (02:10)11Draping the top wing (02:22)12Sewing the wings to the body (02:28)13Sewing the boots ( 02:32)14 Finishing the edge (02:57)15Sewing on the braid under the lacing (03:05)16Bending the antennae (03:21)17Wrapping the antennae (03:30)18Hairstyle (03:48)
Terms
- Biflex is a synthetic knitted fabric.
- Drapery is the arrangement of fabric in which it forms many folds.
- Bias tape is a narrow strip of fabric used to finish the edge.
Step-by-step instructions for making a costume
Wings:
- Cut irregularly shaped wings from the lining fabric (see diagram below), determine the length of the wings based on the child’s height, taking into account that they are attached just above waist level. Make some of the wings longer, some shorter, the width of each part is about 50 cm. There should be 9 parts in total.
- Use chalk to draw the outline of the design onto the fabric (you can use the color of any real butterfly as a sample). Using black fabric, yellow, white and orange paints you will get the Monarch butterfly like in the video. But you can create any other butterfly or your own.
- Paint the pattern on the wings, dry and apply a second coat of paint to keep the colors rich.
- Finish the edges of the wings with bias tape.
- Drape each wing (except the top one), making large folds along the straight side. Stitch to secure the drapery.
- Sew the wings onto the ribbon belt.
- Cover the top wing with sequins, drape in the center and stitch.
- Sew a belt with wings to the gymnastics bodysuit above the waist, arrange the wings in two layers, the longest of them should be at the back. Sew the top wing in the center of the back.
Boots:
- Cut out two rectangles from supplex. To determine the length of the part, measure the child’s leg from foot to knee, the width is 2/3 of the circumference of the shin.
- On the short side of the part, make a semicircular cutout for the heel and sew it into a ring, process the cuts.
- Sew braid with lacing loops along the long sides. Lace up your boots with ribbon.
Pattern of wings and boots Mustache:
- Bend the wire into a "P" shape. Twist two rings in the corners and bend them perpendicular to the antennae.
- Cut the supplex into strips 2–3 cm wide, wrap the antennae, and leave two long free ends at the bases for fixing in the hairstyle.
- Curl the ends of your mustache forward.
- Make two ponytails on the top of your head, put antennae rings on them, and secure with ties. Curl the hair around the base of the antennae. The hairstyle is ready.
Equipment:
Size
The costume according to this description is suitable for children up to 6–7 years old. But such an elegant look can also be chosen for older girls. The material consumption in the table is given for wing lengths from 50 to 70 cm. For every 10 cm increase in length, you will need 30 cm more of the main fabric.
DIY angel wings from isolon, step by step with photos
- Traditionally, you first need to come up with the shape of the wings. Once you decide, immediately form the appropriate frame from copper wire. Keep in mind that its size must be smaller than the finished wings so that the wire is not visible in the end.
- We glue a piece of isolon onto the resulting frame - this is a lining that goes under the linoleum. It is strong enough, the wings will be large, and it will be convenient to continue gluing or sewing on them pieces of tulle and feathers from the same isolon.
- It is better to glue isolon feathers using a heat gun. You need to prepare as many of them as possible, and the feathers must be of different sizes. The largest ones are attached to the bottom of the frame, and then they decrease in size as you get closer to the top.
- It is still better to trim the upper part with pieces of white boa. Finding it is not a problem, because it is sold in any sewing store with accessories and fabrics.
- Use wooden hangers as fastenings. They are tied with ribbons to the frame of the wings and with the same ribbons they are tied to the child’s shoulders. You can also use elastic bands instead of ribbons. The choice should depend on what your child will do in these wings. If he just needs to come out and recite a poem, then ribbons are enough. If the child will dance and jump in the wings, then it is better to attach elastic bands.
Choosing an outfit
The main clothes for a costume can also be different: from a simple dress to an original jumpsuit.
It is not necessary to sew a dress specifically for the holiday. You can take what the girl already has if it matches the color scheme. The most common colors for this outfit are pink, soft green, blue and other pastel shades.
IMPORTANT! It is important to know here that butterflies are diurnal and nocturnal, and their color depends on their belonging to a certain type. Talk to your child and discuss what color she likes best, show a video of real butterflies. Surely, she will quickly decide, and will wear the finished suit with pleasure.
Skirt and body
An excellent option would be a combination of a bodysuit and a skirt. You can take an old unnecessary swimsuit as a basis, and also sew a perky fluttering skirt from light fabric. It is extremely easy to sew, you just need a pattern, a little fabric and time.
In such a costume, the girl will feel confident and free, no matter what she has to do at the holiday.
Overalls
This is an even more convenient option. A one-piece suit always looks interesting and original.
Sewing a jumpsuit is not difficult for anyone who is familiar with basic sewing skills. It is important to decorate it with some details so that the jumpsuit does not look too simple and boring. Of course, in the case of a butterfly, you can’t do without recognizable accessories, but still you shouldn’t deprive the girl of the pleasure of looking bright and stylish.
Templates and materials
Such a beautiful detail of the image of an angel can be made from all kinds of available materials. The base for them is most often made of cardboard. The cardboard is then decorated with materials that look like feathers. Elastic bands are attached to the back of the wings to make it easy to put on the shoulders.
Another base option is a rigid wire frame. It is bent into the desired shape and covered with elastic fabric. Then the base is also decorated.
By using your imagination, you can come up with an original decor for the base. The main thing is that the weight of such wings is not too heavy.
Templates can be simple in shape. The main emphasis is on the feathers themselves.
Or a multilayer openwork template is cut out, the shape of which looks like almost finished wings.
The most natural decoration is, of course, feathers. You can buy a boa and glue feathers from it to the template.
In feather pillows, you can choose light feathers, grease the template with glue and pour feathers onto it. They will stick well and quickly.
You can also ask people who keep pigeons, but they are unlikely to have the required number.
Therefore, they make imitation feathers from satin fabric, paper, tracing paper, cardboard, fabric ruffles, napkins and other available materials.
Feather wings
Let's create a classic version of feather wings for an angel costume. These wings are perfect for a small child.
To make wings, you need to prepare plastic, a piece of chintz, transparent glue, feathers, and elastic bands.
Cut out a wing template from plastic binders. We glue chintz, also cut according to the template, onto the plastic. You can make a frame from wire and glue chintz parts onto it. The effect will be the same. We make two holes at the base and insert elastic bands. Before making holes, you need to attach the wings to the back and mark the location of the holes.
- We cover the edges of the wings with feathers so that the wire frame is not visible.
- We sort the feathers by length and glue them in rows from bottom to top, from long to short.
- We cover the edges at the top with down feathers.
- The results are very realistic wings.
Making from fabric
Wonderful wings are made from fabric ruffles.
Let's prepare cardboard, paper for gluing the back side of the wings, elastic bands for fastening, glue and circles of fabric, tape for connecting the wings.
- Cut out a template from cardboard.
- Using the template, we cut out the parts from paper with a margin around the edge.
Cover the cardboard with paper. We make holes and insert elastic bands.
- We take circles of fabric in the center to form soft, uniform folds.
- Starting from the bottom, glue the fabric to the cardboard base.
- The result is fluffy wings.
- We fasten them with ribbon, and the fabric angel wings are ready.
Another master class on fabric wings. Light and airy wings are made from organza.
To make them you will need rigid wire, nylon or tulle, organza, scissors, thread, and a needle.
The frame is made from wire.
The frame is covered with tulle or nylon mesh. We fasten the parts with wire, which we also glue. We put wide elastic bands on the connection that will be worn on the shoulders.
Strips are cut from organza, and fringe is cut from one edge. The strip is folded and sewn to the frame, starting from the bottom.
The result is delicate airy wings.
Paper product
- Huge angel wings can be decorated with paper feathers.
To work, we need to prepare simple cardboard for the base, paper, nightlights, glue and elastic bands.
- The template is cut out to the desired size and transferred to thick cardboard.
- The diagram shows the principle of gluing feathers of different sizes.
- We cut out a lot of feathers and bend them lengthwise.
- Glue the feathers in rows.
We make two holes on each wing. We insert an elastic band into them. We mask the holes with feathers.
We fasten the wings. We also mask the junction.
- When finished they will look like this.
Napkin wings
Angel wings decorated with napkins are tender and airy.
To create them you need ceiling tiles. It can be replaced with cardboard covered with paper. We will also prepare white napkins, scissors, an awl, elastic bands, and glue.
We cut out the wings according to the template. We make holes in them for attaching rubber bands.
- We thread elastic bands through the holes.
Fold white napkins like an accordion. Cut out the feather.
- We unfold the napkin and get several feathers.
- Glue the feathers from bottom to top, overlapping the top row with the bottom.
After all the feathers are glued, the tips of the feathers are slightly deformed. We do it carefully so as not to damage them. This will give the wings a natural look.
You get such wonderful fluffy angel wings.
Video on the topic of the article
- In this selection of videos you can get inspiration and learn how to make angel wings in different ways.
Source: https://DekorMyHome.ru/rukodelie/krylia-angela-svoimi-rykami-dlia-kostuma-master-klass-s-video.html
How to sew?
This version of the costume is for children 2-3 years old. It consists of a bodysuit, a tutu skirt and a headband.
For the bodysuit you need: costume fabric, example bodysuit and tulle for decoration.
For a tutu skirt: elastic - it could be a headband, pieces of tulle, jewelry.
- The size of the elastic is the same mesh as in the photo, its size is equal to the child’s waist circumference. We will tie tulle into these holes.
- Cut the tulle into strips measuring 50 by 12 cm diagonally and put the elastic band on a chair or toy.
- We tie white tulle into the bottom row, cut it 15 cm wide for the top layer and tie it into the windows above.
- How to tie: fold the cut strip in half and form a loop, thread this loop through the window and carefully pull it through, then thread the ends through this window. You should get a secured knot that does not come undone.
Corrugated paper butterfly
Light butterflies on skewers are suitable for children's games, decorating dishes or drinks. To do this, cut out a piece made from a rhombus with a side of 8 cm and a circle with a diameter of 5 cm. Fold both halves towards the middle, pull them together with wire, straighten the wings and glue the butterfly onto a skewer using a glue gun.
Photo: houswatcheses.ru
: First testing of dyes
Sometimes it takes several attempts to create your perfect wings. It is necessary to choose the best shade by mixing the dye in different proportions. It’s better to experiment with contours and patterns on one piece of fabric and choose the best option for your suit.
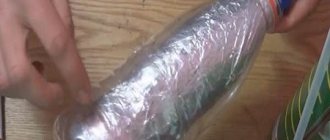
: Wet cloth control
When the fabric gets wet, it may sag. Do not increase the tension, as this may lead to ruptures. Loss of elasticity leads to dye runs. You can use them to create a pattern on the wings. If the process cannot be stopped, you need to lead it! The main thing is not to forget to dodge the drops of paint flowing down right on you.
How to make angel wings at home???? master class, patterns
- home
- We sew ourselves
- How to make angel wings at home???? master class, patterns
There are a huge number of video master classes on the Internet on how to make large or small angel wings for a girl out of paper, cardboard and other improvised things.
Naturally, there are a lot of such master classes, and we will share only a few of them.
Master class on making wings for an angel costume
It’s very easy to make these wings with your own hands . The materials for their manufacture may be different. The frame for them can be made on the basis of wire, between which fabric will be stretched or cardboard (paper) glued.
In the simplest version, they are cut out of paper or cardboard. Next we proceed like this:
- glue both pieces together;
- we cover them with newspapers or covered notebooks over the entire area;
- If desired, cover the paper or cardboard with fabric;
- take napkins or coffee or tea filters and fold them in several layers;
- We glue them on the wings in rows one at a time, gluing one on top of the other so that there are no “empty” areas left.” Lubricate the wing sections with glue, moisten the folded filters or napkins and stick them on. There can be two such layers of “feathers”.
Finally, to attach the paper wings to the angel costume, glue Velcro to the wire. You can try it on.
In other master classes on making angel wings from cardboard or paper, they are suggested to be fastened with a wide elastic band. You also need to make straps for the arms .
A hole is made in the base, then the elastic band is secured on both sides, and the fastening site is masked with feathers from filters or napkins.
When you make the straps, do not forget to first calculate their width and height.
Gallery: DIY angel wings (25 photos)
How to make wings for a costume with your own hands: master class No. 2
Naturally, you can make wings for an angel costume with your own hands in different ways, and doing it from paper and cardboard is the easiest way. But for a morning party in the garden this will be enough. But for a theater or a professional photo shoot you will need something more serious, and you may need the help of a professional.
But now we will take a look at another master class on making angel wings from paper and cardboard.
For this option, prepare:
- white paper;
- cardboard;
- scissors;
- white napkins;
- elastic band;
- stapler or needle and thread;
- PVA glue);
- artificial feathers;
- padding polyester;
- accessories for decorating wings.
Let's get started:
- think over the layout, what shape and size the wings will be. Don't overdo it so you don't end up with butterfly wings instead of angel wings. Cut them out of cardboard and cover them with white paper. Let dry under pressure;
- We try on the wings on a child or ourselves to find out the location of the elastic bands. The distance between them should correspond to the width of the back. We sew elastic bands onto the wings like on a backpack. You can attach it with a stapler. Cover the places of fastening or sewing with white paper;
- decorate the wings. We have discussed the option of decorating with napkins below. Another option is a decoration made of padding polyester. It can be purchased inexpensively at a fabric store. We cover the wings with padding polyester, preferably in two layers. If you want the wings to be fluffy and stylish, then the padding polyester needs to be cut with an allowance at the edges of about 5 centimeters. Glue it onto cardboard and only then cut it out.
What is not recommended is to use real pillow feathers for decoration, as the wings will look very ugly and old .
Another decoration option is to use a white boa. This will make the angel's wings look more original. First we cover them with paper, then with synthetic padding, and sew boa feathers along the edge of the wings.
Third master class on making angel wings with your own hands
This master class will show you how to make large angel wings for a costume with your own hands. The rest of it can be a long T-shirt or nightgown. But the wings will need to be made from scrap materials.
To work you will need the following:
- paper or transparent cover for binding (this is a stronger material);
- copper wire with a diameter of 3 mm;
- pattern of large wings made on a sheet of paper;
- piece of calico;
- glue "Moment-crystal"
- duck or goose feathers;
- white Velcro 5 cm long;
- down boa measuring 1.8 m.
Now we offer an algorithm for making wings according to this master class:
- take the wire and bend it in the shape of angel wings;
- We cut out two wings from a transparent paper cover, based on the shape of the wire, make an allowance and then glue the cover to our wire blank;
- We cut out four similar blanks from chintz, providing for the back and front sides. Remember that in this case these concepts are conditional, since the wings will be the same on both sides;
- We glue the transparent blank with chintz, then apply glue around the perimeter so that later there will be no problems with gluing the feathers;
- then we cover the perimeter of our craft with down feathers in one layer so that the wire is not visible;
- After that, we sort the tail feathers by size. The product must be fastened from the bottom up, you should start with the largest ones and end with the smallest ones;
- We fasten the first row at the bottom. To do this, lightly grease the tip of the feather with glue and insert it under the chintz, then glue it along the feather;
- similarly glue the next two rows of feathers, which will be smaller;
- on the other side of the product we do the same;
- glue two rows of small down feathers so that the ends of the large ones are hidden under them;
- We glue particles of the down boa to the places that remain empty and comb it in the required direction. Our accessory for the angel costume is ready. You can try it on.
Down feathers can be replaced with goose feathers, if possible. But they will cost more.
An angel costume with appropriate accessories will not only be relevant for children at themed events in kindergarten or school, but also for adults who want to take part in an original photo shoot.
Moreover, you can find a huge number of themes for it on the Internet, or you can use the photographer’s imagination and realize some of your original ideas. In the same way you can make bird wings, folded wings.
Other types of sewing
Loading…
Source: https://1igolka.com/shem-sami/master-klassyi-kak-sdelat-kryilya-angela-svoimi-rukami
How to make a butterfly from “gelatinized” material with your own hands
Butterfly made of gelatin fabric. In this case, first of all you need to make a “gelatin” fabric, for this: 1 tsp. pour gelatin with cold water (1/4 cup) and let it brew for 30-40 minutes. Then (when the gelatin swells) place the container with gelatin in a steam bath and add another 1/4 cup of water. Bring the solution until the lumps are completely dissolved. Soak a cloth in it and hang it to dry without wrung out. In addition, you will need: a bun - a knife (butter knife), crepe paper, wire, glue. Additional elements are up to you: for the antennae you can use a hairpin, wire, or make them from fishing line with beads, make the body from beads, etc.
The process is quite simple:
- Make wing templates out of paper, transfer them to fabric and cut them out.
- Next, you need to process the fabric: the knife needs to be heated, directly in the flame on a gas stove (about 10 seconds). Then, before you start working on the wings, check on an unwanted piece of fabric to see if the knife is melting the fabric and start processing. We process the fabric from the inside out, hold the knife at an angle of 45 degrees and at a distance of 2-3 mm from the edge, walk along all the edges and make veins (photo No. 2 shows the grain and the knife).
- We coat a piece of wire with glue and wrap it in a spiral with crepe paper as shown in photo No. 3 (these are the so-called “letons/litons”). We make 4 of these litons.
- We glue one leton on each wing (in the veins).
- We make the mustache and body - everything here depends solely on your imagination. Photo No. 5 shows a version of the antennae twisted from a hairpin (on a knitting needle), painted on top with gold paint. And the body is woven according to a pattern of beads. Glue the antennae to the finished body. We twist the wires of the upper and lower wings together first, then we intertwine all 4 wires together, cutting off the excess.
- Using silicone glue we glue the body.
In a similar way (using hot tools) you can make a multi-layered/voluminous butterfly: for example, use satin for the outer wings, and a veil for the inner wings (by the way, in this case there is no need to “gelatinize” the fabric).
As a result, you need to cut out 2 large and two small wings from the satin (we cut holes in them). For the lower layers of the wings, cut out 4 large and 4 small pieces from the veil (no holes are needed for them).
We process them as shown in the diagram presented above in the upper right corner, glue letons to them, and let them dry. We make a body with antennae and assemble a butterfly.
Origami butterfly made of thick paper
This scheme is partially similar to the first one, but there are nuances that will help you make a more expressive workpiece. Heavy packing paper or even old bags work well. Mark the axes, fold the triangle and lift the corners of the top layer to the top. This is one of the basic blanks for completely different figures, so remember it for the future.
Twist the workpiece, lift the top and straighten it into peculiar polygons. Bend the sharp corner with an accordion, and then, if you want, glue antennae from fishing line to this head. Fold the part and bend the wings in different directions.
Photo: jewswar.com
How to make a paper rocket: 10 step-by-step diagrams
From fabric
Fabric butterflies look original in the interior. Absolutely any fabric that can be found in the house is suitable for their manufacture. There is no need to specially purchase material. Multi-colored and plain shreds can be used. Moths made from them look very interesting.
To avoid fraying the edges of the fabric, the material should be prepared for work. It is kept in a solution based on PVA glue and water, and then dried. At the same time, the shreds will become stiffer and will hold the created shape well. In the future, a kind of pattern is used. It is applied to the canvas and cut out. To make the figure more magnificent, it is additionally recommended to cut out one more element, but a smaller one. Thus, the design will be two-layer.
The origami technique can also be used. In this case, a pair of identical scraps are cut out of the fabric, which are sewn together along the perimeter. It is recommended to give preference to different textures and colors. Due to this, the moth will acquire a more original appearance. The scrap is folded in the same way as in the case of paper. The only difference is that at each stage the figure is ironed.
When using the origami technique, it is not at all necessary to soak the fabric in the glue solution. It is extremely important that the scraps remain pliable. To prevent them from fraying, in this case it is recommended to trim the edges at the time of stitching the two elements. Lace or tulle can be used as decoration. In this way, you can create a chandelier with butterflies with your own hands. Moths will also look great on walls and curtains.
DIY angel wings made of paper, detail
- Prepare a pattern for future angel wings and use it to cut out the product from white cardboard. To make the wings look beautiful, cover them with plain white paper of the same shape as the wings you chose.
- Be sure to place the wings under the press after the paper sizing stage so that the product does not deform during the chemical reactions that will occur when the glue begins to dry.
- After this we glue the elastic band to the wings. You must choose the length of each elastic band individually, taking measurements based on your child. Glue this important element using a hot-melt gun so that the wings do not fall off the elastic during the holiday, and your child is not left without an elegant costume.
- Buy a pack of white napkins and then glue each napkin to the wings, allowing one corner to float freely with the wind. This technique will help you give your wings volume and realism.
Napkins, of course, are not the most practical material because they are fragile. Instead, mothers often use padding polyester. It looks much better and stays on the wings more securely. Its cost is not so high as to save on the quality of a costume for a child.
Fastening crafts to curtains
Usually, for curtains with butterflies, pins are purchased - yellow or metallic - they should not be visible from the inside. Thick fasteners leave holes in the canvas. And since periodically the curtains will have to be removed for washing, the fixation points will change. As a result, the entire curtain will become “in a hole.” Therefore, very thin pins are used even on large structures or attached to curtains of a dense structure.
Other types of fastenings
Beautiful butterflies for curtains are attached to the canvas using Velcro. The pieces are sewn onto the fabricated models during construction. There is a drawback - Velcro tightens the curtain fabric. They are purchased for cotton and wool - there they will not do much harm. The mount should be selected according to the color of the fabric, otherwise they will be visible through the plastic and nylon wings, causing beauty to become sloppiness.
Crabs. Microscopic hair clips that form small braids when purchased in large quantities. To fix the butterfly decor for curtains, they are perfect. They do not leave any traces, except for wrinkles - the curtains need to be carefully ironed after washing. They are fixed to the body of the butterfly with ordinary threads, but in such a way that it is not difficult to open them.
Wire holders. You don’t need to buy special fasteners to sew a butterfly with your own hands, if you show your imagination and make it yourself in the form of insect legs. Several turns of wire are passed through the abdomen, which are then cut lengthwise, bent and, when fixed, fastened tightly to the tissue. There is a minus - if the wire is bent often, it breaks, but this is a fixable defect - the legs are made again, and when the child has played enough, the butterfly will rarely have to be removed. This decor is contraindicated for young children - up to one and a half years old. Small parts will cause them to get into the baby's respiratory tract.
Magnets. The fabric will remain flawless if you attach magnets to the curtains with butterflies - one part is glued to the craft, the second on the back side fixes it. When it’s time to remove the curtains for washing, they are simply detached. The parts are small, so you should carefully monitor them so as not to lose a single one.
That’s the whole solution to the question - how to make beautiful butterflies with your own hands and attach them to the curtains. The joint work of adults and children will become a treasure trove of ideas - children sometimes see beauty even in unusual things. It is worth giving them freedom of creativity and inexpensive decor for traditional curtains will allow them to become exclusive models.
Air tulle flight
Another way to make angel wings involves using tulle and... a hanger. To create a cherub costume you will need two wire clothes hangers, a piece of white tulle and thread.
Step-by-step master class:
- Hooks are cut off from hangers.
- The wire frame is unbent and wings are formed from it.
- The frame is applied to the tulle and outlined.
- The parts are covered with the resulting pieces of fabric, sewing their edges to the frame.
- Fasten the two halves together at the ends, securely fixing the wire. The joint can be sealed with adhesive tape.
- The rest of the tulle is cut into strips.
- The strips are sewn onto the fabric with several stitches, forming dense rows.
- Having filled the wing completely, shake the craft.
An angel costume is a classic for any New Year's party. And beautiful wings will allow their owner to become a real celebrity. You just need to be creative and be inspired.
Originally posted 2018-08-29 09:02:35.
How to make a butterfly from polymer clay with your own hands
If you try, the result will exceed all expectations. By the way, you don’t need any special skills: a little accuracy and concentration and you will get a very beautiful butterfly made of polymer clay.
So, to create it you will need:
- We decide on the silhouette - draw it on paper and cut out the templates (we need 4 wings).
- Take a small piece of clay and mix blue oil paint into it. From the resulting blue clay we tear off a piece the size of a pea (we put the rest of the clay in cling film greased with Vaseline so that the clay does not harden). Roll out a piece of clay into a thin layer in the palm of your hand.
- Next, we simply apply the wing template to this layer, press it tightly and immediately remove it (the outline should remain). We take scissors and carefully cut out the contour, place it again on the palm and thin it with a stack and roll out the edges. And we transfer the wing to some surface to add texture (in this case, a floral mold was used).
- We glue a thin wire to the textured wing using PVA glue and lay the wing to dry on an uneven surface, giving it a shape. We do the same step by step with the remaining 3 wings.
- Next you need to make a body: mix black oil paint into the remaining blue clay and mix thoroughly. Then we make an elongated “drop” from the resulting black clay. We form a head on it and use thread or wire to make longitudinal stripes. Leave the body to dry.
- While the body parts are drying, work on the antennae. Bend small loops on two pieces of wire and paint them with black acrylic paint. Give them time to dry too.
- Completely dried wings must be additionally painted. First, we tint the entire wing with white oil paint: you need to work with a wide, semi-dry brush (you don’t need to “paint over” the whole thing, you need to slightly emphasize the texture). Next, using black oil paint from the edge to the center, draw the veins and paint over the edges. We cut off the excess wire from the finished wings, (8) make punctures on the body and glue the wings with good super glue. Glue the antennae in the same way.
That's it, the polymer clay butterfly is ready!
You can change the color, and even the shape itself, make it double, with patterns, press beads into polymer clay that has not yet dried, decorate the finished butterfly with feathers, etc. - it all depends on your design idea. Go for it!
Handmade from disposable tableware
Even the most unusual materials can serve as the basis for angel wings. For example, disposable paper plates. Unused utensils left over from a picnic should not be thrown away.
Cardboard plates are the ideal material for paper wings. It’s interesting to make such a craft with your own hands, and creating it won’t take even an hour.
You will need the following materials:
- White cardboard plates;
- Hot glue;
- Scissors;
- Tape or rubber band for fastening.
One of the plates will serve as the basis for the craft. The rest of the dishes should be cut to form crescents. The plate halves are glued to the base starting from the top edge. Place the plates one on top of the other, imitating folded feathers.
These wings will be useful for a short performance in the theater or a small miniature at a school party. If you don’t want to make bulky feather wings for the sake of a one-minute performance, such a craft from plates will come in very handy.
Where is it used?
A light, airy butterfly costume is appropriate both for a party in kindergarten or elementary school, and for skits or fairy-tale productions at a theater studio or club. An integral attribute is bright, beautiful, weightless wings that attract the main attention. In addition to wings, the outfit must include a headdress (hat, hoop) with a mustache.
There are many variations of butterfly costumes. All of them have one common advantage - the outfit in question is a collection of individual parts, many of which can be further used in everyday life. The basis of the costume is a dress or short top with a fluffy tulle skirt, which will take up space in your everyday wardrobe, and a gymnastic leotard can be used for its intended purpose. A headband without antennae will also come in handy more than once.
Summary
It became clear how to make wings at home. There are many options for execution. You just have to choose what seems acceptable.
Although, there is a category of people who like to experiment. They are able to try a variety of variations, and ultimately develop their own “wing” concept.
And this approach is correct and justifies itself. You don’t have to worry that someone else will choose a similar costume at the holiday. This is the only way you, your child, will stand out from such angels, butterflies, and birds.
Tags
make butterfly wingsbutterfly wings templatesCardboard butterfly wingsCellophane butterfly wingsCellophane butterfly wingsHow to make wingsbe made as was made on Make two Make you want to make fancy ones around the hands.with one hand.With one hand hold with the other hand, bend for needlework.for hands you can with your own hands Crafts DIY DIY wings butterfly wings butterfly wings butterfly wings Butterfly wings from Butterflies areButterfly wings canbutterfly wings.butterfly wingsbutterfly wings.
butterfliesmasterarticlesclassescardboardframeso many
Beautiful butterfly
Let's try to make butterfly wings. First, buy a couple of brochure covers (they will be needed for the frame). Find stencils on the Internet, and if you have artistic skills, draw them yourself.
Now we need to cut out the wings. Bend copper wire according to their shape and glue the wing blanks on top of the frame. We cut out pieces of fabric that we glue to the frame. This must be done carefully so that the appearance is presentable.
Be sure to prepare down feathers (a pillow is suitable for this). Then glue feathers around the perimeter. It is important to track the direction of the pen here; it should be the same.