Want to see a piece of the galaxy on your ceiling? How to do this is described below.
I've been dreaming about doing this project for several years, and now it's finally ready. It took a fair amount of time to implement it, but the final result was so wonderful that it was worth it.
A little about the project itself. I tried to do everything with my own hands to the maximum, which gave me complete creative freedom. As a result, I have the constellations of the northern hemisphere, control over star clusters using the remote control (brightness and color), response to music, backlight control, and, most importantly, the ability to change anything. I chose Arduino as the platform for all this because I am familiar with its programming. The MSGEQ7 chip was responsible for responding to music; the Internet is full of its descriptions. For communication, I used an NRF24L01 I had lying around. The PCA9685 servo controller is well suited for controlling a large number of LEDs. If you want to do something simpler and cheaper, you can look for ready-made kits on Amazon, but if you are interested in doing everything yourself, like me, then you will need the following skills:
- Introduction to Arduino programming.
- Experience in electrical circuit design and soldering.
- Working with alternating current.
Many people ask me the cost of the entire project. It's quite difficult to give a specific figure since I spent a lot of materials and it all depends on how much of it you decide to do yourself, the size of the project, etc., however, I think it could range from a few hundred to a thousand dollars. I worked on it on weekends, and it took me about a year to finish everything.
Volumetric paper stars
Content
The most beautiful decor can be created from simple details. Stars, for example, are actively used to add a bit of magic to the interior. And not only during the holidays, but also in our everyday life. You can create decorations yourself: today there are a large number of different options and textures of paper. Thanks to this, you will be able to make three-dimensional stars in completely different styles.
The idea of decorating houses with stars for the holidays originated a very, very long time ago. Initially, in different countries it was the Star of Bethlehem that was installed in honor of the birthday of Jesus Christ. In our country, Christmas was banned in 1918, so stars appeared only in 1935, and they were replaced with the traditional five-pointed version.
Today, stars are always present for the New Year, both in our country and in Europe, and in other countries of the world. Considering that such a figure symbolizes the joy of the entire population and the fulfillment of desires on New Year's Eve, star decor is chosen quite often. In addition, the three-dimensional stars resemble snowflakes!
In recent years, stars have been used as lamps, and they are also made from paper. The tradition came to us and to Europe from Sweden. And today such decor can be seen even on the streets. They decorate houses, cafes, shops, clubs with illuminated stars. They can be placed around the house, hung or placed on thin legs and attached to the holiday table. And many even replace the traditional Bethlehem star on the Christmas tree with a glowing star!
Night light "infinity"
Night lights with an infinity effect began to be found in stores. You can make a similar lamp with your own hands. To do this, prepare:
- Wooden plank for the base;
- A strip of aluminum or foil;
- LED strip;
- Translucent glass;
- Artificial acrylic mirror.
Next, do the following:
- Make grooves in the board for acrylic and glass panels;
- Place foil between the slits in the form of a rectangular outline;
- Using glue and wire, secure the LEDs along the foil strip;
- Insert acrylic and glass into the grooves;
After turning on the LEDs, the light from them will be reflected from the metal and mirror, creating an endless corridor of lights.
Types of projectors
The effects created with its help directly depend on which light generator is used in the construction of a stretch ceiling. There are two main types of projectors used to create a star ceiling. These are mechanical and electronic devices. In mechanical projectors, a small electric motor rotates a special filter, which, in turn, changes the color of the light output. In electronic devices, color is controlled using LEDs controlled by a controller that operates according to a given program.
Although a mechanical projector is a little noisy during operation, it is capable of producing interesting lighting effects. Thanks to it, the stars on the ceiling can change their color in a random order, while some luminaries are just beginning to turn yellow, others are already going out or, conversely, acquiring a reddish tint. The dimensions of a mechanical projector are larger than those of its electronic counterpart, and this should be taken into account when choosing a place to install the device.
StParsek FORUMHOUSE user
It is necessary to clarify one point - whether the color change in the design of the light generator is chaotic or not. I think they will change simultaneously. In this regard, a projector with a mechanical color changer produces a more interesting picture.
Electronic light generators are silent, can be programmed and are able to interact with the user via a remote control. The only drawback of modern electronic projectors is the simultaneous change of colors. That is, all the stars turn on, go out and change colors at the same time.
How to make a night light with your own hands
Home » Useful tips » Homemade products » How to make a night light with your own hands
On the Internet we came across many instructions on how to make a night light with your own hands, but they all seemed too complicated to us.
And it’s worth remembering that to assemble many of them you will have to buy a large amount of materials.
We will tell you about the two most popular night lights, which you can actually make from scrap materials in just a few hours. In the article we will also show several video tutorials and step-by-step instructions.
Night light starry sky
Initially, we will tell you how to make an excellent quality star projector using a flashlight and batteries.
Let us note right away that if you show your imagination, you will get it no worse than in a specialized store. What do we need for this:
- A tin can, you can take it from regular canned food. It is desirable that it be large.
- A sheet of foil or colored blue (optimally).
- Scissors to cut out foil.
- Small drill. If you don’t have it, you can take an awl or a regular knife, but in this case you will have to really try.
The essence of the assembly is as follows:
- Take a tin can and cut out the bottom. This is not difficult to do; you can take an ordinary knife or opener. We cut off the bottom only on one side.
- Next, we clean the bottom, usually the metal of a tin can is sharp, you can easily cut yourself with it.
- We make holes in our jar using a drill.
- We put foil or a sheet of colored paper on the jar.
- We make holes in the paper for those that are already on our jar.
- We insert the flashlight and enjoy.
This is what it will all look like.
If you want to do something unusual, then you can make holes for the constellations. For example, you can make several holes for a small and large star, see photo.
In this case, the child will look at the ceiling in complete delight. Of course, you will have to spend a little time to make the holes correctly and install the light, but believe me, it’s worth it, your child will be happy. We also recommend reading how to make a metal detector with your own hands.
Lamp from a can
The second method is more complicated, but the result will not upset you. If we talk about difficulties when searching for materials, then it will be problematic to find a jar (see photo).
It can be taken from under an hour or chips. The main condition is that it should not be iron, otherwise you will not be able to cut it properly.
So, what materials for homemade products:
- The jar has an original shape.
- Sheet of cardboard.
- Paper. Here, show all your imagination and find something unusual. If not, then you can paint it yourself.
- A socket for a small light bulb and the light bulb itself. By the way, the light bulb can have a multi-colored shade.
- Sandpaper to clean our surface.
- A little superglue.
- Switch and power cord, you can take old ones, there are plenty of them in any house.
Step-by-step instruction:
- Wrap the jar in beautiful paper.
- Cut out the window using a stationery knife. For convenience, you can take the lid from the jar.
- We clean the edges of the window so that it looks beautiful.
- On a piece of paper we mark our window. It’s worth drawing a few stripes on it for a night light in a child’s room, see photo.
- On the inside we attach what we cut out.
- Now we need to decorate our night light for the nursery.
- From the back side we make a hole for the cord.
- Take the cap and insert the cartridge there. Please note that it should be attached carefully.
- Close the lid with the lamp. Please note here that the cord must go into the design first, and then we connect it to the cartridge.
- Enjoying a homemade night light for the nursery.
As you can see, making a homemade night light for a child is not difficult. You just need to show a little imagination and patience, then you will definitely succeed.
How to make a night light with your own hands: video
On the Internet, we found several more interesting videos that you will be interested in learning about. Also read: how to hide wires.
Source: https://vse-elektrichestvo.ru/poleznye-sovety/samodelki/kak-sdelat-nochnik-svoimi-rukami.html
Lamp design
The lighting device, simulating the starry sky, is a small projector for decorative lighting. It consists of a housing, power supply, emitter and switch. In addition, some models may be equipped with additional functions. The body of such a lamp is most often made of translucent plastic and has many small holes, which have both the same and different shapes and sizes. They can be made in the form of ovals, circles and various shapes.
Through these holes, light flows from the bulbs and is projected onto the ceiling and walls. The body of certain models of this device is capable of rotating in a clockwise direction. In this case, only the dynamic part moves, while the stand remains motionless. The power supply for such a lamp involves the use of AA AA batteries (usually up to 4 pieces), an AC adapter operating directly from a 220 V network, or a USB cable. Thus, this projector can operate from a stationary outlet, from a PC, or independently. Unlike batteries, an AC adapter and a USB cable are included with the starry sky lamp; their use is most optimal within the home.
Device design
In cases where connecting to a network or PC is impossible (country holidays, various trips), the lighting device can operate using batteries. As a rule, LED bulbs are used as starry sky lamp emitters. In intense lighting conditions, they are energy-saving and safe. Also, such light sources eliminate heating of the plastic housing. LED bulbs provide the possibility of colored lighting. At the moment, a popular starry sky projector is equipped with a switch, thanks to which the image can change color. There are several operating modes for this device, which can be controlled both manually and automatically. This lighting device is turned on using a round button located at the bottom of the lighting device. Some starry sky projector models are equipped with additional elements such as a clock, thermometer, music player, and a device that allows you to adjust the brightness level.
Fiber to the rescue
The stars shine especially brightly and colorfully on the fiberglass ceiling. To make such a ceiling in a nursery or bedroom, you will need:
- suspended ceiling;
- light generator;
- fiber optic threads.
A halogen or LED lamp is installed in the light generator. Additionally, you can install light filters, with which you can change the color of the stars and their brightness. Some models allow you to create the effect of movement or flight. The small size of the light generator allows it to be hidden in a closet or a special plasterboard shelter.
The next step is to connect a flexible optical fiber of a certain diameter to the device. Before installing the suspended ceiling at a higher level, it is necessary to equip another frame made of sheet material or a fishing net. This is necessary so that heavy fiber optic threads do not put pressure on the stretch ceiling structure.
We distribute light-conducting threads onto the frame, laying out a star pattern on the surface. After this, the suspended ceiling is installed, the fabric is heated, and holes are made in it. Their approximate density is 80 pcs. per 1 sq.m.
Optical fiber is pulled through the holes. It is secured with glue, the excess ends are cut off with wire cutters.
How difficult is the manufacturing process?
In fact, this is an exciting task that you can involve your child in. Usually the production takes about an hour, but will bring great benefits to the offspring. And it will help the parent get closer to the baby.
Do not forget about this moment, since the son or daughter will be grateful to the adult for the time spent. To begin with, you can look at various photos on how to make a night light - it will become clearer.
What can be done?
Remember, the most beautiful night lights with your own hands are created more easily in a friendly family company. The theme of the product may depend on the child’s personal preferences. You need to find out from him what he loves most. It could be a cartoon, a movie, or the sea.
You can start from here, the main thing is that the craft is safe and provides the necessary functionality - it illuminates the room in the dark. Then the little person will be happy and you will not worry about the safety of using the created assistant.
Projector starry sky
This version is usually used most often because it is neutral and children like it. Various ideas and instructions on how to make a night light offer many ways to create this craft, and we will look at a few simple options. It will not require large financial and time expenditures.
You need to find a suitable jar and a battery-based flashlight. Although you will have to rely on an extensive set of additional materials:
- The jar must be made of glass and have a lid. We recommend looking for the cylindrical version as it is easier to work with;
- You will need a large sheet of hard foil to cover the entire area of the jar;
- Actually a working flashlight with batteries;
- Scissors with a convenient size;
- An awl to complete the creation of the night light.
It is necessary to cut a sheet of foil to place inside the jar. Holes are created on its entire surface using an awl. Now the included flashlight is sent to the jar and the starry sky is actually ready for night viewing.
But, if this does not seem enough, you can cut out the outlines of Ursa Major and Ursa Minor on foil, since children love to look at these constellations. To do this, you need to check the real location of the stars and transfer it to the craft.
A night light in this style can be made in another way. A large tin can will do. It is necessary to remove the wrapper and perforate it with an awl in the right places to form constellations or stars that fill the night sky.
You can put a flashlight or candle inside. The last option will add a dose of romanticism.
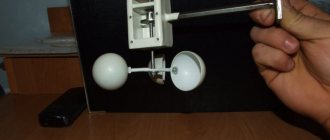
LED lamp
It is clear that it will be based on LEDs. To complete the work of creating it, you will need the following materials:
- Transparent plastic tubes with different diameters, two pieces;
- LEDs with the required color and brightness;
- Volumetric plug;
- Set of glass stones;
- A little bit of wire;
- Reliable glue;
- Pliers for finishing the night light;
- Board for placing LEDs.
Now let's look at the step-by-step process of making a night light with your own hands, since this version is much more complicated. What should be done:
- Pliers will help you bend the ends of the LED bulbs enough.
- All LEDs are connected to the wire in a parallel manner based on polarity.
- The ends of the wire are connected to the board.
- Turn on and test the functionality of all connections. If the bulbs get very hot, then you need to add a resistor.
- A tube with a small diameter is glued into a larger one.
- Glass balls are poured into the resulting void.
- The plug with LEDs is placed on the tube. If the diameters do not match, you can use a sealant made of a convenient material.
- You can turn on a ready-made night light based on LEDs.
Conclusion
We conducted a master class on how to make a night light from ordinary objects. The first option is very simple, and the second is suitable for more advanced parents. Although in fact many other models can be made. It all depends on your imagination and capabilities.
Photos of night lights with your own hands
Installation of lighting by threading threads through the fabric
First of all, you need to choose a location for the projector. It should not be completely hidden under the ceiling, because the need to replace the lamp or eliminate any malfunction will arise sooner or later. For its installation, a plasterboard niche framing a suspended ceiling is best suited. You can use a functional plasterboard box or, as a last resort, a special recess in the wall. In all cases, it is necessary to provide access to the device through a closing hatch.
At the next stage, we attach a painting mesh to the surface of the base ceiling.
After this, the fiber optic threads should be threaded through the mesh in those places where luminous objects will be located on the plane of the stretch ceiling.
It is necessary to avoid sharp bends of the optical fiber, as this may affect the quality of the backlight.
After the optical fiber is threaded through the mesh, its free ends are tied, cut evenly, and the resulting bundle is connected to the light generator. After connecting the projector to the electrical network, you need to make sure that all the fibers are lit.
At the next stage, you can begin installing the stretch ceiling and threading threads through its fabric. The first step is to secure one corner of the canvas to a pre-installed baguette. Considering that the canvas is first attached to the corners of the room, it is necessary to warm it up diagonally and secure it in two opposite corners. Now you can thread the threads, starting from the middle of the room. Please note right away that you cannot do this without an assistant.
Holes in the canvas can be made with fiber optic threads, cutting their ends at 45°. But in most cases, punctures are made with an ordinary needle or a thin awl.
One or more threads are pulled into each hole (depending on the design idea). The ends of the threads should protrude by 15 cm, but for convenience during installation work, longer ends can be left.
You can’t pull the threads too tight; it’s better to leave some extra length. This will allow the fiber bundle to be easily inserted and pulled out of the projector, avoiding many of the inconveniences associated with length restrictions.
As the threads are threaded through the surface of the canvas, you should attach the remaining part of it to the baguette (do not forget that the corners are attached first).
After the ceiling is mounted, the threads, for reliability, can be fixed to the surface of the canvas using transparent glue. But you don't have to do this.
The optical fiber can be left in the form of short hanging strands.
If desired, after completing the installation work, the threads can be trimmed. Some cut them flush with the ceiling, while others leave the glowing ends outside.
In order to create the glow effect of larger stars, the ends of the optical fiber should be cut evenly and their edges should be soldered with a soldering iron.
It is recommended to use threads of different diameters in the construction of one ceiling. This will simulate the light of stars having different brightnesses.
Universe on the ceiling
You can also create a “starry sky” in the room using spotlights and special finishing of the ceiling surface. Spotlights will look great on a stretch ceiling, whose surface was originally stylized to resemble the night sky.
Ceiling in the style of "starry sky"
Making such a ceiling with your own hands is quite problematic due to the complexity of installing a tension covering, which requires special construction equipment. In this situation, spotlights are of great importance, which should help achieve the desired effect. Of course, if you are not a professional builder, then it is unlikely that you will be able to make such a ceiling yourself. But this option is too beautiful not to be mentioned at least in passing. If you dream of “settling” an entire galaxy on your ceiling, then there is no better way.
Ceiling “Starry Sky”: photo in the interior
Options for this design can be very different. Most often, especially with a large area, the ceiling is evenly painted dark blue, with a scattering of stars scattered throughout it. Sometimes the latter make up constellations.
An equally popular option is when the starry sky serves as the background, and the large object is the image of a planet or comet.
A very impressive photographic image of the planet, a real snapshot of a nebula, a distant galaxy.
If the area is smaller, instead of an accurate photograph, an artistically processed one is used: as a rule, it is brighter and includes more colors.
The image of a galaxy, planet and comet can be schematic.
Important! The choice depends not only on the preferences of the owner, but also on the stylistic concept. An overly colorful image of a galaxy is not suitable for an art deco bedroom, for example.
Stickers and ready-made panels
These two methods are the simplest and cheapest. Ready-made stickers can be purchased at a stationery store. Phosphorus stars can be paper or plastic. Simple phosphor stars are glued to the surface at your discretion. This way you can create any drawing.
A little more complex, but nevertheless also easy to install, is the star ceiling in the form of a finished panel. Manufacturers produce such panels in large round disks with photo printing in the center. The diameter of such a panel is from 1.2 to 1.5 m. There are several design options on sale. Installing such a “starry sky” on the ceiling is similar to installing an ordinary chandelier. The only drawback of the finished panel is its rather high cost.
Plastic stars for creating constellations on the ceiling
Illumination with Swarovski crystals
The projection of the starry sky onto the ceiling using Swarovski crystals looks extremely impressive. The crystals are attached to the ends of fiber optic threads and create a unique, scattered light of twinkling stars. The crystals on the “starry sky” ceiling in the nursery look incredibly beautiful. This is primarily explained by the fact that the crystals on the surface of the ceiling are visible during the day; the sun's rays are reflected very beautifully in them, playing with multi-colored highlights in all directions.
Like the LED “starry sky” ceiling, fiber optic star ceilings are controlled using a remote control or switch.
Regardless of where the stars will twinkle, on the ceiling in the nursery or in your bedroom, it will create a unique atmosphere of the twinkling of millions of stars.
Swarovski crystals
Making a night light from a can and LEDs
The night light, which is made from a can and LEDs, by and large does not relate to star projections, but it looks no less impressive than the two options described earlier. In addition, making such a lamp with your own hands is no more difficult. However, such a projector will cost a little more. To work you will need:
Ready LED night light
- glass jar. Some craftsmen recommend using a glass bottle. But the bottle in this situation will not be entirely rational, since it is difficult to place foil and LED strip in such a container;
- foil made of dense material;
- LED strip or several LEDs;
- drill;
- awl.
Here, the process of manufacturing a lighting device, an analogue of a “starry sky” projector, follows the same scheme as for a glass jar. The differences here are that LED strip is used as a light source. Because of this, such a design will cost a little more, since LED is not very cheap. But here some difficulties arise with the installation of related equipment (power supply when using an LED strip). To do this, you will have to drill a hole in the glass and thread a wire through it.
LEDs give a beautiful glow that will give the evening or night a special charm.