- Article
- Video
So, for example, you drew
a diagram of the electrical wiring in the apartment
and laid wires to the junction boxes. Now you need to route the cable from one box to the lamps, socket group and switches.
The main thing here is not to mix up the conductors so that a short circuit does not occur. The connection is quite simple:
- the input phase is connected together with the phase of the socket and switch (in due course, from the keys, the phase goes further to the light bulb);
- the input zero, just like “ground,” is connected to a socket and a lamp (this can be a chandelier or other lamp).
It is best to check the correct installation on the provided connection diagram for the socket, lamp and switch:
Please note that the best quality way to connect wires in the junction box is with WAGO terminals (shown in the picture). They are inexpensive and easy to use.
The video below clearly demonstrates how to connect all 3 elements together:
That's the entire electrical diagram for connecting a socket, switch and light bulb in one junction box. We hope the information was accessible and useful for you!
Always before starting renovation work in a room to move the switching points of lamps, it is necessary to think in advance about their installation locations. Work on the installation of switches and sockets must be accompanied by compliance with safe work rules. If the room has been in use, it must be de-energized and the wiring must be installed according to the approved diagram.
The solution to many issues in a room being renovated is to connect the switching device (switch) of a chandelier or other electrical device from an outlet. During the repair process, this method will help save on wires and the time required to complete the work; there is no need to make additional grooves.
Advantages and disadvantages
Advantages of this cartridge:
- ease of disassembly and assembly
- time-tested reliability
- contact pads are fixed with screws
Firstly, if necessary (burnout, melting), they can be replaced. Or simply tighten it when the contacts loosen and the connection heats up.
By the way, these screws need to be tightened initially, even before directly connecting the wires. This will extend the life of the socket and light bulb significantly.
In 90% of cases, the light bulb stops shining because the central contact heats up and its plate-shaped area begins to bend, gradually moving away from the lamp base.
Flaws:
- inconvenient connection to screw terminals
To ensure good contact, you will have to unscrew them entirely from their seat.
Moreover, if you have a non-Wera screwdriver with a bunch of additional “chips,” then this screw often falls out and rolls into the most inappropriate places.
Although experienced electricians do without completely unscrewing the screws and bending the neat rings on the copper conductors. The entire connection is made much easier.
The veins are stripped a little more than usual (2-3 centimeters), and the screws are only loosened. Next, place the vein under the washer with the screw and make a turn strictly in the direction of tightening the thread.
This is necessary so that when tightening the screw, the ring does not unbend, but rather tightens even better.
After this, bite off all the excess protruding behind the bolt with side cutters. You should end up with some kind of half ring.
All that remains is to squeeze it with platypuses to a full ring.
It is not yet possible to tighten such a connection. It should “play” in its seat.
Take the second wire and do the same procedure with it. Only then can the screws be tightened as far as possible. As a result of such a connection, there is no need to unscrew anything, make some rings in advance, guessing the diameter of the bolts.
All this is adjusted directly on the cartridge itself. Saving time and labor costs is obvious.
The only disadvantage of this method is that the wire consumption will be a couple of centimeters more than usual.
Purpose of the cartridge
The electrical network in a home or workplace consists of wires and electrical appliances, as well as various electromechanical products. Such devices include an electric cartridge. It connects a lighting device (LED, fluorescent or any other light bulb) with a cable and fixes it in a ceiling, wall or table lamp.
The sockets are used for all types of lamps. It is important that the light bulb has the same base as the electric socket. Otherwise, it will not be possible to connect it. Such devices are made from different materials - thermoplastic, ceramics, metal, heat-resistant polymers.
Disassembling the lamp socket
In order to accurately separate the equipment into its component parts, it is necessary, firstly, to unscrew the upper fragment of the device so that its ceramic base is visible, which, in turn, is connected to the contacts. Then this part must be taken out and disconnected from all elements adjacent to it. It is very important to understand how the light bulb socket interacts directly with the wire. Connecting equipment to a stationary switch must be accompanied by connecting the phase cable to the central contact. After this, it is important to make sure that the resulting system works reliably. To do this, you need to apply a light source with a base to understand that the contact obtained as a result of assembly is bent to a distance of at least 2 mm. The assembly of the entire element is completed by screwing the housing into a cylinder.
Marking
In accordance with GOST, products with Edison threads are divided into three main types - E14, E27 and E40. The former are called “minions” and are used in microwave ovens and freezers, the latter in lamps, and the latter in organizing street lighting. The principle of operation is the same everywhere, and the differences are related to the design and dimensions.
There are markings on the cartridge body. When decoding, you can find out the characteristics of the product. E14 is installed in devices with a current consumption of no more than 2 A and a power of up to 440 W, E27 - up to 4 A (880 W), E40 - up to 16 A (3500 W). Each model is designed for 250 V AC.
Types and markings of cartridges
All currently used varieties can be divided into two groups - screw and stud. The first option involves screwing the light bulb along the Edison wire, the second involves inserting special pins into the seat. Requirements for quality and productivity are specified in GOST.
Screw chucks are marked with the letter “E”; the number indicates the diameter of the threaded part. Most often, one of three varieties is used:
- E14, popularly called "Minion". A narrow base, designed for low-power lamps, is used in most new chandeliers. Ideal for LED and incandescent light sources up to 60W. The lamp power limit is usually 440 W at a current of no more than 2 A.
Ceramic cartridge E14.
- E27. The most common option today, previously installed in all types of lamps. Designed for standard incandescent lamps, you can choose any other option with the appropriate base size. The maximum power of light bulbs for this type is 880 W a, the current power is no more than 4 A.
E27 cartridges are the most common.
- E40. Made only from ceramics, designed for street lighting and can be used with lamps up to 3500 W and current up to 16 A.
Pin or pin sockets are distinguished by the fact that the lamps are not screwed into them, but are inserted into the base and fixed with protruding contacts. They are about, the number indicates the distance between the contact elements. Main varieties:
- G4, G5.3, G6.35, G8 and G10 have exactly the same design and differ only in the distance between the contacts. Suitable for halogen and compact LED lamps used in chandeliers and spotlights. Designed for light sources with a power of up to 60W and a load current of no more than 5A.
Types of bases for G-type pins
- G9. Designed for light sources with flat contacts.
- GU10. It differs in that after inserting the contacts they rotate slightly and are thus fixed in the socket.
GU10 socket in the lamp.
- GX53. The flat spindle is designed for installation in suspended ceilings and suspended structures. Saves space if space is limited.
The GX53 flat chuck is different from the traditional chuck.
Speaking of which! When choosing, you need to check the actual characteristics of the cartridge with the standard ones; they are often an order of magnitude smaller.
Mounting methods
In most cases, the socket is connected to the lighting fixture through the bottom. There is a hole in the bottom for entering an electrical cable. The E27 series is available with M16, M10 or M13 threads, and the E14 - M10.
For current-carrying wires
Direct connection of the cartridge to the wires is unacceptable! First you need to ensure reliable fastening of the product in the lighting fixture (lamp or chandelier), for which a plastic sleeve with a hole in the center necessary for the cable is installed on the bottom. A plastic screw is mounted to the sleeve for further fixation.
Connect the socket, clamp the wires with a plastic screw. The sleeve is intended for mounting decorative parts, and the screw ensures reliable fixation of the lampshade and the device suspension.
On the phone
The socket is attached using a metal tube, which allows you to hang heavy lampshades from the ceiling. The tube is equipped with additional nuts, with the help of which the fittings for the chandelier, including caps, are installed. The entire load falls on the metal tube, and the wires needed to connect the power are pulled directly through it.
Cartridges with threads on the outer surface of the body can be decorated with lampshade rings and other decorative elements.
Bushing
Tubular bushings are used for fastening sockets in table lamps and wall sconces. Products are made from sheet materials. It is enough to make a hole through which the cartridge should be attached using a sleeve.
Due to the heating of the light bulb, plastic bushings can become deformed, causing the socket to begin to wobble. Replace plastic with metal.
The mounting thread varies, as there is no specific standard for E27 socket sockets. To replace a plastic bushing with a metal one, use resistors. Before breaking, disassemble and compare the threads so as not to ruin the product in vain.
With screwless terminals
The body and bottom of the cartridge, using screwless clamp contacts, are connected to each other using two latches. The bottom of the product is screwed to the threaded tube, after which the electrical wires are inserted. The body is made in the shape of a cylinder and is attached to the bottom.
Elements are subject to repair and maintenance. Use a screwdriver and move the latches to the sides so as not to damage the cable when dismantling the product.
Device
The design features of the cartridges depend on the series. Type E devices are most often used. Therefore, the structure of cartridges can be considered using their example:
- The outer body with a sleeve on which there is a thread.
- Donyshko.
- The insert on which the contacts are placed.
Thanks to two brass plates on the insert and threaded mounting strips, electric current is supplied to the detachable lamp connector.
In the image above you can see how the plates are in contact with the base part.
To avoid electric shock, connect the phase conductor to the central contact of the base.
G-type sockets function in the same way, but their structure is simpler than that of the E-series devices. In addition, the pin devices transmit current to the detachable bulb holder in a slightly different way.
Design and principle of operation of an electric cartridge
Let's look at the design of an electric cartridge using the example of the widely used E-series Edison threaded cartridges.
The cartridge consists of three main parts. An outer cylindrical body in which a threaded sleeve with Edison thread is fixed, a bottom and a ceramic liner. To transfer current from suitable conductors to the light bulb base there are 2 brass contacts and threaded mounting strips.
In front of you in the photo is an E27 cartridge, completely disassembled into its component parts.
The photo clearly shows how the brass contacts touch the base of the light bulb. The photo on the right shows how current is transferred when brass contacts are attached to a ceramic liner.
The phase, to increase operational safety, must arrive at the central contact of the light bulb base.
With this connection, the likelihood of human contact with the phase is minimized.
Electric sockets of the G series do not differ in operating principle from the E series, but are simpler in design and differ in the method of transmitting electric current to the terminals of the lamp base.
How to connect a light bulb socket
Connecting a lighting socket to the electrical wiring of a house is carried out using one of two methods - detachable or permanent. In the first case (the method is called “screw”) fastening is carried out using a threaded screw or a special terminal.
Permanent fastening is associated with homemade soldering or press-fitting at the product manufacturer. The last procedure is relevant for elements of the G4-G10 series. Two insulated cables are pre-lead from them, the length of which does not exceed 100 mm. The elements are attached to the electrical wiring using a terminal block.
Ordinary electric
First you need to understand the assembly procedure of a conventional electric cartridge. A ceramic liner is made, onto which a brass plate is pressed, used as the main contact. On the other side of the liner there is a steel plate; a screw is screwed to it, ensuring reliable fastening of the plate to the liner. The same screw also performs another function - current flows through it to the main contact.
When tightening the screw, use a lot of force, which is due to its participation in the transmission of electric current from the cable to the light bulb. The same sequence of actions is used to attach the second brass plate, after which the main contact is bent so that it is level with the side ones.
Next, form rings on the conductors, thread them through the bottom and secure them to the steel plates. If the cartridge is used in an electrical circuit with a stationary switch, the wire transmitting the phase should be connected to the central contact. To check the reliability of contact, you need to install the light bulb in the base and make sure that when it rests on the side contacts, the main one bends by at least 2 mm. In case of less deflection, the main contact bends upward.
A cylindrical body is attached to this structure, then the cartridge can be used. Select light bulbs by matching the markings on both products.
Cartridge with terminals
When connecting electrical wiring to modern sockets, screw clamps on terminal blocks are used. The approach significantly speeds up the process of connecting and installing an electrical device.
The body is made of plastic, monolithic. Using a special rivet, the wires that supply the base are attached to the body.
Note! The main disadvantage of a product with terminals is the impossibility of repair, so if it fails, you need to completely replace the cartridge with a new one. Among the standard sizes, the most popular are the E14 and E27 model series, which are also used in conventional electrical products.
Screwless electric
The most modern design involves the presence of special holes on the cartridge body - usually four (grouped in pairs). Wires are pulled through the holes, fixed with brass contacts using a spring mechanism. Pairwise connection of contacts simplifies the parallel connection of light bulbs in chandeliers or lamps. Electric current is supplied to the first cartridge, and subsequent ones are connected to it using jumpers.
Important! In this way, you can connect many housekeepers that consume a minimum of electricity.
The products are characterized by simple and quick connection - strip the end of the wire and insert it into the correct hole on the socket body with a clamp fastening.
Many chandeliers and lighting fixtures use thin stranded wires. It is unrealistic to ensure their reliable fastening in the body of a screwless cartridge. Choose chandeliers with serviced wire ends or solder an alloy onto the multi-core cable yourself so that the wire becomes single-core. Tinned ends are easier to insert into the contact of a screwless product.
If you don't know how to use a soldering iron, there is another way. Before inserting the stripped end of the cable into the hole, place a metal rod there that is larger in diameter than the wire itself. A nail and a screwdriver will do. Pull back the spring contact and insert the stranded wire into the hole without any problems. Remove the nail (rod) so that the contact clamps the wire strands. The same method is used for dismantling. Pull the cable lightly to check the connection is secure.
How to connect old-style carbolite cartridges
This is the most common option. The cartridge resembles plastic and consists of a bottom with a hole for the cable, a threaded body and a ceramic insert for connection. To do the job correctly, you need to remember these simple tips:
- It turns out which phase is being experienced and which is zero. This is important for the safe use of lamps, you can check with an indicator screwdriver. The phase is always connected to the central support for safety reasons. Zero goes into lateral contact. The main thing is to secure the ends of the cable tightly and prevent contact of exposed parts.
When connecting, it is important not to confuse the phase and neutral wires.
- If a three-wire cable is used for connection, it is important to place the ground correctly. Most often, on the body of the chandelier there is a place for its attachment, indicated by the corresponding icon. Since it is located on the side, the length of the grounding conductor must be much longer. If there is no clasp, the end is attached to any part of the body. Some ceramic lamp sockets have space for a third wire, making the job easier.
The green-yellow (PE) wire is ground.
- To securely fasten the braided wire, you need to prepare it. To do this, the insulation is removed from the ends and rings of a suitable size are formed. In order for them to remain intact and not deformed, they should be treated with a soldering iron and the veins should be sealed. This will ensure good contact and maintain the connection even if the cartridge is removed several times.
All folding options are connected according to this scheme; the design is usually no different.
The video clearly shows how to connect a lamp socket to a PVA cable.
Errors during installation and operation
At the end, we will briefly summarize and make a selection of common mistakes that you should avoid when connecting and servicing a light bulb socket.
1Connecting the phase conductor to the threaded part of the base.
How it all ends was described in detail above.
2Do not forget to tighten the screws that secure the contact plates to the ceramic liner at the very beginning.
You can solder all the wires super securely, but if these screws are loose, then heating of the connection is still inevitable.
3Connecting multi-core wires without soldering or tinning. 4Connecting phase and zero to two adjacent contacts of the keyless chuck and creating a short circuit.
5 Squeeze-adjust the central plate in the carbolite cartridge when bending it, using a non-insulated tool.
How to replace a cartridge in a chandelier
After you are convinced of the presence of a malfunction, we proceed to active actions. To replace a part, you should study its design. The most common modifications of the cartridge:
- Domestic designs - base, carbolite E-27. The body consists of carbolite, dismountable, internal elements are porcelain. The cartridges are practical to use. In this case, the damaged individual unit is replaced.
- Chinese ceramic modifications, base E-27. Solid. Attached to the surface with several screws. The contacts are connected with rivets. If any component fails, the cartridge must be completely replaced.
- Domestic ceramic modifications, E-27. The collapsible porcelain case consists of two halves. The cartridges are street (with small lugs for fastening), end-mounted and suspended. Replacing/disassembling the product does not require any special skills.
- Plastic cartridges with end mounting type, E-14 base. The individual halves are secured with plastic latches. The power wires are secured with screw or spring clamps. For such products, the plastic thread running in a small depression has virtually no contact with the base. The aluminum base and brass plate oxidize, the space between them increases and contact disappears. Therefore, it is advisable to install a new cartridge.
Replacing the cartridge in lamps and chandeliers is not difficult. The most important thing is to show patience and attention, since almost all the parts are small.
Connecting wires in a ceramic socket
The ceramic device is not a dismountable product, just like its contacts. This is where the main disadvantages arise.
These contacts are rolled and eventually weaken over time. As a result, heating occurs, followed by burnout or too frequent failure of the light bulbs themselves.
Such cartridges also have the sin of twisting the skirt itself along with the light bulb. After such a defect, it is better to replace it entirely.
Of course, you can initially solder the contacts in the folding areas or crimp the unscrewed skirt again, but the vast majority do not bother with this and simply buy a new one.
The main advantage of the ceramic cartridge is its simplified connection system. Everything happens much faster here.
Firstly, there is no need to disassemble the device itself into three parts. Secondly, completely unscrew the screws.
It is enough to loosen them slightly and insert the stripped wire core into the contact space.
Then tighten the screw with maximum force.
How to connect a socket to an electrical socket
Sometimes there is a need to install an outlet, but the nearest distribution box is far away. I encountered such a case when I was renovating my bathroom. It was necessary to install an additional lamp near the mirror and provide the ability to connect electrical appliances, such as an electric razor.
A wall lamp – a ball – was already installed in the bathroom. I connected two more wires in parallel to the contacts in the electric socket and connected a socket to them in parallel. True, when the light in the bathroom is turned off, the outlet is also de-energized, but there is a positive side to this. In case of water leakage from the upper floor, there will be no short circuit even if water gets into the socket.
The socket in the bathroom or shower room should be installed as far as possible from the bath or shower to prevent splashing water. I installed a standard outlet and it has lasted over 17 years without any problems. Although it is better to install a sealed one, designed for rooms with high humidity.
Once again I had to connect to the electrical socket in the toilet room when installing an automatic light sensor and retrofitting the toilet with a bidet function.
In ancient times, when electricity bills were based on the number of light bulbs and sockets in an apartment, a device popularly known as the “rogue” was widely used.
The adapter cartridge that you see in the photo was screwed into the electric cartridge. On one side it has an external thread, like a light bulb, and on the other, an internal thread, like an ordinary socket. This crook had two brass tubes built into it, like a socket. The swindler allowed him to connect any electrical appliances to the chandelier. You can make such a crook yourself from an ordinary electric cartridge.
DIY socket for two light bulbs
Sometimes in technical rooms there is not enough lighting from one lamp, and it is not always possible to install another one nearby. Putting something like a chandelier in a garage or chicken coop is pretty ridiculous, you will agree.
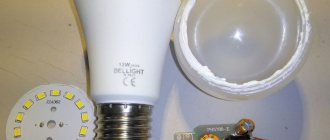
And so, in order to solve a pressing issue, the author decided to invent a kind of double for light bulbs, that is, the master decided to make a twin socket. To do this, he took an old used energy-saving light bulb and disassembled it, leaving only the base and two wires.
I connected the 2 cartridges together and connected the wires in sequential order. And then the resulting double is simply screwed into a single cartridge and “let there be light.”
Well, you should clearly examine the invention, but before that you should study the list of necessary materials and tools for homemade work.
Materials
1) used energy-saving light bulb 2) wall sockets 2 pcs 3) couplers
Tools
1) soldering iron 2) screwdriver 3) pliers 4) knife
And so, first of all, the author disassembles the energy-saving lamp, leaving only the base and the rest for disposal.
This double is then simply screwed into the cartridge and that’s it, 2 times more illumination. And the author also does not recommend screwing in 2 incandescent lamps, preferably diode or energy-saving ones.
That’s actually all I wanted to write about in this article.
Source
Keyless chuck
Today, plastic quick-release chucks have also become widespread.
They work on the principle of the famous Wago clamps.
To disassemble such a cartridge, you need to carefully press the latches on both sides with a slotted screwdriver.
When you remove the cover, you will find that there are no screws inside at all where you could attach the wires. A person who is far from electrical installation work will not immediately understand such a design.
How to connect it? Everything is done very simply.
You need to strip the ends of the wires and push them into the small holes until they click. Moreover, most models have two pairs of contacts at once. And accordingly, not two, but four holes at once.
They are designed for convenient assembly of light bulbs into garlands. Insert the appropriate wire into one hole, and the one going to the next light bulb into the other.
Just don’t think about inserting phase and neutral into adjacent holes, otherwise you will create a short circuit!
Inside these contacts there are spring-loaded metal plates that provide the connection.
Here also do not forget about the correct connection of phase and zero.
The wires in such clamps are held quite securely, and even with a little force, they cannot be pulled out.
In order to still pull it out from there, you will have to turn the core in a circle while pulling.
Common Mistakes
There are several basic mistakes that those with little experience in connecting cartridges make:
- Installing the chandelier before installing the sockets. It is much more convenient to do the work on the table, and only then hang up the equipment.
- Secure the terminals of the twisted wires without tinning them. This option is unreliable and the contact inevitably deteriorates over time.
- Connecting the phase to the side contact. This not only negatively affects the operation of the lamp, but also poses a danger to humans when replacing it.
- Often the screws that hold the contact plates on top of the ceramic coating are overlooked. If they are not tightened tightly, the contact will be poor, which will lead to constant overheating of the cartridge during operation.
Do not insert different wires into adjacent holes.
- Inserting the neutral and phase wires into the parallel sockets of the keyless chuck. This causes a short circuit when power is turned on.
- Replacement of the group due to poorly pressed central contact. Often this element bends and does not put pressure on the base. But if you carefully bend it, the fault can be eliminated without installing a new part.
Connecting the lamp socket to the wires is not difficult, since there are few connection options and they are all simple. The main thing is to follow safety precautions and prevent shorting of wires with opposite polarization.
Methods of fastening electric sockets in chandeliers and lamps
Most often you have to connect nodes that are located in lighting equipment. This imposes certain requirements depending on the mounting option and design of the lighting fixture. The most commonly used methods are:
- Fastening the socket in a lamp to a current-carrying wire is not allowed, since the load cannot be placed on this element. The exception is the use of cables with reinforced insulation designed for certain loads. But still, you shouldn’t hang massive chandeliers using this method. The light bulb socket is connected in the standard manner. The wire is pulled through a hole in the back and fixed in a stationary position with a special screw located on the side. It must be twisted so as to secure the wire, but not deform it.
- Installing a socket connection in chandeliers with a supporting element in the form of a tube is much simpler. Here the load falls on the tubular element, inside of which the wire is pulled, which makes the design much neater. The cable is pulled out with a small margin and attached to the cartridge as usual. In the upper part it is connected to the power supply through a block; the connection point is covered by a decorative cap.
- Installing a light bulb socket using a bushing is used in both chandeliers and wall lamps, as well as table lamps. To do this, there is a threaded element in the upper part, which is inserted into the hole and secured on top with a nut of the appropriate size. It is best if the fastening is metal; plastic ones will become loose over time and cannot be repaired. Only complete replacement will help, since such parts are not sold separately.
- Mounting options with screwless clamps is even easier. This is a modern solution that has appeared recently and is increasingly found in chandeliers. In this case, you first need to screw the lower part of the element onto the thread through which the wire, usually a two-core wire, is passed. Then it is connected to the contacts and the upper part is carefully aligned with the latches and snaps into place until it stops. This system securely holds the element without additional fasteners.
This is what the screwless mounting of the lampshade looks like.
If you need to remove a screwless socket, you will need a thin flathead screwdriver. Use it to first remove one clamp, then the second, and then carefully remove the upper part from its seat.
Repair of electric cartridges
Electric cartridges of the E series can be successfully repaired, since it is possible to disassemble them. In the G series cartridges, the parts are connected using rivets and in case of breakage they have to be replaced with new ones.
Repair of dismountable electric socket E27
If the light bulbs in the lamp begin to burn out frequently or the light bulbs begin to change their brightness during operation, then one of the reasons, in addition to poor contact in the switch or junction box, is poor contact in the electrical socket. Sometimes, when the lamp is turned on, the cartridge begins to make a specific buzzing sound; in addition, the cartridge may smell bad of burning. It's not difficult to check. Just unscrew the light bulb and look into the socket. If the contacts are blackened, then you need to clean them. The cause of blackening may also be poor contact at the point where the cartridge is connected to the wires.
To properly repair an electric cartridge, you need to completely disassemble it, check the reliability of the wire connections and clean the brass contacts until they shine. Sometimes they need to be bent a little towards contact with the lamp base.
Sometimes when you try to unscrew a light bulb, its bulb comes unstuck from the base. In this case, you need to try to unscrew the base remaining in the cartridge by unscrewing the cylindrical body of the electric cartridge, holding it by the bottom. If you can’t unscrew the housing, you can try to grab the light bulb base by the edge with pliers and thus twist it out.
Repair of a collapsible electric socket E14
We had to repair a five-arm chandelier in which only two bulbs were shining. The chandelier was old, Soviet-made, with dismountable E14 sockets with screw fastening of the wires.
The chandelier was used for many years with incandescent light bulbs, and as a result of the high temperature and weakening of the wires, they oxidized and burned where they were clamped with screws.
The screws were stuck in the threads and it was impossible to unscrew them with a screwdriver. I had to use pliers and as a result, the fastening part for fixing the wire from the side contacts of the cartridge broke off in one of the cartridges. There was no similar replacement cartridge at hand and I had to figure out how to repair it.
To do this, a screw was screwed into the fastening part of the contact until it stops and a piece of copper wire, previously coated with tin-lead solder, was inserted, as shown in the photograph.
Next, both parts were installed back into the cartridge body and lubricated with FIM flux.
After assembly, the place where the copper wire was installed was filled with a large drop of solder using a soldering iron. After repair, the electric cartridge became even more reliable than it was before.
As a precaution, all five cartridges were checked and the contacts were cleaned with sandpaper. The wires were freed, the burnt ends were bitten off, the insulation was removed and tinned with solder. But I came across one electric cartridge in which, when unscrewing the screws, the heads broke off.
I repaired the cartridge using soldering, soldering the current-carrying conductors to the place where the screws broke. Now the quality of the connection will be maintained for many years.
After such maintenance and repair, the chandelier will last for many more decades, especially since LED filament bulbs are now screwed into the sockets.
Possible problems and errors
When installing a new cartridge, you can easily make a number of mistakes without practical experience. There is also a possibility of encountering problems that depend on third-party factors. Common errors and problems include the following:
- Attempting to repair a live lighting fixture. If the room is not de-energized first, there is a risk of injury.
- There are problems with the wiring. During operation, you may notice damage to the wiring and will need to be replaced. Without restoring the wiring, you may encounter more complex faults in the future.
- Incorrect connection of contacts. As a result of this error, the lighting device will not function correctly and may fail.
