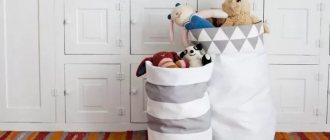
What are soft sensory cubes for children's development
Beautiful toy for boys
Attention! A cube is an element of a simple construction set, thanks to which the baby learns to see the relationships between objects and connect them with each other.
The soft colored cubes are pleasant to the touch and kids will love it. Cubes are one of the oldest toys in the world. They have been known since the 1st century BC. e. A simple but perfectly shaped toy has become an integral part of many interesting children's games.
An educational cube is an interesting and useful craft for very young children. By playing with a cube, the baby will learn to recognize the color, size and shape of the cube, and also remember what the object feels like. Sensory toys play an important role in a child's mental development. The baby will be able to grab the cube, spin it in his hands and move it from place to place. During the game, the child's fine motor skills, speech, attention and thinking develop.
Cubes of different sizes are sold in sets. Such developmental sets are called sorters.
Interesting felt cube for girls
What are their benefits?
It's amazing how a simple cube with colored edges changes its purpose depending on the age of the child. For the little ones, it becomes a universal multifunctional simulator that develops:
- Fine motor skills - in order to grasp an object of this shape, the baby makes a large number of precise coordinated movements, activating the most complex mechanism of mental and speech activity.
- Tactile sensations – by touching surfaces of different textures, the baby compares them, gaining valuable knowledge about the world around him.
- Color and visual perception - by looking at the bright patterns depicted on the edges, the child learns to clearly distinguish shades of the color spectrum. And the use of contrasting colors, for example, black and white, trains the ability to focus and concentrate the eye on small details.
- Hearing - the baby shakes the toy, knocks it on the table, squeezes it in his hand, rustling the stuffing, throws it on the floor, extracting and remembering sounds of different tones and volumes.
For older children, cubes become one of the most favorite toys. Children play for hours, building pyramids or castles, and then destroying them with gusto. In this moment:
- The kid gets the concept of cause-and-effect relationships: if you put cubes on top of each other, you get a high tower that falls and collapses from a slight push.
- Spatial thinking is formed: before creating a structure, you need to mentally imagine it from all sides and analyze the position of each element.
- You train your sense of balance, dexterity and accuracy, which will definitely be required to build a stable structure - after all, the cubes are not fastened together in any way.
- The child’s attention and memory are concentrated, especially if they have to assemble a whole picture from separate parts.
- Imagination and creative imagination develops. Experts have calculated that more than 120 million different combinations can be made from 6 elements. Which ones exactly - the baby will decide for himself.
It goes without saying that cubes are an excellent tool for learning to read and count. Playful activities facilitate the learning process and bring children and parents closer together.
Soft cube options
Soft cubes are created for babies from 4 months to 3 years. They are made from high-quality non-toxic materials. The child will be able to twirl these toys, squeeze them with his fingers and even taste them with his tongue. It is impossible to get hurt on these colorful soft cubes: they are absolutely safe and bring a lot of benefits. As a rule, you can find cubes of various sizes in stores. Relying on a large cube, the child will learn to walk.
You might be interested in How to make your own toy felt owl
There are several types of soft cubes:
- With multi-colored edges. Each face of the cube is painted a different color. This way the child will be able to learn the names of 6 colors.
- With bright, colorful designs. Looking at pictures with images of animals, birds, berries, the baby will remember them.
- With letters. Useful for learning to read and write.
- With letters and pictures. The pictures show objects whose names begin with the indicated letter.
- With numbers. Will be needed to get acquainted with mental counting.
- Mosaic cube. Each face shows a part of the picture. You need to correctly assemble several cubes to get a solid picture.
- With pockets. You can hide various objects in them.
Educational cubes are made from various high quality materials:
- felt;
- plush;
- wool;
- knitwear
The inside of the toy is tightly stuffed with padding polyester or holofiber. There are no sharp elements in it, so the baby will not get hurt. The elastic cube can be washed in a washing machine.
Attention! If a cube is filled from the inside with holofiber, it turns out soft, but may not always keep its shape.
If a cubic piece of foam rubber was used as a base, the figure holds its shape, but may turn out to be too hard.
Application "Amanita"
Ready-made examples for girls and boys
You can sew a cube for your baby with your own hands. By showing imagination, even a novice craftswoman will be able to create an original toy and decorate it with interesting details. Beautiful and funny cubes will appeal to all boys and girls.
You can depict a cartoon character on a craft
A soft watch will certainly interest your baby.
You can complicate your task and make a craft from several parts
Do-it-yourself educational cube “Faspers”
Today I will share with you how I sewed such a developing cube.
From the general idea (a cube with clasps) we move on to the specific - the cube has six sides. This means that we need to decide on the size, what kind of fasteners we will use, and how we will arrange it all. After thinking a little, I decided that the size of the cube would be 15 cm * 15 cm, and the sides would be as follows:
— Buttons (separate felt birds fastened to the base); — Velcro (individual felt fish (with Velcro on the back side) are attached to the base using the corresponding parts of the Velcro + a little more complicated, but this will be seen later); — Zipper (a tent that closes with a zipper); — Lacing (opening edge - eyelets will be inserted at the edges of the “doors” through which you can thread the lace + basic lacing behind the “doors” (I’ll show you clearly later)); — A carabiner (on the edge where some animal is grazing, the carabiner will be a “door” in the fence); — Tying a knot on the ribbon is another facet with doors. The doors are a gift box with a cake (cake inside) that is tied with a ribbon. The subjects of the edges can be absolutely anything that comes to your mind. Not birds, for example, but the sun and clouds on buttons, not fish, but the moon and stars, a door with a zipper, a chest with a lobster lock, lacing on a shoe and much more. You can come up with plots for the edges yourself (and this is a very exciting activity) or spy on the Internet. When I had everything figured out, I drew a rough sketch:
I usually draw such sketches in Corel (corel draw), since there you can quickly sketch everything, immediately experiment with colors, and also, the sketch can instantly be turned into a pattern and printed in the size we need (I immediately drew the edges on a scale of 1 :1) From materials, in addition to the fasteners described above, we will need fabric of different colors (I use gabardine - it has a fairly large palette, it does not fade and has a suitable density), felt (I take sets of hard 1-1.2 mm), interlining (this is a material that, with the help of an iron, can be glued to the fabric from the back side, thereby making it denser and not allowing it to stretch in different directions as it pleases). Well, and all sorts of little things - ribbons, regular and curly buttons. Once again, I’ll make a reservation about the fabric... I take a plain one, because when fabrics with different designs/patterns are used in one picture, the result can look tacky and tasteless. If you (like me) doubt that you can beautifully combine patterned fabrics, it’s better not to. The cost of gabardine (or other simple plain fabrics) in stores ranges from 120 to 180 rubles. You can easily afford to take several pieces of 20-30 centimeters each. So, everything is thought out, visualized, materials are available - let's start cutting! I would like to draw your attention to the fact that it is much more convenient to cut out all the elements from fabric and felt at once, rather than doing this for each edge separately, since for this each time you will need to get all the material and all the tools necessary for this, and it’s very convenient In such a multi-colored product, insert a certain color of thread into the sewing machine and sew all the elements of this color with it, rather than changing the thread for every little detail. Also, I’ll immediately make a reservation that we iron all the pieces of fabric so that everything turns out neatly, and this way it will be more convenient to work with. Edge with buttons: (for each edge, if I did everything for the first time and counted the time for patterning and cutting, it took me two hours):
According to the pattern, we cut out all the elements separately - fabric of two colors ( Attention , since the cube is 15 * 15, pieces of fabric must be with an increase for seams - I have 17 * 17), and felt parts - everything is visible in the photo. For the birds, I used ready-made felt eyes (they are adhesive-based). When I didn’t have such a wonderful thing, I either drew the pupil with a fabric marker or embroidered it with black thread.
We cut off all the excess from the green fabric so that we get a bush and baste it to the base. If you noticed, I also sealed the green fabric with non-woven fabric, albeit in an economical version.
Sew with a small zigzag. We estimate the location of all the details and mark it all with chalk, sew on a twig and leaves.
We sew the birds (and the flower) like this: first we sew on the wing (central flower) and the eyes (if they need to be sewn on), then we sew on both halves (don’t forget to add the beak).
(The flower is the wrong side of the top layer, the yellow bird is two parts of this bird, the blue one is the wrong side of the finished bird)
We attach everything to the base - check everything again and mark the place where we will sew the buttons. Sew on the buttons. Using a special foot (it came with my machine), we sew around the loop hole. Then we make a cut and one side is ready. Hooray!
Edge with Velcro:
For me, the edge with Velcro is the seabed with fish, which is “hiding” behind swing doors (sea and sky), which also close with Velcro.
To make the sea depths look more like depths, I used three shades of blue for the background. I glued the top of each piece with non-woven fabric so that when I sew them onto the base, they would not “move around”. Then, I cut out the curves of the waves I needed, swept the pieces together and sewed them together with a zigzag. Then non-woven again.
On the front side, I outlined the curves of the seaweed in small pieces and sewed them on a machine (I have a special stitch for this, although the machine is a regular one), but if you don’t have one, you can just use a stitch or sew ribbons.
We stitched it and smoothed it out. Now it's the fish's turn. We cut Velcro according to the shape of our fish so that they fit in size and shape. Our fish, like birds, have two layers. We sew Velcro to the underside of the fish, or rather, to a blank that is larger in size than our “front” fish. We do this so that when we sew both halves, the seam (with which the Velcro was sewn) will not be visible, and we will not need to make sure that the halves match perfectly - we will simply then cut off all the protruding parts of the wrong side.
(Velcro on the back of the fish)
We sew the corresponding parts of the Velcro to the background, sew the fish together, and see what happens. I had a sheet of special felt with a “sea creatures” print, but even without it you can make basic fish (as I did with the birds above). If you don’t have enough imagination, then good Google will always help you with ideas.
From the depths of the sea we emerge to the surface - we move on to the “doors”. Since we have to make three faces with “doors”, I’ll write everything down here in detail. In general, everything is similar, but there will be some nuances. So, the size we need here is such that the width is the same as the edge, and the height is more than half (to create a smell - a place for attaching Velcro). Mine, with seam allowances, is 17 cm * 12 cm. The “doors” are double-sided, naturally, which means we need two pieces for the “sky” and two pieces for the “sea”. We glue the inside of all four pieces with non-woven fabric.
We design the two front pieces so that they look like the sky and the sea. I added clouds to the sky, and waves to the sea (again, this is a special line for me, but you can do without it). On the part with the sky I also added a felt boat to make it more fun.
(Alas, the boat was not included in the frame)
We sew Velcro on the back of the “sea” and on the front of the “sky”.
Please note that the “sea door” overlaps the “sky door”, which means that on the “sky door” you need to leave space for Velcro. Sorry, but I only have a photo of the “sky” from the inside out, but it shows what the door looks like, already sewn from two halves, but not yet turned inside out. If you look closely, you can see that the connecting seams are laid along the lines that I drew, once again specifying the dimensions so as not to “go” anywhere, and so that the width of the “doors” is necessarily 15 cm. We also look at that the corners are cut off - this is so that when turned inside out the corners look neater
When the “doors” are ready, we turn them inside out and iron them. You can put a piece of cobweb between the layers of “doors” (this is the kind of material that is used to glue two parts together - we put a piece of cobweb between the halves and go over it with a hot iron). I do this so that the “doors” are more solid. Cobwebs are sold in sewing stores in the form of tape (of varying thicknesses or cut like fabric). A very convenient thing - I recommend it . But you can use it, and in mono you can completely do without it. When everything is turned inside out and ironed, we sew the “doors” to the base with the fish so that everything is in its place when we start assembling our cube.
Edge with lightning:
Everything is simple here. We make the background in the same way as for the previous two faces (interlining from the inside at the joints of the overlay parts, zigzag, interlining to the wrong side of the layer when all the parts are stitched). But you will have to tinker with the tent... As I did: first, having previously folded, ironed and basted the edges, I sewed on the inside of the tent, then I spent a long time fiddling with the zipper and two layers of the outer part of the tent and, lastly, the outer corners of the tent ( in order to cover up the imperfections of the corners, I hid it under triangles of felt. So, I advise you not to do this, since it turned out to be very confusing.
I advise you to immediately take felt or fleece for all parts of the tent - one triangle (inner part), and four triangles (outer part) - two for each half. Carefully (remembering to hide the ends) sew a zipper between each pair of pieces. And, after that, sew to the base along the outer sides. The undeniable advantage of felt and fleece in this option is that it does not need to be tucked - this is very inconvenient on such small parts. Edge with lace: Here, as in the edge with Velcro fish, we will have a background and “doors”. There will also be lacing on the background, but very simple, so that even the smallest children’s hands can handle it, but on the doors - this is already the highest class, when the baby grows up a little. So, the background. In essence, it’s just a sky with clouds. For the clouds, I took faux fur (children are in awe of such details and can touch these parts for quite a long time, but white fabric (the reverse side is lined with non-woven fabric) or white felt/fleece will also work here.
I attached a loop of ribbon to each cloud - just a baste (we will use machine stitching here when we assemble the faces into a cube). Also at the bottom of the background I sewed another ribbon, to the back of which I tied a bird button (it is the one that will fly through the loops on the clouds). I melted the tip of the ribbon (and I have a satin cord) a little over the candle so that it does not unravel.
I sewed the “doors” in the same way as the previous ones, but with a slight difference - they do not close overlapping, but joint to joint and will be fixed not horizontally, as in a border with the sea, but vertically. I decorated their inside with stitched continuations of the clouds that were in the background (see photo above). Now let's move on to the eyelets (these are the same metal things that will frame the holes for the lace). First of all, stepping back a centimeter to one and a half from the inner edge of our “doors”, draw a line in chalk on which the eyelets will be placed, then lay the “doors” opposite each other (in this position, in which they will be in the finished product) and mark three or four points on each side. In order for everything to work out accurately, it is important to measure everything so that there are equal spaces between the points.
A little about eyelets. I took 5 mm ones, you can take larger ones, but preferably no more than 8 mm. They are sold in sewing stores. Some eyelets made of soft metal, when installed on the reverse side, “roll” into a smooth cap, and some (made of harder metal) tear into petals. If you come across the latter, then choose a tighter lace for lacing so that it does not cough on these petals during constant lacing/unlacing. In nature, there is a special machine for installing eyelets, but if it is not there, then you can get by with an ordinary hammer and a special device, which usually comes with the purchase of eyelets, if this is a kit and not sold individually. If we bought it individually, then we will do without a special thing - with one hammer. In order not to accidentally spoil the “doors”, we drive the first, test grommet (I don’t have a miracle machine) on a separate unnecessary piece of paper (it is desirable that it be as thick as same as our product).
We do everything as for finishing work:
- mark a hole; - make a hole (I used a seam ripper for this) - cut it with a cross and carefully cut off the excess with scissors; — correctly, as described in the instructions, install the eyelet and device (or only the eyelet); — we put an unnecessary board under it all; - hit with a hammer several times.
Let's see what happened. If everything is fine, then we nail everything down; if the grommet is wrinkled or deformed, we train some more (reducing the impact force and increasing their number). If the reverse side has not rolled up or split into petals, then you can take small wire cutters (yes, I have those too) and make several vertical cuts around the grommet post in a circle. Now everything should definitely work out! Edge with a snap hook:
This line turned out to be the simplest. I sewed the background (the pig under the oak tree with acorns turned out to be more logical than the sheep). I sewed two fabric strips (although you could probably get by with a simple thick braid, not forgetting to melt it on both sides), inserted them into the halves of the carabiner and secured our fence by sewing felt “pegs” on top of it.
I’ll make a reservation right away that when I sew shaped buttons somewhere (be it acorns on this side, or fruits on the next), I “bite off” the “legs” of the buttons, for which they need to be sewn, then with a thin drill (0.5 mm or 1 mm) I drill neat holes and sew them with monofilament (it is very similar to fishing line, only thinner and softer - very convenient, so as not to guess “what color of thread will be less noticeable here”). I do all this so that the buttons protrude from the background as little as possible. It’s more beautiful this way, and we reduce the likelihood that little fingers will tear them off or chew them off to zero. Edge with a knot There is nothing complicated here either. Making a background with a cake.
We sew the “doors”, as usual, the same size as at sea (so that they overlap a little), when they are ready, we begin to make the ribbons from which the bow-knot will be tied. The ribbons are two rectangles 30 cm * 7 cm. You can glue them with non-woven material from the inside out (so that the ribbons are denser and do not get pulled into a very tight knot). We fold each rectangle in half and, with an indentation of 2-5 mm, stitch along the edge, leaving one of the short sides unstitched. We carefully cut off the corners on the side where we laid the stitching so that they straighten out better when turned inside out. Through which we turn the part unsewn inside out, straighten the corners and iron it. The ribbons will look neater and more elegant if they are stitched around the perimeter and along the front side (this will be visible in the next photo).
All that remains is to put everything together. We tie the ribbons the way they should be tied and apply them to the doors, then we baste and sew them in the middle of the “doors”, stepping back three centimeters from the inner edge (we try very hard to do this at the same level and with the same indentation), and sew the doors to the base.
with edges !
Assembly We lay out the edges in the order in which they should be in the finished product. I made a border with a cake and a red ribbon on top (as if it were the top of a gift box). And from this I danced further - I make the top of all adjacent faces at the junction with it. It is advisable to orient the bottom edge in the same plane as the top (common vertical and bottom/top locations).
We sew the sides together. We turn it inside out and make sure that the basting does not capture anything unnecessary (“doors” or other important elements of the edge).
If everything looks good, we sew it on a typewriter. Please note that the seam retreats from the edge by a centimeter at its beginning and end (this is necessary in order to sew in the remaining edges).
We baste the top edge. We turn it inside out again and check that nothing important has been sewn on.
We stitch on a machine, paying special attention to the corners. We baste the bottom edge, but not entirely, but leaving 5-7 cm on each side at one corner (this will be a hole for filling the cube - we will sew it up by hand at the very end).
They turned it inside out, checked it, stitched it. My filler is foam rubber. Bought at a hardware store - the size of the sheet was meter by meter, thickness 10 cm. cube is 15*15, then another ten-centimeter piece is added, the same, but cut in half in thickness.
We tamp everything inside and carefully sew up the unstitched corner with our hands. Hooray! All is ready! You can also use any other fasteners - hooks and eyes, buttons, various buckles and much more. You can make themed pages, like I did here, or you can just carefully design all the fasteners on the edges. That's all I have. I hope that I wrote everything more or less clearly and that something will be useful. If you have any questions, write, I will try to answer. Happy sewing and creative mood everyone!
What you will need during the work process
Required materials and tools:
- felt, fleece, plush or any other soft fabric;
- sewing threads (they must match the color of the fabric);
- tailor's scissors;
- sewing needle;
- tailor's chalk;
- holofiber, synthetic winterizer, foam rubber, cotton wool - for stuffing;
- ribbons, rings, laces, Velcro, hooks, fasteners - for decoration;
- thermal transfers (transfers);
- interlining.
You can cut out a beautiful design from multi-colored fabrics and sew it to the cube.
You might be interested in How to make slime with silicate glue - recipe options
If there is foam rubber inside the toy, then it itself can be sewn from soft and light fabric. If you plan to stuff the toy with holofiber, it is better to use a denser fabric, for example, felt or gabardine.
Important! You should not sew beads or seed beads onto the toy, as small children may swallow them.
All laces and rings must be securely sewn to the walls of the cube.
Pocket with a pattern is easy to make
Matryoshka (Maria Komkova)
source: https://komkofa.blogspot.ru/2013/01/blog-post_22.html
I sewed a development cube to order.
Edge length 16 cm.
There is foam inside.
I named this girl Fenka (there’s a book about a girl who ate nails, haven’t you read it?) Fenka’s arms and legs are constricted.
Goldfish. Her tail and fins rustle, beads move on a waxed cord, and pearl beads in the net can also be moved with your finger.
There are four doors here. The first one has a button, the rest are smaller and smaller in size, opening in different directions, on each side there is an animal, and at the end there is a button - a frog.
Three cat buttons of different colors are also sewn on for learning the colors accordingly.
House with a bell. The window has a button, there is a mouse behind the window.
Here, behind a zipper, a cow on an elastic band is hiding in a recess; a butterfly on a cord is hiding in the flowers (you can hide it and take it out).
The gate is Velcro, behind them is a suede machine. Wooden bead on a cord.
How to work with templates correctly
To help beginning craftswomen, soft cube templates have been created. You need to cut 6 squares of the same size (8 x 8, 10 x 10 or 15 x 15) and sew them together. On the pattern you need to leave 1-2 cm for seams.
First you need to cut out a template from cardboard - an even square. Then the fabric is folded into 6 layers, a template is applied to them and a square is traced with tailor's chalk. Then it is cut out along the contour, and then you get 6 identical neat parts.
Additionally, fabric-cut designs, appliqués, ribbons and much more are sewn on. You can decorate the walls of the cube with embroidery. Cutting requires a lot of attention and time. The result depends on the quality of the cut.
Templates for fasteners and pockets
Ready-made soft cube templates
The easiest way is to work using ready-made templates, patterns and diagrams. How to work with templates:
- You should print out a diagram, pattern or template.
- You need to put tracing paper on top and trace the outline of the drawing with a simple pencil.
- A carbon copy is placed on cardboard or thick paper, and tracing paper with a design is placed on top. Its contours are outlined with a pencil, pressing firmly on it.
- Using scissors, cut out a piece from cardboard.
In the same way, transfer a design from office paper to fabric.
Template for decorating the edge
An example of working on a cube face
You need to sew everything on consistently and carefully so as not to get confused in the abundance of small parts. For example, for birds on a branch we do this: first glue the edge of the cube with non-woven material, sew a bush (a piece of green felt or cotton) to the base, draw the approximate location of the elements on this side with chalk, sew eyes and a wing to one side of the bird, then sew two parts of the bird together (don't forget to add the beak), sew the buttons to the base in the right places, sew around the eyelet hole on the bird, and then make a slit. Do this one by one on each side.
To make a snap border, first prepare the background. This could be, for example, an autumn or spring landscape, a forest edge. Don’t forget to glue the edge on the back side with non-woven material for the strength and durability of the toy. Now make an animal out of felt and sew it onto the background: a pig (this option is the easiest), a horse, a sheep or someone else, but do not forget to leave space at the bottom for the “gate to the pen” on the carabiner.
Sew two strips of fabric, insert them into the carabiner halves and secure the felt fence. You can sew fence pegs on top of the ribbons.