Just a few years ago, CDs were actively used for data transfer, but today they are almost completely a thing of the past. Nevertheless, with the help of ingenuity and simple engineering skills, you can create fantastic things, including household lamps made from disks with your own hands.
There is nothing difficult to complete all stages yourself. The discs are extremely easy to process, since the material is flexible and pliable. Moreover, on the Internet you can find a huge number of ready-made schemes that can be easily supplemented and create a truly unique work of art. Building your own lamp has never been so much fun.
Chandelier made of disks =)
I’ve been on Pikabu for a long time, but I’m creating a post for the first time, so don’t judge me harshly for my desire to show off =)))
I hasten to tell the whole world about my joy - the completion of a protracted chandelier project.
I won’t hide it - the chandelier was bought on Avito. Somehow she immediately won my heart with her unusualness and cheapness. People gave for a nominal fee, because... It didn’t fit them in size for the new suspended ceiling, and almost all the light bulbs had burned out.
In turn, an interesting design and the ability to illuminate the room with a large number of light bulbs were important to me.
As you can see in the next photo, one light bulb in a Soviet crystal chandelier was oh so small for a 3x5m room.
The room in which it was planned to hang the chandelier will be used in the future for games: board games, computer games, home theater viewing, in short - a “fortress of solitude.” As they say, a dream has come true and you can turn around and start arranging your lair. But. first “light”, and then “camera” and “motor”.
A thought came to mind: “Game room, hmm. I should decorate something with disks, that would be oh so cool!” Internet searches yielded no results on how people made the chandelier or ceiling.
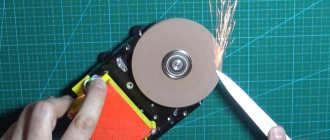
BUT, thanks to the Internet for the advice! First of all, it is easier and more convenient to cut discs with metal scissors. The second thing is that studio and even pirated discs are cut with an even cut, and do not crumble like discs for recording/rewriting. This is probably all that the forums and blogs told me.
During the rearrangement and disposal of unnecessary trash, a bunch of discs of pirated films, games and music from the 90s-2010s were found, as well as a large sheet of hardboard. Unfortunately, the disks from our own reserves would not be enough to implement the idea. Therefore, the project was temporarily frozen, and we continued cleaning and rearranging the apartment, taking out all the garbage in bags.
In our house there is an unspoken tradition of “things in new hands” - things that are not needed are placed on top or bottom of mailboxes to find a new owner. This is how books, toys, things, flowers, whatever, are distributed around the house.
Either it was because of their ant zeal to throw out all the trash and rubbish from the house, or it was just a coincidence, but one of the neighbors was inspired and also got rid of unnecessary things.
On the day when we took out the trash and returned, we discovered a “gift of fate” from an unknown neighbor. The man successfully threw out a huge box of old CDs with music, games and films for us. Thank you, our philanthropist, we are very grateful to you! Without you we would not have made our chandelier. Thanks a lot!
It's time for handicrafts))))))
Hardboard was the first to go into use. The sheet was large, and it was necessary to use it as much as possible as a substrate. The engineer's education did not let him down, the 200*100cm sheet was used with a minimum of waste! As you can see, there are two quarters in the corners, and in the middle is half of the future circumference of the substrate. Pick up a jigsaw and get to work =)
Frame for mirror or photo
You will need a lot of disks, scissors, paints, glue, thick cardboard, colorless transparent varnish.
First you need to cut out a frame from cardboard in the shape and size of a mirror or photo. Then cut the disks into pieces of different shapes - squares, irregular quadrangles, rhombuses, triangles.
Take glue and stick the figures onto the frame so that there is a distance of one or two millimeters between them. As a result, the frame will have a mosaic of iridescent geometric shapes.
When the glue has dried and the figures cut out from the disk have stuck well, use black ink or paint to carefully and carefully go over the joints of the figures. After this, the frame is coated with transparent varnish, allowed to dry and mounted on a wall with a mirror or photograph.
Mirror frames made from discs look mysterious and original.
If the apartment has interior doors with glass, the glass can also be covered with a mosaic of disks. In this case, there is no need to paint the joints between the pieces, but simply cover everything with transparent varnish, then there will be a feeling of light and space.
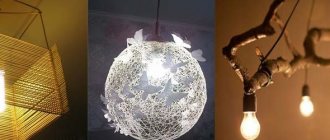
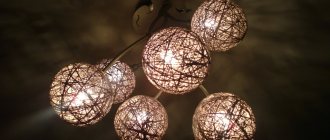
Lamp made from CDs
I received a request to make a chandelier night light from CDs, like on the Internet, indicating a specific type - so that it “shines.” Having studied various designs of such lanterns, I offer my own version of the lamp.
The design was based on 12 CD discs with a double mirror layer. To work, you will need a tool - a screwdriver with a drill with a diameter of 2-3mm, wire cutters and pliers. The disks can be connected to each other with staples made from any soft wire or, as in this design, from pieces of paper clips. The light source will be a 220-volt electric lamp with a standard minion format socket and a standard suspension mount. The cartridge will be connected by a cord with a built-in switch.
Decorating walls with discs
On the wall in the room or in the kitchen, you can lay out an interesting composition from disks with beautiful pictures selected by theme. Or you can use them to create your own painting.
To do this, you need to take the disks and paint their shiny side with black ink; when the ink is dry, mark the lines of the future image along it, and then go over them with something sharp - a thick needle, a special scraper or a sharp knife with a thin blade and a sharp tip.
Iridescent lines on a black background will look very beautiful - you can draw anything you like: unusual birds, flowers, an abstract design. And hang the discs on the wall in any order.
Decorating the kitchen with discs
In the kitchen, discs can make an unusual “apron” in the work desk area. It will look extremely original, and in terms of performance properties the discs will not be inferior to tiles - they are just as easy to clean from splashes of grease and juice from vegetables and fruits.
The principle of working with them is the same as with frames for mirrors and photographs - just stick them on the wall.
Whether for a room or a kitchen, you can make a mosaic panel from disks by gluing pieces of the desired shape and color onto cardboard, and then covering the composition with transparent varnish.
How to make a lamp from a CD
1. Prepare a stencil disk for drilling holes. Using a protractor, we divide the disk into five sectors - this is an angle of 72° and at a distance of 5 mm from the edge we drill 5 holes with a diameter of 2-3 mm. The stencil is ready.
Materials Lamp discs Marking 5 holes Drilling stencil
2. Place disks for the lamp in the disk storage reel. We put a stencil on top of the disk with our own hands and drill the first hole through all the disks. Insert a thin wire guide or a match into the hole. We drill a hole on the other side and also install a guide. Drill the remaining holes. Guides are necessary to secure the disks from moving relative to each other.
3. Install the lamp socket into the first disc. There is no need to widen or saw the hole in the disk. The chandelier has a socket for a minion-type base, but standard sockets with threads at the input of power wires are also suitable.
Stencil in reel Discs drilled Mounting of chuck Chuck mounted
4. To secure the disks together, you need to prepare 30 pieces of fastening brackets. You can use the manufacturing method proposed in the blog about the curtain wall. But, since few staples are required, the latter can be made from soft wire or paper clips. The “U” shaped bracket has dimensions (6-8mm)+(10mm)+(6-8mm). One paper clip makes 3 staples. To make staples you will need pliers and wire cutters.
5. Consistently we begin to assemble the lamp. The staples are inserted into the holes and bent inward with pliers. The discs must rest freely on the bracket and relative to the adjacent discs.
Blank for staples Staples for assembly Connecting disks Assembling the lamp
Main stages of work
So, if you want to get a truly unique lamp, you should start by creating the body of the future device. You can shape it using hot glue, but working with thin disks is problematic. To solve this problem, several dozen CDs are most often glued together to create a weighty case.
Then pass the power cable through the main hole, strip it and attach a lamp socket to one end. These elements can be connected either using modern plastic fasteners or by soldering them together. However, it is worth understanding that high-quality insulation of the connection is required to eliminate the possibility of electrical injury.
Remember that the discs must be positioned with a shiny surface facing the lamp, as it acts as a reflector. Thanks to this, the light acquires a brighter and more saturated hue, so it becomes possible to use sources of lower power - the result will be the same.
A power plug is attached to the free side of the cable, for installation of which solder or a mechanical method can be used. Modern technologies make it possible to eliminate solder, but the decision remains with the engineer. After this, the simplest lamp made from CDs is ready.
As you can see, there is nothing difficult in creating a unique lamp with your own hands. Try, use your imagination and search for information on the Internet to surprise not only your guests and loved ones, but also yourself, since each similar product can perfectly complement your interior design!
Required tools and materials
To make a lamp from old disks, you will need the following materials:
- about 1000 CDs;
- a circle made of fiberboard, the diameter of which is 20 cm and the thickness is 1.5-2 cm;
- steel wire with a diameter of 2 mm and a length of 5 m;
- 12 electrical connectors, selected according to the diameter of the steel wire;
- fluorescent lamp;
- 3 rubber feet with a diameter of 2 cm;
- lamp socket;
- 2 m electric wire with plug;
- switch;
- gun with liquid silicone.
Tools to help assemble the product:
- compass;
- triangle ruler;
- marker;
- a simple pencil;
- hot glue for silicone;
- mites;
- screwdriver;
- pliers;
- drill.
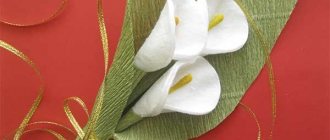
Flower
If you've been sorting out old boxes at your dacha and found a lot of unnecessary discs, there is a great way to use them to benefit the beauty of your yard. Crafts made from disks for the garden look very original and interesting, in addition, they are incredibly easy to make.
In this mini-lesson, I suggest making small flowers from discs to decorate a garden, vegetable garden or yard at the dacha.
Note!
The tools for this craft do not require anything unusual: the right number of disks (it all depends on how many flowers you are going to make), a candle, scissors and paints to make the flowers more vibrant.
The manufacturing process does not require special skills, it is very fast, but at the same time it will captivate you from the first second.
All you need to do is carefully melt the disks over a candle (remember safety precautions: it is best to do this indoors and have some water nearby to put out the fire in case of danger) so that the plastic goes into beautiful waves, similar to flower petals.
I offer step-by-step instructions for making a beautiful rose from disks:
- First you need to cut the disk evenly along the entire length of the radius and heat one edge of the cut over a candle.
- Once the plastic is warm and soft, take a pair of pliers and use them to turn the edge slightly to the side.
- Slowly turn the disc over the flame and continue bending the molten fragments.
- At the end you should end up with a small spiral, which will become a rose bud.
- You can paint it any color, attach a wire stem, cut leaves from other leaves and form a whole flower bed! It all depends on your imagination.
So, today you learned how to make some simple crafts from old CDs. I hope you found this lesson useful and learned a lot from it.
Note!
Manufacturing process
Once everything you need is prepared, you can begin making the table lamp.
Preparatory stage
Before starting work, you need to collect all the tools and materials in one place (for example, on a table). If something is missing, then:
- CDs can be found not only in your closet, many of your friends want to get rid of them, they will be happy to share these unnecessary items with you;
- a circle for the base can be cut from a piece of plywood or take a stand from an old lamp;
- a compass and a triangular ruler - borrow from any schoolchild or buy, because they are inexpensive;
- other materials - in a hardware store;
- You can ask your friends for tools; if that doesn’t work, you’ll also have to purchase them.
Making the bottom
To make the bottom of the lamp yourself, you need to take a round blank from fiberboard and, using a ruler and compass, divide it into 12 sectors. To do this, you need to draw 2 perpendicular lines passing through the center of the circle, and then measure the length of 1 of the radii. By placing the leg of a compass at each of the 4 points on the rim and drawing semicircles passing through it, you can get serifs. When connecting them to the center of the circle, the boundaries of 12 sectors are obtained.
In the center of the bottom you need to drill a hole for the wire through which the lamp socket will be inserted. The position of the chuck in the workpiece should be fixed using liquid silicone. You also need to make 6 holes for the steel wires on which the disks will be located. Then rubber feet are screwed to the base using bolts and a screwdriver, and the cartridge is threaded and fixed into the central hole.
We fasten the disks for the chandelier and form the frame
You need to insert 6 pieces of steel wire into the holes located along the edges of the fiberboard circle and secure them there. The length of each segment must be at least 1 m. The edges of the wire must be bent so that their upper parts are connected in the form of a hemispherical dome, and the lower halves must be raised, leaving straight. 12 pieces of 50 cm wire should rise above the base: 6 bent and 6 straight.
The top of the chandelier
When the stacks reach 26 cm, wrap the wires towards the center. Divide 2 disks folded together into 12 sectors, mark 2 points on each radius, drill holes for the electrical connector. Disassemble the electrical connector so that you can remove the metal connectors. To assemble the top, place a connector on each wire, secure the top disk to the bolts using a screwdriver.
BUTTERFLIES UNDER YOUR CEILING
Latvian weather is so changeable that it is very difficult to wait for real spring. It seems like spring, but it’s cold and chilly. Therefore, we invite you to act yourself and create an atmosphere in your soul and in your home. For example, make a lamp from butterflies with your own hands. You will need (see photo): Round lampshade of an old lamp with 2 circles. Pliers, scissors, decorative chain (in construction, art or craft stores) Aerosol with silver paint - 2.49 ls (K-Rauta) Thin marker - 0.50 ls (K-Rauta) Silver wire - 0.99 per 9m skein (K-Rauta) Transparent plastic material - 2.10 per sheet (SIA Kviller) Fill the old lampshade with silver paint from a can and leave to dry for one day. It may be a different color that fits into the interior of our room. Now we draw or find a suitable butterfly on the Internet or in a magazine (it could be something else - a cloud, a bird, a flower). Cover the drawing with a sheet of plastic and trace it along the outline with a marker. We repeat this as many times as we want butterflies on our lamp. Then we cut them out. Some of the butterflies can be filled with an aerosol of the same color - they will stand out from the crowd and will be even more combined with this specific color with your interior, which already has this tone. For each butterfly, we cut decorative chains 10 cm long. In some chains, using pliers, you can insert transparent beads. They will sparkle and shimmer when the sun shines into the room. Using the same pliers and wire, we attach the chains to the butterflies on one side and to the lampshade on the other. The lamp is ready, all that remains is to attach it to the ceiling. When you open the window and let in a fresh breeze, a flock of butterflies will come to life. To make the lamp even more consistent with the style of your room, use one piece of plastic, from which a butterfly has already been cut out, as a template, and using the same aerosol, place butterflies wherever your heart desires - on furniture, candlesticks, photo frames, mugs. Author of the article: Ekaterina Etsina, photographer and designer, DELFI
Thanks to the development of new technologies, storage devices such as CDs are gradually becoming a thing of the past, replaced by flash drives and memory cards. Most PC users have a huge number of drives left that will never be used. In order not to simply throw away unnecessary discs, they can be used as material for various crafts. One of such products could be a DIY chandelier made from discs.
How to decorate a suburban area with discs
There is room for creativity and imagination. For example, you can make a flower bed out of old car tires and wheels by decorating the outer surface of the tires with a mosaic of shiny pieces.
Or you can cut a peacock out of a rubber tire, and make a tail from whole round disks - to do this, you need to glue them in pairs with their shiny sides facing out, and then make them into a large triangle-tail, gluing the pairs of glued blanks overlapping.
On a country fence made of disks you can depict a huge iridescent caterpillar. You can paint the disks to look like a ladybug - red paint, make spots with black and draw a head, and plant them on fruit bushes and trees.