Using sandpaper from the hard drive of a personal computer, you can edit and sharpen hand tools, knives or small parts. The main advantage of the device: its manufacture requires a minimum amount of tools and auxiliary materials. In this case, the performance of the hard drive does not play a special role: its functions will be completely different.
Modern computer hard drives are not very well suited to realize the idea. The fact is that on HDDs of the first generations, magnetic circles were large in size. This allows you to expand the range of processed elements.
What you need for work
To assemble the sanding machine, you need to prepare the following materials:
- HDD;
- abrasive material;
- standard power supply;
- power supply connection kit;
- materials for assembling the protective casing (at the request of the master);
- rubber caps as a support for the future machine;
- controller for the drive.
Purchasing the last item depends on the type of hard drive. We are considering the use of a brushless drive that will not operate on standard DC or AC voltage. The controller is a special unit that generates voltage at a special frequency for the uninterrupted operation of the electric motor. It operates on a voltage of 9–12 V, depending on the characteristics of the specific model. The cost when ordering from China is $2.8–3.2.
The main advantage of the controller is the built-in function of manually adjusting engine speed.
During the work process you will need the following tool:
- a set of screwdrivers for disassembling a hard drive;
- small drills;
- screwdriver;
- soldering iron;
- glue.
Manufacturing
1. The stationary part of the machine is made of plywood (plastic). Strips 30 cm and 5 cm long and (10...12) cm wide are fastened with the letter G from the bottom with an aluminum corner. We install 1 or 2 magnets in the upper part (fill them with epoxy resin). We drill a hole in the lower opposite part and install a threaded rod (height 12...15 cm) with a bearing vertically.
On the surface (to support the knife being sharpened) we install a prepared aluminum (or stainless steel) plate with a slot in the middle (up to 2 mm thick) with a wing clamp.
2. The moving part has two options:
Option A. For sharpening with whetstones.
Option B. For sharpening with abrasive cloths.
The aluminum profile has 4 sides with a width of 25 mm.
A strip of abrasive sandpaper of different grain sizes is glued to each side: 120, 320, 600, 1500. For stickers, I use a stationery glue stick. Afterwards, the used strip of skin is easily removed with a knife and a new strip is glued on.
How to disassemble a hard drive
With the right tools, the disassembly process is a simple task.
First of all, you need to remove the top cover. Modern models are mounted on several bolts with a hex head. Older versions are designed to use a classic Phillips screwdriver. If the disk has never been disassembled during the entire period of operation, quite serious efforts will have to be made when removing the cover: at the factory, the screws are tightened with a high tightening torque.
The next stage is complete disassembly of the hard drive. It includes the following steps:
- We dismantle the dust collector. In the image it appears as a small white piece. Its function was to filter the incoming air from small fractions that could damage the hard drive.
- We remove the neodymium magnets and the electronic control board. Its performance does not matter: it will not be of value for the future electric emery. Exceptions will be discussed below.
- Remove the read head and all pins except the power supply.
After the work, a bare body with a drive and disks should remain.
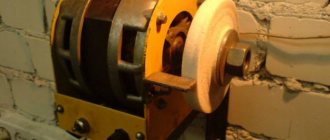
Hard disk grinding machine. DIY grinder
If you have an old non-working or unnecessary computer hard drive lying around, then instead of throwing it away, you can make a mini grinding machine out of it with your own hands. Even if you don’t need it, you can find out from this article how you can start the engine from a hard drive. Such a machine will certainly come in handy at home or in the workshop for sharpening knives, scalpels, drills, chisels, screwdrivers and other tools. Besides, it won’t take up much space, if you’re interested, let’s make a grinder from an old hard drive with your own hands.
Hard disk grinding machine. DIY grinder
Parts and tools:
- Old hard drive;
- Electronic speed controller - buy on Aliexpress;
- Servo tester - buy on Aliexpress;
- Sandpaper;
- Double sided tape;
- Two banana connectors;
- Screwdriver Set;
- Soldering iron;
- Dremel;
- Multimeter.
Hard disk grinding machine. DIY grinder
How to make a grinding machine from a hard drive, step-by-step instructions:
Before you start creating a grinder, make sure that the plates on your HDD are aluminum, as some HDDs may have glass plates. How to check this, there are several ways to do this:
- Take a strong neodymium magnet and bring it to the pancake, if the disk is aluminum then you should feel a slight resistance (due to eddy currents);
- Look through the pancake (round disk) at the sun or bright lighting; if it turns out to be glass, it will transmit a little light, if not, then there will be no gaps at all;
- If you can sacrifice one pancake, then put on safety glasses, clamp the disk in a vice and try to bend it a little with pliers; if it turns out to be glass, it will collapse, if not, it will simply bend.
Step 1
The first thing you will need to do is disassemble the HDD, to do this, take a set of screwdrivers and select a Torx screwdriver of the required caliber, unscrew the top cover of the hard drive, probably one screw will be under the sticker.
Next, we need to pull out the insides of the hard drive, unscrew all the screws and take out the magnetic head with neodymium magnets (don’t throw away the magnets, they can probably be used somewhere else).
Hard disk grinding machine. DIY grinder
Hard disk grinding machine. DIY grinder
Also remove the discs themselves (pancakes) and spacers, since we will have to reassemble them in our own way.
Step 2
Let's figure out how to connect the engine from the hard drive. The motor in the hard drive is a brushless DC motor and its windings are usually connected in the form of a star or delta.
Hard disk grinding machine. DIY grinder
The HDD motor can be easily controlled using the Electronic Speed Controller (ESC). Moreover, it can be controlled by a servo tester and as the name suggests, it is used to test servo motors but still, the type of control signal for controlling motors and servos is the same: it is a simple PWM signal. In the case of a servo drive, a certain signal corresponds to the position of the lever; for an electronic speed controller, this corresponds to a certain speed.
Hard disk grinding machine. DIY grinder
Let's focus on the motor wiring, depending on your hard drive you will have one of two types which we will define by the number of pins:
Hard disk grinding machine. DIY grinder
- If your motor has 3 contacts, then it is a triangle topology: there is a coil between each pair of contacts. This is the simplest option: you just need to solder the 3 wires from the ESC (blue) to the 3 motor pins (a, b, c in the diagram).
— If the motor has 4 contacts, then your motor has a star topology. We will need to connect the electronic speed controller to points a, b, c as indicated in the diagram. To do this, we must determine which 3rd of the 4 contacts they correspond to. To find out, we need to take a multimeter and measure the resistance between the contacts. As we can see in the picture, 3 combinations give a resistance of 1 ohm, and the other 3 give 2 ohms. 1 Ohm is the resistance of 1 coil (1 of Z in the diagram), and 2 Ohms is the resistance of 2 coils connected in series. Conclusion: the combinations that we measured - 2 Ohms, are the ones we need (a, b, c in the diagram)!
Hard disk grinding machine. DIY grinder
After soldering the Electronic Speed Control (ESC), place it in the hard drive case where the read head was. Each hard drive is different, and the mounting method may vary, so base it on where your mounts are located. I screwed on a couple of pieces of aluminum as fastenings, although glue would also work.
Hard disk grinding machine. DIY grinder
Attach 2 banana plugs (black and red) and solder to the red and black ESC wires respectively. Drill 2 holes in the hard drive case to remove and secure the connectors there. You can also use any other nest instead of bananas.
Hard disk grinding machine. DIY grinder
Now you can connect the servo tester to the 3-pin ESC connector, connect it from a power source - 12 V to the banana connector and try testing the motor. If you have connected everything correctly, then everything should work; by rotating the knob of the servo tester, we control the speed of rotation of the motor. That's it, the electronic part for our hard drive grinding machine is ready!
Step 3
After we have tamed the engine from the HDD, we can further turn it into a grinder. Take a piece of sandpaper and cut a circle out of it the size of a railway pancake, then attach it to the disk with double-sided tape, this will allow you to replace the sandpaper in the future without any problems.
Hard disk grinding machine. DIY grinder
My hard drive had 2 pancakes with several spacers between them. Install spacers first and then add 2 plates on top of each other for extra strength. Then place the top washer in place and screw it down, it will also hold the sandpaper securely (that's why we didn't glue the sandpaper with glue).
Hard disk grinding machine. DIY grinder
Now all we have to do is cover the electronic speed controller and its wires from dust and other debris. To do this, we used the cover from the same hard drive and, using a Dremel with a cutting disc, sawed off the unnecessary part, making a cutout for a pancake with sandpaper.
Hard disk grinding machine. DIY grinder
In addition, we also need to make a reading in the form of an arc; we made it from an aluminum strip that we bent and placed on glue.
Hard disk grinding machine. DIY grinder
Step 4
Now we connect the servo tester to the 3-pin connector of the electronic speed controller. I decided to leave it outside, since there wasn’t enough space inside the case for it, and I also often use it for its intended purpose - to check servos when I’m not grinding anything on my mini grinder.
Hard disk grinding machine. DIY grinder
To test our homemade grinding machine from a hard drive, all that remains is to connect 12V from a power source that can produce a current of 1A, then you need to turn the knob of the servo tester (make sure that the servo tester is in manual mode) and the grinder from the old hard drive should start rotating. All you have to do is take out all your dull tools and start sharpening them for your pleasure!
Hard disk grinding machine. DIY grinder
Hard disk grinding machine. DIY grinder
Take home:000
Similar homemade products:
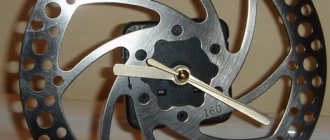
- Desk clock from an old HDD
- Grinder disc for wood processing
- How to make a mini grinder. Belt sanding…
- PWM speed controller on NE555 for Dremel, repair...
- DIY drill sharpening machine
- How to find out AWG wire in mm, section correspondence table
- Turning on motion based lighting, how to connect...
- Simple optocoupler tester
- How to enable AV mode on TV if there is no remote control
Tags:HDD, grinder, hard drive, emery, grinding machine
Assembling a mini-emery machine from a hard drive
After preparing the necessary tools and materials, you can begin assembling an electric sharpener from a hard drive.
The process begins with preparing the abrasive surface. There are two options:
- The nozzle is cut from a sheet of sandpaper along the contour of the disk. An additional hole is made in the center.
- At a hardware store you can purchase a set of abrasive wheels for an angle grinder and adjust their size to the specified parameters.
The discs themselves can be made of aluminum alloy or glass. We recommend covering the discs on all sides to obtain a larger number of processing surfaces. This will increase the replacement interval. To expand your processing capabilities, use abrasives with different grits. By purchasing extra sandpaper, you can make removable attachments from the remaining material.
To attach the attachment to the disk, you can use any universal glue.
After preparing the disks, they are installed back in their original place, tightening all the screws.
Then you should start making the housing for the controller. The simplest option is to buy a junction box measuring 100*100. These dimensions are enough to comfortably accommodate the controller, power socket and engine speed control mechanism. Fans of modern technology can design the case themselves and print it on a 3D printer. It is attached to the hard drive with standard bolts.
The last step is to install rubber feet, which will dampen vibration and provide additional stability during operation. You can order them on Aliexpress or make them yourself.
Required materials and tools
For manufacturing you will need both tools, materials, and some cheap electronics, which are found in every home or are sold for pennies on Aliexpress. Let's prepare:
- the hard drive itself;
- thin Phillips screwdriver;
- Velcro on the drill attachment;
- marker;
- scissors;
- sandpaper;
- glue "Moment";
- metal file;
- drill with drill bit;
- alcohol or acetone;
- computer power supply or 12V power supply with a cheap control board from Aliexpress;
If you want to make a housing, then a 100*100 mm distribution box . We will place the power supply with the control board in this junction box.