One of the main elements of holiday decor is, of course, the Christmas tree. And the Christmas tree decorations set the mood for the fluffy beauty. Agree, homemade toys have a special charm. Although they may not look as perfect as factory ones, you can be sure that they were created with love and soul was put into them. We offer you a selection of 15 master classes on making Christmas tree decorations with your own hands - even if you have never tried making jewelry before. A detailed description of each lesson is available by clicking on the link or photo.
Patterns
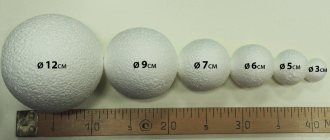
We fold the fabric in two layers, make a pattern, cut it out and sew it, maybe by hand. Don't forget the 0.5 cm seam allowance.
Pattern of mittens and boots
Ideas for fabric Christmas tree decorations
You can use any fabric for New Year’s crafts. Everything will come in handy: chintz, calico, corduroy. Or such fashionable fabrics as matting and burlap. This is very relevant now. Simple and unpretentious stencils are in fashion: Christmas trees, hearts, stars. Making them is not at all difficult, the main thing is to take the time. If you are going to visit, take a couple of toys with you, I think that such a small gift will come in handy.
New Year trees: decorate the tree with paper toys
A great idea for a Christmas tree decoration would be a miniature paper Christmas tree. You can make it from thick paper or old postcards, and you can hang your masterpiece on a regular thread.
By the way, if you don’t have a real tree, you can make your own magical New Year tree. For more ideas, see the article:
Fairytale gnome with gifts
Craftswomen may also be interested in do-it-yourself New Year's dolls made of fabric, for example, a fairy-tale gnome in a cap. To make it you will need:
A piece of white felt fabric;- Textile material of any color:
- Red fleece for the hat;
- Doll knitwear;
- Sackcloth;
- Tailor's pins;
- Combed ribbon of Semenov wool (for beard);
- Felting needle;
- Threads of different colors;
- Beads, bell, bow, buttons;
- Dry pastel (for blush);
- Makeup Brush;
- Patterns of parts: felt boots (legs) - 4 pcs., torso - 2 pcs., bottom - 1 pc., head - 1 pc., arms and mitten - 4 pcs.;
- Weighting agent (granulate);
- Any fiber for stuffing (synthetic fluff).
Little feet in felt boots
Attach the pattern with a pin to the white felt fabric and use scissors to cut out two pieces along the outline. Then, without removing the pin, cut out two more parts in the same way. There is no need to remove the pin yet, because this makes it easier to sew the parts together. Use a loop stitch and white thread. You need to sew both felt boots along the rounded side.
Torso of a magical hero
You can use cotton fabric. For strength, the fabric should be glued with adhesive interlining on the reverse side. Attach the body pattern to the fabric folded in half and outline the outline of the piece. Sew along the side seams. Fold the fabric right side inward, pin and sew with a very fine stitch, leaving an opening for turning inside out. Leave the bottom side unstitched. Cut out the piece with scissors, making notches so that the fabric does not bulge. Do not turn it inside out yet, as you need to baste the legs and bottom from the inside out.
Before basting the felt boots, fill them with synthetic down or other filler, then carefully place them inside the body and baste them. Next, from the same fabric from which the body was made, you need to cut out the bottom. Attach the template and cut with a small allowance. Fold the circle in half to determine the center and sew the bottom in symmetrically. Align the mark on the bottom with the seam on the body and secure with pins. Sew with a fine stitch along the outline, leaving no holes.
Before turning the finished part inside out, make several notches on the bottom so that the part does not wrinkle. Now you can very carefully turn the part out using a wooden sushi stick or any other stick. The body is ready for filling. Glass granules can be used for weighting. Pour weighting material into the body through the unstitched area and insert synthetic down. Sew with a blind stitch. Set aside the body.
New Year's wreath
A New Year or Christmas wreath is usually decorated with the front door or hung on the wall. But you can make a mini paper wreath that will look great on the Christmas tree as a toy.
Well, if you want to make a real Christmas wreath with your own hands, then look:
horse
Separately we cut the horse and the rocking stick. We fold the material in half, draw the silhouette of a horse and stitch it. We leave room for stuffing on the belly of the toy.
Turn out and stuff with a pencil. Sew up the hole.
Sew the horse with a hidden stitch to the rocking stick, as in the photo. Decorate with a bead.