- Interesting idea for a chandelier made from plastic spoons
- Chandelier made of plastic bottles in the form of leaves
- Chandelier with paper butterflies
- Fabric chandelier
- Lamp made of threads and a balloon
- Wine bottle chandelier
- Laserdisc chandelier idea
- Shabby chic chandelier
- 90 photos of DIY chandelier ideas
A chandelier in a room is not only a lighting fixture. Without exaggeration, we can say that it is the main decoration of the room. Handmade items are considered especially valuable. This allows us to highlight the special taste of the owners of the home, as well as their extraordinary and creative mind. Of course, this type of work is quite complex and requires increased concentration. But at the same time, when creating decorations for your home, you can find many interesting and extraordinary solutions in it!
This article presents some ideas for decorating a chandelier with your own hands, as well as instructions for them. Everything is written so simply and clearly that anyone can do it at home.
In order to make a chandelier, sometimes the most unusual materials are used. For example, everyone is already familiar with glass or wood, plastic, and so on. But sometimes, when you want something completely “unusual,” wooden skewers, glass wine bottles, jars, all kinds of tree branches, cardboard, and even straw come into play. You need to choose depending on the idea of the creator and the wishes of the apartment owners. You also need to take into account the general interior of the room where the finished product is supposed to be placed.
Interesting idea for a chandelier made from plastic spoons
Plastic spoons for disposable meals are one of the simplest and most easily available materials for creating a chandelier for a room. Their advantages are low price, a variety of colors, and such material will last for quite a long time. To create such an extraordinary chandelier, you will need a minimum of investments, both physical and material.
Crafts from waste materials: original ideas
DIY salt dough figurines: instructions, photo ideas
Materials:
- empty drinking water bottle, 5 liters;
- plastic spoons (their number depends on the size of the bottle);
- glue for plastic;
- an old chandelier (or rather, a socket from it);
- sharpened knife.
Process of creation:
- First you need to prepare a plastic bottle for subsequent steps. Remove the label in advance, cut off the bottom, dry well.
- Then you need to remove the plastic spoons from the packaging and carefully cut off the unnecessary handles with a knife, leaving about 2-3 centimeters above the level of the “scoop”.
- You need to glue the scoop blanks to the base of the bottle. Apply a large amount of glue to the remaining “tail” and press it to the surface (with the convex side of the spoon facing out). It is necessary to cover the entire bottle in a circle until the entire perimeter is occupied by the plastic. It is advisable to arrange them in a checkerboard pattern and slightly move them together. This will leave fewer “free spots”.
- You need to remove the cartridge from the old unnecessary chandelier, and then place it in an already glued and dried bottle and fix it to the frame.
- A decorative bowl can also be made from plastic and glued around the neck of the eggplant.
- Install and connect the chandelier, check its operation.
Note! The option of decorative painting or painting of spoons in absolutely any color is possible. Thus, your product will look even more beautiful and more original!
Chandelier made of plastic bottles in the form of leaves
Another unusual option in the interior would be a chandelier made in the shape of leaves. It is created from simple plastic bottles, the variety of colors of which allows you to work in the most unusual colors and embody the most daring ideas.
Process of creation:
- Cut plastic bottles into blanks shaped like future leaves.
- For each workpiece, the sheet shape is finally fixed.
- Using a soldering iron with a thick tip and a one-sided bevel, you need to slightly fuse the sections of each leaf in order to give the future product the greatest effect.
- In the same way, using a soldering iron, you need to give the workpieces a sheet structure. You need to act extremely carefully and accurately, because you can easily make a hole in the plastic. Such a leaf with outlined veins and slightly fused edges will look complete.
- Using a hot needle, you need to melt several holes at the “leg” of each leaf in order to attach them.
- Using thin wire, form branches and screw them to a steel wire frame.
It would also be a great idea to make a new chandelier in the form of a lampshade for a floor lamp or a table lamp. Thus, it will be a great addition to the previous product!
Chandelier with paper butterflies
The most common product option is a chandelier with butterflies. And this is not without reason. Let's start with the fact that this option looks luxurious and expensive, and secondly, its production does not require any special physical costs. Thus, even a child can participate in creating a chandelier.
Process of creation:
- It is based on either an old chandelier or a similar frame. If you don’t have one, then you can take the simplest wooden or metal rim. If such material is not available, then, as an option, you can take thick wire and make about 2-3 skeins, so that a circle is formed.
- Cut out butterflies from paper according to the template. You need to take the butterfly template and adjust it to the desired size. The option also looks very unusual when butterflies of several sizes are located on the chandelier (again, depending on desire). Transfer the outlines onto paper and carefully cut out, preferably with a sharpened stationery knife, or small, non-rounded scissors. For the templates themselves, it is better to use a material that is dense, does not become very dirty and does not attract dust. For example, velvet paper is very poorly suited for the product, because in the future you will need to vacuum the chandelier quite often.
- Take a nylon thread or transparent fishing line and attach the butterflies to it. There are two types of fastening: either piercing the bodies of the butterflies, or gluing them with silicone glue.
- Next, we attach the threads with butterflies to the base of the frame and decorate it.
- You can also try a fun variation by making a wire ball! As a basis, you should take a pendant from a chandelier and place several butterfly templates on it using a glue gun.
Design nuances
The spider chandelier consists of several main elements:
- central mount;
- a bundle of cords for connecting cartridges;
- lamps in various quantities.
For each individual cord there is a separate mount, which allows you to unload the base of the chandelier and place the lamps in any direction (the similarity of the cords with the outstretched legs of an insect is what gave it its name).
For these purposes, a small ceiling clamp or a rigid frame is used.
Fabric chandelier
This chandelier is also based on a frame. As in the previous version, either old metal frames or thick wire are suitable for its manufacture.
After you have pre-prepared the base, start cutting out the fabric from which the lampshade will be made in the future. How long the finished product will be depends on your desire, but it is worth considering that the width of the fabric must be the same as the diameter of the frame! Once you finish the pattern, you need to do a fitting.
Another nuance is that the top of the fabric will need to be sewn directly on the frame, which means that it (the frame) must be solid. Otherwise, if it is possible to thread it directly into the fabric, then you should first fold the top edge of the pattern and stitch it, and then iron it. Then we sew a seam on the side of the product.
Foam letters: production, methods of decoration, 69 photo ideas
How to make a key holder with your own hands: step-by-step instructions, photo ideas
To prevent the lampshade from losing its shape, you should pay due attention to the material. If the fabric is too light, “airy,” then the bottom of the product should be weighted. You can use cardboard or fishing line for this.
Carefully sewn fringe, lace or braid will look just as beautiful. But do not “overload” the product! The process of creating a fabric chandelier is similar to making a lace chandelier. So you can safely experiment with the materials that are placed on the frame.
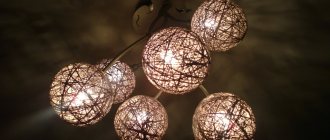
Lamp made of threads and a balloon
Materials:
- dense threads, such as wool, cotton, or jute rope - at least 1 meter;
- cartridge;
- petrolatum;
- PVA glue;
- a brush for applying glue and Vaseline (it is advisable that the brush does not fade);
- 1 or 2 pieces of balloons (the first for working with it, and the second for checking the finished product, if desired);
Process of creation:
- Inflate the balloon to a certain size and secure it. Remember that the finished work will exactly follow the outline of the ball! Using a marker, draw a couple of circles at the top and bottom in order to determine the boundaries of thread winding.
- Using a brush, coat the entire perimeter of the ball with Vaseline.
- Pour PVA into a plastic container and thoroughly process the threads with it (It is not advisable to apply glue to the entire length of the threads at once! Process them as you wind them around the ball!).
- Taking into account the boundaries that you drew with a marker, wind the threads around the ball. Do not forget that the future appearance of the product depends on the density with which you wind it.
- After wrapping, you need to leave the product for a day until it is completely dry; After complete drying, you need to burst the ball and remove it through the holes.
- Cut a spot in the top and insert the cartridge.
- To be completely sure that the product is strong, you can insert a balloon into it and inflate it. In a similar way, you can check the flexibility and reliability of the lampshade.
Alternatively, you can paint the structure with spray can or acrylic paint, and attach all kinds of decorative decorations to it, such as butterflies, artificial flowers or beads. Also, a great idea would be to arrange several balls in the form of a bunch of grapes and fasten them together.
FakeHeader
The result is, blow your mind off, very cool.
A good idea to take note of. Well done
look at mine, it shines much better
I didn’t find where it shines better, I only saw a photo of the head when, send me the link, it’s interesting.
Hurray, my thousandth “Like”))) It shines cool!
Awesome)) You've messed up! 5+,
Pass!, 5+ for the idea, 5+ for the execution, 5+ for the uniqueness, 5+ for the simplicity. We are waiting for performance characteristics (service life). Thanks to the author, added to favorites.
I give a standing ovation! Of course, I can’t understand how it shines, but the work should be praised. Now I’ve also finished the LED headlight in the bumper-DRL+ high beam. I can’t install everything on the car!
Related article: How to seal a pipe on a metal roof
It turned out cool))) But it would be interesting if the extreme ones blinked yellow when turning (my opinion)… And that’s cool!
I used the same spots in the car. good thing. what power did you use and how much?
Cool idea. I think it would work better with these ones ru.aliexpress.com/item/Wa...9.html?recommendVersion=1 They might come in handy))) I’ll probably make them myself.
Sorry for interfering, but think carefully about whether they are suitable for you, apparently, the product (ru.aliexpress.com/item/Wa...9.html?recommendVersion=1) does not correspond to the description: emitters = 3 W, and not 10 W. as in the description, I don’t even know what will happen if you apply 3 A to it. Reviews for the product are also not very good: (Two lamps and a board arrived that organizes a police strobe alternately with one and the other diode. The housing is not sealed both around the lens and through the wire input. Measurements showed that from 12V - the real current consumption without a strobe board - 100 mA per each diode, that is, they shine a maximum of 0.8 W for both. The diodes inside were not secured and were dangling in the housing. One of the lenses was loosely secured and fell out when lightly tapped, the second one, prying with a knife, also fell out without much resistance. In general, use them without modifications are unlikely to be possible.) (the strobe is not needed, we remove the board and they shine perfectly without a strobe, you just need to connect them to 12 volts, otherwise they will burn out.) The rating of this particular seller is dangerously low. But of course it’s up to you to decide. Good luck .
Thank you) I didn’t look at the reviews. Here l...ra))) Well, that means looking for something like that.
Be sure to look at the reviews and seller rating. For myself, through trial and error, I decided not to deal with goods and sellers with a rating below 97% - it’s more expensive for myself. 4 years of purchasing experience. 300 orders.
Well, not always. I worked with a seller whose status is 20 percent. So he returned the money for a non-working product. Looks like it's just starting to develop)))
Yes, at first I ordered from them, but the question is what are you risking, 3 $ or 30 $, and you will lose time.
Wine bottle chandelier
This version of the chandelier is a little more complex than the previous ones. Making a chandelier this way is quite difficult; the manufacturing process will require care and attention. However, you will like the result!
Materials:
- wine bottle;
- glass cutter;
- sandpaper for sanding edges;
- cartridge;
- electrical wire;
- metal or wooden frame, rim.
Process of creation:
- First you need to prepare the bottle itself for further manipulations with it. The first step is to draw a straight line around the perimeter at the level you need. This is required in order to cut off the bottom of the bottle using a glass cutter;
- To avoid cutting yourself on the glass, you need to sand the sharp edges with sandpaper;
- Pull the wire through the neck of the bottle and then connect the socket;
- Attach the bottle to the frame.
You can also decorate the bottle with all sorts of decorative items, or leave it in its original form. In any case, it will look original and impressive.
The number of products on the frame depends on your desire. You can either leave one bottle or secure four or more bottles at once.
Suitable light bulbs
The design of the lighting fixture allows you to adjust the length of the legs at your discretion, so the spider lamp is able to direct light flows even to the most remote corners of the interior. This is especially appreciated if it serves as central lighting. Occasionally, an unusual model is used as an additional device for a separate zone.
When choosing a design, pay attention to the cartridges and what sockets they are intended for.
Advice! For spider chandeliers, it is recommended to choose lamps with a power of 40-60 W.
It is possible to dilute the boring atmosphere and play with shades by using LED lamps in the spider chandelier. They provide a choice between color temperatures. When trying to achieve a truly urban interior, light bulbs with a cool tint are installed. Such lighting immerses you in the atmosphere of neon signs and vividly reminds you of modern technology.
The use of LED lamps in a spider chandelier is beneficial not only from the point of view of saving energy costs. The formation of lighting in different colors is another opportunity for modern interior lighting. If you are planning a youth party, guests will love spending it in an atmosphere filled with the color purple.
Another advantage of installing spider LEDs in a chandelier is their long service life, reaching 5 years. Other light sources cannot boast of similar results. In addition, lighting devices do not pose a danger to the environment, which is important in an overly polluted environment.
Edison light bulbs, familiar to everyone from childhood, look no less attractive in a spider chandelier. Old forms immerse the interior in a retro atmosphere, although often such sources are already equipped with an LED board.
Interesting options for interior lighting with lamps in a spider chandelier in the photo:
Laserdisc chandelier idea
This idea is great for those who have a large number of laser discs left in the house, but don’t dare throw them away. It’s worth noting right away that manufacturing options and the result can be very different. It all depends on your imagination and creativity!
Materials:
- two round wooden planks of different thicknesses, and which are slightly larger in diameter than the disks;
- racks made of metal or wood;
- Fluorescent Lamp;
- magnetic switch;
- disks.
Process of creation:
- Make a hole in a thicker board and install a starter with a switch in it.
- Then connect it all to the lamp.
- String disks onto the lamp.
- Place the stands around the discs and secure the top.
Weaving from rubber bands: overview of methods, step-by-step master class
How to make shelves for flowers with your own hands: ideas, types, instructions
The finished product will delight its owners for a long time, and it does not require special care. It is not advisable to place this type of chandelier in a child’s room so that the child cannot harm himself (only if the chandelier hangs out of reach).
Stages of work
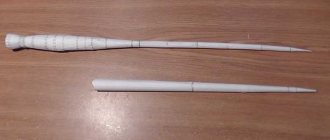
First, see if the length of the table leg is suitable. If necessary, it can be shortened, but not more than 50 cm. The further steps are as follows:
- Drilling a hole with a diameter of 7-8 mm at the lower end of the leg. This is the cable entry.
- Creating a hole in the top of the leg. It is necessary for hanging.
Article on the topic: DIY Japanese chandelier
- Removing the rotating side of the table. The leg indicated above is placed in this place in the middle. The clamps move slightly away from the edge of the Snudda.
- Light bulb switches are cut off. The wire breaks.
- Connecting cables using a connector. Here you cannot place more than three lamps on one connector. In this version, this is exactly the permissible quantity supplied. Then the wires coming from the connectors through the leg are passed and connected to the ceiling.
Shabby chic chandelier
To create spectacular lighting in a room, you can also make a chandelier from fabric or beads. The result will be a kind of candelabra or lampshade in the “shabby chic” style.
Materials:
- a ready-made metal or wooden frame (or it can be made from an old hoop, garden basket, thick wire);
- socket and lamp;
- chains and threads for decoration;
- all kinds of beads and seed beads.
Working on such a lampshade is not difficult, but it is a very painstaking task. Such chandeliers usually consist of two or three levels of rings, which are located on top of each other. It all depends on the size of the chosen bases. If you take rings of the same diameter, the finished product will be made in the “modern” style.
One of the important points is that before you start decorating the chandelier, you need to paint and wrap the frames with decorative materials!
The approximate consumption of beads is:
- For the lower part of the lampshade - 16 mm beads, about 15-17 pieces per thread;
- For the upper part of the lampshade - 12 mm beads, about 35 pieces per thread.
Naturally, when stringing beads on a thread, you can increase or decrease their number or the degree of thread tension. But it is still advisable to stock up on materials in excess of the norm.
The essence of the work is to hang threads with beads in a “waterfall” or “cascade” so that they flow downward along the structure.
In order to create the effect of “muting” the light, you can sheathe the frame with thick fabric.
A DIY chandelier will definitely add a fresh touch, originality and beauty to your interior. You will immediately notice how the room will sparkle with new colors, and your guests will sincerely admire your creativity, hard work and original taste!
Types of design and color design
As already mentioned, all structures are conditionally divided into two groups:
- The central mount is equipped with soft legs - wires. Most often, models are supplemented with simple spherical light bulbs that imitate droplets of moisture. Sometimes the lamp is surrounded by a metal shade of varying degrees of complexity.
- A distinctive feature of the second type is solid legs, which are usually made of metal; wooden parts are less common. Due to the presence of 2-3 hinges, tripods bend and freely change their position. These models are decorated with metal lampshades. Due to their external bulkiness, they are suitable for interiors of large rooms.
Article on the topic: DIY Provence style chandelier
The following photos show examples of various designs:
Since in nature large tarantula-shaped spiders are dark in color, the chandeliers are also available in black. But such a design is not at all necessary. For the interior of a nursery, you can decorate your own chandelier with multi-colored wires, which will fill the room with bright colors.
In the classic design, the original designs are monochromatic, but if you wish, you can experiment with the color of the ceiling bowl or the shade of the cartridges.