Decorative plaster fur coat could belong to the finishing materials from the “well forgotten old” series, if it were not so popular today. Indeed, such a rough surface for walls was invented several decades ago and is found in Russian cities at almost every turn.
However, modern decorative plaster fur coat, although performed using the same technology, looks different. They began to paint it in a variety of colors - this very economical coating was transformed beyond recognition. You can prepare plaster under a fur coat with your own hands.
If previously facade plaster fur coat served purely utilitarian purposes - to protect buildings from atmospheric factors, now it can rightfully take its rightful place among decorative finishing materials.
Advantages and disadvantages.
According to professionals, shuba plaster is even superior to its colleagues in many respects. This type of coating is different:
- high levels of soundproofing and noise insulation characteristics; this happens not only due to its composition, but also due to the possibility of applying it in the thickest possible layer without significant financial costs; after all, unlike, for example, Venetian plaster, a fur coat costs almost a penny - there is no point in saving the solution, so you can create the thickness that you want, so that, of course, it sticks to the surface;
- ease of application: even a person inexperienced in finishing can do this, which cannot be said, for example, about mosaic or Venetian - they require knowledge of the technology and training;
- different options for applying to walls: four methods are used - with a roller, a trowel with a spatula, through a mesh, using a broom or brush; machine application is also possible;
- good aesthetic characteristics, which are quite comparable with another, more expensive, type of coating - bark beetle plaster, as well as other decorative finishing materials;
- the ability to paint the finished surface with any color: you can add dye to the solution or apply it to an already dried coating;
- good maintainability: the fur coat is very easy to restore;
- very low price of the material compared to other types of mixtures.
Decorative façade plaster has the disadvantage of being able to quickly collect dust. Therefore, a wall finished with it must be washed with a powerful jet of water every few years. However, this is perhaps the only significant disadvantage of this type of coating.
Types and installation of foundation plasters
Whatever finishing option you choose, the packaging with the composition should be marked “for facade work.”
Mosaic covering for the foundation
Mosaic plaster for the plinth is a working mixture of acrylic resins filled with granite or marble chips, natural color or painted, both mono- and multicolor. The filler fraction can be different, from 0.5 mm to 3 mm. The most popular is with a grain size of 1.2 to 2 mm. The coating can withstand mechanical loads, temperature changes and humidity well. Also, the acrylic contained in the finish gives it high elasticity, and therefore crack resistance.
Important: applying mosaic plaster for exterior work to the foundation is only possible in dry weather and on a dry surface. This is due to the low vapor permeability of the composition - moisture will escape from under it for quite a long time, which, in turn, can cause mold to damage the surface.
Mosaic plaster
Plastering the base of a house with your own hands: the video describes the process of applying mosaic finishing:
Stone foundation finishing
Plastering the plinth under the stone is done with ordinary cement mortar in a ratio of 1 to 3. Some craftsmen advise adding tile adhesive to it, approximately 20% of the total mass. The coating can be given any design: Roman and simple brickwork, rubble stone, etc. The technique of applying a coating to the foundation is very simple: ordinary plastering is done, then the texture is applied and the seams between the “stones” are unstitched.
The video clearly shows the process described above:
Stone plinth plaster has the following qualities:
- Good decorative characteristics.
- Low price compared to other types of finishing.
- Easy to install on foundation.
- Good vapor permeability.
- When applied correctly, long-term and trouble-free operation.
Important: this finishing option requires a fairly thick layer of working compound. Therefore, the foundation for installation of the coating should be prepared very carefully. If the surface is not very reliable, then the plinth must be plastered using a mesh.
Plastering the foundation under a stone: the photo shows a combination of textures
Basement plaster “fur coat”
Finishing the base with decorative plaster “fur coat” can be cement-sand, cement-lime or silicate in composition. The performance characteristics will directly depend on this:
- Cement-lime mortars are quite elastic, resist mold attacks well, and do not harden too quickly, which makes them easy to work with.
- Base silicate plasters “shuba” protect the foundation well from moisture, while maintaining decent vapor permeability. It should also be noted the high decorative qualities of the coating and long service life.
The characteristics of cement-sand compositions are given above, so we will not repeat them. “Shuba” plasters are applied manually or mechanically. Both of them are quite simple and do not require special skills to operate.
Finishing the base with “fur coat” plaster
Base plastering technology
The process of plastering the base with cement mortar or a composition of another quality can be divided into three stages:
- Preparation. This is repair, priming and/or installation of reinforcing mesh on the surface if the foundation is insulated with foam plastic.
- Application of working composition. The method depends on the type of plaster: stone and mosaic - with a trowel, fur coat - by spraying by hand or with a special machine.
- For “stone-like” and fur coats - creating a relief, stamping or trowel.
Plastering the foundation with your own hands: the video describes the process of creating a relief by stamping:
Important: preparing the base for finishing must necessarily include cleaning the surface from crumbling concrete. We knock down such areas until a homogeneous material appears.
Components.
Basically, façade plaster coats are prepared independently - it’s very simple. After all, the solution is made from ordinary cement and sand. Nowadays, fine sand is increasingly used: with it, the coating turns out to be more finely structured. You can use gypsum instead of cement, but then you need to be prepared that the coating will absorb moisture very quickly. It will have to be protected with special paints or compounds.
One of the recipes for preparing fur coat plaster with your own hands assumes the following ratio of components: one part cement and three parts sand. Another option suggests taking sand and cement in half, the third option is 1:2. Do-it-yourself fur coat plaster is diluted with water, which is added until the solution acquires a consistency that resembles liquid sour cream.
Factory product.
Ready-made mixtures - in dry form or already suitable for starting work, have different compositions and characteristics. Thus, under the Cerezit brand, pebble-type plaster is offered, with which you can create a “fur coat” effect. In addition to cement, it contains small stone granules. It tolerates mechanical and atmospheric influences well. To make a “fur coat” out of it, experts recommend using a short-haired roller.
“REAL” brand plaster is proposed to be used for finishing concrete walls. They can be used to create a decorative coating when arranging a thermal insulation system for walls.
ATLAS CERMIT SN (CERMITE SN) has mineral inclusions measuring one and a half or two millimeters. Allows you to create a decorative “fur coat” type coating.
Another decorative option is “Lakra Shuba”, packaged in 15 kilograms ready for use. Its composition contains minerals and acrylic. The ready-made mixture “Aura Putz Fur Coat” can be used for finishing concrete walls, brick, stone, plywood, plasterboard, chipboard.
DIY plastering machine
Car homemade products Homemade products for the dacha Fisherman, hunter, tourist Construction, repair Homemade products from unnecessary things For the radio amateur Communications for the home Homemade furniture Homemade light Home craftsman Homemade products for business Homemade products for the holidays Homemade products for women Origami Origami Paper models Homemade products for children Computer homemade products Homemade products for animals Homemade healer Food and recipes Experiences and experiments Useful tips
Homemade plastering machine for applying a “fur coat”.
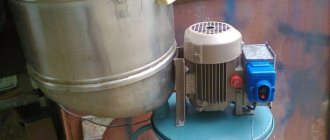
Over time, everything is destroyed, and no matter what grandiose buildings there are, time erases them into dust. True, the Egyptian pyramids still stand, but time will scatter their ashes over the desert. These were the philosophical thoughts that flowed in a slow stream in my head as I looked at the peeling plaster of my house. It was clear that the amount of work would be large, and I turned out to be right - when I started knocking down the old plaster, it began to peel away from the wall in layers. A couple of days later I looked at the brick wall with quiet horror, and realized that if I didn’t come up with anything to help myself, I’d be plastering it just before Chinese Easter. I’ve been plastering for a long time, but I haven’t had to apply a “fur coat”, I looked up this topic on the Internet, but it was suggested to wave a broom (an old grandfather’s method), and I brushed it aside. When I entered the garage, a spray gun caught my eye, and I decided to make a plastering machine using the same principle, powered by a compressor. I took a fire extinguisher as a basis, cut it, it turned out to be a 4-liter capacity, inserted a tube with a nozzle (d4mm) inside, the outlet hole in the fire extinguisher was 10mm, the distance from the nozzle to the outlet was 15-20mm. As they say, I assembled it on my knees, installed what was at hand, but if you have a turner nearby, you can order nozzles of different diameters - 3mm, 4mm, 5mm. The machine went off with a bang, four liters of solution flew out in 50 - 55 seconds, covering almost a square meter. It took more time to prepare the solution; by the way, the solution was made 1c to 2p, and filled with lime milk. I tried making the solution both thinner and thicker, but I liked the second one better - it fits the fur coat perfectly.
I would like to apologize for the low quality of the video, you could say I filmed it with the Lumiere brothers camera :request. and therefore the texture of the plaster is poorly visible.
Similar homemade products Apparatus for applying plaster: features of use
A plastering machine for mechanical finishing of walls helps a person get rid of heavy manual labor. This is especially important when performing repair work on a large facility in a short time. Plastering with a machine is a process of leveling walls with special mixtures. It allows you to replace doing the work yourself with a mechanical method, while preparing the mixture and applying it to the surface.
Features of mechanized plaster
If when working manually:
- The mixture needs to be prepared in small portions because it hardens quickly, in about 50 minutes.
- Operations are slow.
- Even a fairly experienced plasterer will not be able to prepare a solution of the same consistency every time.
- It is impossible to apply the mixture simultaneously to the entire surface:
- the solution is mixed;
- throws himself on the wall.
- Apply coating quickly and evenly.
- Achieve better surface finishes.
- Save solution - much less of it is used. This is due to the fact that when the unit stirs, the mixture is saturated with air, which increases the volume of the solution.
As a result, part of the wall practically dries out, the second part dries out, and the third part is only covered with mortar. The result is a scaly surface, which can lead to unevenness and cracks over time.
Unlike the manual process, the mechanized one allows:
So, with manual plastering, approximately 16 kilograms of solution are needed to finish one square meter of area, and when using a machine, 13 kilograms. One layer saves 3 kilograms. When applying three layers, this difference is already 9 kilograms, which means the price of the material will be less.
- Treat facades and walls in a shorter time. which significantly increases labor productivity. The device applies the solution to the surface much faster. This allows you to use a wider spatula and a longer rule than when working by hand. The wall surface becomes smoother, which is very important for further finishing of surfaces.
The principle of operation of the unit and the technology of applying the solution
The main element of the plastering machine is the container:
- Water flows into it and the dry mixture is poured. The proportions of materials are programmed, which allows you to obtain a solution of only the desired consistency.
- Here the composition is thoroughly mixed, loosened, and saturated with oxygen.
- The mixture is applied to the surface through hoses.
- The use of special nozzles allows you to cover a large area in a minimum time, and large rules and a spatula can level this surface in a few minutes.
Tip: With mechanized plastering, one or two workers can complete a large amount of work, up to five times faster than by hand.
Instructions for plastering work include:
- Using a level, the curvature of the walls is measured.
- At the outer corners, guide beacons made of aluminum are installed. These works are done manually.
- The device is connected to the electrical network and a water supply.
- The dry mixture is poured into the hopper of the plastering machine.
Tip: If there is no water supply at the construction site, you should use the pump included in the equipment package. It supplies liquid to the hopper, regardless of the type of container.
- The feeding auger delivers the plaster mixture to the mixing chamber.
- The composition is thoroughly mixed with water until a homogeneous consistency is obtained.
- Mixing occurs constantly throughout the entire operation of the machine, which allows you to obtain a solution of sufficiently high quality.
- The mixture is supplied through a mortar hose to the surface to be treated and evenly applied to it, as shown in the photo.
Mechanical plastering
- The mortar on the walls is leveled using large spatulas, a trowel and a rule. In this case, the surface is rubbed until it is even and smooth.
- The plaster mixture on the walls is left to dry.
- Other sections of the wall are being prepared for finishing and the corners are being finished.
- All stages of the machine plastering process are controlled by building levels.
- The last operation is to remove small scratches and protrusions and smooth the surface with a special sponge.
What mixture is used for devices
Mixtures for plastering machines are produced:
They can treat surfaces from:
Tip: The prepared solution must be used at temperatures ranging from 5°C to 29°C. Before starting plastering, a primer corresponding to the type of surface being treated is applied.
- A special plaster composition is used to fix the corner profile.
- For plastering facades, the solution is made from mixtures that are intended for this type of work.
- For interior decoration, it is better to use gypsum-based mixtures. They are used to level the surfaces of ceilings and walls in rooms with low humidity. Gypsum plaster allows the surface to be made more even, smooth, with high strength and environmentally friendly.
How to make a machine for applying plaster
A homemade plastering machine, just like an industrial unit, allows you to apply the solution faster and with better quality than manually. One of them could be a homemade pneumatic bucket or a small hopper.
This not very complicated device allows you to apply mortar to walls with virtually no losses, very quickly, without special preparation. As additional material for making the device yourself, a video is offered in this article.
Plastering walls with a pneumatic bucket
Tip: This type of device is intended for finishing large areas and for plastering the entire building. If the area to be treated is small, it will take more time to install the device and, after finishing the work, to wash it afterwards.
The advantages of the device, compared to the manual process, are:
- The speed of application of the solution increases by approximately 2.5 times, without loss of coating quality - the created jet pressure promotes adhesion.
- Finishing can be done using various admixtures and fibers.
- The solution can be applied to walls indoors and outdoors.
- The device is easy to clean. To facilitate maintenance, it is better to make the container from stainless or galvanized steel. The pneumatics simply need to be blown out with a working jet of air, after which all parts are dried.
To make such a pneumatic mechanism, first of all, you should understand on what principle it works, which will facilitate the assembly of the pneumatic bucket.
The action of the device is performed in the following sequence:
- From the compressor, a stream of air flows through a hose into a bucket, which is filled with solution.
- On the opposite wall of the container there are holes for pushing out the mixture under air pressure.
- The front wall of the bucket is tilted; this will allow the mixture to be scooped out more efficiently from the container where it was prepared in advance.
Tip: To prevent the solution from spilling when applied to the ceiling, a small lid should be made on the top of the hopper, which will cover only a third of the hole on the side from which the air will be supplied.
- A nozzle is put on the pneumatic hose, serving as a nozzle; its internal diameter should be 5 millimeters, and the diameter of the outlet should be 12 millimeters.
- The nozzle is adjusted so that the distance from it to the front wall, or to the outlet, is approximately 20 millimeters. In this case, the lower part of the bucket can be much larger: 50x50 millimeters or 70x70 millimeters.
- The material for the manufacture of the structure is chosen from a variety of materials, from any available parts. It is important that the principle be followed: the solution is lowered through a narrow space and pushed out by air.
For example, when the distance to the front wall from the nozzle increases to 100 millimeters, almost all the pneumatic power will be spent on the resistance of the solution, and at the top of the container only bubbles and too weak outflow of the solution through the outlet hole will be observed.
- The sides of the bucket are fixed with two clamps attached to the edges of the hopper and the nozzle itself. In this case, the bucket receives three points of support. The clamps can be welded, secured with rivets, the front part must be fixed to a threaded connection.
Tip: When plastering with a pneumatic ladle, you need to use a thicker solution.
- A gun is connected to the compressor through a hose; in this case, a pressure of two to three atmospheres is required: with a higher value, the spray will inflate, with a lower value, there will be no jet.
- When plastering, the distance to the outlet from the wall is approximately 18 centimeters, and the thickness of the layer is adjusted as necessary.
Tip: To increase the speed of work, you should make more nozzles and outlets. In any case, the hose remains alone.
The use of any mechanical apparatus facilitates the process of plastering surfaces.
Graduated from the Faculty of Architecture of the Penza State Institute of Architecture and Construction. For the last ten years, he has been a leading specialist in a large construction company in Penza, engaged in the construction of multi-storey residential buildings. Total work experience in the specialty is 18 years. Consults on design issues, selection of materials for interior and exterior decoration, and technology for finishing work.
Do-it-yourself plastering machine: classes, sizes, solutions
Builders never did simple work. Finishing is one of the most labor-intensive processes when performing repairs.
But new technologies are reaching this market sector along with mechanization. Thanks to the advent of the plastering machine, the need for manually performing complex operations disappears.
The unit replaces an entire team of finishers. From the point of view of economy, a do-it-yourself plastering machine will be profitable.
What are these machines good for?
Machine application of plaster
A person must still be present nearby, because these installations do not belong to the group of autonomous robots.
But the most routine and complex processes are performed by the unit itself.
If we talk about physical activity, it is difficult to prepare solutions. The machine can cook everything itself.
The fact that water and dry mixtures have clearly dosed proportions becomes important, but the unit allows you to constantly obtain high-quality mixtures.
The complete elimination of the human factor is guaranteed, and when carrying out such work this is important.
The components are mixed using mechanical movements. The supply of the composition is carried out at high speed. Air is included in the solution. This saves money - the mixture takes up more volume with less spending. Compared to manual work, this solution is much more profitable.
The machine is capable of doing the same job as a whole team of workers, only much faster, and the solution is quickly and evenly applied to the walls and also takes less time to dry.
All this helps to improve the overall quality of the finish.
- The controls of such a machine are accessible and understandable to users of any level of training. Any buyer will understand the operating instructions without additional help. The same goes for maintenance and repairs, if necessary.
- The units are made with small dimensions. For transportation, the structure is equipped with handles and wheels.
- Models are most often assembled from separate modules. The machine can be quickly disassembled and reassembled at any time. A relevant property for those who are interested in long-distance transportation and storage.
- If the unit is serial, then all basic work processes are regulated in it. Thanks to this, the machines can be used not only on large, but also on small construction sites, with small teams of workers.
What are the features of the technology?
For uninterrupted operation, the device requires constant access to the electrical network. The presence of running water is also an important requirement, but only in some situations.
But don’t be upset if there is no device on the sites that can take water from other places. Many models are equipped with a pump that pumps liquid from any container.
The machines have bunker parts where the mixtures are supplied in dry form. Filling of ready-made mixtures, which are produced in factories, is also acceptable.
The solution must get inside special chambers; for this, a screw method is used. There it is mixed with water. The process is organized continuously.
The mortar hose, its end, is held in place by a special device. It usually looks like a pistol. This allows the mixture to be applied to walls. in an even and even layer.
The material is applied to the surface using several modes supported by plaster guns. The consistency of the solution and the type of surface being treated are determined by changes in technology.
Plastering machines operate on several types of pumps:
The design necessarily includes a cyclic block. Thanks to this, mixing occurs continuously.
Conventional plastering units have a simpler design.
About cars made with your own hands
How to make a plastering machine yourself
Of course, in mass production it is easy to find high-quality and practical, powerful tools.
But the price will be the main disadvantage for many.
When performing a one-time job, not everyone will decide to purchase expensive equipment.
And rent is not always available to buyers.
But even in such situations there is a way out - homemade plastering machines.
They will be inferior to serial models in power and performance, but have an acceptable cost.
And working with such a tool will not cause much trouble.
- As a basis for creating a tool such as a do-it-yourself plastering machine, we take an ordinary fire extinguisher with a capacity of up to 4 liters. It has most of the parts we need. These include pens and cylinders where solutions are placed. And a lever that opens the valve at the outlet.
- If the volume is larger, the product will become too bulky. And a small container will need to be refilled too often.
It all starts with cutting off the bottom of the fire extinguisher. A homemade machine works the same way as a spray gun. In this case, the fire extinguisher capacity plays the role of a solution hopper; its bottom should be at the top.
Next, the hole is drilled. It is located opposite the valve outlet. A metal tube is placed inside.
And then at its end a nozzle with a diameter of 4-5 millimeters is installed. Air is supplied through it, which is taken from the compressor.
The power of the device is determined by several factors:
- The gap between the parts of the incoming nozzle, as well as the nozzle
- What diameter is the outlet hole provided?
- Air pressure
The mixture is ejected more actively as the outlet nozzle approaches the nozzle.
15-20 millimeters from the nozzle to the nozzle will be enough for those who perform plastering under a fur coat. But the distance to the nozzle needs to be shorter if we are talking about fine mixtures. It is important to increase the compressor pressure.
You can complicate the design somewhat. For example, cutting threads on metal water pipes with diameters in accordance with the requirements.
And the pipe itself is then secured to the nuts, using gaskets with a seal. Then the gap will be easier to adjust and the connection will be easier to weld.
But the simplest option is fastening while simultaneously sealing the tube. Resin is indispensable in this process. How to create a plastering machine with your own hands - the video shows it more clearly:
To do this you need to perform the following set of actions:
- A certain position is important for the hopper part, which is already equipped with a tube at this stage. It is necessary to ensure that the angle between the horizon and the axis of the outlet hole is equal to 45 degrees.
- Pouring resin into liquid form. With that calculation, the final level was slightly lower than the nozzle. Then the fire extinguisher is left alone until the resin part has completely hardened.
- The option when everything is filled with resin has its advantages - the liquid flows along the surface at an angle, flowing directly to the nozzle
- It is necessary to acquire a compressor that creates pressure up to 2 atmospheres. We connect the connecting hoses and fill in the solution. You can start working.
Application technique details
- The surface requires careful preparation before starting work. The preparatory process is the same as before manually applying plaster. It is imperative to inspect the surface and then get rid of old finishing layers, if any. The main requirement is the absence of oil and damp stains on the materials. Only a clean, dry, strong base is allowed. Fungus and mold will only interfere with further work.
- The next step is to move on to the primer. The process depends on what types of solution we use. For application use ordinary rollers and brushes. But you need to install corner profiles and beacons before you start work. Fastening occurs on a solution. or on mounting adhesive.
- You can take a machine and connect it to the process. Each device comes with instructions that are as easy to understand as possible. The main thing is to carry out a preliminary check with the hoses; punctures are unacceptable.
- Work begins when the operator stands at a certain angle in relation to the material requiring processing. The dominant hand is needed to hold the pistol. And the second one is needed to fix the hose.
Recommendations
They start by transferring the mixture into cracks and depressions with large dimensions. After this, they proceed to applying the composition to the surface, distributing it evenly. It is customary to start plastering in the left corner of the room, which is located at the very top.
If work is carried out on ceilings. then the starting point is the angle. Usually the one with the greatest distance.
The composition should be applied only in the form of even strips. Each of them should have a length of 700 millimeters. The laying step is selected according to the thickness of the application.
The plaster is laid in several layers if the material itself is thick. The main thing is that the time interval between applications does not exceed 30 minutes.
Solutions for mechanized plastering
It is most convenient to use mixtures that are designed specifically to do this job. Indoors, they often resort to cement bases and gypsum.
The exception is objects where humidity is always high. For facade finishing, it is recommended to give preference exclusively to the cement component.
Among the materials suitable for use in such situations are cement and sand mortars. But when preparing it, you need to maintain consistency and proportion.
But it is the use of specialized mixtures that will allow you to obtain a high-quality coating. Plasticizers and other substances are added to the solutions, which improve the texture of the wall and make all the work easier. Just like creating a plastering machine with your own hands, the drawings will confirm this.
Special purpose mixtures provide the following benefits to owners:
- Improving the sound and heat insulation properties of walls. If the composition contains a special component like perlite.
- Creating a favorable climate, because the compositions are vapor permeable.
- Easier achievement of the effect of a perfectly flat surface. This applies even to curved sections and corners.
- High-quality connection to the walls.
- Now drying does not take so much time.
It is easy to find compounds on the market that are designed specifically for machine plastering. But most manufacturers prefer to supply compounds with universal functions. They are plastered both manually and mechanically.
About plastering machines. Classes and sizes, work performed
The most attractive are devices produced in Western countries, compared to other factory-type analogues.
For example, the Knauf company produces devices that are distinguished by high performance characteristics, compact dimensions, and support for many functions.
Such machines also work on the painting process, and not just on supplying the solution to the walls and its direct preparation.
The plastering machine from RFTRitmoM is another development with miniature dimensions. At the same time, it is superior to its huge analogues, if you study the technical ones. functionality.
Regardless of the size of the equipment, at least one or two operators are required to service these machines. The technical equipment is almost not determined by the class and size of the devices; it is almost the same everywhere. It includes:
- Compressor devices that spray the composition on the surface, supplying it to the materials at a certain pressure.
- Chambers mixing the elements of the solution.
- Containers where water and dry mixture are stored.
- Pump supplying solution.
Automation is widespread in modern models. Thanks to this, the work of operators becomes easier and easier. In this case, the solution is prepared with parameters that are set precisely.
Kits with nozzles with nozzles of different diameters also make the task easier. They determine how intense the spray flow will be.
Additional rules for mechanical plaster
Usually maintain a strict right angle when holding the gun next to the surfaces being treated. The gun case and the material itself must be kept at a distance. not exceeding three tens of centimeters.
The gun moves at a certain speed, which allows access to adjust the layer that is distributed over the surface. The plaster layer will be thicker if the gun moves more slowly.
Approximately 10 kgm2 per square meter is the consumption of MP75 plaster.
The main thing is that the width of the grips does not exceed 70 centimeters. And each subsequent one is applied to the previous one with an overlap of 5-10 cm.
About the types of plaster
Plaster can be thermal insulation, cement or gypsum. Gypsum machine plaster is the most popular.
It implies that only natural materials are used. The environmental safety of gypsum has been scientifically confirmed.
Cement is used if gypsum cannot be used due to the volume of work. And thermal insulation - if other materials do not allow obtaining the required characteristics.
About the features of gypsum plaster by machines
This type of work has its advantages compared to other solutions:
- There is no need to additionally treat the walls with putty.
- Availability of single-layer leveling of bases, with a layer of up to 50 mm.
- The ability to regulate the indoor microclimate, environmental safety.
- Whiteness, to a high degree.
Qualified setup of equipment affects the result. This is the only way to avoid unnecessary waste of material. The long, expensive puttying process is easier to avoid by using modified mixtures.
The main thing is to understand that mortar mixing pumps are needed only to work with dry mixtures. Filling the receiving hopper of machines does not tolerate free experimentation.
Plaster mortar
Compared to traditional compounds, specialized mixtures shrink much less.
They resist cracks and their appearance anywhere.
The surface is leveled in layers, with a thickness of 5 to 100 millimeters.
Low specific weight and the ability to connect to any materials are the main advantages for practical use.
Plastering machines have short payback periods, because they are universal. The ideal application option is when three people are involved in the work.
One of them works with the machine, two continue to plaster and grout the walls. This will reduce the time for construction work. Gypsum solutions are good because very little of them is consumed.
These materials also have a lower specific gravity compared to analogues. Thanks to this, transport costs are reduced and there is less work for the plasterers themselves. The load on the foundation is reduced to a minimum.
- Replacing an socket with your own hands Replacing an socket is necessary in cases when the old one stops performing its functions or is simply broken.…
- Installation of a split system with your own hands (instructions) Stages of installing a split system with your own hands Outdoor unit of the air conditioner
- Decorating doors with your own hands Decorating interior doors with your own hands: ideas You are not going to spend a large amount, but want to refresh...
- How to make stretch ceilings with your own hands How to make a stretch ceiling with your own hands? This design looks stylish, but it also costs a lot. If...
Prime well.
Prepare the base for plastering work as usual before application. The wall is thoroughly cleaned of everything foreign, including old finishing materials.
Expert advice: On a smooth surface you need to make notches using a hammer and chisel. This is necessary to ensure good adhesion to the base.
Be sure to prime the base. The composition for this can be purchased at a building and finishing materials store. A large brush is suitable for application. It is important to wet the wall very well. You can do this using a spray bottle. Then you need to wait until the primer is completely dry.
The golden rule of plastering work
- Before applying a new plaster layer, the surface must be thoroughly cleaned of old plaster.
- Another requirement is the absence of damp and oil stains on the walls. Only a dry, clean and strong base is allowed.
- Mold and mildew will also interfere with further work.
- A person working with a homemade plastering machine must direct the unit’s hose to the wall, ensuring uniform coverage in relation to the beacons. If the solution is applied in excess, the strength of the plaster will noticeably decrease. If the solution is applied insufficiently, characteristic gaps will appear on the walls. The optimal thickness of plaster is a layer from 12 to 30 cm.
A roller will help.
Decorative plaster coat can be applied to the surface in different ways. There are four of them in total, each with its own characteristics and preferences when choosing a place of application.
The first, simplest option is decorative facade plaster coat for application with a roller wrapped in fur. In order for everything to work out as it should, it is important to monitor the thickness of the solution - it should not be liquid, but not thick. You can proceed as follows: first apply the mixture to the surface with a spatula, then roll it out with a roller. Or simply dip the roller in the solution and “paint.” In the second case, the structure of the finished coating will be rougher. Usually, when the mixture dries, the surface is smoothed a little using a dampened trowel. The result is a cork effect.
You can vary the surface structure. So, a roller with a longer pile will give a larger texture. A roller with holes will create a unique design. When applied with a roller, decorative fur coat plaster can be applied in two layers. Apply one first, level it out, then roll over the wet mixture. Then, when the solution has set, walk the more liquid mixture over the surface. This will help you get a different texture.
Staining and tinting
Decorative plaster “fur coat” is supplied in white and gray shades.
If you want to paint the surface in light shades, use white; gray is better suited for obtaining rich or dark tones.
You can change the color of the composition during mixing or after application and drying. The first method is more labor-intensive, since the solution is prepared in small batches, and it is necessary to achieve an exact match of the second and subsequent portions of the first. In the process of diluting the mixture with water, you need to measure the exact volume of the solution and the color added, and then strictly adhere to these proportions when making subsequent batches.
The color of the plaster can be changed by painting. Use regular paint, apply it with a brush or spray.
Making and applying “shuba” plaster is not particularly difficult. If you follow the work technology, you can get a smooth, durable and aesthetic coating without significant costs.
Special sprinkler.
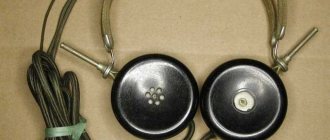
The second way to apply fur coat plaster with your own hands or factory-made is by spraying. It is done using a special tool - a sprinkler. A manual fur coat plastering machine looks like a small box, inside of which there is a shaft equipped with rigid cables, as if disheveled. When a manual plaster machine rotates, the cables grab the solution and spray it onto the wall. If the cables are thin, the texture of the “fur coat” turns out to be finer.
The thicker the cables of a manual machine for plastering a fur coat, the larger it is. This tool is usually made by hand. A classic of the genre is to use a trowel with a spatula. First of all, grab the mixture with a spatula and place it on the surface. The layer should be thin. Then, using a trowel, the structure is made. The tool is simply pressed tightly against the wall, and then quickly torn off. The rather rough texture that results is usually smoothed out with a wet trowel.
About cars made with your own hands
How to make a plastering machine yourself
Of course, in mass production it is easy to find high-quality and practical, powerful tools.
But the price will be the main disadvantage for many.
When performing a one-time job, not everyone will decide to purchase expensive equipment.
And rent is not always available to buyers.
But even in such situations there is a way out - homemade plastering machines.
They will be inferior to serial models in power and performance, but have an acceptable cost.
And working with such a tool will not cause much trouble.
- As a basis for creating a tool such as a do-it-yourself plastering machine, we take an ordinary fire extinguisher with a capacity of up to 4 liters. It has most of the parts we need. These include pens and cylinders where solutions are placed. And a lever that opens the valve at the outlet.
- If the volume is larger, the product will become too bulky. And a small container will need to be refilled too often.
It all starts with cutting off the bottom of the fire extinguisher. A homemade machine works the same way as a spray gun. In this case, the fire extinguisher capacity plays the role of a solution hopper; its bottom should be at the top.
Next, the hole is drilled. It is located opposite the valve outlet. A metal tube is placed inside.
And then at its end a nozzle with a diameter of 4-5 millimeters is installed. Air is supplied through it, which is taken from the compressor.
The power of the device is determined by several factors:
- The gap between the parts of the incoming nozzle, as well as the nozzle
- What diameter is the outlet hole provided?
- Air pressure
The mixture is ejected more actively as the outlet nozzle approaches the nozzle.
15-20 millimeters from the nozzle to the nozzle will be enough for those who perform plastering under a fur coat. But the distance to the nozzle needs to be shorter if we are talking about fine mixtures. It is important to increase the compressor pressure.
You can complicate the design somewhat. For example, cutting threads on metal water pipes with diameters in accordance with the requirements.
And the pipe itself is then secured to the nuts, using gaskets with a seal. Then the gap will be easier to adjust and the connection will be easier to weld.
But the simplest option is fastening while simultaneously sealing the tube. Resin is indispensable in this process. How to create a plastering machine with your own hands - the video shows it more clearly:
To do this you need to perform the following set of actions:
- A certain position is important for the hopper part, which is already equipped with a tube at this stage. It is necessary to ensure that the angle between the horizon and the axis of the outlet hole is equal to 45 degrees.
- Pouring resin into liquid form. With that calculation, the final level was slightly lower than the nozzle. Then the fire extinguisher is left alone until the resin part has completely hardened.
- The option when everything is filled with resin has its advantages - the liquid flows along the surface at an angle, flowing directly to the nozzle
- It is necessary to acquire a compressor that creates pressure up to 2 atmospheres. We connect the connecting hoses and fill in the solution. You can start working.
We knit brooms.
The third type of plaster mixture can be applied with a broom. But not the ones who sweep the floors.
Important point: The broom must be knitted from thin twigs of willow or other trees. It is important that the branches are rigid, otherwise the desired effect will not be achieved.
The process is as follows: a broom is dipped into a bucket of solution, quickly spraying the mixture onto the wall. The coarseness of the coating texture depends on the thickness of the twigs used to make the broom. You can smooth the surface again with a damp trowel. Instead of a broom, you can use a brush with metal bristles. It is dipped and then brought to the wall by running a wooden plank along it. This sprays the solution.
The principle of operation of the unit and the technology of applying the solution
For mechanized application, you need to become familiar with the operating principles of the machine.
Important! Consistency of the solution: when squeezed into a fist, a lump is formed that does not release moisture. The plaster is laid in an even layer on the surface of the wall.
Plastering instructions:
Before applying the plaster mixture, the surface is treated with a primer. The working solution is used at a temperature of 5−29 degrees.
Additional Information! If there is no water supply at the site, use a pump that supplies liquid from any container.
What mixtures are suitable for application by machine:
Machine application.
A faster, fourth method is when a machine is used to apply plaster under the “fur coat” - a mechanized electric device. For this purpose, a hopper and a compressor are used. The essence is the same as with the manual method of application - the solution is sprayed onto the wall with a machine for applying plaster under a “fur coat”. You can make its drops larger or smaller, thus influencing the texture of the finished coating. There are more options for the final structure with this method of application than with manual application.
It is important to consider several points:
- in order for the coating to be uniform, you need to hold the nozzle of the sprayer at an angle of ninety degrees to the surface that is being finished;
- Using a machine for applying plaster under a “fur coat”, the mixture is applied in multi-layers.
Expert advice: prepare the mixture for machine application yourself, maintaining the following proportions of ingredients - one part sand to one part cement. In this case, it is better to first sift the sand and cement through a sieve to remove too large fractions that will interfere with the operation of the machine.
Large relief.
If you throw large portions of the mixture onto the wall at once, you will get a do-it-yourself “fur coat” plaster with a large relief. A thick, coarse-textured layer will help hide serious surface irregularities.
Metal mesh is also used during application. First, a metal construction mesh is installed at a short distance from the wall to be finished. It is prepared in advance by stretching it over a wooden frame. The solution is poured through this mesh, scooping it up from the container with a trowel. Having completed one section, the grid is transferred to another - and work continues.
How to make a machine for applying plaster
Common models are made of a fire extinguisher and a hopper bucket.
The do-it-yourself plastering station, made on the basis of a fire extinguisher, has become the most widely known.
The fire extinguisher has a handle, a lever, and a nozzle, which makes it a favorite among devices for homemade mechanical plastering devices.
Step by step description.
- The factory fire extinguisher (bottom) is cut off and a container of several liters is obtained. The working solution will flow through the hole. The volume must be at least 4 liters. If it is larger, the device becomes heavy. If less, you need to frequently fill the container with solution.
- A tube with a nozzle with a diameter of 4 mm is inserted into it. The diameter of the fire extinguisher hole is 10 mm, the distance from it to the nozzle is 20 mm. Nozzles can be of different sizes: from 3 to 5 mm. Resin is suitable for attaching the tube, the level of which is below the nozzle.
- The compressor is connected to the fire extinguisher using a tube, through which compressed air is supplied. The tube is embedded in the wall of the container and is located opposite the outlet of the finished mixture.
- The solution supply power is regulated by increasing (decreasing) the diameter of the nozzle, air pressure, and the distance between the nozzle and the nozzle.
The average pressure is approximately 2 atmospheres. If it is larger, finishing is carried out, all pores and cracks of the coating are filled.
Productivity of the device: 4 liters of mixture are applied in 1 minute.
Homemade hopper bucket
It is used for renovation of the entire building.
Benefits at work:
- high spraying speed, which creates conditions for better adhesion of the mixture;
- the use of various impurities;
- outdoor and indoor use.
Before assembly, you need to understand the principle of its operation. Sequencing:
- The compressor supplies a stream of air through a hose into the bucket with the mixture.
- The other side of the bucket has holes d 12 mm for the solution to exit.
- The front wall is slightly inclined for ease of taking the mixture from the common container.
- A nozzle d 5 mm is placed on the hose. The distance from it to the outlet hole is 20 mm.
- The top of the bucket is wider than the bottom. It is fixed with two clamps.
- The device is connected to a compressor. Pressure 2-3 atmospheres. Distance to wall 18-20 cm.
When assembling a machine yourself, devices and spare parts from other products are used.
Making a metal hopper bucket
Sequencing:
- The drawing is made on a galvanized sheet.
- Cut using a grinder or scissors. When using rivets, an allowance of 15 mm is left.
- The parts are bent and connected by welding and riveting.
- A handle is attached.
- Holes are drilled for the nozzles (on the front wall) and for the spray gun (on the back).
- The nozzle is attached to the inside of the container.
- Additional stiffening ribs are attached.
- It is filled with solution, covered with a lid on top, and sprayed.
Additional Information! Use a lid to cover the top of the ladle. This will prevent the solution from splashing.
Additional nozzles and outlet openings increase operating speed. One hose is needed.
Finish in color.
The finished dry coating can be painted. The most common paint for use on facades is suitable for this. You can add pigment while the decorative plaster under the “fur coat” is still in the form of a solution. In this situation, it is better to choose white cement to achieve a purer shade.
Important point: It is recommended to add dyes to the mixture if you intend to create a fine-medium relief coating. It is better to paint a large texture after applying the solution and drying it.
You can begin painting the finished coating when it is completely dry. First, the surface is “swept” with a large brush - particles of the composition are removed, which are easily removed. Then paint using a roller or spray. It is recommended to use vapor-permeable materials for this.
Note!
Here are a few recommendations from professional finishers who will help ensure that the decorative plaster under the “fur coat” is applied to the highest possible quality:
- work can be performed if the air temperature is not less than plus five and not higher than plus twenty-seven degrees Celsius;
- if the mixture is applied in two or three layers, you need to apply them immediately one after the other, before the previous one has time to dry;
- it is important to pre-prime the walls very well;
- mineral powders of red iron ore, white asbestos, manganese, cobalt glass, white marble, coal and others are suitable as dyes;
- the consistency of the mixture is of medium plasticity, such that the composition does not slide off the surface;
- if you want to make a larger texture, you can take a metal mesh or a stick with a broom at the end;
- a finer texture is achieved using a metal brush.
data-matched-content-ui-type=”image_stacked” data-matched-content-rows-num=”2″ data-matched-content-columns-num=”3″ data-ad-format=”autorelaxed”>