TOP 6 drawings will help you make a cutting machine from an angle grinder with your own hands without errors and extra costs. Answers to frequently asked questions, recommendations.
TEST:
Is it possible to make a homemade cross-cutting machine from an angle grinder: a verification test with answers based on the materials presented
- What switches are installed for emergency stop of the machine?
a) manual;
b) hand and foot.
- Which angle grinders are suitable for creating a cutting machine?
a) pneumatic and electric;
b) battery-powered.
- Minimum power of the electric motor of an angle grinder for a cutting machine from an angle grinder:
a) 400 W;
b) 900 W.
- What machines can be made based on angle grinders?
a) trimming, cutting;
b) grinding, milling, sharpening.
- Where can you place the grinder in the cutting machine?
a) above the tabletop;
b) under the tabletop.
Answers:
- The correct option is b). Foot switches are more convenient because they operate quickly.
- Theoretically, there is enough power in all three options. In practice, a) - electric and pneumatic models are used. A battery is not needed for a stationary machine. For a pneumatic drive, you will have to purchase a compressor of appropriate capacity.
- 900 W or more. Correction is made if workpieces made of relatively soft materials are expected to be processed, or at high speed.
- Both options are correct. A powerful grinder is suitable for creating various machines at the household and semi-professional level.
- Two mounting options are allowed. Experts prefer the top one.
An electric grinder performs many different work operations. To reduce labor costs while increasing accuracy, it is used as the basis for the machine.
“Bulgarian” is a common name for an angle grinder (angle grinder). By changing the disk, this universal device can be converted for cutting and performing other work operations.
Bulgarian women
How to make a cutting machine step by step with drawings: 4 reasons in favor of implementing the project
In order not to doubt the correctness of the decision made, study the following facts:
- without reliable fastening, the workpieces vibrate, increasing the risk of damage to the disk;
- it is difficult to manipulate a heavy tool with high precision while maintaining the perpendicularity of the cut;
- difficulties increase when processing thick products, when creating a large batch of similar parts;
- Using both hands significantly increases the likelihood of injury.
A high-quality machine is necessary to solve the noted problems and improve productivity. It is created according to the following algorithm:
- clarify the purpose and scope of work;
- study drawings of factory analogues and homemade products, choose the appropriate option;
- compose a set of design documentation with a list of necessary purchases;
- carry out assembly according to the approved plan with performance testing.
How a pendulum saw works and works
Any pendulum saw, regardless of whether it is made by hand or produced by a well-known manufacturer, has the following components in its design:
- bed;
- powerful electric motor;
- saw blade;
- protective casing;
- return mechanism;
- clamp for clamping the sawn product.
Arrangement of pendulum saw units
The massive, heavy saw frame is made of cast metal to ensure stability of the tool during operation. All other saw components are attached to it. First of all, this is a pendulum arm on which a powerful electric motor is mounted, an elongated shaft with grooves and screw threads for installing a saw blade. This lever has a spring mechanism that returns it to its original position after finishing cutting the product.
A button to turn on the saw is installed on the lever handle. For ease of use of the tool, a latch is added to the button that blocks the tool from turning off when the button is released. The cutting tool is completely covered with a protective casing, protecting a person from injury during operation. On some models, manufacturers install two casings - one fixed, the second sliding, completely covering the cutting zone.
Device with description of nodes
A pendulum saw for metal is used not only when working with metal products. It can work with wood, ceramics, and plastic. But to cut other materials you need to use a different cutting blade. Various cutting attachments can be supplied as a set, but can also be sold at retail.
A clamp consisting of two parts is attached to the frame for clamping the product being cut. The first part is rotating, which can be rotated at an angle of up to 45°. It has a pointer and a scale graduated in degrees. The second part has a screw adjustment of the pressure. The clamping jaw on the second part has a hinged fastening, which allows you to firmly fix the part at any turn to the front of the cut of the product, guaranteeing an accurate cut at the selected angle.
This is interesting: Band sawmill for longitudinal cutting of Taiga logs (video)
TOP 6 drawings with explanations for making a homemade metal edger
It is not difficult to create a standard circular saw if you attach a grinder under a work table with a slot. It is necessary to consider a guide system for high precision movement of workpieces.
Picture No. 1. Schematic diagram
Look at picture No. 1 to see what a typical edger looks like. Here the angle grinder is mounted on a movable hinge, which somewhat complicates the design. This scheme has several advantages:
- simple and reliable fastening of the workpiece;
- the significant weight of the upper part will help to use less effort when cutting workpieces;
- if necessary, hand-held electric tools are dismantled to perform work operations as usual.
Picture No. 2. Stand for an angle grinder
This power frame is assembled from standard steel angles and pipes with a square cross-section. Welded joints are more durable. But it is also possible to create a prefabricated structure using screws and nuts.
Picture No. 3. Assembly drawing of a pendulum saw
This project can be used as an example for making a high-quality metal edger. Equipping with wheels makes it easier to move a heavy product.
For your information! In other racks it is necessary to install screw supports. With their help, unevenness in the floor covering is compensated.
Picture No. 4. Pendulum circular saw
Look at the picture for an example of a machine for processing wood. This technique is suitable for cutting large workpieces. It is necessary to choose a grinder with sufficient power so that it is enough to work with large-diameter discs. A load is secured on the reverse arm of the lever (instead of an electric motor, as in the drawing). The weight and mounting location are selected in accordance with personal requirements and the characteristics of a particular design.
Picture No. 5. Drawing of a circular saw
This machine can be converted to be mounted at the bottom of an angle grinder. If longitudinal sawing of wood is planned, such an engineering solution will be optimal.
Picture No. 6. Design of a factory miter saw for wood
Look at Picture No. 6. You can use it to make a set of drawings with your own hands. It is recommended to pay attention to the spring, which lifts the working unit to its original state. A rotary table with measuring devices will help create a machine with increased tolerance requirements.
Picture No. 7. Drawing of the frame
In the manufacture of this part of the machine, thick metal is used. This solution increases cost and weight, but extends service life, increases reliability, improves fastening of hinged elements and processing accuracy.
Instructions for making a simple lathe with your own hands
Since everyone decides what his lathe will look like and what dimensions it will have, it is impossible to give an accurate description of the manufacture of all parts indicating dimensions, tolerances and fits. However, the process of building any lathe consists of the same steps.
Making the frame. As mentioned above, it is impossible to make a massive cast-iron frame at home. Therefore, its role will be played by a frame made of channel or steel profile pipes, which are cut to size and then welded according to the drawing
It is important to maintain the correctness of all right angles, so control using a square should be carried out every time the next joint is made. It is best to work on a flat, horizontal slab
This will make it possible to obtain a frame with strict geometry in the horizontal plane. You can do without a massive frame by making it from long shafts as guides.
The side posts of the bed are made on a lathe.
Assemble the guides with the posts. In this case, spacer bushings are installed between the side support elements.
Bushings for fastening the tailstock and tool holder are mounted on the guides. It is not necessary to make them the same length. One piece can be made shorter than another by using the long piece as a guide and the shorter piece to support the moving parts. This solution will increase the working stroke of the rear center.
The mounting areas for the quill and caliper are made from a steel sheet 8–10 mm thick and secured to the guides and retaining bushings using bolts with a diameter of 6 mm. Particular attention should be paid to the mounting holes, since the slightest inaccuracy will lead to distortion and jamming of the moving parts of the machine.
Install the lead screw. You can turn this part from a blank or use a threaded part from any device, for example, from a high chair with variable height. Be sure to ensure that anti-friction bushings made of bronze or brass are installed in the corresponding holes in the side posts. A vernier and a steering wheel are attached to the lead screw.
A platform for attaching the headstock is installed, after which the assembly of the frame is considered complete. The headstock is assembled from a bearing support, two ball bearings, a main shaft with pulleys and a spindle.
A tailstock is made from a long screw, a bushing with an internal thread, a metal profile and a handle, after which the rear moving unit is mounted on the machine. Monitor and, if necessary, adjust the alignment of the front and rear centers. Assembling the caliper. The process of its manufacture is similar to assembling the frame - the guides are equipped with bushings, a screw, a vernier and a small steering wheel are mounted. A tool holder is made from a thick metal plate and bolts with a diameter of 8 mm, after which it is installed on the support.
Using a welding machine, an electric motor subframe is made, for which metal corners or profile pipes are used. The subframe must provide raising and lowering of the power unit, otherwise it will be problematic to transfer the belt from one pulley to another to change the spindle speed. The electric motor is mounted and connected, after which a test run is performed.
After the lathe has been tested in operation, its components and parts should be painted. This will add attractiveness to your creation and will not allow corrosion to spoil the equipment you created with your own hands.
A lathe at home is a universal piece of equipment that can be used for purposes other than its intended purpose. A polishing or grinding wheel can be attached to the spindle for sharpening tools or finishing metal parts.
Converting an angle grinder into a machine step by step: 10 assembly stages, electrical diagram for drawings
To create a machine yourself, you need to choose a design that matches your existing skills and capabilities. The easiest way is to assemble a machine from blanks created according to drawings in a specialized metalworking workshop. Otherwise, you will have to master welding technologies and purchase the necessary equipment.
Below is a step-by-step self-assembly algorithm with useful comments:
- After approval of the project parameters, the necessary materials, workpieces, tools and replacement attachments are purchased. The shopping list is determined based on the prepared set of design documentation. Compliance with current standards is not required in this case. However, all important details must be included, as in the examples above.
- Blanks for the power frame are cut. The table is made from sheet steel with a thickness of at least 5 mm.
- A transverse shaft is welded to the pendulum arm. When creating this unit, the perpendicularity of the parts is carefully controlled.
- A grip in the shape of the letter “P” is suitable for attaching an angle grinder. A hole for bolts is made in its side parts. With these fasteners, the hand tool is rigidly attached to the machine bed. Choose a fairly strong part of the grinder body.
- Additional fixation is provided using a metal clamp. All of the above mounts are made rigid to improve accuracy.
- The swivel bearings are pressed in. Instead of standard factory-made units, steel pipes with thick walls of suitable internal diameter are used.
- The assembled units are fixed on the axis of two sides.
- The pendulum is attached to the platform by welding. To avoid damaging the bearings, it is recommended to limit the temperature rise. To cool, use a cloth soaked in water.
- Weld a block with a mount for an angle grinder. Reinstall the angle grinder, protective devices, and return spring.
- They check the quality of the assembly, the reliability of the fastenings, and the functionality of the pendulum. Connect the machine, check the functionality first at idle and then in operating mode. The groove in the table is cut with a disk of appropriate width.
Picture No. 8. Connecting a magnetic starter with shutdown buttons and a protective thermal relay.
Look at Picture No. 8. Here is an electrical diagram for the drawings that improves the protection of equipment from overheating. It is also useful for quick emergency shutdown. One or more buttons for breaking the corresponding circuit are installed in a convenient place in the machine body. Foot operated switches are also used.
Procedure for making your own machine
Any machine with which it is possible to cut metal is assembled according to the following scheme:
- preparation of protective covers intended for installation on the drive belt;
- installing a motor using a drive belt as a connecting part between the motor and the shaft;
- manufacturing a shaft for attaching a pulley and a cutting disc to it (the unit is assembled and mounted on a pendulum, which is the upper part of the structure);
- manufacturing a shaft for mounting a pendulum on it;
- manufacturing a machine frame on which the metal for processing and a spark catcher are supposed to be mounted;
- the pendulum is fixed on the frame;
- electrical wiring is installed;
- The device is launched in test mode to check the build quality.
Machine reinforcement and other operator protection
A reliable power frame is the basis of safety. Additionally, they cover moving parts and prevent unauthorized persons from accessing the work area. When processing parts, goggles, masks, mittens, and other personal protective equipment are used.
In addition to the reliable strengthening of the machine, a certain location of the grinder serves to protect the operator. For safety and to prevent damage to clothing, it is installed so that the sheaf of sparks during operation is directed in the opposite direction from the person.
§ 22. Technology for manufacturing products from metals and artificial materials
The manufacturing technology of a thin sheet metal product usually includes the following operations:
- preparatory (selection of metal blanks, their editing and marking);
- processing (cutting, bending, hole making);
- assembly (connecting product parts with a seam seam or rivet);
- finishing (cleaning the surfaces of parts, varnishing or painting).
A workpiece made of thin sheet metal must have allowances for processing, since it is impossible to find a workpiece that exactly matches the dimensions of the finished part. Allowances allow you to correct inaccuracies in the operations of marking or cutting a part. However, the allowances should not be large, since the metal used for allowances when processing the workpiece turns into waste. For example, if a tin product has dimensions of 150 x 190 mm, then for its manufacture you should take a workpiece with dimensions from 155 x 195 to 158 x 198 mm (Fig. 101), i.e., the allowance should be 5...8 mm.
Rice. 101. Making a box for small parts: a - drawing; 6 - technological process (1-9)
When making a product from wire (Fig. 102), first select and mark the blanks of the parts from which it consists. Then the blanks are cut and bent in accordance with the drawing. The resulting parts are cleaned, connected to each other into a finished product, which is then varnished or painted.
Rice. 102. Making a screwdriver: a - drawing; b - technological process (1-7)
If you need to make a product from sheet plastic (Fig. 103), then the workpiece is first marked, then the holes of the internal contours are processed. After this, the outer contours are cut out, the surfaces are cleaned and, if necessary, painted.
Rice. 103. Making a number plate for an apartment door (blank - made plexiglass): a - general view (the number and location of the mounting holes is assigned by the student); b - technological process (1-8)
Figures 101-103 show the technological processes for manufacturing three products: boxes for small parts (made of thin sheet metal), screwdrivers (made of wire) and a number plate for the apartment door (made of sheet plastic - plexiglass).
In school workshops, when making a part from metal or artificial material, students usually work according to a technological map (in the form of a table), which sets out the technological process for manufacturing the part.
At enterprises, technological processes for manufacturing parts from metal and artificial materials are developed by technologists.
Practical work No. 20
Development of technology for manufacturing parts from metals and artificial materials
- Read a teacher-provided drawing of a sheet metal, wire, plastic part, or a drawing of a part from your own creative project.
- Write down the technological sequence of manufacturing this part in your workbook (see Fig. 101-103). Compare your notes.
- Determine what tools you will need to make this part and write down their names in your workbook.
Find on the Internet an example of the technological process for manufacturing other parts from thin sheet metal and wire.
Testing your knowledge
- Remember (from the section “Technologies for manual processing of wood and wood materials”) what a technological process and a technological operation are. What operations are used in the manufacture of products from thin sheet metal, wire and plastic in educational workshops?
- How are the technological processes for manufacturing parts made of wood and metal similar?
- What is an allowance for machining a sheet metal part?
- Why is the product cleaned before painting?
All 5 options for homemade grinder machines for various purposes
The drive of tools in this category is highly powerful. A high-quality grinder is small in size, durable, and resistant to high workloads. Some models provide speed control. Modern angle grinders are equipped with overheating protection as standard. Such products are a good basis for the manufacture of homemade machines for various functional purposes.
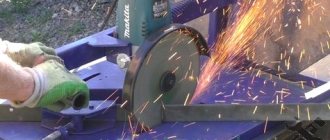
Picture No. 9. This homemade cross-cutting machine is suitable for processing granite and marble slabs
Grinder lathe
Picture No. 10. Diagram of a wood lathe made from a grinder.
The standard design is used here. The only excellent component is the device for transmitting force to the spindle. A gearbox is needed to regulate the speed and torque within the appropriate range.
Homemade wood milling machine with your own hands, other types of equipment
Picture No. 11. To secure different tools, a do-it-yourself wood milling machine must be equipped with a universal head
For your information! This device can be attached to the electric motor shaft after dismantling the standard gearbox.
Picture No. 12. Quick solution to problems
Look at Picture No. 12 shows how you can assemble a full-fledged sawing/circular machine from available materials in 15-20 minutes. With its help, it is easier to ensure precise processing of wooden workpieces compared to using hand-held power tools.
Picture No. 13. From the picture it is not difficult to understand the principle of operation and design of the grinding/surface grinding machine
3 other machines: sharpening machine, for sharpening chains and cutting bricks
Picture No. 14. Sharpening machine
Here, potentially dangerous places are protected from damage by sparks using strips of foil. A temporary, but inexpensive and quick solution to a practical problem.
Picture No. 15. When equipped with a suitable disk, such equipment is used for cutting brick, ceramic tiles, natural/artificial stone
Picture No. 16. Rigid attachment to a durable tabletop turns an ordinary grinder into a convenient machine for sharpening chains
VERY DANGEROUS! In any case, we must not forget about the intended purpose of the equipment. If you are making a homemade metal cutting machine, you should consider strengthening the structure. Processing of plastic and wooden workpieces is carried out with less stress.
Metal processing machines
To work with metal (especially in mini workshops for the production of metal structures), a variety of machines and devices are used, and many of them can be made with your own hands.
For metal processing, making machines from wood with your own hands is impractical for the reason that they simply cannot cope with the load.
For example, a homemade bending machine (for making half-arcs and rings) is made only from ferrous scrap metal. The design must be reliable.
An automobile hydraulic jack is also additionally used, since the hand strength is definitely not enough to bend the workpiece. And with a jack, the device becomes truly functional.
Making a machine out of wood with your own hands (or rather, just a frame for it) for processing/cutting metal is possible only in a number of cases.
For example, this can be implemented when assembling a cutting machine based on a small grinder. In this case, the base is made of laminated chipboard (you can take plywood).
But all the same, if you are making a machine for cutting metal, then it is better to make the base for it more reliable and durable. You shouldn’t skimp on material here—savings can backfire.
You can weld a simple frame from a profile pipe with reinforcement in the central part, and then weld or bolt a suitable sized metal sheet on top.
A bending machine for bending metal rods and strips also needs a very strong base.
If instead of a sheet of metal there was a plywood board, then the machine simply would not be able to cope with its task.
Therefore, making machines from wood with your own hands for metal processing is possible only in cases where the load on the base (bed) is insignificant. For example, a drill stand or cutting machine.
We make a machine for cutting metal using high-quality equipment: TOP 3 manufacturers of angle grinders
This list contains brands whose equipment has received high ratings from ordinary users and professionals:
- Bosch. It is famous for its reliability and well-thought-out small design elements. A significant limitation is the high cost even in the basic configuration.
- Hitachi were initially expensive. But these days, part of the production has been moved to China, which has reduced costs. Some models do not have automatic speed stabilization under load.
- Makita - Reasonable combination of price and quality. All new high power models are equipped with effective overload protection, which extends the actual service life.
Cutting and primary processing of the workpiece
The fastest way to saw a workpiece is with a grinder with a thin metal cutting disc. If it is not possible to use a grinder, you can use a hand hacksaw for metal
It is important to correctly install the file into the hacksaw. The saw teeth should be directed forward and the hacksaw should cut while moving away from you
Cutting and preparing the workpiece
First, the approximate shape of the knife is cut out using straight cuts. Then the bends are cut out. The easiest way to cut them is with several oblique cuts converging at one point.
It is important to leave an allowance of 2-3 millimeters to the drawn outline. This is due to the fact that when using a grinder, the metal at the cutting site overheats. By grinding off 2–3 mm using a file and sandpaper, you can remove the overheated edge of the metal
By grinding off 2–3 mm using a file and sandpaper, you can remove the overheated edge of the metal.
How to avoid 4 mistakes during operation of grinding/surface grinding and other machines
In order for the machine to perform its functions for a long time, the following simple rules must be followed:
- Do not increase the load more than planned.
- Use suitable replacement tips as specified in the manufacturers' official instructions.
- Remove dirt promptly to avoid deteriorating the air cooling mechanism.
- Maintain the ideal state of electrical insulation and the functionality of protective devices.
Advantages and disadvantages
Assessing the advantages and disadvantages, it is worth noting that there are much more advantages. These include:
- Functionality. By changing the working blade and operating power, such a saw can be used for cutting workpieces made of various materials.
- Quality. Most of these tools are made for professional use. Therefore, the quality and service life of such saws is increased.
- Accuracy. The workpiece is cut very accurately at the required angle of inclination, which cannot be done using another tool.
- Speed of work. Thanks to the design of the machine, you can cut a lot of workpieces in a short period of time. At the same time, changing the angle does not require spending a lot of effort and time.
- Easy to maintain. Changing working tools is quite easy, and the necessary parts can be easily found in almost any hardware store.
The only disadvantages include the high cost of the tool. But when used professionally, it is compensated by properties and characteristics. It should also be noted the low quality of discs made by unscrupulous manufacturers
Therefore, when purchasing consumables, it is recommended to pay attention only to trusted manufacturers.
Pros and cons of a pendulum saw
Before adding a pendulum saw to your toolkit, you should study not only the principle of its operation and capabilities, but also all the advantages and disadvantages of this necessary tool. It is necessary to distinguish a professional tool from a household one, because some advantages that suit a home craftsman may turn out to be disadvantages for a professional.
The advantages of a pendulum saw include:
- multifunctionality;
- fairly simple replacement of the saw blade;
- accurate and high-quality cut of the object being cut;
- fairly high cutting speed;
- ease of installation;
- availability;
- easy maintenance.
The disadvantages of the tool include the fact that during operation it is necessary to exert significant force on the lever. In addition, the design of the tool limits the thickness of the workpieces being cut. The productivity of such tools is not very high, so they are used mainly in everyday life. For professional work, other devices are used.
How to choose and what to pay attention to?
When choosing a mounting saw, it is important to consider a number of parameters:
- cutting depth - for home use, a depth of up to 7 cm is sufficient, for professional models the figure is up to 20 cm;
- control automation - this system ensures high accuracy and quality of processing, and also does not allow a decrease in the speed of rotation of the disk;
- soft start - almost all modern devices are equipped with this option; its presence guarantees protection against power surges;
- overload control - the presence of this element prevents overheating of equipment under high loads;
- type of disc - the accuracy of the cut depends on its material and size.
What are they?
All electric pendulum saws can be divided into products according to the type of material being processed:
for metal;
cutting (universal).
Electric saws from the first category are capable of working with aluminum and other soft and harder materials. Some models come with a carbide blade and even a rotary table, making the task much easier. You can buy a product for cutting with a large broach. A tool for metal eliminates the thermal effect on this material, thus mechanical cutting does not affect the composition of the alloy, and therefore the characteristics of the metal do not change.
The power of the pendulum saw and the type of disk that sits on it determine what kind of metal the tool can work with. Non-ferrous and ferrous metals can be processed. If we talk about the scope of application, metal saws are used for cutting:
- corners;
- rods;
- fittings.
There are lower power pendulum saws available for sale that are used for cutting wood. Such units are classified as one of the types of circular saws. They are used for trimming timber or cutting wood at right angles. During operation, such a tool swings like a pendulum, hence the name.
During operation, the operator has the opportunity to follow the cutting line, which is very important if no preliminary markings have been made. Disadvantages include limited cutting width and the need for additional effort by the operator
The design uses cutting elements with a diameter of 50 to 65 cm.
This is interesting: The chainsaw will not start - reasons and solutions
Saw features
A homemade pendulum saw is suitable for processing any metal elements and structures, creating workpieces, etc.
Most often it is used for cutting products, because... This is precisely its key purpose.
The only negative is that the price of pendulum saws is quite high, and therefore not everyone can afford them.
The homemade model has the same principle of operation, which is described below.
A pendulum saw for working on metal is also called a miter saw.
This is a type of circular apparatus, it operates using electric current and is mounted on a frame.
Video:
Factory models are equipped with a special turntable, thanks to which the saw can function not only as a cutter, but also as a miter box.
If you only need a cutting function, then in a homemade model you don’t have to make a circle, so assembling the saw will cost you less and it will be somewhat easier to do.
The name of the saw comes from its functions: during operation, it makes pendulum movements - the cutting mechanism moves alternately up and down, making cutting movements on the metal.
While the machine is operating, the cutting circle is lowered onto the workpiece, and after the work is completed, it must be raised to its original position.
If you buy a ready-made device, then it will be enough to study the main characteristics and brands (Makita, etc.) of the device, as well as read reviews from saw owners.
If you assemble a pendulum saw, you can use it to cut not only metal workpieces, but also glass, porcelain, wood, make tiles of the size you need, etc.
Makita models have a wide functional range, but a homemade model often does not have such parts and is suitable for working mainly with metal.
However, if you often work with other materials, you can make or purchase the necessary equipment to make the cutting saw more functional, especially since this is not at all difficult to do.
Most of the tools needed to work with products will not cost you much: for example, to cut wood you will need a circular saw blade, and for ordinary metal processing a disk that previously belonged to an angle grinder will do.
Therefore, converting a saw is very simple: by replacing the blade from a machine for working with metal, you will get a machine for working with wood, etc.
Changing disks and other elements is very simple. Once you assemble the saw with your own hands, this will not be a problem for you.
The advantages of this type of saw include the ability to create a high-quality and precise cut, which is not always possible when working with other tools. However, you should not compare a saw made by yourself with tools from well-known manufacturers, for example, Makita.
An even cut is obtained due to the fact that the cutting saw has a powerful drive, as well as a cutting wheel that rotates at high speed.
Video:
Another advantage is that these metal saws are safe when working with your own hands: the abrasive wheel of the device is covered with a special housing that protects from sparks and chips that may get in during operation.
Thanks to the high power and rotation speed of the wheel, the work happens faster than when using other tools, which means the energy consumption required for cutting metal will be much lower.
Finally, pendulum saws are more functional - they can process metal products at different angles up to 45 degrees.
If you decide to buy a ready-made tool, the price will depend on several factors: firstly, the size of the product and its power.
Saws designed for processing thick and large parts are very bulky and heavy.
It is very difficult to move such a tool; as a rule, it is placed in a garage or workshop, where there is a three-phase grounded outlet that is necessary for work.
Compact saws are easier to work with: they can be carried around the area or taken with you to the right place. However, they are not suitable for processing massive products. Usually they make this particular version of the tool with their own hands.

