How to choose a hat size for a child
When a child is very small, he is only a few months old, it is difficult to take him to clothing stores, so you need to buy hats according to your own measurements. Determining the size of a children's headdress is quite simple. It is recommended to use a centimeter, or, as a last resort, a thread that does not stretch. The centimeter must be applied to the most convex point of the head, and placed in front above the child’s eyebrows.
Pattern of a cap for a newborn
Do not tighten the tape, and if necessary, round the result up. The number that turns out will be the size of the headdress. For example, if the measurements give a result of 42 cm, then it is better to take the size of the product 43. When purchasing, you need to focus on the age of the baby.
Use of baby fabric
In the first years of life, the baby grows very quickly, so it is not advisable to buy many hats of the same size at once. Approximately every 2 months you need to take new products. Sometimes you can buy things to grow. For babies, size 44 is suitable, in six months you can safely buy 46, and in a year from 48 and above. These are averages and may vary for different babies because each person is different.
After one year, the size of the head will change, but not at a rapid rate. It is advisable to take measurements every six months and note changes. For sewing, regular knitwear is perfect, which is easy to care for. For the winter option, plush fabric is suitable, but in this case it is necessary to make a lining so that the headdress keeps its shape well.
Knitting a cap like Cinderella's
Materials and tools
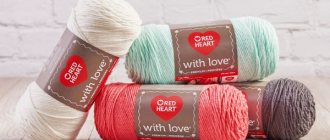
When knitting a hat for a baby for the winter or spring-autumn, it is worth purchasing fabric for the lining - fleece or cotton. A product for a baby up to one year requires 100–200 g of yarn, for a newborn and a child up to three months - 50–100 g. The exact amount depends on the model and design of the hat.
When choosing yarn, you should pay attention to the thickness of the thread: the fewer grams per meter, the thicker it is. Experienced knitters recommend taking 50 g/150 m from 100% wool or acrylic (40–50 g/150 m) for winter hats. Or mixed yarn in the ratio: 40% wool, 20% bamboo, 40% acrylic. To knit a cap with ruffles for the warm season, you can take cotton of the same thickness or up to 100 g/250 m.
Knitting needles are selected depending on the thickness of the thread. The store can help with this, or you can rely on the correspondence table. If you are using a 50 g/150 m skein, you will need knitting needles from 3.5 to 4.5 mm. It is desirable that they be metal and circular. If the package is marked “2” - this is a thin yarn, knitting needles from 3.5 to 4 mm are suitable, “3” is a light yarn, for which it is optimal to take knitting needles of 4.5 mm.
Wool
Acrylic
Cotton
Types of knitting needles
Size chart for newborn hats
The size of the headdress can be found out without measurements; approximate figures are known depending on the child’s age. Since the Soviet Union, children's things have been bought this way. Size chart based on child's age:
You might be interested in this All about sewing pillowcases for scented pillows
| Age (months) | Product size |
| 0 to 1 | 35 |
| 3 | 40 |
| 6 | 44 |
| 9 | 46 |
| 12 | 48 |
Using this table, you can buy hats and bonnets for children, but since there were no specific measurements, it is better to take products from stretchable fabrics. Because all babies have different head shapes. Modern doctors insist not to buy children's caps at all if the manufacturer relied on age and medical statistics when producing them. Below is how to sew a cap with your own hands.
How to take measurements correctly
Product modeling
Before starting work, you must choose a cap model. A cap pattern is searched on the Internet, magazines or master classes. If imagination works well, then it is better to rely on it and make an original headdress. It can be sewn or knitted, and you can add ears or ribbons to it. You can sew a hat for a newborn with your own hands in several stages, which are presented below.
Winter plush option
Useful tips for sewing fleece hats
- To create a truly comfortable and beautiful thing, you must always carefully think through the sewing process before starting work.
- Select materials and threads to match the color, think over the style, and carefully draw out the pattern. And then you are doomed to success.
- Fleece is relatively easy to work with. It is easy to cut, does not crumble, does not require special threads or complex sewing machine settings. A regular seam with a stitch length of 3-3.5 mm will work fine.
- Since this type of fabric has good elasticity, the edges must be pinned together before sewing them on a machine.
- Experienced craftswomen sometimes advise finishing all the seams with an overlocker. Then they will turn out more accurate.
A smart fleece hat will come in handy in any wardrobe.
Constructing a drawing of a cap pattern
The standard model of a hat for a child is sewn from two parts. It is very easy to do, even a person without experience can do it. The pattern of a hat for a newborn can consist of three parts or more, but the complexity of the work will increase.
Building the bottom
Length of the bottom of the product. Make a right angle where point O will be the vertex. Next, the length of the bottom of the cap is canceled, about 10 cm.
Bottom width at top. From vertex O to the right, measure 5 cm and make point O2.
Bottom width. From line O1 to the right, measure 5 cm, make point O3. Connect measurements of O2 and O3 together. Next, divide line OO2 in half and mark O4. From O2 down, count 3 cm and make O5. Make 1.5 cm from O2 along the corner and place point O6. Then connect O4, O6, O5 with a straight line.
You might be interested in: Features of paint in spray cans and its use for fabrics
Crochet
Construction of the main part
Make a right angle and mark the vertex M.
Base length. From the top of M, measure 16 cm down and make point M1.
Base width. From point M to the right, lay 10 cm and make point M2. Since the width of the cap at the top is 2 cm greater than at the bottom, then count 12 cm to the right from place M1 and make point M3. Now connect M2 and M3 with a line. From point M3 up, make 2 cm and add point M4. Now M4 and M1 need to be connected.
The back of a child's cap
To pattern a baby cap for newborns, you need paper and a pencil.
Product with frill
You need to carefully draw a beautiful rectangle. It can be marked as ABSD, the vertical lines AD and BC will be of equal length 15 cm (half head circumference, and an additional 2 cm):
The horizontal lines AB and DS will be the width of the occipital lobe and also of the same size, 7 cm.
Line of the front and bottom of the cap
From line C you need to draw a segment CD and set aside 2 cm.
Connect points B and 1 (below). Connect point 1 (on the bottom line) to the place where it will be sewn on the product. This can be seen in the figure below.
Occipital part
Description of the process (step-by-step instructions)
Initially, you have to cast on seventy stitches, after which a couple of rows are knitted with pink yarn. Next, a snow-white thread is attached to it, which is also used to knit two rows with an elastic band. The remaining four rows of elastic are made with pink yarn.
- Using the purl stitch of snow-white yarn, two rows of the main part of the cap are knitted. After this comes the turn of the pink color, which will have to knit a couple of rows with purl stitches, also with stockinette stitch.
- The entire procedure is repeated four times.
- This is followed by two rows, knitted with a white thread using purl stitch, after which the thread is cut off. The same is repeated with pink yarn.
- The fabric now needs to be turned towards itself, and then the number of loops is divided into two parts. One will have forty-five loops, and the second will have twenty-five loops. Now the thread from the pink yarn is attached.
- To knit the back part of the product you will need to knit nineteen stitches in pink. Using facial knitting for this. Twenty stitches are worked purl together.
The canvas needs to be turned again. The last stage is completely repeated. Now you only have to knit the middle twenty stitches. The outermost loop must be knitted together with the loop belonging to the side part.
The canvas must be turned after the end of each row. The work continues until there are three loops left on the knitting needles. The two middle ones are knitted together, the rest go the same way as described earlier.
The last three rows of the back part are knitted with double loops, after which all loops are closed and the thread breaks.
For ties, either laces or ribbons are usually sewn on. Many people prefer to do them using a crochet hook. It will be enough to knit seventy chain stitches.
