Advantages of solar power plants
Power plants running on solar energy have a number of advantages compared to traditional sources:
- Modern installations amplify light in the presence of a large concentration of clouds, using rays that are in the invisible frequency spectrum, which ensures their continuous operation.
- They allow you to combine types of energy obtained from different sources: wind-solar batteries are mainly used.
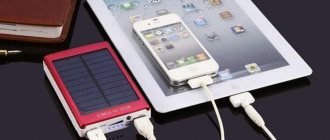
- Compactness . Portable mobile power stations are made in small sizes, which helps to use them as a home source of electricity.
- Long service life, averaging from 30 to 50 years . By connecting storage batteries, you can store energy and use it at night.
- Save on bills because solar energy is free.
- Cheap, durable and easy to maintain.
Important! A home SES allows you to lead an autonomous existence, independent of the state of the power grid, changes in tariffs and other decisions of the owners of resource companies.
About batteries for autonomous systems
Batteries are probably the most expensive and important part of the system, they are very capricious and quickly deteriorate, there are many types of them and they need to be treated with care, otherwise they quickly lose capacity and deteriorate.
That’s why you need to buy a smart controller so that it can be configured for different types, or it should already have pre-installed settings for working with different types of batteries. For example, car starter batteries lose capacity very quickly in autonomous systems, just 1-2 years and they already lose 90% of capacity. This is due to deep discharges, since cheap controllers turn off consumers at 10 volts, and car batteries are not designed for this, so if you use them, do not discharge them more than 110.8-12.0 volts.
Traction batteries are more durable and can be discharged by 80%, but they are more expensive and it is also not advisable to discharge them to 10 volts. There are also, for example, gel batteries that are critical to overcharging. There are many subtleties and it is better to study everything so as not to lose your money. You can read more about lead batteries here - Automotive and traction batteries
Alkaline batteries are very durable, but also very expensive. And if lead batteries have an efficiency of 85-90%, then alkaline batteries are a little inferior here, and if they are operated by charging and discharging with high currents, then their efficiency noticeably deteriorates. Such batteries are not profitable, especially in winter, since there is already little energy coming in, and even the batteries give out 30% less energy than they receive from solar panels. Although now it seems that alkaline batteries with improved efficiency have appeared, the overall picture is the same.
Lithium iron phosphate batteries are the most promising for autonomous systems; they have a high efficiency of 95-98%, and at the same time are not at all afraid of undercharging, deep discharges, and high discharge-charge currents. But they are also expensive and require an additional BMS cell condition monitoring system. If such a battery is charged or discharged below the required level, it irreversibly loses capacity or the cell stops working altogether. But the condition of the battery is monitored by the BMS and it also balances the battery charge, so if something goes wrong, it will protect the battery and turn everything off, and it will not deteriorate.
You can’t describe everything in one article, but I tried to mention and describe the main things so that it would be clear to those who are not at all familiar with this. You can read more in other articles from the section. But in general, at the moment, judging by my experience, it is more profitable to build a small power plant without an inverter and power all electronics from 12 volts, and if everything is transferred to 220 volts, then build a system at 48 volts. Especially in winter, even a little extra energy is very necessary. Also, this winter I have lithium iron phosphate (lifepo4) batteries, and obviously the energy in general is noticeably greater than when using car batteries, plus lifepo4 have not deteriorated at all and there is no loss of capacity, although they have not been charged for a whole month before end and were constantly discharged until shutdown.
What types of power plants are there?
There are different types of SES, they are classified according to their design and operating principle. Types of power plants:
- Tower solar power plants are a tall structure with a tank on top. This container is painted black to maximize solar energy absorption and is filled with water. As it is exposed to sunlight, the water evaporates and condensation appears. It comes with a steam generator. The efficiency of this solar power plant is 20%, this is a large indicator for alternative resource extraction, which is why it is often used by industrial facilities;
- Disc or modular type . It has almost the same principle of operation as the tower one, but it does not consist of solid material, but is made up of several modules. Installation is carried out on hills, a receiver and a reflector are installed. The receiver receives the sun's rays and transmits them to the reflector, and the reflector converts the concentrated rays into energy. This achievement is often used by the thermal power industry of the Netherlands and the USA (California); Design of a modular solar power plant
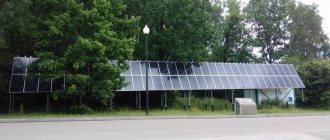
- A solar power station with photo batteries can be easily made with your own hands. It consists of a number of photocells with different powers, sizes and other indicators. Such household stations are used in country houses, small industrial facilities, to power individual machines or mechanisms. You can select the required characteristics and assemble portable or mobile solar power plants. In this case, a camping power station can be just one module with a connected battery; Household Solar Power Panels
- SES with concentrators .
These are power plants that also include inverters. Such equipment is used where there is not enough solar energy and an increase in efficiency is required in order to achieve the conversion of energy into the required amount of electricity. They are networked machines that are connected to a turbogenerator, and with insufficient efficiency, they increase the concentration of sunlight by changing the angle of the receiver; Solar power plant with concentrators - Solar balloons or space power plants are the latest word in science. These are sets of special modules (receivers and reflectors) that are located beyond the earth’s orbit, which allows them to receive more sunlight than ground-based solar power plants. The system is very effective, but expensive;
- Combined power plants. These are wind or water sources of alternative energy, working in tandem with solar ones. You can easily make such devices yourself, and you only need to develop a project that will combine the principles of all the systems used. Home alternative energy often combines the capabilities of several types of electricity production. This saves time and money.
Combined power plant
Selecting the type of photoconverter
Activities to create a solar generator with your own hands begin with choosing the type of photovoltaic silicon converter.
These components come in three types:
- amorphous;
- monocrystalline;
- polycrystalline.
Each option has its own advantages and disadvantages, and the choice in favor of any of them is made based on the amount of funds allocated for the purchase of all system components.
Features of amorphous varieties
Amorphous modules do not consist of crystalline silicon, but of its derivatives (silane or hydrogen silicon). By spraying in a vacuum, they are applied in a thin layer to high-quality metal foil, glass or plastic.
The finished products have a faded, blurry gray tint. No visible silicon crystals are observed on the surface. The main advantage of flexible solar panels is their affordable price; however, their efficiency is very low and ranges from 6-10%.
Amorphous solar cells made from silicon have increased flexibility, exhibit high levels of optical absorption (20 times greater than mono- or polycrystalline counterparts) and operate significantly more efficiently in cloudy weather
Specifics of polycrystalline types
Polycrystalline solar cells are produced by gradually cooling a silicon melt very slowly. The resulting products are distinguished by a rich blue color, have a surface with a clearly defined pattern reminiscent of a frosty pattern, and exhibit an efficiency of around 14-18%.
Higher efficiency performance is hampered by the areas present inside the material, separated from the overall structure by granular boundaries.
Polycrystalline solar cells operate for only 10 years, but during this time their efficiency does not decrease. However, to install products into a single complex, a strong, solid base must be used, since the sheets are quite rigid and require strong, reliable support
Characteristics of monocratylic variants
Monocrystalline modules are characterized by a dense dark color and consist of solid silicon crystals. Their efficiency exceeds that of other elements and amounts to 18-22% (under favorable conditions - up to 25%).
Another advantage is the impressive service life - according to the manufacturers, over 25 years. However, with prolonged use, the efficiency of single crystals decreases and after 10-12 years the photoreturn is no more than 13-17%.
Monocrystalline modules are significantly more expensive than other types of equipment. They are produced by sawing artificially grown silicon crystals
To create a solar generator at home with your own hands, you mainly take poly- and monocrystalline plates of various sizes. They are purchased from popular online stores, including eBay or Aliexpress.
Due to the fact that photocells are valued quite highly, many suppliers offer customers products of group B, that is, fragments suitable for full use with a slight defect. Their cost differs from the standard price by 40-60%, so assembling a generator costs a reasonable price that is not too expensive.
Advantages and disadvantages
A portable or stationary solar power plant is a device that converts the sun's energy, using photovoltaics, into electric current. Sometimes the technology of indirect application of concentrated solar energy is used in various mechanisms. Most often, solar power plants for the home are indirect devices, mirrors or ray reflectors. Their operating principle is based on concentrating a large area of light into a directed beam, the energy from which will go into battery-type storage.
Tower solar power plant
Modern turnkey solar power plant solutions help convert solar energy into current using special photovoltaic cells and photovoltaic processes. Batteries work using tracking systems that seem to “catch” light and direct it to the desired point.
Advantages of using solar power plants:
- Photovoltaic processes occur even when there are clouds in the sky. The human eye does not always catch rays breaking through clouds, unlike tracking devices. This ensures virtually uninterrupted operation;
- Possibility of combining several alternative energy sources. Nowadays, wind-solar batteries are increasingly being used, which combine the capabilities of wind and solar power plants. This tandem works in any conditions, regardless of external factors;
- Even a small device is enough to power an apartment or even a country cottage;
- An autonomous solar power plant is an infinitely renewable source of energy, with an average operating life of 50 years (modular design). Storage batteries can store energy until the system needs it, while the Sun emits light every day - this is a very large resource saving;
- Small solar power plants can be built on private plots, which is impossible for wind turbines;
- If you buy ready-made solar power plants for your dacha, apartment, or house, you don’t have to worry about their maintenance—they won’t need repairs. Among all alternative energy options, solar power plants are the most reliable and durable.
In addition, you will be able to use as much electrical energy in your home as you need without worrying about taxes for exceeding the norm.
But, in addition to the advantages, solar power plants also have disadvantages :
- Geothermal (thermal) stations are quite expensive, they are difficult to buy in domestic stores, in most cases you will have to order them from abroad;
- There is no possibility of using SES at night. Therefore, you need to have large batteries to store energy;
- The main disadvantage of the systems is that even solar power plants with high power can convert only 20% of all solar energy. This means that you lose up to 80% of potential electricity. Please note that tidal ones use up to 70%, and wind ones use up to 40%.
To make the most of the advantages of the system, but at the same time avoid the disadvantages, many manufacturers offer their customers stationary hybrid systems.
Case and glass
Solar panels for home have an aluminum body. This metal does not corrode and has sufficient strength and is light in weight. A normal body must be assembled from a profile containing at least two stiffeners. In addition, the glass must be inserted into a special groove, and not fixed on top. All these are signs of normal quality.
There should be no glare on the body
When choosing a solar battery, pay attention to glass. In normal batteries it is not smooth, but textured. It is rough to the touch; if you rub it with your nails, you can hear a rustling sound. In addition, it must have a high-quality coating that minimizes glare. This means that nothing should be reflected in it. If reflections of surrounding objects are visible at any angle, it is better to find another panel.
How to make a solar power plant at home
To create an SES yourself, you will need to perform the following steps:
- Assembling solar panels for your home or garden with your own hands
- make a careful calculation of the required daily amount of electricity. To do this, you need to calculate the amount of energy consumed by each appliance in the house and sum up these values.
- In accordance with the obtained values, a set of equipment is purchased. You will need the entire kit, starting with the panels and ending with the inverter and switching. The equipment must correspond in its characteristics to the needs of the house, in addition, all devices must be coordinated with each other
- equipment is delivered to the site and installed properly. All elements of the system are connected to each other
- All actions require an accurate understanding of the meaning of the work being performed. If you lack knowledge, it is better to seek help from specialists who can eliminate mistakes and losses of expensive equipment.
Features of work
Thanks to electromagnetic induction, a current is generated inside the device. It consists of two parts: stator and rotor. The stator is the stationary part of the unit; it contains coils for exciting the electromagnetic field. The rotor is a mobile part of the unit; magnets are located at an equal distance from the middle, which remove the electromagnetic field from the stator. Thus, carrying out rotation.
Lower efficiency losses. They are less susceptible to breakdowns, since asynchronous units are more resistant to sudden voltage surges. They have a longer service life and the body heats up less.
How much power does a family need?
On average, one family of three, taking into account a full set of equipment and an electric stove (and these are the ones most often found in houses, because running gas is even more difficult than running power lines) consumes 6-7 kW per day. And this is in an apartment. In the house, consumption will be even higher, because you need to additionally heat water, ensure the operation of the sewage system, and much more. Thus, we can conclude that a 5 kW solar power plant for a home will still not be able to provide everything needed. But if you cut down on your appetite and activate only what you need at the moment, you can get by with that amount. Ultimately, this is still significantly better than no power supply at all. The same refrigerator will be able to work around the clock, like other basic devices. But the TV, computer and other similar devices will have to be turned on only occasionally, which, in principle, is not as critical as it might seem.
Advantages and disadvantages of self-assembly
The positive aspects of making a homemade electric generator with your own hands include:
- Increasing your own self-esteem, which is extremely important for men. A successfully assembled unit can become a source of pride as well as an alternative power source.
- Significant financial savings.
- The ability to create a device that would meet all the stated requirements.
In addition, the process can become more complicated and have a lot of negative consequences:
- It is possible that the unit will often break down, which is due to the impossibility of a hermetically sealed connection of all parts of the generator.
- Incorrect connection or power calculation will lead to generator malfunction and will also reduce its productivity by an order of magnitude.
- A certain skill in the work is required, as well as caution, since all work is carried out with electricity, which, as we know, is not to be trifled with.
Interesting option. Electric generator from a bicycle
Real output of a solar power plant for a home
The output depends on the power and angle of inclination of the panels, the intensity of the sun and the length of daylight hours.
Batteries differ in area, which affects their power. It can be 10W, 100W, 150W, 260W and so on. However, the actual output of the panel is usually higher than its rated power, since the solar intensity factor must be taken into account. In the southern regions the sun shines stronger and longer, and in the northern regions it shines weaker and less, so the same panel produces different amounts of electricity.
Case Study
This is a graph of electricity production from one 260W panel for June 2022. The total output of the station for the month is 34.89 kW. Based on the calculation that the nominal monthly power of the battery is 7.8 kW (260 W X 30 days), its actual power turned out to be 4.5 times higher (correction factor). In summer it is larger, in winter it is smaller or absent altogether.
The graph shows that production is not constant and there are sharp drops - these are cloudy days, when daylight hours are shorter and solar activity is very weak. The worst performance was recorded on June 17 - about 0.4 kW, and the maximum on June 25 - about 1.4 kW.
And this is what the output of a solar battery looks like hourly during the day:
Production starts around 9am, peaks around 1pm, then gradually declines and stops around 7pm. During the day there are small dips - when the sun was hidden by clouds.
Power generation was unstable from approximately 1:00 pm to 3:00 pm due to cloud cover. But this did not greatly affect the final performance of the station - 1.32 kW.
There were many failures during the day, which affected the final output of the station - 0.98 kW. And this is a cloudy rainy day, when solar activity is very weak and the generation during the day was 0.45 kW.
From this we can conclude that relying entirely on solar electricity is difficult. The performance of the station is highly dependent on the intensity of the sun and even in summer it can be inconsistent due to cloudy weather.
Selecting the cable cross-section and the fineness of the electrical connection
Solar panels for your home must be connected using a single-core copper cable. The cable cross-section depends on the distance between the module and the battery:
- distance less than 10 meters: 1.5 mm² per 100 W solar panel;
- for two batteries - 2.5 mm²;
- three batteries - 4.0 mm²;
- to connect one panel we take 2.5 mm²;
You can take a larger cross section, but not smaller (there will be large losses, but we don’t need it). When purchasing wires, pay attention to the actual cross-section, since today the declared dimensions very often do not correspond to the actual ones. To check, you will have to measure the diameter and calculate the cross-section.
Solar panels for home: electrical connection
When assembling the system, you can draw the positives of solar panels using a multi-core cable of a suitable cross-section, and use one thick cable for the negative. Before connecting to the batteries, we pass all the “pluses” through diodes or diode assemblies with a common cathode. This prevents the battery from shorting out (which could cause a fire) if the wires between the batteries and the battery are shorted or broken.
Diodes use types SBL2040CT, PBYR040CT. If these are not found, you can remove them from old power supplies of personal computers. There are usually SBL3040 or similar ones. It is advisable to pass through diodes. Don’t forget that they get very hot, so you need to mount them on a radiator (you can use just one).
The system also requires a fuse box. One for each consumer. We connect the entire load through this block. Firstly, the system is safer. Secondly, if problems arise, it is easier to determine its source (by a blown fuse).
How to connect if there is electricity on the site
If the site is connected to the network, then installing a solar power plant will make the house more energy independent, reduce energy costs and even make money on it thanks to the feed-in tariff.
- DIY solar cell assembly
There is no battery in this connection scheme, since there is no need to store electricity (but if you want to have a backup power source in case the lights go out, then a battery is required).
To connect such a station, you only need a solar battery (or several), which is connected to an outlet through a network inverter. In this form, the station is already ready for operation. The battery generates electricity and you immediately consume it for internal needs: running the refrigerator, lighting, kettle, etc.
Photo of real power plant connection
For example, the station’s daily output is 1 kW of electricity, and the building consumes a total of 5 kW. In fact, you only take 4 kW from the network. But if the station produces 5 kW per day, and you actually consume only 2 kW, then the remainder (3 kW) is burned. In this case, you can connect a green tariff and sell the difference to the state at a higher price, or install a battery and accumulate the excess for it.
Now there are companies that connect green tariffs on a turnkey basis. Starting from the selection and installation of the station to the conclusion of an agreement with OBLENERGO.
How to test the installed unit?
Before finally sealing the assembled generator, it must be tested in order to identify potential malfunctions during the soldering process. The most reasonable option is to check each soldered row separately. This way it will immediately become clear where the contacts are poorly connected and require re-processing.
To carry out the test, use a household ammeter. The measurement is carried out on a cloudless sunny day at lunchtime (from 1 to 3 p.m.). The structure is placed in the yard and installed at the appropriate angle of inclination.
A household ammeter helps measure the actual current. Based on its readings, it is possible to determine the level of performance of the mounted solar system and identify violations in the sequence of connection of silicon photocells
An ammeter is connected to the output contacts of the solar battery and the short circuit current is measured. If the device shows results above 4.5 A, the system is completely correct and all connections are soldered clearly and correctly.
Lower data that appears on the tester display indicates violations that need to be tracked and re-soldered. Traditionally, do-it-yourself solar generators from photocells with a slight defect (group B) show figures from 5 to 10 Amperes on the test.
Factory-produced units show data 10-20% higher. This is explained by the fact that the production uses silicon wafers of group A, which do not have any defects in the structure.
Do-it-yourself autonomous solar power plant for home
It is not difficult to assemble your own solar station; it contains only four components:
- solar panels;
- battery charge;
- controller;
- inverter
Solar power plant diagram
All of them are easy to find and order through online stores. But how to make a solar power plant with your own hands in order to create a full-fledged autonomous power supply system at home? First, you need to collect information about your needs, the capabilities of the area where the solar station will operate, and make all the necessary calculations for selecting the components.
How to calculate the number of solar panels
Choosing a solar station begins with searching for information on insolation in your area - the amount of solar energy that hits the earth's surface (measured in watts per square meter). This data can be found in special weather reference books or on the Internet. Typically, insolation is indicated separately for each month, because the level is highly dependent on the season. If you plan to use the solar station all year round, then you need to focus on the months with the lowest indicators.
Next, you need to calculate your electricity needs for each month. Remember that for an autonomous power supply system, not only the efficiency of energy storage plays a role, but also its economical use. Smaller needs will allow you to save significantly when purchasing solar panels and creating a budget version of a solar power station with your own hands.
Compare your electricity needs with the level of insolation in your area and you will find out the area of solar panels that is needed for your solar station. Please note that the efficiency of the panels is only 12-14%. Always focus on the lowest figure.
- DIY absorber assembly for a solar collector
Thus, if the insolation level in the most unfavorable month in your area is 20 kWh/m², then with an efficiency of 12% one panel with an area of 0.7 m² will produce 1.68 kWh. Your energy requirement, for example, is 80 kWh/month. This means that in the least sunny month, 48 panels (80/1.68) will be able to satisfy this need. You can read more about how to choose solar panels in our previous article. And here you can learn how to make candles at home.
How to choose solar panels
Solar panel device
At first glance, all solar panels are the same: the cells of solar cells are interconnected by busbars, and on the back side there are two wires: plus and minus. But there are a lot of nuances in this matter. Solar panels come from different elements: amorphous, polycrystalline, monocrystalline. I will not advocate for one type of element or another. Let me just say that I myself prefer monocrystalline solar panels. But that's not all. Each solar battery is a four-layer cake: glass, transparent EVA film, solar cell, sealing film. And here every stage is extremely important. Not just any glass is suitable, but with a special texture, which reduces the reflection of light and refracts light incident at an angle so that the elements are illuminated as much as possible, because the amount of energy generated depends on the amount of light. The transparency of the EVA film determines how much energy reaches the element and how much energy the panel generates. If the film turns out to be defective and becomes cloudy over time, then production will drop noticeably.
Next come the elements themselves, and they are distributed by type, depending on quality: Grade A, B, C, D and so on. Of course, it is better to have quality A elements and good soldering, because with poor contact, the element will heat up and fail faster. Well, the finishing film should also be of high quality and provide good sealing. If the panels become depressurized, moisture will quickly enter the elements, corrosion will begin, and the panel will also fail.
How to choose the right solar panel? The main manufacturer for our country is China, although there are also Russian manufacturers on the market. There are a lot of OEM factories that will paste any ordered nameplate and send the panels to the customer. And there are factories that provide a full production cycle and are able to control product quality at all stages of production.
How can you find out about such factories and brands? There are a couple of reputable laboratories that conduct independent tests of solar panels and openly publish the results of these tests. Before purchasing, you can enter the name and model of the solar panel and find out how well the solar panel matches the stated characteristics. The first laboratory is the California Energy Commission, and the second European laboratory is TUV. If the panel manufacturer is not on these lists, then you should think about quality. This doesn't mean the panel is bad. It’s just that the brand may be OEM, and the manufacturing plant also produces other panels. In any case, the presence in the lists of these laboratories already indicates that you are not buying solar panels from a fly-by-night manufacturer.
How to install a solar panel
For the best efficiency, the solar panel should be installed so that the sun's rays fall on it at an angle of 90 degrees. Since the sun constantly moves across the sky, there are two solutions:
- Dynamic installation. Use a servo to make the solar panel rotate as the sun moves across the sky. The servo drive will allow you to collect 50% more energy than a static installation.
- Stationary installation. To get the most out of the fixed position of the solar panel, you need to find the installation angle at which the panel will collect the maximum possible amount of sun rays. For year-round operation, this angle is calculated using the formula +15 degrees to the latitude of the area. For the summer months this is -15 degrees to the latitude of the area.
How to choose a charge controller
Another way to build your own solar power plant and make it work efficiently is to use a charge controller that allows you to track maximum power points (MPPT). Such a controller can store energy even during low light conditions and continues to supply it to the battery in an optimal manner.
How to choose a battery
So, energy from solar panels goes to the battery. This allows energy to be stored so that it can be used even in the absence of sunlight. In addition, batteries smooth out uneven energy supply, for example, during strong winds or clouds.
Installing solar panels may require a large roof slope
To correctly select and install a battery for a home solar power station with your own hands, you need to consider two parameters:
- It is very important that the charging current (from the panels) does not exceed 10% of the rated capacity level for acid batteries and 30% for alkaline devices.
- Low side voltage inverter design.
Consider battery self-discharge rates (not always indicated by manufacturers). For example, acid devices are recharged every six months to avoid breakdown.
How to choose an inverter
Description of parameters and mandatory functions of an ideal inverter:
- sinusoidal signal with distortion not exceeding three percent;
- when a load is connected, the voltage amplitude changes by no more than ten percent;
- double current conversion - direct and alternating;
- analogue AC conversion part with a good transformer;
- short circuit protection;
- overload reserve.
When modeling your home's electrical system, group the loads so that different types of loads are powered by different inverters.
Determining the size and number of photocells
Good 12-volt solar panels should have 36 cells, and 24-volt solar panels should have 72 solar cells. This amount is optimal. With fewer photocells you will never get the stated current. And this is the best option.
You should not buy dual solar panels - 72 and 144 elements, respectively. Firstly, they are very large, which is inconvenient for transportation. Secondly, at abnormally low temperatures, which we periodically experience, they are the first to fail. The fact is that the laminating film greatly decreases in size in cold weather. On large panels, due to high tension, it peels off or even breaks. Transparency is lost and productivity drops catastrophically. The panel is being repaired.
4V solar panel has 7 cells
Second factor. On larger panels the thickness of the body and glass should be greater. After all, windage and snow loads increase. But this is not always done, as the price increases significantly. If you see a double panel, and the price for it is lower than for two “regular” ones, it’s better to look for something else.
Once again, the best choice is a 12-volt home solar panel consisting of 36 solar cells. This is the best option, proven by practice.
How much does a solar power plant cost?
The main factor influencing the cost of a solar power plant is its future total capacity. Taking into account the costs of installation, commissioning and paperwork, it ranges from $0.8-1.0 per 1 kW. The floating price range is formed due to secondary factors - “branding” and quality of equipment and complexity of installation work.
The cheapest option is to buy used equipment from Europe. The disadvantage of such an acquisition is obvious, and is associated with the impossibility of objectively assessing the real efficiency of the station and the remaining service life of the panels.
Distribution of costs for SE
The second most expensive option is the purchase of budget components from little-known Chinese companies. Their equipment is 20-30% cheaper than batteries, inverters, accumulators and peripherals from companies from the world-famous TIER-1 Bloomberg rating, but is inferior in quality and durability.
Therefore, before purchasing, experts advise considering only the third option and basing calculations on how much a solar power plant for a home from trusted manufacturers will cost.
Here are some of the most popular examples.
How much does a 5 kW solar power plant cost?
Approximately, you will need to purchase the following kit for the cheapest network SES:
| Accessories | Qty. | Price, $ |
| Panels 250-275 W | 18-20 | 1800-2200 |
| 5 kW inverter | 1 | 700-900 |
| Electronics and peripherals | 700 | |
| Total: | ~ 3500 |
Table of the estimated cost of a solar power plant for 5 kW
Taking into account the costs of turnkey delivery, which will include the registration of a “green tariff” and a multi-tariff meter with ASKUE, the total amount will be approximately $ 4800 .
An autonomous station will cost a little more, since it will require inclusion in the list of high-quality batteries, but the exclusion of a meter from it and registration of permits for the “green tariff”.
How much will a 10 kW solar power plant cost?
The calculation principle here is almost the same. You will need to purchase:
| Accessories | Quantity | Cost, $ |
| Panels 250-275 W | 36-40 | 4000 |
| 10 kW inverter | 1 | 1400 |
| Electronics and peripherals | 1300 | |
| Multi tariff meter + installation | 1400 | |
| Total: | ~ 9100 |
Table of estimated cost of solar power plant for 10 kW
How much does a 30 kW solar power plant cost?
There is no need to make any fundamental changes when determining the total cost of such a second, more powerful solar power plant. However, the following consideration must be taken into account.
Such a station will require more than 100 batteries of 250-275 watts, or about 200 square meters. meters of free space. Replacing with more efficient 300-400 watt panels will save some space, but the southern slopes of the roof of even a large house may not be enough. Therefore, it will be necessary to consider the option of installation on the ground. But the area of the free area will have to be almost doubled in order to prevent the shadow from some obliquely installed modules from falling on other neighboring ones.
If this is not a problem, you will need to allocate about $25-26 thousand, or almost 700 thousand hryvnia, for the purchase.
However, the payback of such a solar power plant will not exceed 5 years, and then it will begin to generate a constant income of more than $4,000 annually.
It has been noted that the price of the kit always approximately corresponds to its power and amounts to $1000 per 1 kW.
Where and how to place the generator?
The location for installing the solar generator is chosen very carefully and without haste. The plates that receive light must be placed at an angle so that the rays do not “fall” perpendicularly to the surface, but seem to “flow” neatly along it.
Ideally, the structure is positioned so that it remains possible, if necessary, to adjust the angle of inclination, in this way, “catching” the maximum amount of sun.
It is quite acceptable to install a solar system from solar panels on the ground, but most often the roof of a house or utility room is chosen for placement, namely that part of it that faces the most consecrated, mainly southern side of the site.
It is very important that there are no tall buildings or powerful, spreading trees nearby. Being in close proximity, they create a shadow and interfere with the full operation of the unit.
For solar installations to perform well, they must be kept clean and tidy. A layer of dirt formed on the surface of the catching panel reduces efficiency by 10%, and adhered snow completely shuts down the unit. Therefore, regular maintenance is a must and helps keep the modules in perfect operating condition.
The average roof slope level for installing a solar generator is considered to be 45⁰. With this arrangement, photocells absorb solar flux very efficiently and produce the amount of energy necessary for the correct functioning of the house.
To get real returns from the panels and provide the average family with the required amount of energy, you will have to occupy 15-20 sq.m of roof surface for a solar generator
For the European part of the CIS countries, slightly different indicators apply. Professionals recommend using a stationary tilt angle of 50-60⁰ as a basis, and in movable structures during the winter season placing the batteries at an angle of 70⁰ to the horizon.
In summer, change the position and tilt the photocells at an angle of 30⁰.
By installing generator panels on a track system equipped with an automatic sun tracking option, you can increase the output efficiency by 50%. The module will independently detect the intensity of the rays and will adjust to the maximum illumination from dawn to sunset
Immediately before installation, the roof is additionally strengthened and equipped with special strong supports, since not every structure is able to withstand the full weight of equipment for converting solar energy.
To reliably and firmly install a solar generator on the roof, it is worth purchasing special fastenings. They are produced separately for each type of roofing and are always available for sale. When installing between the panels and the roof, it is necessary to leave a gap for full access of air and correct ventilation of the sun-absorbing elements
In some cases, reinforced rafters are placed under the roof to protect the roof from collapse, potentially due to increased load, which increases significantly in the winter season when snow accumulates on the roofing surface.
To put the solar system into operation, you will need batteries, an inverter and a charge controller. You will learn about the rules for selecting devices and their inclusion in the circuit from the articles we recommend.
Reviews
Judging by the reviews existing on the Internet, a fairly large number of people speak positively about the installation of such devices. Solar power plants for home, reviews of which can be found, are usually installed in remote parts and have no analogues in terms of convenience, comfort and cost. Yes, they really are still too expensive to fully replace centralized supply. But, firstly, this is only for now, and secondly, sooner or later such a power plant pays for itself and begins to save money. As was already said at the very beginning, cheap stations will help you gain profit within 5-10 years. Expensive and more powerful models rarely pay for themselves longer than 40 years. Some people have longer mortgages. One-time serious expenses will still be compensated, but you will have to pay for central electricity until the very last days of your life.
Sources used:
solarpanel.today, term.od.ua, energo.house, www.syl.ru, altenergiya.ru, sovets24.ru, www.asutpp.ru, m.habr.com, motocarrello.ru
What do you need for work?
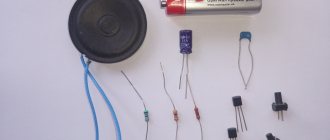
To manufacture a generator consisting of a set of solar panels, the following tools and materials are required:
- modules for converting sunlight into energy;
- aluminum corners;
- wooden slats;
- chipboard sheets;
- a transparent element (glass, plexiglass, plexiglass, polycarbonate) to create protection for silicon wafers;
- self-tapping screws and screws of different sizes;
- dense foam rubber 1.5-2.5 mm thick;
- high-quality sealant;
- diodes, terminals and wires;
- screwdriver or set of screwdrivers;
- soldering iron;
- hacksaw for wood and metal (or grinder).
The volume of materials needed will directly depend on the planned size of the generator. Large-scale work will entail additional costs, but in any case it will be cheaper than a purchased module.
The protective base for silicon wafers can be made of glass, plexiglass, polycarbonate or plexiglass. The first three materials create minimal loss of converted energy, but the fourth transmits rays much worse and significantly reduces the efficiency of the entire complex
For final testing of the assembled unit, an ammeter is used. It allows you to record the real efficiency of the installation and helps determine the actual output.
Operating principle of an electric generator
The generators operate on the principle of electromagnetic induction, when current is induced in a closed loop due to its intersection with a rotating magnetic field. The magnetic field is created by windings or permanent magnets.
When the electromotive force from the commutator reaches the closed circuit and the brush nodes, the rotor begins to rotate together with the magnetic flux. This creates tension in the spring-loaded brushes pressed against the plate-type commutators.
Next, the electric current is transmitted to the output terminals, passes into the network, and spreads through the generator.
They use alternating and direct current generators. The alternating current electric generator is small in size, does not generate eddy currents, and at the same time has the ability to operate in extreme temperatures. A device with direct current does not require careful monitoring and has a significant number of resources.
Structurally, the generator includes: brushes with brush holders, a commutator, an armature winding, an armature, a starter, contact rings, a starter winding, a rotor, a housing, a fan, a drive and a frame
The alternating current generator can be either synchronous or asynchronous. The first is with a permanent electric magnet and the number of stator rotations is equal to the rotor, forming a magnetic field. The advantages of such a generator are a consistently high voltage; the disadvantages include current overload due to an excessive load on the regulator, which increases the rotor winding current.
Design of an asynchronous generator: squirrel-cage rotor, stator. When the rotor rotates, the generator induces a current, and the magnetic field produces a sinusoidal voltage.
Selecting a transparent element
The main criteria for choosing a transparent element to create a generator:
- ability to absorb infrared radiation;
- level of refraction of sunlight.
The lower the refractive index, the higher the efficiency the silicon wafers will demonstrate. Plexiglas and plexiglass have the lowest coefficient of light reflection. Polycarbonate also has far from the best performance.
To create frame structures for home solar systems, it is recommended, if possible, to use anti-reflective transparent glass or a special type of polycarbonate with an anti-condensation coating that provides the necessary level of thermal protection.
The best characteristics in terms of absorption of IR radiation have durable thermal-absorbing plexiglass and glass with an IR absorption option. For ordinary glass these figures are significantly lower. The efficiency of IR absorption determines whether the silicon wafers will heat up during operation or not.
If the heating is minimal, the photocells will last a long time and provide stable output. Overheating of the plates will lead to interruptions in operation and rapid failure of individual parts of the system or the entire complex.
Connecting coils
A self-assembled generator for a windmill can be either single-phase or three-phase. Most beginners choose the first option as it is a little simpler and easier. But a single-phase connection has disadvantages in the form of increased vibration under load (the nuts can unwind) and a peculiar hum. If these indicators do not matter, then the coils must be connected as follows: the end of the first must be soldered to the end of the second, the second coil to the third, etc. If you mix something up, the circuit will not work. It's hard to do anything wrong here though. Although the three-phase circuit requires more care, the installation does not hum or vibrate under load, and the phases separated by 120 degrees increase power in certain operating modes. Do-it-yourself three-phase connection of coils involves connecting them through 3 units. For example, when using 12 coils, 1, 4, 7 and 10 are soldered for the first phase. For the second - 2, 5, 8 and 11. For the third - 3, 6, 9 and 12. All six resulting ends can be safely led out of the stator . The phases can be connected in a star (to obtain a higher voltage) or a triangle (to obtain a higher current).
Base elements can be ordered from a turner. This would be a better decision, since the car hub and brake discs are quite massive. You can also do a little trick in the form of increasing the diameter of the entire wheel, because the larger it is, the higher the radial speed of the wind generator.
Disc generators have a simple structure, high efficiency and no sticking effect. Additionally, wind turbines created on their basis are quite lightweight. But due to the lack of cores, twice as many magnets need to be used. The considered option is the easiest to create a windmill with your own hands.
Analysis of design errors
Assembling a wind generator at home with your own hands is, of course, not an infallible task. Even in the designs of industrial wind turbines, engineers make mistakes. But they learn from mistakes, as evidenced by well-established household structures.
So, among the errors in the design of household wind generators, such a detail often appears as the absence of a braking module in the design of the generator. The standard version of such devices (automotive or tractor) does not provide such a part. This means that the generator needs to be modified.
However, not every “designer” wants to deal with this delicate matter. Many people ignore this detail, hoping for “maybe.” As a result, in strong winds the propeller spins to incredibly high speeds. The generator bearings cannot withstand it and break the seats of the aluminum covers. The rotor becomes wedged.
Destroyed wind generator due to design flaws. Errors in the design and installation of such structures lead to serious consequences.The same issue relates to the defect associated with the lack of a weather vane rotation limiter. Often this component is simply forgotten to be installed and remembered only when wind currents begin to spin the “cockerel” around its axis, like the spinning top in the program “What? Where? When?". The result is disastrous.
The minimum damage is kinking and breaking of the electrical cable, and in severe cases, destruction of the entire structure.
Another notable assembly error was the incorrect calculation of the center of gravity point on the base of the weather vane. In this case, the device may function normally for some time. But over time, a misalignment forms on the bearing assembly, freedom of rotation is limited, and the efficiency of the structure in terms of energy output decreases sharply.
You will learn how to correctly calculate a wind generator from our article.
Often, they try to directly power the battery with the current received from the generator. Very soon they begin to wonder why the battery does not hold a charge or they discover a breakdown of 2-3 cans.
This is a banal and natural mistake, since in any case, the battery must be charged under conditions of certain currents and voltages. Here we need control of this process.
For home craftsmen interested in the topic of assembling a wind generator, we suggest that you familiarize yourself with another original option. This article describes the manufacture of a generating unit from waste washing machine parts.
Principle of operation
The device consists of a rotor with blades, an electric generator, a mast for installation, inverters, a battery, a charge controller, and wires through which electricity passes. The mast can be with or without guys. Depending on the type of structure, sometimes it can be lowered for maintenance or repair of the device.
Wind generator - a device for converting wind energy into electrical energy
The operation of a wind generator includes 5 main stages:
- The wind spins the rotor or blades.
- The connection between the electric generator and the rotor occurs.
- The generated energy goes first to the charge controller, and then to the battery.
- It then goes to the inverters and is converted from 12 to 220 Volts (or from 24 to 380 Volts).
- Electricity is supplied to the network.
The power of the wind generator is enough for street lighting, alarms and other devices
Conclusions and useful video on the topic
Features and nuances of soldering photocells for making an effective solar generator at home with your own hands. Hints and tips for craftsmen, interesting ideas and personal experiences.
How to properly test a photocell and measure its main parameters. This information will be useful in subsequent calculations of the exact number of plates required for full operation of the system.
A complete step-by-step description of the process of assembling a solar battery for a generator at home. Rules of operation, starting from the acquisition of the necessary elements and ending with a general test of the manufactured device.
Knowing about the structure of solar generators, assembling them at home will not be difficult. Of course, the work will require attention, accuracy and scrupulousness, but the result will justify all financial and labor costs. The finished unit will fully provide the building with heat and electricity, creating the necessary level of comfort for residents.
There is no point in taking on a major project right away. To begin with, it makes sense to try your hand at assembling a small unit, and then, having fully mastered all the nuances of the process, begin building a more powerful and large-scale installation.
Making at home
In order for the finished structure to perform its functions efficiently and provide people with a sufficient amount of electricity, it is necessary to manufacture it correctly. To do this, you need to take into account many factors and choose only high-quality materials.
Primary requirements
Before making a solar battery with your own hands, you need to perform a number of preparatory measures and carefully study all the requirements for the device. This will help to get a working installation and simplify the installation process.
In order for the solar panel to work at its maximum capabilities, the following requirements must be met:
- The finished product is highly fragile, so it must be protected with a special frame.
- The size of the structure depends on the amount of electricity required. It should be taken into account that an increase in the number of conductors will lead to an increase in the mass of the battery.
- The device body must have small side edges. All this is necessary so that the shadow they cast covers the minimum working space of the battery.
- The structure is installed outdoors, so it will be constantly exposed to atmospheric conditions. Because of this, the inside and outside of the case must be coated with high-quality moisture-resistant paint.
- It is necessary to provide space in the frame for the manufacture of the substrate.
- At the bottom of the panel you need to make small holes for ventilation. With their help, the gas that is formed during battery operation will be removed.
Materials and tools
Photocells are considered the most important parts of the device. Manufacturers offer customers only 2 varieties: monocrystalline (efficiency up to 13%) and polycrystalline silicon (efficiency up to 9%).
To make the panel you will need the following materials and tools:
- a set of photocells;
- fasteners (hardware);
- silicone vacuum stands;
- copper wires capable of operating at high power;
- aluminum corners;
- Schottky diodes;
- soldering equipment;
- set of screws;
- transparent sheet of plexiglass or polycarbonate.
Procedure
In order to make solar panels with your own hands at home, you must follow the sequence of actions. Only in this case can mistakes be avoided and the desired result achieved.
The panel manufacturing process is simple and consists of the following steps:
A set of poly- or monocrystalline solar cells is taken and the parts are assembled into a common structure. Their number is determined based on the requirements of the home owners. Contours formed from tin soldered conductors are applied to the photocells. This operation is performed on a flat glass surface using a soldering iron. According to a pre-prepared electrical circuit, all cells are connected to each other. In this case, it is necessary to connect shunt diodes. The ideal option for a solar battery would be to use Schottky diodes to prevent the panel from discharging at night. The cell structure is moved to an open space and tested for functionality. If there are no problems, you can begin assembling the frame. For these purposes, special aluminum corners are used, which are attached to the body elements using hardware. A thin layer of silicone sealant is applied to the internal parts of the slats and evenly distributed. A sheet of plexiglass or polycarbonate is placed on top of it and pressed tightly against the contour of the frame. The structure is left for several hours for the silicone sealant to dry completely. Once this process is completed, the transparent sheet is additionally attached to the body using hardware. Selected photocells with conductors are placed along the entire inner part of the resulting surface
In this case, it is important to leave a small distance (about 5 millimeters) between adjacent cells. To simplify this procedure, you can apply the necessary markings in advance. The installed cells are securely fixed to the frame using mounting silicone, and the panel is completely sealed. All this will help increase the life of the solar battery. The product is left to dry the applied mixture and acquires its final appearance.
All this will help increase the life of the solar battery. The product is left to dry the applied mixture and acquires its final appearance.