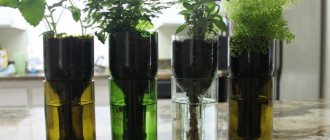
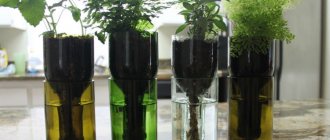
If you have some beautiful transparent glass bottles, for example, for strong alcohol (we sometimes come across very beautiful options), do not rush to throw them away. Today we will tell you how you can make very beautiful, bright vases from bottles with your own hands. We will paint the bottles from the inside, so it is better if they are completely transparent, made of colorless glass. Or maybe you have several of them? Then you can make different vases and use them for home decor, and these bright vases will look great even without flowers inside. This is what we get:
What do we need
- Transparent glass bottles;
- Multi-colored paint or white + color;
- Big syringe
- Not very necessary basin or other container
- Wipes or paint thinner
You can get regular waterproof paint for walls or windows - at any hardware store. It is often sold in quite large volumes, we don’t need that much, so if you want to use several different colors, it is better to take white paint and a colored tint - it is sold in small bottles. This is for pastel shades; for bright colors you can use the color itself without adding white paint.
Step-by-step master class
If you have fewer colors than you want to make vases from bottles, you can simply mix two colors in a bowl and get a third one - completely new. But first, practice with one color so that you know how much paint you will need to make one vase.
Stir the paint to make a one-color mass and draw it into a large medical syringe (without a needle).
Related article: The best wallpaper for plaster: 3 selection rules
Fill in the color. If you don’t have a syringe, you can pour the paint into the bottle through a funnel, which, by the way, can easily be made from cardboard and you don’t mind throwing it away later.
We turn the bottle in a circle and tilt it in different directions so that it is completely painted from the inside, including the neck. Pour the excess paint back into the container where you mixed it.
We set our vases to dry upside down so that any excess paint drips off. The paint or color usually says how long it takes to dry.
After some time, your glass bottle vases will be ready; the remaining solvent will remove the paint from the outside or from the neck of the bottle if you accidentally stained it.
The author recommends using a container for flowers - sold in florist shops or flower departments. But I believe that you can do without it.
If you use a container, buy different sizes to match the size of the necks of your bottles. Then everything is simple - pour water into the container and place the flowers.
However, our vases, which we made with our own hands, can be an excellent interior decoration in themselves. The main thing is to choose similar colors or shades of the same color. You can also use rainbow lights or shades that go well together.
If desired, they can be decorated with flowers; after all, sometimes a vase should still be used for its intended purpose.
Agree - this is an excellent and very economical option to decorate your home and add spring mood with the help of such bright details. It is believed that it is worth making either vases from bottles of different colors, but of the same shape, or using one color and its shades for bottles of different shapes. But you can experiment yourself.
Related article: How to glue tiles to concrete: a fallen off ceramic floor, a wall in the kitchen that has fallen off in its old place
You can choose any colors for the vase. These can be pastel shades (mix the main color with white paint), or rich colors if you want to use vases as bright parts of your interior, and even gold or silver vases - such paint is also not difficult to find now. Here, for example, is an idea with blue and blue vases of different shapes from glass bottles:
Double stroke technique
Half the brush should be dipped in one color, and the other half in the second. Using one brush, two colors are applied simultaneously. The optimal combination is brown and white. If you brush across the surface of the vase, the brushstroke will be two-color. In this case, the transition of colors will be smooth. You need to put paint on a brush and apply the design to the paper first. In this case, the brush will lie horizontally in relation to the image. Next you need to draw a straight line. When the lines are drawn, you will get an unusual weaving pattern. The lines must be drawn alternately - vertical, then horizontal. All lines are drawn in a checkerboard pattern. When you make test strokes, you will be able to understand what thickness of paint will be optimal. You will also understand how well the paint will adhere and whether you will like the drawing in the end. If everything is good, then you can go to work.
Geometric patterns
We will need:
Special paint (acrylic or for glass surfaces), brush (when choosing, take into account the type of paint), tape, cotton pads or cotton wool, alcohol to remove errors.
Let's move on to painting
You need to wash the brush and blot it with a napkin. The paint should be put on a brush and proceed to directly applying the pattern to the vase. When painting, do not forget that the color must be pure. After each couple of strokes, the brush must be washed and blotted using a napkin. Only in this case can you achieve beauty and clarity of color transitions. Once the painting is completed, the piece should sit for approximately two hours to allow the image to dry thoroughly. The glass vase is dried in the oven at 180 degrees for 20 minutes. Then wait for the vase to cool in the oven. After this, it is washed and varnished (colorless). As a result, you will be able to create a truly luxurious item that will bring you joy or will be an excellent gift for family and friends. This option is much more interesting than the usual plain background. If desired, you can decorate vases with acrylic paints. You just have to want and try for everything to work out.
How to draw a glass glass vase highlight reflex
I bring to your attention a short and informative lesson that will help you in the future to draw and paint glass objects. Today we will begin to understand what is so special you need to know when you draw, for example, a glass or a glass vase. How to fill this vase with water, and then with flower stems.
You will learn the simplest rules for depicting glass from this article and a short video clip. Perhaps after viewing you will be able to use the paints, pastels or pencils you have on hand to depict a vase with your favorite flowers.
Such a painting or drawing will bring you great pleasure and will be quite appropriate as a gift for March 8th :).
So let's start figuring it out:
Glass color
Naturally, glass comes in a variety of colors and shades, but we will start with transparent and colorless glass so as not to get confused.
If the glass is on a blue background, then the substrate will be blue in any of the techniques (oil, acrylic, pencil, gouache). And to be more precise, probably a darker color than the background, than the color of the environment.
Examples of glass color in paintings
Blue vase on a blue background
The color of the glass is the same as the background color (Alexander Adriaenssen 17th century)
How to make an opaque vessel glass?
To put it simply, without delving into physics and discussions about high painting, there are a few simple things that need to be understood and used:
Determine where the light source is and set a highlight
Knowing where the light is coming from, we can determine where to place the highlight. We draw a conditional beam from the light source. In the place where the beam touches the glass, the brightest glare on the entire glass object is formed.
The highlight is on the dark side of the vessel - because here the light touched the object, but has not yet had time to dissipate.
Examples of glare in paintings
How to draw glass? Where to put the highlight?
Highlight on the right side of a glass vase
The highlight follows the shape of the vessel
Highlight on a dark vase
Glare reflex
Since glass is transparent, light will pass through, scatter a little, and hit the opposite side of the glass object. If you conditionally extend this beam further and stop it on the other wall of the vessel, this is where the reflex will form.
Examples of glare in paintings
How to draw glass? Reflex
Reflex on the vase
Reflex, clearly visible
Reflexes of the external environment
If there are several colored objects around our glass, then they should be displayed in it to a greater or lesser extent. You can decide for yourself how bright the reflection to draw on the glass is.
These reflexes are not as noticeable as on opaque objects.
Examples of reflexes in the picture
Yellow, orange, greenish reflections on the glass surface
Glass has thickness and shape
It is worth considering that the bottom and curves of a glass object are usually thicker. This means that the shadow and light in such places will be more intense or “thick”. If the glass is colored, then the intensity of its color will be greater on the bends and bottom.
Examples in pictures
The thickness of the glass is a darker feature. The highlight follows the shape of a vase
Video tutorial on how to draw glass
Let's watch a short lesson and draw a glass vase together
https://youtube.com/watch?v=gq0OwGDAoyg
It is worth noting that it is better to draw glass from life, since the photo usually has a lot of glare, or too laboratory conditions, which almost never happen in nature.
To correctly show the shape of a glass vessel, watch our video tutorial on how to draw a vase with a pencil step by step.
I wish you all creative success!
I'm waiting for your comments
Recommended publications
- How to draw a vessel: vase decanter jug
- Still life with daisies in a glass vase on a blue background
- How to draw poppies
- How to draw a blooming iris
- How to learn to paint roses with paints
- How to draw a daffodil flower
Painting idea for beginners
To create such a stylish and at the same time laconic decor, you do not need the ability to draw. Zigzags, intersecting lines or stripes can be easily created using regular masking tape. You need to purchase acrylic paint in spray form, a brush, tape and regular nail polish remover, and cotton swabs. First, degrease the vase well using any degreaser. Then you need to wait for the surface to dry. Next, you should cover it with tape according to the traditional stencil principle. You will achieve an unusual effect if you cover the vase with small-width tape. You should place the vase on the newspaper and begin carefully painting those areas that remain unsealed. For clearer drawing lines, you need to extend the tape a little. After this, you should wait until the paint dries completely. Each paint has its own drying time. You need to rely on what is indicated on the packaging. Spray versions dry very quickly. Acrylic paints require baking. To do this, place the vase in the oven for a quarter of an hour. The temperature should be 150 degrees. Naturally, the product will dry for a maximum of 4 hours. On the Internet you can find a lot of unusual ideas for beautifully decorating a vase with your own hands. Such simple decor will be a worthy decoration for any celebration.
How can I do it?
To create the simplest flowerbed from an old wheel, you don’t need step-by-step instructions - just pour soil into the tire, and the flowerbed is ready. But even such a trivial thing can be made beautiful, given character and some “flavor” added.
To create an elegant flowerpot from tires, just make leaves or petals of different sizes along the edge:
What to cut with?
To increase the glide of the knife blade, you can lubricate it with liquid soap during the cutting process. The use of a jigsaw, which allows you to cut even the most complex shapes, will help greatly facilitate the process.
You can get injured when cutting, so be sure to use special gloves and safety glasses. It is better to work on a hard, wide surface: a stable table or a piece of plywood laid on the ground.
You need to cut the pattern strictly along the intended line, then the product will turn out smooth and beautiful. The cut out part is not thrown away; it can be used as a base for a stand or a border for a miniature flower garden.
How to turn it out?
To turn a wheel, you need to lay it cut side down, grab the cut edge and try to turn it inside out
It is important to at least start by manipulating a small part of the tire. Further the process will go easier - each part will carry the next one along with it
This job requires a certain amount of physical strength, and girls here will have a hard time.
How to color?
The process of decorating a tire is the most enjoyable stage in manufacturing; it requires preliminary preparation. The surface of the future form is carefully polished to smooth out roughness and other defects. Then the rubber blank is washed to remove fine dirt and dust stuck in the protectors and degreased with solvent or white spirit. Only after this do they start painting.
You can paint wheel tires:
Using a brush allows you to paint even the most difficult to reach areas on the surface, including the spaces between the protectors. This method is effective, but takes a lot of time. Using a brush, they also create more subtle, elegant patterns, emphasizing the details and shapes of the product.
The sprayer guarantees uniform distribution of the dye. The advantage of this coloring is the absence of drips and brush marks. The paint consumption in this case is slightly higher than in the previous version.
Enamel, oil or nitro paints are used as coloring solutions. The paint is applied not only to the outside, but also to the top 10-15 cm of the inner surface. It is better to use a layer of white as a primer and only after that apply a colored layer: this way the finishing color will be brighter and more even.
When painting tires, you should follow several rules:
The color palette is selected according to the design concept of the garden:
The shape can be left monochromatic or a design can be applied using a stencil, decorated with a stripe or pattern imitating brickwork, checkerboard - the variety of ornaments provides enormous opportunities and scope for the flight of imagination of landscape designers.
Let's talk about some nuances
To paint a vase with acrylic paints, you need to be patient and allocate a certain amount of time for this work. It’s easy to fantasize and bring your ideas to life if you know exactly what you ultimately want to get. Painting is a rather labor-intensive process. It is important to do everything carefully and not to rush. If the vase is floor-standing, then painting will require even more effort and time. But if you use masking tape as a handy stencil, you can decorate it quickly enough. It is necessary to approach the choice of paints that match the color very carefully. Unusual shades: silver, gold, pastel, copper, black and white will turn a completely unremarkable glass vase into a luxurious piece of designer decor.
Scope of application of painted glass
Product color changes may be required in the following areas and products:
- Wall cladding is a plain or contrasting fabric.
- Furniture production - in the decoration of cabinets, shelves, tables.
- Decoration of entertainment facilities - glass partition, bar area.
- Shopping center showcases and partitions for dividing commercial spaces.
- In living quarters - decorating functional elements in kitchen and bathroom interiors.
- Functionally decorative partition. Used for fencing stairs or elevator cabins.
Secrets of dot painting
If you are not looking for easy ways and want to decorate a vase with a rather intricate pattern, you can start mastering the dot painting technique. Another name for it is pique. You need to prepare acetone or alcohol and cotton swabs. With their help you will degrease the surface. For painting, you should purchase excellent quality acrylic paints and a small synthetic brush, toothpick or cotton swab. First, degrease the vase and wait until it dries. Dot painting specialists immediately apply a specific design to the vase. They don't make any preliminary sketches. They are characterized by virtuoso improvisation right during the creative process. If you are a novice decorator, be sure to first outline the contours of the design that you will create.
In order to quickly transfer an image onto a vase made of opaque material, you can use a soft, simple pencil. You should print or draw a picture in the desired size. After this, you should simply cut it out and place it image down on a sheet of paper. After this, you need to paint over the wrong side of the drawing with a pencil. You should cover the entire area of the picture as generously as possible. Next, you should take the tape and use it to attach the picture to the vase so that the wrong side of it is adjacent to the vase. Next, the contours of the drawing are drawn. A blunt pencil is used for this. There will be a sketch on the surface. The work will become much easier. To paint a glass vase, you just need to draw or print a sketch. Glue it on the back side.
When choosing a design for a vase with a transparent surface, it is worth remembering that the images and patterns will intersect with each other. The main drawing should be placed on one side. On the other side it is good to apply background painting. Before you start painting on a vase, you need to learn how to put dots of the same size on paper. In this case, you should draw them at equal intervals. It should be just such that the points are clearly distinguished, but at the same time create a single background line. The contours should be tested to ensure they are thick and fluid. You also need to prepare a needle in order to clean the spout. A cotton swab will allow you to correct a failed drawing.
If applying a dotted image directly from a tube is difficult for you, you can use acrylic paints. Points of different sizes will allow you to install various available means. This is an eraser located on a pencil, a needle, a toothpick, a cotton swab, a small brush or its blunt end.
Design
You can make a flower garden using ready-made examples, or using your own original ideas. You can supplement the finished design with any available materials: it all depends on your imagination and skill. The process of creating a flowerpot is often not completed after cutting and painting the tire. A product of complex shape in the form of an intricate figure must be supplemented with decorative elements. When decorating a flower garden you may need the following materials:
From several flower beds you can form bright compositions. A combination of multi-level flower beds of various shapes looks more impressive. A popular option is a composition of flower beds in the shape of cups and a teapot. To decorate it, you don’t have to turn the tire inside out and cut out patterns on it. It is enough just to arrange several tires of different sizes, form handles from pieces of rubber and paint the finished products.
Unusual
In a children's play area, flower beds in the shape of animals or fairy-tale characters would be appropriate. You can make a turtle from a tire and tread:
Flower
Near the house, flower-shaped flower beds will look good. Before you start making such a flowerpot, you need to decide on the shape of the petals. Petals can be in the shape of a triangle, semicircle, rectangle or wavy. Sometimes they are narrow at the base and wide at the edges.
Holding the edges of the cuts, you need to carefully turn the tire inside out. The finished product needs to be painted. Flower-shaped flower beds look more attractive if you use different shades of the color palette when painting them.
On a leg
From a solid wheel (tire with disk) you can make a magnificent flowerpot on a leg.
The workflow for creating such a flower bed consists of the following steps:
Swan
One of the most common options for flower beds made from tires is a product in the shape of a swan. Such a flowerbed is made in the same way as a flowerpot in the shape of a flower. The only difference will be more complex cutting. You can use a ready-made diagram that shows the lines of the wings, tail, neck and head of a swan for drawing on the tire.
After applying the markings to the tire, the swan shape itself is cut out. Next, you need to turn out the tire and complete the formation of the swan. The beak can be made of rubber or any other convenient material, painted with orange paint and attached to the head using self-tapping screws. The swan's eyes can be made from pieces of electrical tape.
See below for a master class on making a swan from tires.
Painting in Greek style
A Greek style clay jug is perfect for this type of work. You will also need excellent quality acrylic paints. Initially, the drawing is created on paper. And then applied with a pencil to the vase. After this you can move on to coloring. The neck should be made a transition. You need to brush over the dark. In this case, light paint is used. It remains to be shaded.
Under the pattern, the background will be light, and the rest of the vase will be dark. This way you will achieve contrast. The lines of the pattern are outlined in red. A thin brush must be used. Next, you can move on to dot-type painting. To even out existing shortcomings, the line is circled on both sides with dots. Initially, the outline is made red, and then gold is added to this color. With these contours you need to make points along all existing lines. In order to tone down too toxic orange, you can mix it with purple. As a result, the colors will be less bright. For extra beauty, you can add golden dots at the end. As a result, you will be able to create real splendor with your own hands.
Painting with acrylic paints allows you to create your own. You will be able to fantasize and bring your wildest ideas to life. To do this, you need to stock up on imagination, and you will definitely succeed.
Tools and operating procedure
The following products can be used for application:
- Flat brush.
- Hard brush.
- Spray gun.
- Paint roller.
- Foam swab.
The choice of tool is determined from the point of view of the painter's convenience and surface area. It is easier to paint small glasses with a brush, but it is impossible to paint a large canvas efficiently without a spray bottle.
Procedure:
- After preliminary preparation of the glass, you need to install it on a flat surface in a horizontal position. Otherwise, the likelihood of leaks increases. Painting in a vertical position is used only in the case of a spray gun.
- Apply the paint in an even transition without streaks. It is recommended to do at least two layers with intermediate drying. Because The material is transparent; with a single layer of painting, unpainted paint will certainly appear.
- Wait until the fresh coat dries. After this, the glass can be fired or placed in a rack to dry completely.
Caring for painted glass objects
Decorative glass objects painted with paints cannot be used in everyday life without following certain rules. Of course, you can coat the products with varnish, which will make them more durable and protect them from scratches (many paints are sold complete with a suitable varnish), but even in this case, adhere to the following care rules:
- Do not place painted glassware in the dishwasher or use detergent.
- Do not soak for a long time, do not wipe with force.
- The best way to clean a painted glass piece is to gently wipe it with a soft cloth dampened in warm water.
- To improve the water and light resistance of the product, apply a thin layer of varnish to the painted surface with a wide brush immediately after the paint has dried.
