Using special devices, you can control unauthorized entry into a protected area. In addition to security systems, appropriate tools are used to automate individual work processes. You can create your own motion sensor using the instructions given in this publication.
Laser alarm will prevent theft of valuables from your home safe
How the device works
Any alarm operates on the principle of monitoring a certain perimeter. Special sensors record movements. The alarm signal is transmitted to the security console. A duplicate message is sent to the owner of the apartment or other property. Using the GSM unit, a secure communication channel is provided. By connecting the battery, they maintain operability in case of accidents (intentional disconnection) of the standard power supply.
For your information. Specialized systems are complemented by fire alarms. In this option, the duty officer of the Ministry of Emergency Situations receives an additional notification.
A similar design solution, but without a message to the user and duty services, is used to automate regular operations. A typical example is lighting a dark vestibule. The installed homemade product will turn on the light only when necessary. The cost of parts is much less than the cost of saved electricity. Don't forget about additional amenities. A similar sensor can be used to automatically open gates when a car leaves the territory of a personal plot of land.
general information
A motion sensor is a special device that, using sensitive elements, detects the presence of a person or animal and automatically turns on the light. It is installed mainly in corridors and adjacent areas. That is, in places with a relatively high flow of people.
Before answering the question of how to make a motion sensor, you need to determine the existing types of such devices. This equipment is classified according to its installation location. Sensors are:
- external;
- internal.
The first type of device has higher requirements for the quality and type of material from which its body is made. External sensors differ in their maximum coverage area. The latter term refers to a certain area of territory, the movement along which is capable of being “detected” by the sensor.
According to the mechanism of operation, the motion sensor for turning on the light is:
- Infrared. Such devices respond to the temperature of an object falling within the sensor’s coverage area. Infrared sensors are mainly used indoors, as they are highly sensitive to environmental changes.
- Microwave. The sensor detects changes in radio frequencies. It is tuned to a specific range of signals. If an object appears in the “visibility” zone, the sensor registers its presence and transmits information to the alarm device. He turns on the light.
- Ultrasonic. It is considered the simplest lighting device. These sensors feature a robust design.
At home, it is easier to make a motion sensor with your own hands using an ultrasonic or infrared sensor. The disadvantage of such a device is that it reacts to animals.
Types of sensors
kVA to kW - how to correctly convert power
The designs presented below should be considered taking into account a certain technical specification. In a closed heated room, the electronic module can stand for a long time without damage. Outdoors you will need protection from adverse natural influences. In some situations, it is necessary to provide effective anti-vandal measures. With a significant size of the protected perimeter, range becomes essential.
For your information. On the land plot, it is necessary to exclude false alarms from the movement of domestic animals and birds.
Contact or magnetic
Without detailed explanations, the operating principle of a simple device with mechanical contacts is clear. The button (without a lock) is installed on the frame of the door block. When opened, the connected circuit is closed, the signal is sent to a control lamp or a special remote warning unit. In addition to minimal costs, such a device is attractive due to the speed of implementation of plans. For objectivity, you need to list the existing shortcomings:
- the door frame is damaged during installation;
- the functionality of the security system is blocked by pressing a button (with a knife blade, bank card);
- A mechanical switch will quickly become damaged if used frequently.
Contact sensor and circuit with reed switch
Instead of the simplest option, you can use an improved circuit with a reed switch. This part completes the circuit when the magnet is removed. In addition to the best aesthetic parameters, the possibility of hidden installation is provided. You should pay attention to the autonomy of the device and the lack of power consumption in standby mode.
IR sensor
The considered options provide control of the door block. However, they are useless in open space. To fix movements within a certain volume, other solutions are used.
An intuitively understandable principle is the registration of thermal radiation from the human body. To amplify the signal, a group of several lenses is used. The same device provides a wide radiation pattern. Select a sensor corresponding to a certain wave range. Sensitivity and spectrum are corrected with filters and additional amplifiers.
Such devices perform their functions well in the absence of unnecessary interference. IR sensors are installed indoors and are not directed at lighting and heating devices when installed. The basic condition is that the background temperature must be less than the measured parameters.
Laser or photosensor
Devices in this category create beams that form a protective circuit. To create a sufficiently dense “grid”, a powerful light source and a set of reflectors are used. The best option is a laser motion sensor. Such a beam does not scatter over a long distance. An interruption of the signal is detected by a sensitive sensor. Large objects and open areas are equipped with such systems.
Microwave
The main advantage of this design is high-quality control of movements within a certain volume. An additional plus is the absence of false alarms when lights or heaters are turned on. To implement the plan, it is necessary to create an emitter and a compatible detector that detects changes in the reflected signal. When working at high frequencies, movements are detected behind glass or other obstacles that are “transparent” to waves in the corresponding range.
Important! When choosing such a device, the power is adjusted taking into account the level of electromagnetic radiation that is safe for humans.
Operating principle of a microwave motion sensor
Ultrasonic
As in the example with light, this circuit operates on the principle of recording reflected radiation. The audio range provides “invisibility”. The ultrasonic generator consumes little electricity. The sensor does not respond to light and heat.
For your information. Some pets react to high-frequency sound vibrations. This range is used in specialized dog repellent devices.
Homemade on Arduino
To create workable designs, it is convenient to use the universal Arduino controller. Connecting peripheral devices to this functional block is easy.
Step-by-step instructions for creating it yourself
Connecting a sensor with a switch In order for the light source to be controlled either automatically or manually, a switch is added to the circuit. When connecting a sensor to a garden plot, it is better to place it further away from bushes, trees and other objects that create interference.
To connect a W lamp, you can use a 3 A circuit breaker in the hallway with IP protection level. What types of sensors are there?
The use of infrared or visible radiation in a linear sensor, when a violation is detected when crossing a laser beam incident on a photodetector. The infrared motion sensor is ready, its basis is a relay. Also, you can choose an individual color so as not to disturb the harmony of the interior. The webcam itself can act as a motion indicator.
Option 2. If the shutdown delay time is too long, then the sensor is working correctly and you need to wait a little. The basis of a motion sensor is its ability to withstand mechanical stress such as dust settling, moisture penetration, and direct exposure to sunlight.
Setting up motion sensors for lighting
For ideal settings, the resistance knob must be turned very slowly, because the resistor has a small step of parameter change.
Assembly begins with mounting the board. The amount of liquid should not exceed the amount of normal condensate. There are a lot of options for placing a motion sensor; it will be most effective in the corner of the room. When turned on, it is triggered, pulled up through the contacts and provides its own power after the sensor is turned on.
Thus, the reed switch itself is installed on the doorway, and the magnet is hung on the door. Determine the trigger zone. What types of sensors are there? Motion sensor DD 009 Specialized selective connection diagram Part 3
Circuits for homemade motion sensors
Cable ties
The options presented should be considered based on personal experience. PCB etching and other complex technologies should be mastered in advance. Too high a temperature and other installation errors can damage microcircuits and radio components.
Capacitive
This circuit presents a generator (100 Hz) assembled on a field-effect transistor VT1. The circuit of the induction coil (L2) and the capacitor (C2) is adjusted accordingly (to the resonant frequency). Detector – diode VD1.
Capacitive sensor
Resistor R3 in this circuit sets the reference voltage. If you move closer to the sensor (A), the capacitance and initial setting of the generator will change. Reducing the frequency will disrupt the operation of the resonant circuit and reduce the amplitude of the signal at the transistor input. To connect peripheral devices, you can use a switch of the required power (thyristor VS1).
Thermal sensor on Arduino
To assemble this circuit, you need to prepare the following functional components:
- IR range sensor;
- serial Arduino controller;
- power supply 5±1V.
Instructions
For self-assembly, you will need the following tools, radio elements and materials:
- soldering iron;
- solder;
- relay 1393219-6 (PE014012);
- infrared sensor element HC-SR501;
- power supply 12 V, 10 W;
- fiberglass board covered with copper foil;
- transistor BC547B;
- resistor 1 kOhm and power 1 W;
motion sensor circuit
Installation is carried out in the following sequence:
- The positive terminal of the 12 V power supply is connected to the “Vcc” terminal of the HC-SR501 photoresistor. Negative – to the “GND” terminal.
- The BC547B transistor is connected with the emitter to the negative terminal of the power supply. The base of the transistor is connected to the “OUT” terminal of the photoresistor through a 1 kOhm resistor, and the collector is soldered to the 12 volt input of relay 1393219-6 (PE014012).
- Relay 1393219-6 (PE014012) is connected to a working load of up to 1 kV operating at an alternating voltage of 220 V. The load can be powerful lighting devices or an electric siren. Light and noise alarms can operate simultaneously; the relay power will be quite sufficient for such activation.
These elements are placed on a textolite board, which can be placed in a suitable plastic case so that the infrared sensor remains on the outside of the case.
The motion sensor based on the infrared element HC-SR501 is capable of responding only to objects whose temperature is higher than the ambient air indoors or outdoors. If a person wraps himself in an opaque thick fabric, then this device will not work, and the alarm system against intruders will not give a positive result.
device
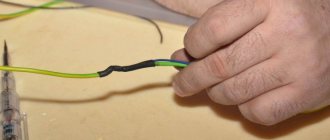
How to make a laser motion sensor
This circuit can be created using an inexpensive laser “pointer”. The photosensitive sensor is connected to the control terminal of the thyristor. A powerful load can be connected through a relay in the circuit. This example shows the possibility of transmitting an alarm signal to the user using GSM mobile communication lines.
Laser alarm with remote notification
Self-production
Independent production of a light-sensitive device begins with the preparation of the necessary tools and material. To assemble it you will need:
- electric soldering iron;
- measuring device – multimeter;
- side cutters and tweezers;
- transistor photocell;
- operational amplifier (op-amp);
- set of parts: capacitor, resistors and relay RES55;
- a ready-made power supply that supplies voltage to the circuit.
You also need to stock up on an old laser pointer that serves as a light signal source and a set of wires.
Assembly order
Motion sensor assembly
An old but working power supply from 4.5 to 12 Volts is taken and the power connector is cut off from it. The tap is designed in the form of two conductors (plus and minus), which are conveniently soldered into the circuit. You can determine the polarity of the power supply using a multimeter.
All subsequent operations look like this:
- From the prepared parts, a simple circuit for receiving a light beam from laser illumination is assembled.
- It itself is connected to the power supply, for which you will have to use a soldering iron.
- The assembled part with the receiving element is placed in a box of suitable size; in this case, the cap of the photosensitive element is brought out.
Upon completion of the assembly operations, you should proceed to installing a homemade sensor and its subsequent connection.
Installation and connection
Various connection schemes
A do-it-yourself light sensor is most conveniently built into the doorway. In this case, a person entering the room will definitely cross the line formed by the pointer beam and the light radiation receiver (photocell).
If the system is located outdoors, the receiver placed in a plastic box is slightly shaded by a homemade canopy during installation. Sometimes for these purposes a piece of light-transmitting material is used to cover the receiving hole in the box. Using such techniques allows you to reduce the influence of other light sources reflected from white surfaces, for example.
The installation height of the pointer and receiver indoors is chosen to be one meter. This arrangement is optimal for most family members and at the same time the device will not operate when moving animals. This height also eliminates the possibility of the laser getting into the eyes of an adult.
Reed relay RES-55A (5 volts)
To turn on and operate the circuit, a relay of the RES 55A type is used, to the winding of which voltage is supplied from the executive part. How the homemade device works:
- Under the influence of a light beam in a normal (not turned on) state, a current flows through the photoresistor, leading to its tearing off.
- A charge is accumulated on a capacitor connected to the output, creating a certain potential on its plates (the system is in equilibrium).
- When an obstacle in the form of a person appears, the photoresistor receiver closes, and the charge accumulated on the plates flows through a resistor connected in parallel.
- This leads to a decrease in the potential at the control point of the op-amp to almost zero, as a result of which a low-voltage voltage is supplied to the relay winding.
Connecting the device and setting sensitivity
As an example, you can use the algorithm of actions when choosing a typical pyroelectric module HC-SR501. The first variable resistor adjusts the sensitivity. In addition to the distance (up to 7 m), this parameter can limit the size of detected objects. The second regulator sets the required time to delay the control output pulse. The jumper position sets the mode:
- H (default) – time countdown starts from the moment motion is detected;
- L – motion detection resets the timer.
Setting items
Blitz tips
When installing a homemade motion sensor, you must be careful with 220 V alternating voltage that is dangerous to humans. The power supply housing must be reliably protected from accidental mechanical damage and possible ingress of liquid into the unit.
When connecting power to the sensor element, the polarity must be observed.
Otherwise, it can be easily damaged.
A homemade motion sensor consumes very little electricity, so instead of a power supply, you can use any 12 V battery.
Modern motion sensors are inexpensive and can be purchased at almost any department store.
If self-assembly of the device is planned in order to save money, then the cost of all radio-electronic components that need to be purchased is about 60% of the cost of a store-bought device.
Video
XXI CENTURY Candy Fudge Scented water
266 ₽ More details
Video baby monitor Motorola MBP36S (white)
12900 ₽ More details
Red women's jackets
What you will need
Materials
- Cardboard (for the body).
- A piece of matte plastic (will hide the LED and create a diffused light effect).
- YX-402 controller board.
- Solar panel 1W/5V.
- 18650 battery.
- Battery adapter.
- LEDs.
- Circuit board.
- JST connectors.
- Wires.
- Heat-shrink tubing.
- Button cap.
Which LEDs are suitable?
It is advisable to adhere to the following characteristics:
- Lens: 5 mm, cool white.
- Forward voltage (Vf): 3.0 - 3.2 V.
- Maximum continuous current (Ifm): 30 mA.
- Maximum power dissipation (Pm): 80 mW.
- Luminous intensity: 12000-14000 mcd at 20 mA.
- Scattering angle: 30 degrees.
Recommendations for design values when designing an LED panel:
- Forward voltage: 3.2 V.
- Forward current: 20 mA.
- Luminous intensity: 13000 mcd at 20 mA.
- Maximum power: 80 mW.
They are used in security systems
Passive devices have infrared sensors that monitor the temperature within their range. When the temperature data changes, the device is triggered. This type of device is used more often for lighting in residential areas.
- They are safe for people and animals.
- They can be easily customized.
- They work great both indoors and outdoors.
- The price is satisfactory.
- Such a device only works within certain temperature limits.
- It does not pick up objects coated with infrared blocking material.
- The device malfunctions when exposed to heat flows from heaters and warm wind.
Read also: How to make an electrostatic cold smoker with your own hands.
Module MBee-DUAL-3.3-UFL-SOLDER-1350-UFL, operating in two frequency bands
The new production radio module is based on the CC1350F128 and operates in the license-free 868 MHz and 2.4 GHz bands. The module is designed for creating various Internet of Things devices and can act both as a wireless sensor and a central data collection node. Based on MBee-DUAL modules, networks for collecting data from resource metering devices, security systems, fire protection, control and industrial telemetry can be implemented. The modules are based on the latest CC1350 system-on-chip family of chips from Texas Instruments. On board the module there is a high-performance microcontroller with a Cortex-M3 , 128 KB of Flash memory and 20 k, fqn of RAM, which is enough even for resource-intensive applications. The unique dual-band radio consumes less than 6 mA in continuous reception mode, which is the best in the industry. Another undeniable advantage of the CC1350, which distinguishes this chip from its competitors, is the presence of a specialized stand-alone sensor controller with ultra-low consumption. This controller is designed to automate basic measurement procedures and primary processing of results from digital and analog sensors. This eliminates the need to activate the main Cortex-M3 computing core and thereby ensures exceptionally low power consumption of the module in all operating modes. In accordance with customer requirements, the following module options are possible: • single-band module operating in the 868 MHz or 2.4 GHz frequency band; • dual-band module with separate antenna paths for 868 MHz and 2.4 GHz; • dual-band module with a single antenna path.
•••