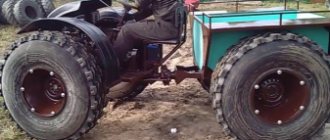
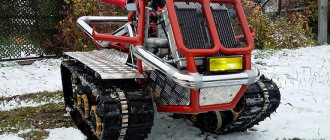
A snowmobile made from a motorcycle? Really!
Snowmobiles are an extremely useful tool for winter hunting and fishing, even without taking into account the fact that in some regions movement is possible only on such vehicles. Production models are extremely expensive and require careful maintenance, but sometimes it is impossible to know which parts to replace due to the design features. Therefore, you can create a homemade snowmobile from a motorcycle.
In order to make such equipment with your own hands, you need to use the following components:
- motorcycle "Ural" or "Izh";
- scrap metal;
- welding machine.
The last two components are necessary to create the frame, because only the engine, steering wheel, tank and fork will remain from the Ural and Izh brand models. The snowmobile does not have a wheel, so it will have to be dismantled. The fork design is modified to accommodate mounts for sleds or skis, which must first be purchased at the store. The element can be made with your own hands using duralumin. The slides are welded to the fork using argon.
The model will move due to the drum, onto which a special protector is welded with an attached chain and connected to the engine. The stability of the structure can be ensured by installing a trapezoidal frame, on top of which the original saddle from the motorcycle will be placed.
It is worth considering that when creating equipment with your own hands based on motorcycle elements, the best option would be to install a caterpillar. It is best to convert the engine starting mechanism from a foot version to a manual one.
Design of a homemade mini-tractor
This design was developed and tested in practice by students of the Kharkov Institute of Mechanization and Electrification of Agriculture.
You can make such a mini-tractor yourself from scrap: various components and parts from old serial machines produced by the domestic industry.
The unit can be equipped with a large set of replaceable trailed and mounted implements. Thanks to this, the walk-behind tractor can be considered a universal assistant in household farming. It can be used for plowing and harrowing, cultivating and hilling, as well as for other operations related to soil cultivation and plant care.
This tractor can also be used in conjunction with a single-axle trolley to transport various household goods, site debris, soil, and sand. To achieve this, the tractor is slightly modified and the driver is placed on a sprung seat in front of the trolley.
The main parts of a homemade mini-tractor are the VP-150M engine, transmission, power take-off system, chassis, control system and towbar. All of them are mounted on a rectangular channel frame. The engine that is most suitable for the walk-behind tractor of this device is
VP-150M from the Electron scooter or its equivalent, with a power of 7.5 hp. With. (5.5 kW), single-cylinder, two-stroke and carburetor. It has a compact integrated gearbox and clutch and is equipped with electronic ignition. It is also valuable that this motor is equipped with a centrifugal fan, because other engines have to be cooled using various “makeshift” forced methods.
You can, of course, use other engines. But for comparison, it is enough to provide basic data on the VP-150M engine. Here, the transmission of torque to the gearbox is carried out by a helical pair of gears with a gear ratio of 3.045.
The gearbox is three-speed with constant mesh gears. The gear ratios by stage are as follows: for first gear - 4.883, for second - 2.888, for third - 1.800. The engine and gearbox are made in one monoblock. There are no special requirements for the operation and maintenance of the engine complete with clutch and gearbox; in this case, they are regulated only by the manufacturer’s recommendations.
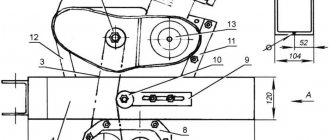
The transmission of the walk-behind tractor is mechanical, gear-chain, consisting of a serial differential with reverse (from the Ant cargo scooter), an intermediate shaft, two final drives and a wheel locking mechanism. The intermediate shaft in this mechanism simultaneously serves for power take-off and for mounted implements. Therefore, torque is transmitted from the engine to the intermediate shaft using a chain with a pitch of 12.75, and then to the differential using a chain with a pitch of 15.875 mm. And then, again along the final drive chains with a pitch of 15.875 mm, to the drive wheels. Sprocket Z1 belongs to the engine, Z4 is a set together with the differential, and Z2 and Z3 are from the Voskhod motorcycle.
The intermediate shaft is made of steel 40, it is mounted in two ball bearings No. 180205. Standard flanged housings can be used for them (for example, from decommissioned agricultural machines); fastening to the side cheeks of the transmission casing.
The diameters of the shaft seats should be selected according to the dimensions of the sprocket hubs. The length depends on the width of the transmission housing plus a small margin (for installation on the right side of a double-groove drive pulley with a diameter of 100-120 mm).
As you can see in the photo, this homemade mini-tractor is a two-wheeled machine driven by a person walking behind it.
Choosing a chainsaw
If you want to make a homemade snowmobile, you need to start looking for a reliable and convenient chainsaw that will serve as the basis for a future vehicle. At the selection stage, it is important to make sure that the parameters of the unit correspond to the required ones. First of all, power and efficiency are taken into account. Also, the chainsaw should not have a lot of weight.
To implement the idea of producing a homemade snowmobile, a Ural chainsaw is often used. It is characterized by increased reliability, low weight and good performance. In addition, the tool is environmentally friendly and is not afraid of working in difficult conditions.
Using such a chainsaw, you can make a high-quality unit that is capable of moving through any snow drifts.
As for the technical characteristics, they look like this:
- Power - 3.68 kW.
- Weight - 11.7 kg.
- Dimensions - 46x88x46 cm.
Three-wheeler based on "Ant"
This lightweight all-terrain vehicle was assembled for the purpose of helping to work on a site in the village. That is, it must transport sand and firewood. land along routes with average road conditions. Before this project, the author assembled a cart on a walk-behind tractor, but it does not have any special off-road qualities or traction for transporting heavy loads.
Units and materials used to create this all-terrain vehicle:
1) Chinese engine 2) CVT for it 3) Frame from an Ant motorcycle 4) gearbox from an Ant motorcycle 5) hubs from an Ant 6) shock absorbers also from an Ant 7) axle shafts from Oka hubs from Oka 9) disk from a Chinese scooter 10) hydraulics from motorcycle Minsk 11) brakes from a motorcycle Minsk
Let's take a closer look at the work performed to create this all-terrain vehicle.
Here is a photo of a cart with a walk-behind tractor; as you can see from the photo, the wheels are very small and slip a lot, especially when the cart is loaded. In addition, such a unit turns very poorly, which is why the author thought about creating something more powerful.
To begin with, the author began a complete restoration of the hubs and axle shafts, since they were not in the best condition.
After the work on the hubs and axle shafts was completed, the author began installing them on the frame from the Ant motorcycle. The spline was redone, which went to the gearbox of the future all-terrain vehicle. Work was also carried out on the cardan shaft, which was cut for welding through the bushing using electric rivets
A small pulley, which with weights and a large nut was attached to the motor shaft, is the drive one. A large pulley with a spring and oblique stops is the driven one; it was installed as follows: the belt pulls the pulley cheeks, and the cheek gusset runs over the counter gusset. Then the stopper is pulled off, the gusset side is flipped over and the driven pulley is installed.
After installation and testing, a miscalculation was discovered, the fact is that the drive pulley is designed for revolutions of 1000-3500, and this all-terrain vehicle has a clutch with a 1:2 gearbox, so the shaft rotates 500-1700 revolutions per minute. Consequently, the variator will not work with such a scheme, so the author was faced with the choice of either increasing the weight of the weights or replacing the engine.
Motor scooter Ant - tuning
Every driver dreams of upgrading his own vehicle. And here fantasy knows no bounds, and external tuning becomes a way out of the situation. How can you improve your Ant scooter - tuning will be the best solution. You can paint the wings, hood, body and thus transform the model.
Before carrying out work, the vehicle is carefully prepared: cleaned, sanded, degreased.
As you know, scooter owners love to use various stylish bells and whistles, and external tuning allows you to transform the device. There are a great many options for external transformation of your favorite iron horse, and the owners of the Ant scooter are not alone in their desire, because the Voskhod 3M motorcycle is an equally popular model for tuning. Even an inexperienced motorcyclist can do tuning of Voskhod 3M with his own hands. You just need to pay attention to this and use your imagination to make your old man sparkle with new colors and get an attractive appearance.
Ignition installation
Secondly, starting a cold or warm engine. Thirdly, the scooter's headlights are supplied with the current needed at night, and the brake lights and turns are also supplied with electricity.
All you need is very thin paper, a narrow rod and a set of keys.
When the paper is released when the piston is lowered to the depth of the mark made, the ignition will be set correctly.
Those who are already tired of suffering with the dynamo starter will understand me. Of course, for this you need to have a special tester, thanks to which you can always determine the malfunction of a particular mounting unit or part.
Construction of a homemade motoblock snowmobile
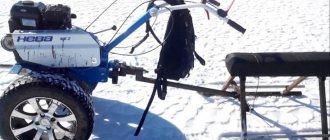
This is a sought-after invention that you can make yourself if you have quality parts. The walk-behind tractor is taken partially (separate parts) or used completely. If you decide to use it not fully assembled, you need to weld a supporting frame with a rear axle, steering fork and wheels onto it. The most difficult stage in this case is the transformation of the working shaft of the walk-behind tractor into a drive gear.
The most practical and universal solution in the manufacture of a self-propelled vehicle would be to use parts from a walk-behind tractor. You only need to remove the steering fork and engine from the finished walk-behind tractor.
The motor can be located at the rear of the structure.
Before you start making your own structure, draw a drawing, collect all the necessary materials, prepare the tools, and you can get started. The design is quite simple and anyone can handle it; technical education and any skills are not required.
How to install an engine from an Ant walk-behind tractor
Work on installing the engine from the Ant walk-behind tractor should begin by rebuilding the motor. Then it is recommended to adhere to a certain plan in order to get a high-quality and reliable unit:
- Making the frame. This is done by welding an iron sheet and a four-millimeter diameter pipe. The frame must be firmly secured to the engine.
- We install the carburetor, air filter and muffler.
- It is necessary to provide holes for draining and filling oil, since the insides of the engine must be constantly lubricated.
- The steering wheel can be made from an ordinary tube, preferably metal. For ease of control, it is better to provide the ability to adjust the height.
- Although the equipment will work mainly in first gear, the walk-behind tractor usually has two or three speeds; there is no need to redo the gearbox.
In this video we will look at an ant on the engine of a walk-behind tractor:
Attention! You will have to open and close the carburetor damper manually. we install the wheel in the front part of the walk-behind tractor, and the level of soil plowing depth and ease of control will depend on the correct attachment; we make nozzles from pipes and angles, fix them with a key in special grooves and, so that there is no movement along the axis, secure them with bolts; We determine the capture level to be approximately 1-1.2 meters, depending on the work performed.
we install the wheel in the front part of the walk-behind tractor, and the level of soil plowing depth and ease of control will depend on the correct attachment; we make nozzles from pipes and angles, fix them with a key in special grooves and, so that there is no movement along the axis, secure them with bolts; We determine the capture level to be approximately 1-1.2 meters, depending on the work performed.
The unit based on the Ant motor scooter will be a little bulky, weighing about 90 kilograms, and slightly clumsy. But special maneuverability in the garden and field is not required, since there are usually no obstacles that need to be avoided frequently. But the motor will perfectly withstand all loads, even with long and continuous operation.
When a homemade Ant with a motor from a walk-behind tractor needs to be moved over a long distance, during the manufacture of the equipment it is necessary to provide for the possibility of installing wheels that are bolted through, or to make an additional stand for transportation in the back of a truck or in a trailer.
It is also possible to make the wheels smaller and attach a plow, potato digger or hiller.
Nowadays, the development of agricultural machinery has reached its best development. It’s hard to imagine a modern farmer without a cultivator or walk-behind tractor.
For convenient and comfortable use of the walk-behind tractor, it is made from an old Ant scooter. With such equipment it will be comfortable to move around the cultivated area, transport harvested crops, humus, agricultural tools, even firewood, garbage and everything else.
Branded walk-behind tractor Ant
First of all, you need to find an old scooter and decide what size areas will be processed. This affects the power of the walk-behind tractor motor. The Ant scooter with an engine from a walk-behind tractor is converted into a real walk-behind tractor according to the standard classical scheme:
- Frame.
- Engine.
- Chassis based on 2 wheels.
Secondary parts are attached to the vehicle - walk-behind tractor
which of course will be very necessary for further use of the device:
Following from the above, the necessary elements for the production of a walk-behind tractor are a frame, engine, wheels, steering wheel, seat and electrical equipment. to menu
The elements of the walk-behind tractor are placed on the frame for our client. The frame design consists of two spars, which are made of an inch and a quarter metal pipe. The front and rear ends of the side members are bent upward, the rear ends need to be bent towards each other and later connected by welding. At the control control production stage, the Izh bike and its spare parts are used.
Homemade walk-behind tractor with a motor from Ant
The control structure from the bike is welded to the rear ends of the side members. To tension the chain of the first stage of the box, you need to connect the side members lengthwise with several cross members. The platform for the battery and other parts also serve as cross members. The gearbox housing, which is part of the frame assembly, in addition to its own functions, also functions as a rack between the chassis and the power unit. For transporting cargo with a trailer, you can hook up a two-axle cart to one of the rear parts of the crankcase.
How to make a snowmobile with your own hands: detailed instructions
Features of homemade snowmobiles
Self-propelled guns made by yourself have a number of features:
- Riding a snowmobile can be quite dangerous and this must be taken into account, so although most snowmobiles cannot go faster than 15 km/h, extreme care and caution must be taken when assembling a snowmobile.
- When riding a snowmobile, the user will not get stuck in a snowdrift, since the device is equipped with a crawler walk-behind tractor.
- The snowmobile is reliable and can easily overcome many obstacles.
- When making a snowmobile with your own hands, the creator carefully selects the parts and assembles them into a single system, so the designer is responsible for the quality of his device.
- The cost of snowmobiles is quite high, but its individual elements cost little; By assembling a snowmobile yourself, the designer also saves on labor, so a homemade snowmobile costs several times less than a purchased one.
Preparation
First you need to make a drawing of the device. If you do not have such skills, then simply calculate the parameters of the machine. The design of a snowmobile is quite simple, so you can easily make a device based on a sample or video.
To make a snowmobile, you will need:
- pipe with a diameter of 40 mm. and a wall thickness of 2 mm. – needed for the frame and other frame elements;
- conveyor belt 3 mm thick. (you can use V-belts) - this is the main element of the track mechanism; lugs with a diameter of 40 mm are made from them. with a wall thickness of 5 mm;
- engine, fuel tank and carburetor from a motorcycle (for a snowmobile);
- sprockets and chain from motorcycles and snowmobiles;
- any drive shaft of suitable size;
- skis from another snowmobile;
- steering wheel with throttle and cable (from a motorcycle);
- the platform is optional because you can mount all the parts directly to the frame (most people skip this part because it's a little tricky and has little payoff); Several seats can be attached to the platform;
- seat;
- body;
- small elements (nuts, bolts, hinges, etc.).
Engine and hydraulic installation
The most profitable option for converting a walk-behind tractor into a homemade four-wheeled tractor is considered to be a single-cylinder water-cooled diesel engine - this is usually installed on Chinese Scout, Zubr and Russian Neva brand motor-cultivators. A single-cylinder diesel engine is economical, so operating a mini tractor based on it will not be expensive. It is typically placed on the front of the frame, allowing the small tractor to maintain optimal balance when operating with additional tools. A fastening system is installed at the location of the motor, which is best made “floating” (sliding) to simplify the adjustment and tension of the belts.
The transmission of force from the engine to the rear wheels of a homemade tractor is organized using a belt drive. The PTO transfer case, like the gearbox, can be used from a decommissioned GAZ-53 car. The homemade power unit is mounted in such a way that the PTO pulley is located in the same plane as the pulley located on the rear axle of the mini tractor. At the same time, they mark out a place for the clutch pedal. The belt drive is covered with a protective cover to avoid slipping during operation and to make its service life longer.
After completing the main work, a hydraulic lift is installed on a homemade mini tractor with an engine from a walk-behind tractor. The hydraulic conversion kit must include an oil pump, oil reservoir, hydraulic cylinder and distributor. All components of the system are connected by flexible oil-resistant hoses. It is advisable to make the hydraulics in a floating mode - this will ensure full operation of the motor-tractor hitch. Then the rotary cutter will work as it should.
The entire range of heavy walk-behind tractors (Scout, Ugra, Neva, etc.) - https://garden-shop.ru/motobloki.html
Then the driver’s seat is installed, as well as headlights and dimensions if the mini tractor is planned to be driven on roads. They will ensure safety when operating vehicles at night and will allow you to avoid problems with demanding road patrol officers.
Motor scooter Ant: adjusting the clutch with your own hands
Like any other equipment, the “Ant” scooter can break down and need repair. But thanks to its structure, repairs can be done independently.
The “Ant” clutch is one of the weak points of the scooter, which needs frequent adjustment and cable replacement.
Carefully observe the clutch, as problems can be divided into 2 main causes:
- The clutch drives. In this case, problems are possible:
- the cable has become unraveled, rusted or bent;
- adjusting nuts are too tight;
- large free play of the lever;
- crooked discs.
- The clutch is slipping. Possible reasons:
- The cable has become unraveled, rusted or bent;
- The adjusting nuts need additional tightening;
- There is no free play of the lever;
- Crooked discs.

