creativecommons.org
All knitters face the problem of storing tools. You constantly have to look for knitting needles and hooks in drawers and on shelves. Moreover, it is not always possible to find the necessary equipment on time. A convenient organizer – a pencil case with pockets and special compartments – helps to avoid the problem. Finding a comfortable item on sale is difficult. Size, number of pockets or design does not fit. It is much easier to take care of your own comfort. To do this, you can knit an original tool stand with your own hands.
How to knit a pencil case for knitting needles and hooks with your own hands: diagram
A non-standard knitted pencil case can be used not only for storing hooks. It is suitable for organizing pens and pencils on your desk. Before starting work, you need to select threads and choose a color, prepare everything you need. The basis will be a bucket in which the yarn will be stored. The size of the bucket is any, depending on the wishes of the craftswoman. There are convenient compartments on the sides of the pot. Each pocket is designed for one tool.
The idea is quite original. The bucket is easy to take with you, it is stable, and the hooks and knitting needles are securely held in place. The pencil case consists of three parts: a round bottom, a rectangular wall and a rectangular pocket. Each detail is made separately. When calculating the dimensions, the height and diameter of the pot are taken into account. The knitted product should be one centimeter larger. If the bucket expands upward, you should measure the width of the knitting along the widest possible area.
Let's start from the bottom:
- The product has the shape of a circle. For knitting, you can use any stitches - this is not important, since this element is not visible in the finished product. The main thing is to maintain the same style so that the part comes out neat.
- We use standard single crochets. The work process is standard. A chain of five loops is formed. A single crochet is knitted into each loop.
- Knitting each next row, add six columns.
- We continue working until the circle has a diameter that is one centimeter larger than the size of the base of the pot.
- We knit five rows, we do not increase.
Crocheted pencil case
August. It's time to get ready for school. a pencil case necessary for all students (or rather, female students) . We will do it in soft blue tones with a rosette. Although you can take any other yarn and decorate it to your taste. However, you can store both pens and pencils in it, as well as your knitting supplies (the same hooks). After all, the base for the pencil case is not difficult to knit. So, how to crochet a pencil case.
Pencil case (crochet)
To knit a pencil case we will need:
- Yarn is blue, blue and green;
- Hook;
- Fastener (Velcro);
- Lace;
- Beads;
- Needle.
In order to knit a pencil case , you need to choose a fairly thick yarn. This yarn will eventually hold its shape well.
First we cast on fifteen stitches and one more for lifting.
Photo 1
Next we knit single crochets. We must perform one such column in each loop of the chain.
And now we knit the other side in exactly the same way. And thus all our knitting will go in a circle.
Photo 2
Next, we simply knit several rows without increases.
Photo 3
When we knit a bag 25-27 centimeters in height, the thread can be broken. We already have the basis for the future pencil case. We sew a Velcro fastener inside. Or you can use buttons or the usual zipper - whichever is more convenient for you.
Photo 4
Now let's start knitting the flower. We will knit it from thinner yarn. And let's start with thirty-nine loops.
Photo 5
In the fourth we further knit a double crochet. And we skip the loop in the chain. In the second we knit two double crochets and between them we still need to make one air stitch.
Photo 6
Unfold the knitting. And we knit into the resulting pattern, which resembles the letter V, two double crochets and three double crochets. And here we’ll do two double crochets again.
We move on to the remaining letters V, in which we knit the same thing.
Photo 7
We start a new row with three loops and knit eight more double crochets under the arch, which is formed by three chain loops of the underlying row. And so we end up with nine columns in the arch.
And so we must tie all the arches obtained in the bottom row.
Photo 8
Our knitting will begin to curl.
Photo 9
Let's help him with this. We roll up our flower. This will give us a rose. From below, we use a needle to sew the flower together so that it does not fall apart. You need to sew tightly, piercing all layers.
We sew the rose to the pencil case. Next, we knit seventeen chain stitches with green yarn. And in the second loop we make a connecting column. Next we knit in the following loops: single crochet, then half double crochet, then double crochet in another loop. And we knit the same thing again, only in reverse order. We knit six more loops.
We sew our stem and leaf to the rose. And we decorate the top of the pencil case with white lace and beads. One bead can be placed in the center of the rose.
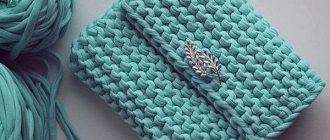
Our knitted pencil case is ready!
A wonderful gift for the new school year.
In order not to forget the address of the page and share with friends, add it to your social networks: Do you want to know news about competitions or master classes?
Tags: Crafts for home, School
Attention! It is better to write urgent questions in the comments on the website (form at the bottom of the page) or, better yet, directly by email. There are no notifications about comments from the VKontakte form! This form is more for feedback. 
Discussion: 3 comments
- Olga Andreeva:
August 27, 2016 at 9:51 amA wonderful knitted pencil case for a girl! Thanks for the master class. You can try to link.
Answer
- Julia:
October 19, 2022 at 9:11 am
Very cute. I'm just learning to crochet, I want to try to make myself a pencil case like this.
Answer
- Victor:
November 14, 2022 at 09:19 pm
A wonderful gift for a schoolgirl, although at first I thought it was a glasses case)
Answer
Your comment Cancel reply
DIY pencil case for hooks: pocket and walls
creativecommons.org
For the wall of the organizer you will need a rectangular shape made with cross stitching. A rectangle for a pocket is made using a similar principle, but its size is smaller in width. It should be taken into account that the pocket will start at the base of the bucket. It ends approximately three to five centimeters from the top of the pot.
- For the wall we use air loops. Length is equal to the height of the bucket.
- We begin to knit a rectangular shape. The height should be identical to the diameter of the top of the pot.
- On average, twenty-five loops are obtained.
- The pocket will need about fifteen loops - two-thirds of the height of the wall. The height of the parts is identical.
- To make the case exclusive, the outer pocket can be tied with stripes. In addition, multi-colored stripes are easier to sew in.
- The width of the strips depends on the type of thread used in the work. The density of the knitting is taken into account.
- When the pocket piece is ready, we tie one of the sides using single crochets. At the same time, we hide the ends of the thread that remain after changing colors.
- We connect two parts - a pocket and a wall - with single crochet columns. To do this, we apply two elements clearly along the contours.
- We turn one large pocket into separate pockets for hooks. To do this, we use simple connecting posts.
- Be sure to fasten all the threads after stitching the compartments. We tie a strong knot. Otherwise, the seams will begin to separate when using the pencil case.
Distributing hooks and hosiery needles
To make a beautiful and convenient organizer for handicrafts, you need to draw a sketch of the craft. To do this, you need to prepare a paper template. Its dimensions must correspond to our idea. And to determine its parameters, you should take the longest tool. The pocket for it should be a little longer so that the knitting needles or hook do not stick out, fall out and spoil the beauty of the organizer. This way we will find out the height of the product that we plan to cut and sew. Now you need to figure out the width.
Experienced needlewomen advise using a ruler and a simple pencil for these purposes. Next, we simply lay out the tools on a piece of paper and draw cells - pockets of the planned organizer made of fabric or other material. They should be a little wider so that the knitting needles and hook can be easily reached. This process is a bit like Tetris; you will also have to arrange the tools, trying to take up as much space as possible and not leave any empty space.
How to sew a knitting needle cover with your own hands - connecting the parts
We sew the bottom with a crochet hook and use standard single crochets. This doesn't have to be done from the inside out. Side seams are best done on the wrong side. The bucket - the basis on which the work was carried out - can be inconvenient to use. Therefore, we replace it with a foam analogue. We cut out a circle and a wall similar in shape to the bottom from the material. Carefully connect and fix.
We put a knitted pencil case on a foam base. It must be secured to the bucket using a glue gun or thread. At this point the work is completed, the pencil case is ready.
Sew pillows from leftover curtains with your own hands: pattern, diagrams and description
Sew a key holder with your own hands: pattern, diagrams and description
Organizer made of plywood
A man can prepare the next interesting and useful thing for his beloved.
Its implementation technology also completely depends on the performer. The main thing when preparing is to take into account the size of the products for which the craft is intended. For the rest, you can rely on your own imagination and taste. However, we still recommend planning the appearance of the idea on paper. And then you will be able to make a really impressive organizer for knitting needles and hooks from plywood.
In addition, it is important to note that such a product can be made by the whole family. For example, dad will prepare the frame and assemble the base, and mom and the children will sew a fabric cover or cover the craft with material or paper and come up with an interesting decor.
