We continue our section on electronic homemade products; in this article we will consider devices that support a certain thermal regime, or signal when the desired temperature has been reached. Such devices have a very wide scope of application: they can maintain a given temperature in incubators and aquariums, heated floors, and even be part of a smart home. For you, we have provided instructions on how to make a thermostat with your own hands and at a minimum cost.
Outdoor thermostat
How to make an outside temperature sensor with your own hands? This device allows you to accurately determine the air temperature in an open space. Such products are often used in vehicles.
- To work you will need the following set of parts and tools:
- Thermistor brand 2.56 Kom;
- Microcircuit for equipment assembly;
- Soldering iron;
- Tweezers;
- Thermistor 5.6 Kom;
- Protection glasses;
- Calibrator. It will help to measure errors in measurement and regulate the correct operation of the structure.
We solder a thermistor onto the microcircuit. Next, the calibrator and thermistor are fixed. When all the elements are fixed, we proceed to testing our product.
To do this, connect the wires to the area of the upper connector of the on-board computer. It is recommended to connect the equipment in the area of contacts number 6 and 7. In this case, polarity does not matter.
If the part does not show the temperature, then long dashes will appear on the computer screen. In this case, it is recommended to change the polarity of the wires. After this, the display will show accurate measurements of the temperature outside the enclosed space.
How does a digital thermostat work?
Accurate temperature control is best achieved through the use of digital thermostats. They differ from simple designs in the method of signal processing. The voltage is removed from the sensor, passes through the analog-to-digital converter and enters the comparative side. The digitally obtained initial temperature value is then compared with that received from the sensor, after which the control device receives the appropriate command.
Thanks to this method, the measurement accuracy is increased and is almost independent of ambient temperature or interference. Sensitivity and stability are most often limited by the system capacity and sensor capabilities. The digital signal easily allows you to display the temperature on a special display.
Review of digital thermostat models
The Ringder THC-220 thermostat is an inexpensive model that is perfect for a small DIY home incubator.
Thanks to the external block of sockets and temperature control from 16 to 42 degrees, it can be used in the off-season, and not just in summer. Technical characteristics of the device:
- humidity and temperature in the sensor area are displayed on a special display;
- the displayed temperature varies from -40 to 100 degrees, and humidity – up to 99 percent;
- one or another mode is displayed as a specific symbol;
- the temperature setting step is 0.7 degrees;
- The timer has a 24-hour format and is divided into night and day;
- one channel has a load capacity of 1200 W;
- the temperature in a large room can vary by up to one degree.
Another factory model of the digital controller is XM-18. In Russia you can buy it with an English or Chinese interface. It is more complex and costs more than the previous device.
It's not difficult to deal with him. Depending on the required temperature inside the incubator, special keys can control the factory program. The front panel has screens that display temperature, humidity and additional parameters. Active modes are indicated by LEDs; in case of dangerous deviations, light and sound alarms are triggered.
Characteristics of XM-18:
- temperature operating range - from 0 to 40.5 degrees, probability of deviation - 0.1 degrees;
- the permissible load along the heater channel is 1760 W;
- permissible load on the humidity, alarm and motor channels – 220 W;
- There is an interval of up to 999 minutes between turning eggs;
- cooling fan runs 999 seconds between permissible periods between inversions;
- indoor temperatures are allowed from -10 to 60 degrees, and relative humidity is up to 85 percent.
When choosing a factory thermostat with a temperature sensor for an incubator, it is very important to consider its capabilities. If it is small and made by yourself, then a device that controls only humidity and temperature will be enough for you, and additional capabilities are needed for more complex models for industrial needs
Blog Archive
We also must not forget that the power supply system is the most vulnerable part of the suburban infrastructure.
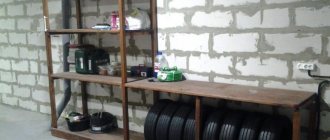
This incubator was made at home, which means that its design can be repeated if desired. The thermostat can also be purchased at the store. It is selected as a multi-channel type.
Gani This year I was the first to purchase an incubator, I chose Cinderella 98 eggs with automatic turning, 12 V and heating with hot water.
Eggs selected for incubation are placed in wire mesh trays. In order to prevent heat loss, all cracks must be sealed with sealant. It is advisable that it be mounted at the highest point, where the temperature is highest. The output gear shaft must make a full revolution around its axis at 4 o'clock.
For better visual control of the operating modes of the thermostat, the current through the HL1-HL3 LEDs is selected to be relatively large. In the circuit shown in the figure, the temperature sensor is transistor VT1, which is placed in a glass tube and placed directly on the tray with eggs. Read on to learn more about the features of choosing a voltage stabilizer for a gas boiler.
Article Archives
Its main elements are a heater, which uses an infrared emitter or a group of incandescent lamps, and a temperature sensor. Disadvantages: insufficient thermal insulation, fragility and manual turning of the racks with eggs.
Read more here. If we talk about a metal plate, it is considered the cheapest, but also the most unreliable method. In addition, the grilles dissipate the heat flow coming from the lamps. Choosing a controller circuit If you take factory products as a basis for manufacturing a thermostat, you may encounter insurmountable difficulties in assembly, and especially in setting up such products. Some hobbyists assembled small incubators at home using improvised materials with their own hands.
Three years warranty on any product. Modifications with pulse triodes The thermostat circuit for an incubator with pulse triodes includes a microcontroller, an expander, and a set of capacitors. connection diagram for a homemade incubator
Varieties today
As mentioned above, plastic was previously used to make tampers. Rage Barber created a company that soon became an industry leader in the production of hand presses. Manufacturers of accessories for coffee machines have not stood aside and nowadays you can find a variety of products on the market.
Nowadays you can find a variety of products on the market.
The size is determined by two parameters. The first is diameter. It is practically the same regardless of the manufacturer and is 53, 57 or 58 millimeters. The second parameter is the height of the accessory. It can be within 7-10 millimeters. The size of the portafilter affects the size of the tamper. Its diameter should be 1 millimeter larger than the diameter of the filter.
There are many manufacturers of this product, which explains the variety of coffee tampers. For the most part, there are some common standards, but differences still exist. They mainly concern materials of manufacture and colors.
The most common shapes are flat, round and convex. It is impossible to choose the best among them.
The choice of the form of tempera depends only on the preferences of the person. On the Internet you can find works that talk about the advantages of flat-shaped hand presses. But there are also a lot of articles about the advantages of a convex shape.
There are four materials from which temperas are made: plastic, aluminum, steel and wood. Each will be discussed in more detail below.
- Plastic is the material with the lowest price. The low price is due to the low quality of the product. Nowadays, plastic accessories are practically not found.
Plastic is the material with the lowest price. Aluminum tampers are better than their plastic “brothers”, but their mass is too small for high-quality compaction and there is a risk of corrosion. Their mass is too small for high-quality compaction and there is a risk of corrosion. The ideal material for the product is steel. It is hard, heavy and durable. Not subject to corrosion and oxidation. Steel bases are the most expensive, but also of the highest quality.
Temperature drop
When the temperature decreases, the resistance of the thermistor increases, which leads to an increase in the voltage across the divider. At a certain moment, transistor VT1 closes, after which capacitor C1 begins charging through R5. Eventually the moment comes to reach the logical one level. It is this that is supplied to one of the inputs of D4, and the voltage from the divider is supplied to the second input of this element. When both inputs are set to logical ones, and a zero appears at the output of the element, the trigger switches to the opposite state. In this case, the relay will be turned off, which will allow you to turn off the fan, if necessary, or turn on the heating. So you can make a thermostat for the cellar with your own hands so that it turns the fan on and off when necessary.
How to install correctly
To extend the life of the thermostat, use the following recommendations:
- do not install electronics without additional protection outdoors or in rooms with high humidity levels;
- if necessary, remove the control sensor into an unfavorable environment;
- exclude the placement of the regulator opposite heat guns or other “generators” of cold or heat;
- To increase accuracy, choose a location without active convection currents.
Thermostat circuit - second option
After some thought, I came to the conclusion that it is possible to connect here the same controller as on the soldering station, but with a little modification. During the operation of the soldering station, minor inconveniences were identified: the need to set the timers to 0, and sometimes an interference occurs that puts the station into SLEEP mode
. Considering that women do not need to remember the algorithm for switching the timer to mode 0 or 1, the circuit of the same station was repeated, but only the hair dryer channel. And minor improvements led to stable and “interference-free” operation of the thermostat in terms of control
When flashing AtMega8 firmware, you should pay attention to the new fuses. The following photo shows a K-type thermocouple, which is convenient to mount in the oven
I liked the work of the temperature controller on the breadboard and started final assembly on the printed circuit board.
I finished the assembly, the operation is also stable, the readings in comparison with the laboratory thermometer differ by about 1.5°C, which is basically excellent. When setting up, there is an output resistor on the printed circuit board; I have not yet found an SMD of this value in stock.
The LED models the heating elements of the oven. The only note: the need to create a reliable common ground, which in turn affects the final measurement result
The circuit requires a multi-turn tuning resistor, and secondly, pay attention to R16, it may also need to be selected, in my case it is 18 kOhm. So, here's what we have:
In the process of experimenting with the latest thermostat, more minor improvements appeared that qualitatively affected the final result, look at the photo with the inscription 543
- this means the sensor is disconnected or broken.
And finally we move from experiments to the finished design of the thermostat. I implemented the circuit into the electric stove and invited an authoritative commission to take over the work :) The only thing that my wife rejected were the small buttons on the convection control, general power supply and airflow, but this can be solved over time, but for now it looks like this.
The regulator maintains the set temperature with an accuracy of 2 degrees. This happens at the moment of heating, due to the inertia of the entire structure (the heating elements cool down, the internal frame is temperature equalized), in general, I really liked the scheme in the work, and therefore it is recommended for independent repetition. Author - GOVERNOR
.
Discuss the article THERMOREGULATOR DIAGRAM
Autonomous heating of a private house allows you to choose individual temperature conditions, which is very comfortable and economical for residents. In order not to set a different mode indoors every time the weather changes outside, you can use a thermostat or thermostat for heating, which can be installed on both radiators and the boiler.
Kinds
Manufacturing companies offer customers 3 types of thermostats, each of which has different internal signals. They control the heating process of the coolant and equalize the temperature order.
Signal expansion methods:
- Directly from the coolant. It is considered insufficiently effective, so it is used infrequently. Its operation is based on an immersion sensor or similar mechanisms. Compared to other types, it is one of the most expensive.
- Internal air waves. It is the most reliable and economical option. It balances the air during its changes, and not the level of water heating. Easy to install in an apartment. It communicates with heating communications using a cable through which the signal is transmitted. Thermostats of this type are constantly being updated with new functions and are quite convenient to use.
- External air waves. High efficiency is achieved through an outdoor sensor, giving an immediate response to any weather changes. Signs in the form of a signal sent by the diaphragm give the system a command to open or close the pipe with the heating device.
In addition, the devices can be electrical and electronic.
According to the scheme and option for receiving a signal, devices are divided into semi-automatic and automatic, which, in turn, can:
- Monitor the heating level of the radiator and the main line.
- Monitor the boiler power.
DIY temperature controller: power and load
As for the connection of LM 335, it must be serial. All resistances must be selected so that the total current that passes through the temperature sensor corresponds to values from 0.45 mA to 5 mA. The mark should not be exceeded, as the sensor will overheat and show distorted data.
The thermostat can be powered in several ways:
- Using a power supply oriented at 12 V;
- Using any other device whose power supply does not exceed the above figure, but the current flowing through the coil should not exceed 100 mA.
Let us remind you once again that the current in the sensor circuit should not exceed 5 mA; for this reason, you will have to use a high-power transistor. KT 814 is best. Of course, if you want to avoid using a transistor, you can use a relay with a lower current level. It can operate on a voltage of 220 V.
Tags: temperature sensor, sensor manufacturing
Comments 153
I installed exactly the same one on a double-circuit boiler. The third season is already plowing. The power supply is from an antenna amplifier. Did you have a controller with a sensor?
no, as far as I remember, I bought the sensor separately at Chip and Deep
But in general, then I assembled everything I had planned on the DS18B20
And this option: a thermocouple attached to the pipe and a simple multimeter in temperature measurement mode
Tell me, what kind of display board is it? Homemade?
no, not homemade - a friend bought a “bunch for a heel” on Aliexpress and gave one to me:
Have you ever thought of stirring up such a thing yourself?
Thought. On the DS1820 sensor. But it so happened that I went to visit a friend, we started talking over a glass of tea, I told him what I wanted to do, and he took this device from the shelf and gave it to me. Now the need for independent production seems to have disappeared. But I’ve already done it according to this scheme before and I have everything for it:
Dallas works better compared to thermistors, and digitally. However, the range is small.
why is it too small? More than enough for use in cars.
Dallas, in principle, has a better measurement range. But the upper limit is critical. The thermistor, as far as I remember, is not reliable. Although if the potential sits at 12 volts, it works. But Dallas needs stable power.
Can you tell me more about what the top bar is critical? I heated the sensor to more than 120 degrees with a hairdryer, it seemed to work after that.
The upper temperature range seems to be 125 degrees in Dallas. That is, -50 and +125. And if you need a controlled temperature above 125, then Dallas will not cope. In general, its accuracy is normal, but there is a delay of 0.5-1 seconds. There is a 3-wire connection, it is possible to connect via 2 wires. There will be a delay and the range will be less.
I know about these connections, just for fun I tried to heat the sensor with a hairdryer, I was able to see 127.9 as much as possible on it, beyond zero, when it cools down it returns to normal)
no, this is already a proven technology. I only got confused by taking pictures of everything, formulating it and posting it here)
I understand that it’s used, but is it really worth the effort given the relatively low cost of the sensor? Although of course there are rare and expensive sensors...
no, it’s not a matter of cost, it’s a matter of fitting a Chinese sensor into the required structure. You need to regulate the temperature of the water, for example, with a boiler - you just can’t put the sensor in the water; you have to screw it in somehow, so you need a housing.
By the way, what a cool idea...listen, how much would the cheapest sensor like this cost? If only it would open the circuit like a thermostat and then there would be no price...
I understand that it’s used, but is it really worth the effort given the relatively low cost of the sensor? Although of course there are rare and expensive sensors...
Well, look - I, for example, have a Bosch Mono-Jetronic, according to all the tables, DTVV and DTOZH should (at the same air temperature and coolant) give the “brains” the same resistance. At the same time, the DTVV is quite adequate, but cannot be replaced (due to design features). And the DTOZH is “buggy”; when the readings differ, the ECU begins to “adjust”, because can’t figure out who to believe (DTOZH or DTVV)! I bought 4 (FOUR) different sensors - they all give different resistance at the same temperature! And with the technology described above, it is possible to select a cheap thermistor for almost any resistance value at a given temperature! Yes, whatever, you can replace BOTH thermistors (by selecting the required resistance) with both DTOZH and DTVV! And this will help solve several problems with “glitches” of the electronic power system at once! Moreover, the price of Chinese thermistors, consumables, etc. There is no comparison with “branded” sensors (which sometimes cannot be replaced, or they cost like an airplane wing)! Am I explaining this clearly? )))
Instructions for choosing materials
There is a certain electrical circuit for which it is necessary to select fastening materials. The required cross-section of the conductor depends on the amount of current that will pass through it.
Table 5. Ratio of cross-sectional values to current values
According to the working diagram, you need to decide on the number of pins. It will coincide with the number of independent circuits. This technique determines the number of terminals of a certain cross-section.
Table 6. Correlation of cross-section with number of pins
WAGO is discouraged from other manufacturers by the fact that each modification is designed for a specific transverse dimension, and not for a set of sections. This can help reduce the number of different clamps for each cross section. When using a single-core conductor in a circuit, an order of magnitude larger cable can be inserted into the WAGO socket. In other words, a nominal outlet for a cross section of 2.5 mm2 is also applicable for sections with one core with a diameter of 4 - 6 mm2 or more.
Top manufacturers
Tampers are produced all over the world and it is difficult to find a manufacturer that does their job poorly. In stores you can find hand presses for every taste and budget. All of them will be performed at a fairly high level. But we can distinguish four to five product models that are distinguished by high quality products.
- Lava Deluxe Tamper from Espresso Parts Northwest. The weight of the product is 450 grams, and the height is 80 millimeters. The base is made of steel, and the handle combines aluminum and plastic. The diameter can vary from 49 to 58 mm. You can choose one of the four available colors: purple, red, blue and green.
The base is made of steel, and the handle combines aluminum and plastic. La Marzocco Tamper by Espresso Specialists, Inc. The weight is 353 grams and the height is 99 millimeters. The tamper is made from aluminum for an espresso machine from the same company. The product is not available for free sale.
The tamper is made from aluminum for an espresso machine from the same company. Reg Barber Whole Latte Love. The tamper weighs 365 grams with a height of 90 millimeters. Red Barber is the most popular company on the market. Often, various products of this company are used as prizes for competitions among baristas of different levels. Red Barber is the most popular company on the market. Gourmet Espresso Tamper by EspressoTamper. The weight is very small, only 104 grams, but the height is corresponding - 35 millimeters. The main feature is originality. The top is covered with anodized aluminum. The main feature is originality. Pro Tamper from Espresso Parts Northwest. Weight is 528 grams, height is 85 millimeters. Like all products from this company, the tamper is offered with a diameter of 49-58 millimeters.
Like all products from this company, the tamper is offered with a diameter of 49-58 millimeters.
Why is it needed?
In autumn, when central heating has not yet been connected, heaters are often used in cold winter or early spring. The peculiarity of their work is that they require heating control. If the temperature in the room becomes normal, the device is turned off. As it cools down, connect it to the network again.
At the same time, everyone has their own comfort zone - some rest well at +18 degrees, others require a different regime. To maintain the required air temperature at all times, thermostats are purchased. They automatically turn off the heat source when a pre-selected temperature point is reached.
How to use a tamper
Most espresso brewing manuals include tempering rules. Special courses for the barista profession help you learn in practice how to use a special device.
Be sure to read: The culture of serving coffee in a restaurant
The main condition is that the dimensions of the press must fit the holders. The barista should use a digital scale to take out as much ground coffee as the recipe calls for. Professionals determine the coffee mass by eye and add it without additional measuring on a scale.
To avoid slipping, make a bookmark on a special mat. Coffee is poured into the holder, then the mass is distributed in the filter. The barista should tap the sides with his palms, then press the press firmly against the surface.
If everything is done correctly, you will get a dense and even tablet. The barista should refrain from rotating the tamper and unnecessary movements. If you scroll the tamper, bevels are formed. They cause uneven extraction.
The principle of operation of the thermostat
A thermostat is a device that can respond to changes in temperature. Based on the type of action, a distinction is made between trigger-type thermostats, which turn off or turn on heating when a specified limit is reached, or smooth-action devices with the ability to fine-tune and accurately adjust, capable of controlling temperature changes in the range of fractions of a degree.
There are two types of thermostats:
- Mechanical. It is a device that uses the principle of expansion of gases when temperature changes, or bimetallic plates that change their shape when heated or cooled.
- Electronic. It consists of a main unit and a temperature sensor that sends signals about an increase or decrease in the set temperature in the system. Used in systems requiring high sensitivity and fine adjustment.
Mechanical devices do not allow for high precision settings. They are both a temperature sensor and an actuator, combined into a single unit. A bimetallic strip used in heating devices is a thermocouple made of two metals with different coefficients of thermal expansion.
The main purpose of the thermostat is to automatically maintain the required temperature
When heated, one of them becomes larger than the other, causing the plate to bend. The contacts installed on it open and stop heating. When cooled, the plate returns to its original shape, the contacts close again and heating resumes.
The chamber with the gas mixture is a sensitive element of the refrigerator thermostat or heating thermostat. When temperature changes, the volume of gas changes, which causes movement of the surface of the membrane connected to the lever of the contact group.
The thermostat for heating uses a chamber with a gas mixture that works according to Gay-Lussac's law - when the temperature changes, the volume of gas changes
Mechanical thermostats are reliable and provide stable operation, but the operating mode is adjusted with a large error, almost “by eye”. If fine tuning is necessary, providing adjustment within a few degrees (or even finer), electronic circuits are used. The temperature sensor for them is a thermistor, which is capable of distinguishing the smallest changes in the heating mode in the system. For electronic circuits, the situation is the opposite - the sensitivity of the sensor is too high and it is artificially coarsened, bringing it to the limits of reason. The principle of operation is a change in the resistance of the sensor caused by fluctuations in the temperature of the controlled environment. The circuit reacts to changes in signal parameters and increases/decreases heating in the system until another signal is received. The capabilities of electronic control units are much higher and allow you to obtain temperature settings of any accuracy. The sensitivity of such thermostats is even excessive, since heating and cooling are processes with high inertia, which slow down the reaction time to changing commands.
Operating principle
The thermostat circuit is multifunctional. Starting from its foundation, you can create any adapted device that will be as convenient and simple as possible. The supply power is selected in accordance with the available relay coil voltage.
The principle of operation of the adjusting device is the ability of gases and liquids to compress or expand during cooling or heating. Therefore, the operation of water and gas configurations is based on the same essence.
They differ from each other only in the speed of reaction to changes in temperature in the house.
The principle of operation of the device is based on the following stages:
- As a result of a change in the temperature of the heated object , a change in the operation of the coolant in the heating mechanism occurs.
- At the same time , this causes the siphon to increase or decrease its dimensions.
- After this , the spool moves, which balances the coolant inlet.
- The inside of the siphon is filled with gas, facilitating uniform temperature regulation. The built-in temperature sensor monitors the external temperature.
- Each value of the heat level is equated to a specific value of the pressure force of the working atmosphere inside the siphon. The missing pressure is compensated by a spring that controls the operation of the rod.
- As a result of increasing degrees, the valve cone begins to move towards closing until the operating pressure level in the siphon becomes balanced due to the forces of the spring.
- If the degrees decrease, the work of the spring is reversed.
The result of the work depends on the type and functionality of the control valve, which is directly subordinate to the heating circuit and the diameter of the supply pipe.
What to consider when choosing a device
There are a large number of devices on the market, the functionality of which varies markedly, which directly affects its cost. When purchasing universal current clamps, you must take into account that this is still a specialized tool for determining the current strength in a live conductor. Therefore, it is worth deciding for yourself whether this device needs such functions, for example, as checking capacitors, diodes and transistors.
A regular multimeter can do everything the same, only its dimensions and weight are much smaller, but in any case this is a matter of taste.
The main tasks that the device must perform:
- Measurement of current and voltage (ideally AC and DC).
- Testing wires (preferably with a sound signal)
- Determination of current frequency.
Desirable options that in some cases make work easier:
- Fixing measurement results – “Hold” button
- Possibility of setting zero - if neighboring wires give interference.
- Possibility of measuring inrush current, which is several times higher than the rated current.
- Automatic range selection when displaying results.
- A plus will be the ability to connect a temperature probe to measure temperature.
- Large backlit display.
It is also imperative to pay attention to the quality of the plastic, the absence of metal parts on the surface of the device, and what batteries are used (so that they can be easily found and replaced, if necessary)
Visually about current clamps in the video:
As a result, a current clamp is a device that greatly simplifies the work of a professional electrician and a home craftsman who is used to doing everything with his own hands. Using the device, in general, is no different from taking measurements with a tester or multimeter - it is intuitive and accessible even to people with minimal skills, but in some cases some knowledge will be needed to interpret the obtained measurement results.
Homemade coffee maker tamper for coffee lovers
Tamper A tamper is an indispensable barista tool used to form the correct “coffee tablet” in the portafilter when preparing espresso. The tamper consists of a working surface and a handle. Both elements can be made of metal, wood or even plastic. The working surface is a circle with a diameter 1-1.5 millimeters smaller than the diameter of the portafilter. The bases are found in both flat and spherical shapes.
How to choose the correct tamper diameter for a coffee machine?
1. If you know the brand of your coffee machine, then just look at the table below.
| Home espresso machines | Recommended tamper size |
| Ascaso | 57mm |
| Bodum Granos | 51mm |
| Delonghi (new machines) | 51mm |
| Delonghi (older machines) | 49 mm |
| ECM Botticelli | 58 mm |
| ECM Cellini, Giotto | 58 mm |
| Espressione Cafe Retro, Cafe Novecento | 58 mm |
| Estro | 53mm |
| Faema Family | 53mm |
| Francis! Francis! X1 (new version) | 56 mm |
| Francis! Francis! X1 (old version) | 52 mm (or 53 mm*) |
| Francis! Francis! X3 | 57mm |
| Gaggia (semi-auto machines) | 58 mm |
| Gaggia Factory (lever machines) | 51mm |
| Innova | 57mm |
| Kitchen Aid Proline | 58 mm |
| Krups | 49 to 52 mm (verify) |
| La Pavoni Club Combo, Duet, Napolitana | 57mm |
| La Pavoni lever machines (mfg. 1999 and newer) | 51mm |
| La Pavoni lever machines (mfg. pre 1999) | 49 mm |
| La Pavoni Lusso, Pisa, Si | 53mm |
| La Riveria | 45 mm |
| La Spaziale | 53mm |
| La Valentina | 58 mm |
| Mokita | 55mm |
| Mypressi Twist | 53mm |
| Olympia Club, Cremina, Express | 49 mm |
| Pasquini Livia 90 | 58 mm |
| Quick Mill | 58 mm |
| Rancilio Silvia | 58 mm |
| Saeco | 53mm |
| Solis | 53mm |
| Starbuck's Barista | 52 mm (or 53 mm*) |
| Commercial coffee machines | Recommended tamper size |
| Astoria | 58 mm |
| Astra | 56 mm |
| Aurora | 56 mm |
| Azkoyen | 58 mm |
| Bezzera | 58 mm |
| Brasilia | 58 mm |
| Bunn | 58 mm |
| Caramali | 58 mm |
| Cimbali (other) | 57mm |
| Cimbali Junior Casa DT1 | 58 mm |
| Conti | 58 mm |
| ECM | 58 mm |
| Elektra | 58 mm |
| Expobar | 58 mm |
| Faema | 58 mm |
| Florenzato | 58 mm |
| Futurmat | 58 mm |
| Gaggia | 58 mm |
| Grimac | 58 mm |
| Isomac | 58 mm |
| La Marzocco | 57 or 58 mm (verify) |
| La Scala | 58 mm |
| La Spaziale | 52 mm |
| Nuova Simonelli | 58 mm |
| Olympia Cremina | 49 mm |
| Pasquini | 58 mm |
| Rancilio | 58 mm |
| Reneka | 56 mm |
| San Marco | 55mm |
| Spaziale | 52 mm |
| Synesso | 58 mm |
| Unic | 56 mm |
| V.F.A. | 58 mm |
| Wega | 58 mm |
General concept of temperature controllers
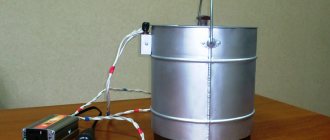
Devices that record and simultaneously regulate a given temperature value are more common in production. But they also found their place in everyday life. To maintain the necessary microclimate in the house, water thermostats are often used. They make such devices with their own hands for drying vegetables or heating an incubator. Such a system can find its place anywhere.
In this video we will find out what a temperature regulator is:
https://youtube.com/watch?v=bXNiBuC6LSM
In reality, most thermostats are only part of an overall circuit, which consists of the following components:
- A temperature sensor that measures and records, as well as transmits the received information to the controller. This happens due to the conversion of thermal energy into electrical signals recognized by the device. The sensor can be a resistance thermometer or a thermocouple, which have metal in their design that reacts to changes in temperature and changes its resistance under its influence.
- The analytical unit is the regulator itself. It receives electronic signals and reacts depending on its functions, after which it transmits the signal to the actuator.
- An actuator is a kind of mechanical or electronic device that, when receiving a signal from the unit, behaves in a certain way. For example, when the set temperature is reached, the valve will shut off the coolant supply. Conversely, as soon as the readings drop below the specified values, the analytical unit will give a command to open the valve.
Device
mechanical thermostat circuit diagram
The temperature always remains at the same level by turning the heating device (heating element) on and off. A similar control principle is used on all simple structures.
It may seem that the thermostat circuit is very simple, but as soon as it comes to assembling the device, a lot of questions arise related to the technical part.
The thermostat device includes:
- Temperature sensor - created on the basis of the comparator DD1.
- The key circuit of the thermostat is the comparator DA1, made on an operational amplifier.
- The required temperature indicator is set by resistor R2, which is connected to inverting input 2 of the DA1 board.
- The thermistor R5 (type MMT-4), connected to the input of the 3rd device, acts as a temperature sensor
- The design circuit does not have galvanic isolation from the network, and takes energy from the parametric stabilizer on parts R10, VD1.
- as a power supply for the device . When connecting it, you must be guided by the rules and requirements for new wiring, since the room conditions can be electrically hazardous.
A small supply of capacitor C1 contributes to a gradual increase in power, which leads to a smooth (no more than 2 seconds) switching on of electric lamps.
Important nuances
It is not necessary to use the K140UD6 microcircuit. It is allowed to use analogs of D2, D7, D8, D12. The recommended zener diode can be replaced by any other. The main thing is that the power is between 11 and 13 V.
FU1 should also be more important. To ensure safe opening and closing of the SCR, resistors R2 and R6 are selected.
These elements are used to control the device. The thermistor R5 can have a designation in the range of 10-51 kOhm, and the resistance of the resistor can be similar.
It is imperative to follow safety precautions. The terminals of thermostats that are designed to operate in a humid or watery environment must be hermetically sealed.
Assembly and adjustment
When assembling the thermostat, it is necessary to ensure a high-quality connection of all electrical contacts, especially in the power section.
When using a temperature sensor LM-335 or a similar (calibrated) one, there is no need to configure the device, as already noted.
If a thermistor or any semiconductor element is used as a temperature sensor, then adjustments cannot be avoided. It is most convenient to carry it out using a digital thermometer, for example, brand TM-902C.
The sensors of the thermometer and thermostat must be connected using adhesive tape or electrical tape and placed in environments with different temperatures. In this case, each time you need to gradually change the resistance of the variable resistor until the device works. At this moment, you need to record the readings of the digital thermometer and make a corresponding mark opposite the current position of the variable resistor knob.
Advantages and disadvantages
Even a simple do-it-yourself thermostat has a lot of advantages and positive aspects. There is no need to talk about factory multifunctional devices at all.
Temperature regulators allow:
- Maintain a comfortable temperature.
- Save energy resources.
- Do not involve a person in the process.
- Follow the technological process, increasing quality.
The disadvantages include the high cost of factory models. Of course, this does not apply to homemade devices. But the production ones, which are required when working with liquid, gaseous, alkaline and other similar media, have a high cost. Especially if the device must have many functions and capabilities.
Areas of application of the thermostat
Basically, this device was used for thermal stabilization of poultry incubators. Where the heating elements were played by low-power 60 W electric light bulbs, connected in parallel in groups of 4, 6 and 8, depending on the size of the incubator and the number of eggs being incubated.
How to install an incubator heater
- the lamps should be evenly located above the surface of the eggs, at a distance of 25-30 cm from their surface;
- the thermistor should be as close as possible to the surface of the eggs, but not touch them;
- Instead of light bulbs, you can use other heaters, but with a low heat capacity, for example, tungsten wire stretched over a tetrahedron-shaped ceramic frame.
How to choose a tamper for a coffee machine
When choosing, you should be guided primarily by the diameter of the coffee machine’s portafilter. The pressing base should be slightly smaller than the diameter of the holder, about 1 mm or even less. If the coffee machine has a portafilter with a diameter of 54 mm, then you need to buy a tamper, respectively, 53 mm.
The shape of the base is also important. A completely flat sole is better suited for double holder baskets. For single ones, you can use rounded bases that form a small depression and a thicker layer along the edge of the basket. The shape of the base does not greatly affect the quality of compaction: uniformity can be achieved in any case. There is an ongoing debate among professionals about which form of distemper is better, as well as discussions about what the surface should be: completely smooth or grooved. But all disputes ultimately come down to one conclusion: the main thing is to achieve uniform, dense compaction of the coffee powder.
For coffee lovers who prepare espresso at home, all these subtleties are not so significant. The main thing is matching the diameter and ease of use.
Operating principle of the thermostat for incubator
Excess alternating voltage is reduced due to the reactance of capacitance C4.
| Thermostat on PIC microcontroller |
The basis of the first thermostat design is a PIC16F84A microcontroller with a DS1621 temperature sensor with an l2C interface. When the power is turned on, the microcontroller first initializes the internal registers of the temperature sensor and then configures it. The thermostat on the microcontroller in the second case is already made on PIC16F628 with a DS1820 sensor and controls the connected load using relay contacts.
| DIY temperature sensor |
The dependence of the voltage drop at the pn junction of semiconductors on temperature is perfectly suitable for creating our homemade sensor.
Choosing a thermostat for a home incubator
Successful incubation of poultry eggs is impossible without stable temperature control. The thermostat for the incubator must provide an accuracy of ±0.1˚С, with the possibility of changing it within the range from 35 to 39˚С.
Most of the commercially available digital and analog devices meet this requirement. A fairly accurate thermal relay can be made at home, provided you have basic knowledge of electronics and the ability to hold a soldering iron.
Table of DC voltages of the K561LA7 microcircuit
(measured with a digital multimeter in the working circuit)
| Pin no. | Heater off/on |
| 1, 2 | 4,3 / 5,5 |
| 0,2 / 8,9 | |
| 3,8 / 8,9 | |
| 5, 6 | 4,1 / 0 |
| 7 | |
| 7 / 8,9 | |
| 0,2 / 8,9 | |
| ~ | |
| 12, 13 | |
| 14 | 9 / 7,5 |
Thermostat as a regulator
This option is simpler to manufacture and at the same time very reliable in operation. To make it, you will need to find any thermostat from household appliances, for example, from an iron.
He needs to be prepared for work in a certain way. To do this, fill the thermostat housing with ether using any available method and seal it well.
It is important to know: ether is a strong volatile substance, so you need to work with it quickly and carefully. Ether reacts very sensitively to the slightest change in outside temperature, which leads to a change in the state of the thermostat housing
The screw, which is soldered to the body, is rigidly connected to the contacts. At the right moment, the heating element is turned on or off. The desired temperature is set by rotating the adjusting screw (number 6 in the figure)
Ether reacts very sensitively to the slightest change in outside temperature, which leads to a change in the state of the thermostat housing. The screw, which is soldered to the body, is rigidly connected to the contacts. At the right moment, the heating element is turned on or off. The desired temperature is set by rotating the adjusting screw (number 6 in the figure).
Please note that before laying eggs, you need to set the desired temperature and warm up the incubator. So, as can be seen from the description, making a thermostat for an incubator is not difficult
Even a schoolchild who is interested in radio electronics can do this. The circuit does not contain scarce radio components. Elements are mounted on a printed circuit board or mounted via wall mounting
So, as can be seen from the description, making a thermostat for an incubator is not difficult. Even a schoolchild who is interested in radio electronics can do this. The circuit does not contain scarce radio components. The elements are installed on a printed circuit board or mounted using a surface-mounted system.
If you make your own “electric hen”, it is useful to increase the percentage of hatching of young birds by providing a device for automatically turning the eggs in the incubator. From this video you will learn how to make a thermostat for an incubator with your own hands:
Homemade thermostat: step-by-step instructions
If you have purchased all the necessary components for assembly, all that remains is to review the detailed instructions. We will consider the example of a temperature sensor designed for 12V.
A homemade temperature controller is assembled according to the following principle:
- We prepare the body. You can use old shells from the meter, for example from the Granit-1 installation.
- You select the circuit that you like best, but you can also focus on the board from the meter. The forward stroke marked “+” is necessary to connect the potentiometer. The inversion input with o will be used to connect the temperature sensor. If it so happens that the voltage at the direct input is higher than required, the output will be set to a high level and the transistor will begin to supply power to the relay, and it, in turn, to the heating element. As soon as the output voltage exceeds the permissible level, the relay will turn off.
- In order for the thermostat to operate on time and temperature differences to be ensured, you will need to make a negative connection using a resistor, which is formed between the direct input and output of the comparator.
- As for the transformer and its power supply, you may need an induction coil from an old electric meter. In order for the voltage to correspond to 12 volts, you will need to make 540 turns. It will only be possible to fit them if the diameter of the wire is no more than 0.4 mm.
That's all. These small steps are where all the work of creating a thermostat with your own hands lies. It may not be possible to do it yourself without certain skills right away, but with the help of photo and video instructions you will be able to test all your skills.
Thanks to its simple design, a self-created thermal controller can be used anywhere.
For example:
- For heated floors;
- For the cellar;
- Heating boiler;
- Can adjust air temperature;
- For the oven;
- For an aquarium where the water temperature will be controlled;
- In order to control the temperature value of the electric boiler pump (its switching on and off);
- And even for a car.
It is not necessary to use a digital, electronic or mechanical commercial thermal switch. Having bought an inexpensive thermal relay, adjust the power on the triac and thermocouple and your homemade device will work no worse than the purchased one.
Assembly instructions
Required materials, parts and tools:
- magnifying glass;
- pliers;
- soldering iron;
- insulating tape;
- several screwdrivers;
- copper wires;
- semiconductors;
- standard red LEDs;
- pay;
- forged textolite;
- lamps;
- Zener diode;
- thermistor;
- thyristor.
- display and internal generator with a capacity of 4 MGU (for creating digital devices on a microcontroller);
Step-by-step instruction:
- First of all, you need an appropriate microcircuit, for example, K561LA7, CD4011
- The board must be prepared for laying tracks.
- Thermistors with a power of 1 kOm to 15 kOm are well suited for such circuits, and it must be located inside the object itself.
- The heating device must be included in the resistor circuit, due to the fact that the change in power, which directly depends on the decrease in degrees, affects the transistors.
- Subsequently, such a mechanism will warm the system until the power inside the temperature sensor returns to its original value.
- Regulator sensors of this type require adjustment. During significant changes in the surrounding atmosphere, it is necessary to control the heating inside the object.
Assembling a digital device:
- The microcontroller should be connected together with the temperature sensor. It must have the output ports that are required to install standard LEDs that work in conjunction with the generator.
- After connecting the device to a network with a voltage of 220V, the LEDs will automatically turn on. This will indicate that the device is in working condition.
- The microcontroller design contains memory. If the device settings are lost, the memory automatically returns them to the originally specified parameters.
When assembling the structure, we must not forget about safety precautions. When using a temperature sensor in a watery or humid atmosphere, its terminals must be hermetically sealed. The value of thermistor R5 can be indicated from 10 to 51 kOhm. In this case, the resistance of resistor R5 must have a similar value.
Instead of the designated K140UD6 microcircuits, you can use K140UD7, K140UD8, K140UD12, K153UD2. Any instrument with a stabilization power of 11…13 V can be used as a zener diode VD1.
In the case when the heater exceeds the voltage of 100 W, then the VD3-VD6 diodes must be superior in power (for example, KD246 or their analogues, with a reverse power of at least 400V), and the thyristor must be mounted on small radiators.
The value of FU1 should also be made larger. Controlling the device comes down to selecting resistors R2, R6 in order to safely close and open the SCR.
Self-assembly costs
Today, any such gadget can be purchased in a store.
The price range is quite wide, and the cost of many models is over 1000 rubles. In terms of financial investments, this is quite unprofitable, so it is much cheaper to do it yourself. Costs for self-assembly are several times lower, namely:
- K561LA7 board will cost no more than 50 rubles;
- thermistor with a power of 1 kOm to 15 kOm - about 5 rubles;
- LED (2 pcs) – 10 rub.;
- Zener diode - 50 rubles;
- thyristor - 20 rubles;
- display – 200 rubles (for creating digital devices on a microcontroller);
The purchase of lamps, foil and other materials will cost no more than 100 rubles. It turns out that the cost of self-assembly will have to be spent no more than 430 rubles and a little personal time. The owner can completely adapt the device to his needs, using a simple circuit for this.
Control
Based on the type of control, there are several types of thermostats for heaters. According to this, the following devices are distinguished:
Mechanical. Adjustment is made using a wheel or small lever. Mounted into the wall, the size does not exceed the dimensions of sockets or switches. The main advantage is low cost.
Electronic. Compared to mechanics, they have additional capabilities - adjustment in accordance with the time of day, days of the week, and humidity. They operate in a network with a voltage of 220-240 V.
GSM modules. With their help, you can remotely control the temperature in the room. Communication is carried out via a mobile phone - a SIM card is inserted into the regulator, which receives commands via SMS.
Wi-Fi.
These are the most expensive devices. Control is carried out from a smartphone, computer, tablet with Internet access. Allows you to program the desired parameters a week in advance. It is advisable to install such gadgets where the heater serves as the only means of heating. No tags for this post.
Is the leveler a savior for your espresso or a useless tool?
It will definitely come in handy if the team has novice baristas
6 min. for reading
We have already talked about why channels are formed and how negatively they affect the taste of espresso. Let's see if the leveler will help get rid of them.
How to distribute coffee evenly in the basket
If the coffee is not distributed evenly in the basket, the espresso will not taste good. This is because the lumps in the coffee tablet will cause the particles to be extracted unevenly. To avoid this, it is first important to work with a grinder that does not clump the coffee. Here's how to choose one.
To distribute the coffee in the basket, the barista taps the holder on the counter. Some people use a thin needle or paper clip and use a rotating motion to break up the lumps. This method is called Weiss Distribution Technique.
How to do WDT correctly
One of the most popular methods is to smooth the top of the coffee grounds with your finger. However, Scott Rao believes that this is not the most effective method. When using it, coffee is distributed only in the upper part of the tablet, and in the lower part everything will remain as it was originally - with lumps and voids. In most cases, this will still result in channeling, so it is better to use a coffee leveler.
A tool that helps distribute coffee evenly
Sasha Shestic, winner of the World Barista Championship in 2015, has released a special OCD leveler that helps make even tablets.
This is what the OCD working surface looks like. One of the disadvantages of a leveler is that its surface must be clean and dry so that coffee does not remain on it © thecoffeecompass.com
Shestich said what prompted him to create the leveler:
“When I decided to develop OCD, I had one goal in mind - to achieve consistent espresso shots and improve the taste of coffee. I made nine different prototypes. After developing OCD, we tested this tool many times on different coffee machines, grinders, baskets (IMS and VST), different types of coffee.
We started testing with several different forms of OCD and focused only on taste. I have found that in all the tests we do with OCD, the aftertaste of the espresso improves.
I then decided to test how different the TDS of espresso could be if I used a leveler instead of my finger. The refractometer showed that the leveler helps prepare consistently the same espresso - the differences in shots are negligible."
Video review of the OCD leveler with Sasha Shestic
The OCD is easy to use: it's similar to a push tamper, but instead of applying pressure, you twist it a couple of times. Due to this, the coffee will be evenly distributed inside the basket; all that remains is to compact it with a tamper.
However, part of the coffee community is skeptical about the OCD smoother. There is an opinion that if there is a lump in the middle of a portion of coffee, then this tool will not help. Also, if there is a cavity inside, then this cavity will not close during subsequent tempering. This means that water will still break through the channels.
Is the leveler really good at its job?
In the coffee industry, some professionals believe that the leveler does not help achieve a perfectly smooth tablet.
The creators of OCD, ONA Coffee, did their research and tested several coffee smoothing methods for experienced and inexperienced baristas. The purpose of this test was to find out which espresso tastes better and is more consistent: using the OCD or tapping the side of the holder with your hand.
Tapping the side of the holder with your palm is another way to distribute the coffee in the basket.
For the study, an experienced and a novice barista was invited and asked to prepare espresso. The same conditions were created for them: they used the same coffee and the same equipment, the only difference was in their ability to distribute the coffee before tempering. To determine the results, the outlet weight of the espresso, extraction time, and TDS level were recorded. Five cups were randomly selected and tasted for evaluation. Each espresso was tasted at 38°C. Taste balance and tactile balance were assessed using the World Barista Championships (WBC) scoring system.
The study found that an experienced barista was better at dispensing coffee manually than a beginner. The first subject had a more consistent TDS level for each espresso than the second. When using OCD, the espresso was more consistent for both.
In terms of taste, each espresso was rated equally when using OCD. When tapped by hand, there were 2 cups that were different from the others.
As a result of the test, it was found that the leveler would be most useful for novice baristas to prepare consistent espresso. An experienced barista is able to prepare delicious espresso from cup to cup and by tapping with his hand, so in his case it is not necessary to use a special leveler.
The leveler will help the novice barista prepare consistent, tasty espresso
Is it possible to do without a leveler?
Delicious espresso cannot be prepared without a uniform tablet. Therefore, it is not enough to grind the coffee into the holder; you need to distribute it evenly and then compact it. Using a leveler this can be done quickly and easily.
However, the attitude towards this tool in the industry is ambiguous: some believe that the leveler still does not make the tablet as uniform as possible.
A study by ONA Coffee found that hand tapping is a good distribution method when used by experienced baristas. A less experienced barista will handle it worse - which means his espresso will be unstable. Therefore, in this case it is better to use a special leveler.
We recommend experimenting and finding out from your own experience whether this tool helps in your work.
Title photo — © pxhere.com
You might be interested in:
Latte art: why a beautiful design in a cup is important
Jul 15, 2022 · 6 min. for reading
Source