In this article I will tell you how to use a ruler, a pen and an eraser (found in any pencil case) and use simple stationery items to make a simple bow and blowpipe for school battles. It’s better not to use a bow on people (my brother almost accidentally shot a physicist), because if it hits the eye, the eye can, in fact, fail; if it hits a soft spot, a very noticeable wound remains in that very spot, sometimes with blood . The blowpipe does not cause any noticeable harm, but more on that later.
The idea and implementation are the author's.
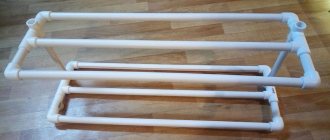
1. Making a bow.
For a successful business, we will need these items (only instead of scissors, we use a stationery knife, and we don’t need electrical tape at all (smiley)). The ruler in the photo is half a meter long, but in this case the bow will have simply monstrous strength, therefore, in order to avoid accidents, we will build a shorter bow - from a 30-centimeter ruler, always wooden. Such a bow is not only easier to make, it is easier to hide and the elastic bands stretch to its length.
Ideal arrows are ballpoint pen refills. I was lucky - I found cheap handles with a thicker nose - the arrow will fly straight and have more kinetic energy.
When cutting a hole, it is very important to prevent cracks from forming. You also need to make sure that the arrow goes freely, but not too much.
The elastic bands need to be stretched well before tightening. When stretched, they have a larger diameter and are less likely to tear.
Before tensioning, they must be combined and twisted several times.
We do not pierce the rubber bands themselves. Not the best way, but there is another - more convenient.
On the other hand, I made it both simpler and more reliable (I used part of a pen cap). If the rubber band breaks, it can be easily removed and replaced.
That's it, the onion is ready! Be careful, don't shoot at people. Okay, the physicist was kind. The prototype shoots right through a cardboard box and the base of a toilet paper roll.
Another advantage of such arrows is that they limit the maximum tension on the bow and do not jump out, and are also fixed in a tense position.
2. Blowpipe.
But that's not all! We still have ballpoint pen cases! So...
Not a very useful photograph, but with chewed pieces of paper shooting continues and is more accurate. The main thing is to roll the projectile tightly so that it passes freely along the barrel of the handle.
The barrel should be straight, and it would be very good if it tapers/changes shape at one end so that if you accidentally inhale, you won't inhale the projectile. The prepared projectile should be pushed into the barrel from the end (exit), then blown into the tube from the same side so that it moves to the beginning of the barrel. If it doesn’t work, compact it more, because the projectile, pushing the walls, will fly slower, and it will take more force to blow it out.
The photograph clearly shows that the trunk is tapering. It is from this side that you need to blow. The projectile gets a little stuck in the narrow walls of the constriction, so to get it out you need to reach a certain pressure - after which it flies out like a cork. We blow sharply and strongly, not with our cheeks, but with our abs.
If the projectile is softened, it will flatten on the target upon impact and splash it with your own saliva (bah!). If you make it hard, it will noticeably hit the target. It is possible (and especially effective!) to shoot with shot. You can shoot notes, but only if the recipient will be pleased to unwrap the wet piece of paper and make out the blurry scribbles. Source
How to make a slingshot from wood
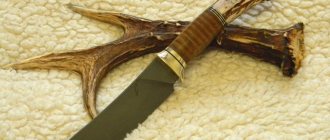
Necessary materials and tools: Y-shaped stick, elastic band, piece of leather (rubber), knife.
You may ask, how to make a slingshot quickly so that you can use it right away? Of course, from the branch.
- To do this, you just need to find a suitable stick on the street, the right shape and strong enough so that it can withstand the load and not break. The stick will be the basis for the future slingshot.
- Excess branches and twigs will need to be cut off with a knife.
- Next, you may need to dry the workpiece if the branch is fresh. To do this, you can use a regular oven.
- The next step will be preparing the rods. You need to take any elastic band, measure the required length and make two pulls.
- At the edges of the horns of the branch, in the places where the rods are attached, it is necessary to make indentations so that the elastic does not slip off.
- Next you will need to make a platform for the projectile. This could be a piece of leather or rubber. You need to give it a rectangular shape and make holes for the elastic along the edges. It is convenient to use a hole punch, but if you don’t have one, you can make slits using a knife or scissors.
- What follows are very basic steps - connecting all the parts into a single structure.
Price issue
A pistol that shoots metal balls using a gas canister can be bought at your nearest gun store for a price of 2,000 rubles. A can for about 50 shots costs 25 rubles. Shooting balls: jar 500 pcs. — 50 rub. Moreover, we have been shooting with one jar for several months now: we shot, collected balls from the floor with a magnet, and put them in a jar.
A pneumatic breaking gun, which does not need a spray can, costs 1,800 rubles in the same store. But the lead bullets he shoots cost about 70 kopecks apiece. They cannot be reused.
The first slingshot that I bought at a stall at the market cost 70 rubles. She couldn’t even withstand fifty shots. Now I bought a normal sports slingshot for 700 rubles. You can buy balloons in bulk from 50 kopecks. Beer cans, cardboard and polystyrene for targets are lying around for free in the nearest trash heap in incredible quantities.
As you can see, it’s not at all difficult to make a shooting gallery even in an ordinary small-sized apartment. You just have to want it. And do.
Tags: shooting, pastime, sports games, hobby, weapons, hobby
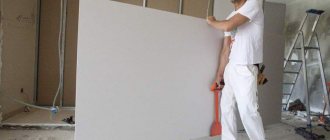
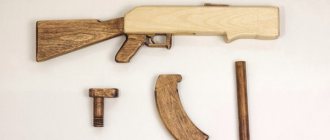
Homemade slingshot from board or plywood
You can also take a more complicated route - using a jigsaw to cut out a base for a slingshot from a board or plywood.
Sharp corners will have to be rounded off with sandpaper or sandpaper, or something should be wrapped around the handle. Most likely, every home has duct tape. This would make a great slingshot, considering that electrical tape comes in a variety of colors. You can also use soft leather or other material that needs to be easily secured so that it will not slide along the handle. A great idea would be to put a name or some kind of symbol on the handle or horns. It used to be fashionable to burn various patterns on wooden products using a wood soldering iron. In the case of a slingshot, it can also come in handy.
Shooting technique
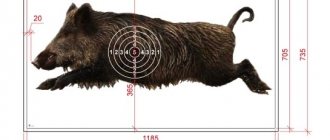
How to properly use a slingshot for hunting and make the most successful shots that hit the target? Hunting with a slingshot can be a pleasure if you know the shooting technique.
The main thing in hunting with a slingshot is the aiming and stance of the hunter. That is, you need to understand the essence of how to shoot from a slingshot. First, let's look at the aiming technique. There are basically two techniques: instinctive and targeted.
Instinctive shooting
The essence of this method is that the hunter aims “by eye”. In this case, two eyes are focused on the target, the hunter sees the slingshot and skin only with peripheral vision. In this way, the goal is achieved more by intuition than by sight. If, according to the hunter’s feelings, the direction of the weapon and the rubber bands is correct, then the skin itself goes down. The advantage of this type of aiming is that the projectile range is automatically calculated. And when hunting, calculating flight range is a very necessary quality.
Another advantage is that it does not matter which eye sees better. The disadvantage of this type of aiming is that when changing the slingshot or the rubber band on it, you will have to re-master the aiming technique, because the trajectory of the projectile changes depending on the quality characteristics of this type of weapon. In order for shots to be accurate when intuitively aiming, you must be able to mentally imagine the trajectory of the ammunition. And this requires shooting experience, which can be gained by shooting at cans or targets. During the learning process, you need to constantly imagine which line the projectile will fly along, try not to blink during shots, and see the point where the projectile hits after the shot.
Aiming with an eye
When shooting with an eye, the results are more effective. The sight can be any landmark on the slingshot that aligns the eyes, the shooting device itself, and the target. You can make your own guide. The point of aiming will be that the aiming eye, the sight of the slingshot, will be lined up strictly in a straight line. For this type of aiming, it is better to use one eye, which has sharper vision. The second eye can be closed for convenience.
Most often, when using an eye gauge, the skin will be in a tense position in the area of the face on the side of the dominant eye. But we must not forget about convergence, which can significantly deteriorate the quality of shooting. Therefore, the slingshot sight must be placed at some distance so that the lines intersect at the location of the target. The scope is convenient to use when several models are used for hunting, with different tension forces and shot quality.
Depending on the hunter’s stance, and also depending on whether he is moving or standing still, several types of aiming and shooting can be distinguished:
- Aiming technique while moving - keeping the sight steady while moving is a very difficult task, almost impossible. But this type of technique does not require the hunter to be completely immobilized. When moving, the sight should move along a line similar to a figure eight laid on its side, or along the line of the infinity sign. The point where the circles will intersect should be the target point. In fact, the point of aiming will be that the skin will be released when the line of sight coincides with the location of the target. It is important to act quickly here because how quickly the skin is released plays a big role. As you gain experience, your shots will be well-aimed and accurate. The sight line can move along other trajectories. Some use horizontal or vertical movements of the sight.
- Fixed aiming technique. With this technique, you need to aim the sight at the target, lock it and fire the shot. With experience, this technique gives very high results. To achieve high results in this technique, the main thing is to learn how to hold your hands with the weapon in a stationary position for as long as possible, and when shooting, make a minimum delay, up to about 6 seconds. This tactic is mainly used when shooting from a sports slingshot.
How to set up a real shooting range at home
Simple air spring-piston rifles are designed to shoot at a distance of 10 meters, but this can be reduced to 5-6 meters without any problems. Adjustable sights allow you to shoot at such distances, and it is not necessary to practice accurate shooting skills at large shooting ranges. Short distances are quite suitable for developing the basic skills of holding a weapon, aiming, handling the trigger, holding your breath and other skills of accurate shooters. If you put air bullets into the top ten from 10 meters, you will most likely do the same from a hundred meters in a large firearms range.
Bullet catcher
What you can’t save on is the bullet catchers that all pneumatic sellers offer. Without them, you will damage the walls or furniture behind the targets. An ordinary steel sheet at the back will not so much protect as it will create additional problems - a bullet ricocheting can cause big trouble. Bullet traps have an angled rear steel surface that redirects the bullet down into the bullet receptacle. After class, I remove the fired bullets from there in one motion.
Rifles
Air rifles are an excellent tool for learning, it is not for nothing that they were used for initial training in schools in our childhood. Cheap spring-piston ones are good for basic skills, while expensive ones with pre-pumping (PCP) and precise trigger adjustment are quite suitable for practicing sniper shooting skills. But if the latter are certainly not suitable for shooting in an apartment, then spring ones are just right. Their undoubted advantage is that you don’t need anything to shoot except a rifle and bullets. Pumping is carried out either by breaking the barrel or by cocking the side lever. I would recommend single shot options - all my experience is that all air pellet magazines are not very reliable and cause far more problems than they save. For our experiments, I chose two pneumatic dreams of my childhood: the MP-512C (4,790 rubles) and MP-60C (5,390 rubles) rifles. Plus a magnetic target-bullet catcher for 2990 rubles. Plus a box of 4.5 mm Diabolo bullets - 300 pieces for 300 rubles. All this is promptly delivered under quarantine conditions from the Kalashnikov concern store.
Dream No. 1
The dream of all the boys of my childhood was the Izh-22 spring-piston rifle, which was in school and entertainment shooting ranges, as well as in DOSAAF sports sections. It was impossible to buy them and they were stored in real gun safes, almost like rifled weapons. I wanted to own such a treasure so much that my friends and I several times developed an operation to steal them from the school section - despite the fact that everyone had hunting weapons at home. Fortunately, the plans did not come true. The most popular domestic air rifle, MP-512C, is a direct successor to the legendary Izh-22 and is produced by the same Izhevsk Mechanical Plant (which is now part of the Kalashnikov concern). A classic, reliable and unpretentious rifle, loaded by breaking the barrel. Besides the price, it has a lot of advantages. In terms of weight, it is closest to the “large” firearms, which will have to be switched to in the future. Plus - good adjustment of the open sight, which allows you to quickly zero the rifle at any distance. The accuracy is more than sufficient for an open sight. Almost eternal. Allows the use of an optical or collimator sight - there is a dovetail mount, but I would not recommend this. The specificity of spring rifles is that they quickly loosen optical sights, which need to be re-sighted every 200 shots. And the optics are still good on PCP rifles.
The rifle has two disadvantages - large mass and great effort when cocking. Which was unnoticeable to me, but caused difficulties for my 12 year old son.
Dream No. 2
The 60 series spring-piston rifles were developed by the Izhevsk Mechanical Plant in the late 1980s as an alternative to models with a broken barrel. Rigid fastening of all main parts and a fixed barrel made it possible to create a weapon with fairly high accuracy and compact dimensions. But this was not what delighted the boys - the rifle looked like a weapon from a science fiction action movie! Even after almost 30 years, its successor MP-60C still looks futuristic. And importantly, ergonomics are not sacrificed for looks - this is the most comfortable air rifle I've shot, and I've shot a lot. It is ideal for children - its compact size, weight, comfortable cocking force, and adjustable butt. The fact that the length of the stock is adjustable over a wide range makes the MP-60C an ideal choice for children who have not yet grown up. The sights are vertically adjustable, but there are no horizontal adjustments. However, on my copy they were not needed - the rifle was zeroed out of the box. The process of cocking with the side lever is generally a pleasure. In general, if you have children under 14 years old, I would recommend this model. I kept both for myself.
Safety
Any weapon is a subject of increased danger. Therefore, the same rules apply with pneumatics - never point the weapon at people, do not allow anyone to be behind the firing line before shooting, make sure the weapon is unloaded before going to the target. It’s a good idea to use shooting glasses, although not a single bullet flew further than a meter from the target, even if it hit the edge of the bullet catcher. For training, I highly recommend printing out classic P-9 school targets for pneumatics, attaching them to a bullet catcher with magnets, and practicing accurate shooting on them. In our house, the sound of gunfire has not stopped for two days now, and the spread of bullets on targets has become noticeably smaller. By the end of self-isolation, we will definitely all become snipers.
Do-it-yourself working Spider-Man web shooter
Hi all. In today's article, as you may have guessed from the title, we will talk about how to make a working Spider-Man web shooter with your own hands .
The webshooter consists of a small Gauss cannon and a simple winch that is attached to the wrist.
To make such a craft, you do not need experience with electronics.