Bird feathers are an absolutely beautiful and special material for crafts. Firstly, its shape and coloring ensure that you will never repeat yourself if you work with it. The drawings are unique, the bends of the pen are often unpredictable, and every time you implement what seems to be the same idea, you will get new and new results. Of course, at first glance it may seem that nothing sensible or worthwhile can be made from feathers, however, we remember that humanity learned to use this gift of nature thousands of years ago, and having remembered, we cast aside doubts and simply decide what to make from feathers what you want today, and what you want, put it off until tomorrow, what you decide to implement right away, when you get excited about the idea, and what - a little later, when the idea has matured and acquired your personal details. Crafts made from feathers are varied and multifaceted. The working material lends itself well to painting, it is quite plastic, it can be opened with varnish. Don't neglect feathers for crafts, they're fun!
What to make from feathers - 5 master classes:
Feather Christmas trees
Feathers are a unique material from the point of view of nature. It protects its owner from water (a healthy bird does not get wet), from heat (thermal insulation is our everything), from cold (the down that is under the feathers keeps the bird warm even at very low temperatures). Not long ago, scientists proved that feathers also protect from ultraviolet rays. And feather Christmas trees will protect your home from a bad mood!
How to make Christmas trees from feathers - master class from Thethingsshemakes
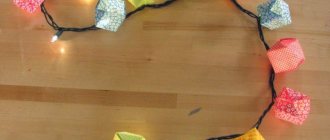
Angry birds made of paper
Now let's make angry or angry birds. Everything is much simpler here - we print the template, cut it out and glue it together. It is better to glue it with a glue stick. PVA makes the paper wet and makes it more difficult to assemble the cube.
Templates for printing paper birds on a separate sheet are enlarged by clicking. If you print separately, you can make larger cubes.
Mirror frame
Do you know what color a soap bubble is? That's right, it has no color, everything we see is the result of light interference - a phenomenon in which light is refracted through light waves and thereby produces colorful shades and colors. The same effect applies to bird feathers. The peacock feather, by the way, is brown, but thanks to an optical illusion we see and admire the rainbow. What will you see in the frame, which will be decorated with bird feathers?
How to make a frame for a mirror with your own hands - master class from Kraftandcarat
How to make a crow step by step
To sculpt a bird you need to prepare:
- plasticine set;
- stack.
Step 1 . Prepare a black block of plasticine. You need 1 or more pieces, depending on the size of the craft you plan to make.
Step 2 . Sculpt the body of the bird. Make an elongated part - a pear. If there is not enough plasticine, then inside mask any other shade, damaged plasticine, or a rolled up piece of foil.
Step 3 . Glue a small black ball at the wide part of the pear and smear the plasticine at the joint. Connect the head and torso. The skeleton of the crow will be ready.
Step 4 . Move on to the flat parts: the tail and two wings. Make models of triangles and drops, also leave a little black plasticine for the crow's beak, because it is also black.
Step 5 . Glue 2 wing drops on the sides of the body, and begin to bring out small hangnails in a stack, thereby imitating feathers. If the plasticine is dense, then at this stage you can use small scissors; they can simply cut out such small corners, completely filling the surface of the wings.
Step 6 . Perform identical operations on both wings. After you do this, do not touch the top with your fingers so as not to press down the selected corners (feathers). Attach a tail that flares to the bottom at the back.
Step 7 . All that remains is to design the head. Turn the last small piece of plasticine into a beak. This will be a small cone, glue it in front and carefully bend it down. Glue 2 gray circles as eyes with pupils. Only these lighter spots will stand out against the otherwise dark background.
Step 8 . The bird should also have legs; make these parts from black and gray pieces. Glue small cones in wide parts to the body, and on the bottom - legs.
The crow figurine is ready.
If desired, you can carefully mix blue into black plasticine to make the plumage believable, with a beautiful tint. Everything is simple and clear.
Feather bookmark
Surprisingly, the feathers of owls (and a number of other nocturnal bird predators) are designed in such a way that they provide their owners with silent flight. Thanks to this fact, owls can hunt at night and not scare away their prey, fly and remain virtually unnoticed. A bookmark made of bird feathers will also be silent and unnoticeable - with it, reading will be a joy and pleasure. Intellectual and aesthetic.
How to make a bookmark with your own hands - master class from Elsarblog
Small bird
One of the most beloved birds for people is the titmouse. According to popular belief, if a bird flies into a house, it is a bad omen. However, this does not apply to tits. Maybe it is precisely because of this popular love that tit bird crafts are one of the favorite activities of both children and adults.
Interior wreath
Feathers can age. Unfortunately, they wear out and fall out. But in their place new ones grow - which then fall out again, thereby providing us with an inexhaustible source of material for creativity. And only birds have feathers! No other living organism can boast of beautiful plumage. Perhaps, except for a person? We have them, feathers, that can be used in needlework, right?
How to make a feather wreath - master class from kreativk
Making a wooden Bird of Happiness
Since ancient times, our ancestors have made amulets for their homes. The chipped bird of happiness is one of the most powerful amulets in Rus'. It is believed that a bird soaring in the air is capable of driving out evil spirits and protecting household members from adversity and disease. Often a wooden bird of happiness was placed under the ceiling in the hallway. The amulet takes away everything negative that a person might come into the house with and only lets in the good. The chip bird protects family happiness and well-being of people.
In this master class I will reveal the secrets of making the traditional Arkhangelsk chip bird and show some elements of Gorodets painting. Our bird will be large, with a wingspan of 40 cm. To work, you will need 2 pine or spruce bars measuring 400*70*25 and 440*70*50, a hacksaw, a Bogorodsk knife and a set of chisels for wood carving. The first block is for the wings, the second is for the body with the tail. When choosing wood, make sure that there are no knots; the annual rings should be positioned as shown by the arrows in the photo. If the wood is dry, steam it in hot water for 2-3 hours.
First we make the wings: take the first block and mark it, as shown in the photo. Important: the initial meaning is the so-called “hook” - in the diagram it is a semicircular hollow at a distance of 45 mm from the edge, with the help of which the feathers will be fastened to each other.
Using a hacksaw, semicircular chisels and a knife, we make the initial shape.
Next, use a semicircular chisel to cut more hollows, and use a corner chisel to cut teeth, so that future feathers become more textured. Try to do everything symmetrically, then the weight of the wings will be the same and the bird will not roll to the side.
This is what we got for the wings.
Place it in boiling or very hot water for 15-20 minutes. Since the bird will be large, I steam the preparations on the stove in a basin (see photo). For smaller sizes, a teapot or other container will suffice.
We clamp the steamed workpiece in a vice and use an ordinary kitchen knife to split it on one side and the other into feathers 1.5-2 mm thick. We guide the knife strictly along the fibers, without applying much effort. Properly prepared wood can easily be split into chips even 1 mm thick.
Again, lower the split workpiece into boiling water for 5 minutes and spread the wings, connecting the feathers to each other using a “hook” (see photo). The wing itself acquires its characteristic curve. Now dry the wings at room temperature for 2-3 days.
We take our second block and mark the body and tail of our bird. The length of the tail is approximately equal to the length of the feather on the wing.
Using an ax and a hacksaw, we roughly process the block, giving it the desired shape.
Next, we proceed as in the case of wings, with the only difference that instead of one wing we will now have a body. I decided to make the tail consisting of a double row of feathers - the tail itself and the rump. Why I shortened the upper section of the tail blank, making an independent blank.
This photo clearly shows how the blank for the top row of feathers and for the bottom one looks from above.
Now we soften the wood in hot water and split it in the same way as we did with the wings.
We separate the rump and tail. To avoid cracking, dry the workpiece for 3 days at room temperature and 1 day in a warm place, in the sun or on a central heating radiator.
While our wings and body are drying, we can make a small crown for the bird. To do this, we make such a blank from leftover wood. Dimensional accuracy is not important here; complete freedom of creativity is allowed.
As in previous cases, we steam it and split it, at the same time removing all excess.
We sand the dried body with sandpaper and braid all the feathers with ordinary fishing line. We do the same with the wings and crown. You can braid not only with fishing line, but also with thread. Birds braided with multi-colored woolen threads look good.
Using a semicircular chisel, cut out the eyes.
Next, we attach the wings to the body and mark the boundaries of the cuts with a pencil.
We make a lock in the body to a depth of approximately 1-1.5 centimeters.
Using a small flat or semicircular chisel, we make a 5 mm deep recess in the bird's head for the crown.
We place the wings and crown on PVA wood glue. We press the wings to the body using a clamp and leave until the glue dries completely. We distribute the remaining glue evenly at the base of the feathers, strengthening them.
We remove the clamp, tighten the back and clean it with sandpaper.
Congratulations, our Bird of Happiness is ready! If it is not painted or varnished, over time the bird will acquire an amazing bronze color. But we will make the bird of happiness brighter and more beautiful by painting it in the style of Gorodets painting. We prime with PVA diluted with water to a milky consistency, when dry, remove the raised pile with sandpaper and paint over the background. I prefer to work with acrylic paints - they are non-toxic, safe and do not fade over time.
We make a decorative border and other decorative elements along the contour.
Using a cut round brush we create large “eyes”. We make strokes on the body.
We make the so-called malevok - traditional Gorodets preparations for future flowers and leaves.
We paint the body black and put white and black dots on the wings. Razzhivka is a term used since ancient times by the masters of Gorodets painting and denotes the revival of the fry.
This is a fry on the back, rendered black.
Next, we brighten it with white and yellow, and also put white and yellow dots.
Painting on the back.
We cover our Bird of Happiness with acrylic varnish and hang it on a fishing line from a bracket on the back of the bird. Let's see what we got!
Place a chip bird in your home, and it will bring happiness to you and your loved ones. I hope you enjoyed my master class. Thank you for your attention!
Captivity
To make the composition more natural, the bird craft can be placed in a cage.
In principle, all the options for making birds proposed above can easily be placed in a cage.
It is very easy to make a cage out of cardboard or thick paper. To do this you need:
- cut out two circles of the desired size;
- four long strips up to 1 cm wide;
- one strip for the ring.
4 stripes fold into the shape of a snowflake. Glue to one of the circles - this will be the bottom of the cage.
The strips are folded and glued to the second circle - the top of the cage.
A ring is made from the remaining strip and attached to the top of the cage so that the product can be conveniently transported from place to place.
The bird is placed in a cage. The interior decoration is ready!
Making a porcelain bird
If you are tired of using ordinary polymer clay, you can also plunge back into childhood and teach your descendants how to make crafts from cold porcelain. This activity is suitable for schoolchildren who are interested in creating something unusual. The recipe for porcelain at home is very simple:
- First you need to find any frying pan with a non-stick coating. It will not deteriorate during operation and can be easily washed.
- Next, you need to find 1 cup of starch, add a tablespoon of cream to the mixture, then fill everything with PVA glue (1 cup) and 1 tbsp of glycerin (available at any pharmacy).
- Place everything on low heat and stir until smooth.
Next, the mass is pulled out, you need to let it cool a little. After this, it is completely ready for modeling. It is better to work with gloves. The bird is molded as if from ordinary clay, first the body is formed, then the head and beak. After drying, you can carefully cut out the wings with a knife. This toy will look very expensive in any interior.
Alternative recipe
In many cases, craftsmen end up with a mass that quickly becomes covered with cracks. This often depends on the quality of the starch and PVA glue. There is another option that will help if the solution begins to crumble in your hands:
- You need to add another spoonful of glycerin.
- Next, add a few tablespoons of dissolved citric acid (not juice) to the total mass.
Painting porcelain afterwards is very difficult, as a special glaze is needed. However, adding a little dissolved food coloring can create some truly beautiful items.

