Hello to all visitors to the “Secrets of the Master” site! I immediately apologize for the violation of the frequency of publication of articles. The increasing construction season is taking its toll. Nevertheless, I sprinkled in a little. In this article we will work for ourselves, namely, we will do household chores. I bring to your attention a few examples. Maybe it will be useful to someone.
- Remaking curtain rods.
- Remaking a broken pot lid handle.
- Replacing the front glass on the oven door of a Nord gas stove.
- Repair of the gas control knob of the same stove.
- Reworking the broken handle of the mosquito net frame.
So let's get started.
How to remake a curtain rod.
For example, there was a wall cornice, i.e. was mounted on the wall, and after a little modification it will be mounted on the ceiling.
For work we only need
- drill with a set of drills
- and a puncher for attaching the finished cornice to the ceiling.
First we remove the mounting brackets.
Then we drill holes ø4-6 mm with an even distance from each other, depending on the length of the cornice itself.
Advice. ✔The recommended distance between holes should be at least 500 mm and the distance from the edges of the cornice should be 50-100 mm. ✔You need to mount it on the ceiling, stepping back from the wall at least 100 mm if the curtains are long and at least 50 mm if the curtains are short.
By the way, the ceiling version of the profile cornice is well used in cases where the room has a suspended or suspended ceiling.
Then the cornice can be hidden in a niche behind the box and it turns out to be completely hidden. You can also hide it without making a false ceiling, but do it, for example, like this.
style=”display:inline-block;width:336px;height:280px” data-ad-client=”ca-pub-3518738935631683″ data-ad-slot=”6877683473″>
Everything is on the cornice.
Filling voids in frying pan handles
After you have pressed the two parts.. fill the gaps, and they will be there anyway..
And if the gap is large. Then we use soda as a filler!
They spread glue... sprinkled it with soda, shook off the soda. They smeared glue, poured in soda, shook off the handle of the frying pan, and so on until the gap was filled. You need to do it in such a way that your glue and soda are higher than the surfaces to be glued.
After everything is ready... leave it to dry for 20-30 minutes...
We clean, if it turns out that the voids have not been filled, we repeat the previous operations.
We clean, sand, paint... as a dye... we have a black marker...
Well, the result of repairing the frying pan handle.
How to remake a broken pot lid handle.
Nowadays, pots with glass lids are popular with many housewives. These lids have handles in two versions:
- With built-in thermometer.
- Regular - without thermometer.
But, whether in the first option or in the second option, the handle may break. In order not to throw it away, we remake it.
note
that in most cases, after a breakdown, a fastening screw remains in the cover. It is not always possible to unscrew it. Therefore, using a grinder and a metal circle, we simply cut it off. After this, you need to choose a new comfortable handle. Since I make furniture, I used a furniture handle.
And those who deal with plumbing can use a plastic pipe holder.
Advice. It is advisable to place a rubber or silicone washer between the glass and the mounting screw.
This will guarantee that the glass will not burst when tightening the screw with the handle. The entire cover has been restored and is ready for further use.
Types of handles
The modern tableware world is replete with a variety of not only different dishes, but also accessories. One of them is the pen. Now they produce frying pans with all sorts of variations of holders, which differ in mounting methods and material.
Solid handle
It is one piece with the frying pan, as it is cast together with the main container. A cast iron or steel frying pan has such a handle. Its main advantage is reliability, as it relieves tension from the attachment point. It is easy to clean, which avoids severe contamination at the connection point.
The big disadvantage of the cast mold is its easy heating, as a result of which it is simply impossible to touch it without a tack. But now a silicone frying pan handle attachment is available for purchase, which can withstand temperatures up to 240°C. It is made of high-quality heat-resistant silicone and has the appearance of an elongated hollow cylinder with a ribbed outer surface. In addition, manufacturers paint attachments in different colors (red, green, orange, yellow and others), which allows you to choose an accessory that is harmonious in the style of your kitchen and utensils.
Now models of solid-cast frying pans are produced, the handle of which is supplemented with heat-resistant material.
Removable complete handle
This type is suitable for easy detachment and reattachment to the dishes. To do this, they are equipped with a special mechanism that fits the frying pan like a key to a lock. Such a pen will be called complete, that is, corresponding only to a specific model. Fixation is carried out in several ways:
- the simplest is done by pressing the button and then lifting the handle up at an angle of 45°, this makes it easy to attach and detach the handle;
- a more complex method involves pressing the button with its deep recess, which requires a certain skill;
- The most understandable method is considered to be the one in which the handle is removed by pressing a button and pulling the handle towards you. This requires supporting the pan on the other side to prevent it from moving;
- using a lever, the turns of which provide fixation or detachment of the holder.
Such frying pans are compact, because after detaching the handle, the frying pan takes up much less space. In addition, such forms are often used on the stove and in the oven.
Folding handles
The foldable holder is practical. It can be easily turned to one side. Thanks to this, firstly, space is saved when storing dishes, and secondly, such a handle will not be lost. At the junction there is a running mechanism, activated by a button located on top. After pressing, you need to turn the handle until it clicks in the direction indicated by the manufacturer.
The folding handle is convenient during hiking or on a picnic. In such models, a special mount allows you to control the structure up and down. If the frying pan is not in use, the holder can be folded inside the container or under the bottom, which is convenient for transportation. And when using, you need to bend it in the opposite direction. The handle itself is made of metal, it is equipped with inserts made of silicone, wood or plastic.
Grill pans are equipped with this holder; they are used at home or taken with you outdoors.
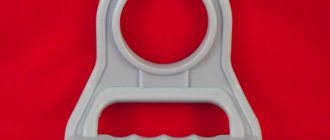
Universal holder (chapel)
This type has long gained popularity among housewives because it makes it easy to hold a hot frying pan on the stove or take it out of the oven. But not everyone knows what such a frying pan holder is called. In another way it is called chapelnik or a more approximate name - frying pan. It consists of a clamping element and a handle. The universal clamp makes it possible to lift the dishes from any side.
Screw-in handle
The holder is secured using a screw mechanism, ensuring a tight fit and maximum fixation. Unwinding the mount takes time. Also, the pan must be cold.
How to change the oven glass yourself.
There is no difficulty in this matter.
✔You must order the required glass from the manufacturer’s service center. ✔But before that, you need to measure the overall dimensions of the cracked glass and name the model number of the gas stove itself.
Watch the video to see how the work is performed.
&feature
Repairing a pan holder
If you are faced with the problem of how to repair the handle of a pan, for example, when the holder has come off, then use the proven method. An ordinary transparent ballpoint pen will be useful for this:
- The holder will need to be turned upside down, and the handle, freed from the rod and cap, will need to be set on fire.
- Hold the burning flame over the hole in the holder so that molten plastic drips onto it.
- Then you need to quickly put the cap on the rod, turn it and press it slightly.
- After 20 minutes, the lid can be fully used.
Important! It’s not just broken frying pan handles that make the housewife feel despondent. Read more about solving kitchen problems in the following materials:
- We repair an enamel pan at home.
- How to quickly wash dishes by hand and greasy dishes in the dishwasher.
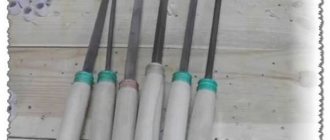
Repair of the gas control knob.
Quite often, handles fall out on many gas stoves.
And as a rule, the locking plates are lost, which prevent idle cranking when the burner is ignited. These spring plates are not easy to find. To get out of this situation, instead of a plate, I used a regular clip from the cap of a stationery ballpoint pen. In many pens this clamp is made of decent spring steel. In short, I cut off a fragment with a hacksaw and inserted it.
The handle does not turn at idle, i.e. works as it should. Another example.
Step-by-step instruction
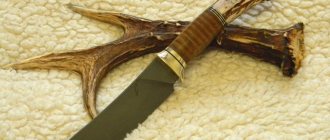
If you have time, opportunity and most importantly, desire, you can do it yourself. The easiest way to make a handle for a frying pan is from wood, for example, birch, hornbeam, dogwood, maple. The algorithm of actions is as follows:
- We select a pin with a diameter that matches the bracket remaining after removing the broken handle. It can be purchased at any hardware store.
- We screw the pin into the bracket so that it does not rotate. To do this, drill a hole and secure it with a suitable nail.
- At a distance of 5 cm, bend the pin at an angle of 30 degrees. This is necessary for ease of use and to ensure that the handle does not burn.
- We cut 6 cm from the aluminum pipe, while cutting one side at an angle of 30 degrees.
- We drill a longitudinal hole for the pin in the wooden holder and also cut one of the sides at an angle of 30 degrees.
- We put a handle and bushing on the hairpin.
- We cut the stud so that there is a tail for the nut.
Now you know how to make a handle for a frying pan. To secure it, you can use a nut with a washer, a wing with ears, or make a plug with a ring.
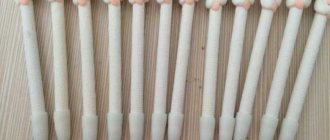
How to remake a broken mosquito net frame handle.
Now many people in their apartments (houses) have Euro-windows with mosquito nets. The sore spot in the nets is the plastic removal handles, which often break. Of course, you could buy new ones at a plastic window store and replace them. But I didn’t want to waste time on this, and what’s the point in changing the awls for soap if they broke due to the fact that they are made of thin plastic, so instead I used galvanized brackets for attaching the baseboard.
I’m finishing up on this topic and will be preparing to write the next one, so subscribe to new articles.
I will try not to delay the next publications. Sincerely, Yuri Filippov. To be continued.
Form
The handle for a frying pan is usually made in a standard form. It is elongated, massive and can expand slightly from the base. It is convenient and recognized as a classic. But there are metal forms that are made of tubular metal, hollow inside. Most often, such handles are used on pots, but sometimes they are also found on frying pans. They are not entirely comfortable to grip, but their advantages are different - they always remain warm (not hot), although they are made of metal; a product with such handles can be placed in the oven. This is achieved through a special hollow design and spot welding.