Homemade products for the apiary
The main equipment of an apiary is a beehive. Professional beekeepers make them with their own hands from boards. However, without tools and equipment, the beekeeper will not be able to maintain the hive, care for the bees, pump honey, or melt wax. Beekeeping accessories are available for free sale, but they are often overpriced. Another disadvantage is the inconvenience of working with factory products. Sometimes apiary equipment is ill-conceived and made of poor quality materials.
The beekeeper creates the most convenient beekeeping devices with his own hands. They are completely free, and in terms of quality they can compete with their factory counterparts.
Advice! On the forums you can find amazing homemade products for beekeeping, which have no analogues for sale. The only way a beekeeper can get hold of such a thing is to construct it with his own hands.
Choosing a place and time to install a bee trap
Escaped swarms fly far away, so the beekeeper needs to carefully examine the surrounding area within a radius of up to 3 km. When swarming sites or separately flying scouts are discovered, a place is chosen to set a trap.
If bees circle around a tree, fly traps are hung nearby, guided by the following rules:
- discover a tree that attracts insects:
- choose a strong branch on which ants do not crawl;
- strengthen the trap, place the entrance hole on the south side;
- airplanes do not need to be installed higher than 7 m;
- the temporary hive must be tied in the shade so that it can be seen from afar;
- bees love when there is a forest or stream nearby, but avoid the banks of large bodies of water;
- the trap can be placed in raspberry thickets and other places where honey collectors gather;
- if the swarm is captured during the flowering of fruit honey plants, the microhive is attached to the trunk of an apple, plum or pear tree.
The supplied traps must be inspected regularly. If there are several dozen bees hovering around the entrance, you need to check the trap to see if a family has moved into it. If this is the case, close the microhive with a bolt.
Be sure to read:
Caring for bees for beginners: tips, processing rules, how to care all year round
This is done in the evening, when all the pickers return home. The samolov are transferred to the apiary and left overnight with the entrance open. Early in the morning the family is moved to the prepared hive.
The following precautions are required when removing traps:
- if the aircraft is located high, they are approached using a safety belt and claws;
- the entrance is blocked with foam rubber;
- The structure is tied with ropes and carefully lowered.
Traps should be inspected weekly. If you miss the deadline, a lot of honey can accumulate inside and the box will become heavy.
In order for bee catching to be effective, it is prepared 2 weeks before the start of the average period of swarming in the region.
How to make a frame nose
It is difficult and dangerous for the beekeeper to carry the frames with honey to the honey extractor in the presence of bees. It is similarly inconvenient to deliver foundation to the hives. A frame cutter helps simplify the task. The apiary device resembles an ordinary wooden box that can hold from 6 to 10 frames. It is equipped with a handle for carrying. You can make a simple bee frame with your own hands according to the presented drawing.
The DIY assembly process consists of the following steps:
- First, the size of the apiary frame-noser is determined. It must accommodate the frames used in hives. The frame frame consists of two side walls, a front and a back wall, a bottom, and a lid. In total, you need to put together 6 elements of the box with your own hands.
- For the frame, slats with a cross section of 20x45 mm are used. Do-it-yourself cladding is done with fiberboard. The slats are nailed to the outside of the walls so that it is convenient for the apiary frame carrier to grasp the protrusions with your hands. Inside the box, 2 slats are similarly nailed to form a stand for the frames.
- The bottom is nailed last and the lid is secured with hinges. It should lean to the side. A ventilation hole is drilled in the front panel, but it is optional. Many beekeepers refuse ventilation. Staples are attached to the frame frame, and a handle is hooked from the belt.
- If necessary, beekeepers quickly adapt a self-designed apiary frame to catch a swarm.
The video shows an example of a frame plant:
Devices for pumping out honey
Of course, bees store honey to meet the needs of the family. But they store it twice as much as they can eat. In the summer, the entire bee family works on honey collection. Taking away the filled honeycombs with honey is the beekeeper’s goal. Therefore, 2-3 times during the summer, honeycombs are taken from the hives to pump out honey. For this purpose, a honey extractor is used. The device consists of a tank with a rotating frame structure installed inside. The designs are either chordial or radial. If 4 frames represent a parallelepiped installed inside a cavity, these are chordial honey extractors. If the honeycomb is installed from the central shaft to the periphery, the tool is radial.
Additionally, you will need a sieve to strain the honey during pumping. A special knife is needed to cut the bar. The table on which the honeycombs are printed is a special device with separate drawers for storing equipment. Honey is poured into a container with a tap located at the bottom. All these devices can be purchased at a store that sells beekeeping supplies.
Bee remover
The functionality of the apiary bee remover resembles a check valve. Bees from the honey housing move into the nest through special channels. They cannot return back. Having installed the bee remover in the evening, the beekeeper can safely maintain the insect-free frames the next day.
Among the factory-made apiary devices, bee removers from Krasnov and Quebec are popular among beekeepers. The latter is made in the form of a dividing diaphragm and resembles a labyrinth. The basis of the apiary bee remover is four-layer plywood. At the bottom, two triangles are fixed from slats. Their sides do not meet at the corners, but form a gap of 8-10 mm. A hole is drilled in the center of the triangle. The total area of the triangles is covered with a mesh on top.
Advice! 10 hours after installing the bee remover, the beekeeper can observe the movement of bees from the honey housing to the nest.
Assembling a bee remover with your own hands is no more difficult than an apiary frame carrier. You will need drawings. The dimensions must correspond to the internal parameters of the hive so that the bee eliminator can be installed. Plywood thickness – from 10 to 25 mm. The diameter of the hole in the center of the triangle is up to 50 mm.
Triangle slats are used with a width of 20 mm. The distance between the elements forming the channel is about 18 mm. Additionally, you will need bars for the frame.
The DIY assembly technique is simple. Triangles are formed from slats. The blanks are glued or shot with staples. A hole is drilled in the center of the triangle with a feather drill. The edges of the plywood blank are framed with bars with your own hands. The triangle area is covered with a fine-mesh steel mesh.
Advice! It is not necessary to assemble a triangle on an apiary bee remover. If desired, the figure can be a circle, hexagon or other figure.
Where to begin
Let's consider how to make a single-wall vertical hive, the so-called “riser”, that is most suitable for beginner beekeepers to master, with 12 standard frames (300x435 mm) and 12 half-frames (145x435 mm) with a square body (450x450 mm) and a magazine extension. After this, you can safely take on deck chairs, multi-hulls and other more complex structures.
Selection of materials
Recently, when setting up apiaries, building materials that are non-traditional for beekeeping are increasingly being used - polystyrene foam, various types of plastic (expanded polystyrene, technopor, etc.), bituminized paper boards, chipboard and others. Wood continues to be the best material. pine , poplar , linden , spruce, alder , willow , aspen are optimal for making a bee house - they retain heat better and are easy to process.
Hardwoods (oak, maple, hornbeam, etc.) do not store heat and quickly let in cold.
The material must be of good quality: straight-layered, without cracks, rot or knots. Moisture content – no more than 15% (achieved after 2-3 years of aging in a barn, under a canopy). Freshly sawn boards have a humidity level of 40% or higher, so they must first be dried by keeping them in a warm, dry room for 20-30 days.
Necessary tool
An important component of success is the availability of a workplace and tools. The ideal option is a carpentry workbench for processing wooden parts and assembling them. It can be replaced by a platform or trestles with a board and additional equipment - clamps.
To work, you will first need ordinary carpentry tools:
- saws for cutting boards and workpieces;
- tools for planing (plane, jointer, etc.);
- tools for chiseling and stripping (chisels and chisels);
- drill, screwdriver and drill bits.
You will also need a hammer, axe, mallet, pliers, level, measuring tape, ruler, pliers, etc.
Mastering basic carpentry techniques and skills will be useful to anyone who wants to repair a bench or table in the garden, build a stool, etc. with their own hands.
The big winners will be the owners of apiaries who have acquired their own professional equipment - a circular saw, a jointer or planer, or an angle grinder. On beekeepers forums you can see numerous photos and stories about devices that make the process of making hives easier and simpler.
Pollen collector
Pollen is a useful beekeeping product. To collect it with his own hands, the beekeeper places pollen collectors on the hives. Professional beekeepers do not like store-bought apiary devices. They have many extra holes or their diameter is too small. The most popular are beekeeping homemade products that help the beekeeper collect a lot of pollen.
A special feature of hand-assembled apiary devices is the presence of a shaped hole. A bee crawling through it is guaranteed to leave all the pollen in the collection.
It’s easy to assemble the apiary device with your own hands according to the drawing. First, for the pollen collector, prepare a bar with holes with a diameter of 5 mm with your own hands. A fishing line will help make them curly. The veins are passed into the holes, braiding them in a ring. Overcoming the obstacle, the bees will cling with their paws and push the fishing line apart. Actions will lead to the tearing off of the pollen.
The apiary pollen collector is placed on the front of the hive so that the lower cut of the entrance coincides with the upper edge of the arrival bar. A strip is placed in the slot on the lid of the beekeeper's pollen trap. The landing board is covered with a mesh with 3x3 mm cells. The torn-off pollen will roll into the ditch.
Advice! The beekeeper regulates the quality of pollen collection with his own hands by changing the length and thickness of the fishing line.
The groove of the apiary pollen collector can be used to install a dividing grid to prevent the queen from flying out.
Collect and install a bottom pollen collector with your own hands in the bee pavilion when the bees bring the maximum amount of pollen. On unfruitful days, the apiary device cannot be used.
The design of the bottom pollen collector consists of a valve. When it is lifted, the bees enter the nest without passing through the grate. When assembling the pollen with your own hands, the valve is lowered.
Advantages and disadvantages
Throughout this topic, the benefits are clearly visible. But there are no shortcomings. They are available, although not so many.
- The hives in the pavilions are located close, almost close to each other. Bees can confuse houses.
- Almost the entire structure is assembled from flammable materials. In a dangerous situation, all this flares up and burns out instantly. It will not be possible to save the bees. Chemicals repel bees.
Most modern beekeepers strive to optimize their business to reduce costs. This takes beekeeping to a new, higher level.
Uterus caps
Special caps are used for placing queens. Beekeepers can improve factory models with their own hands by making a hole and equipping a lid. The device is pressed into the area of the honeycomb where there is honey, empty cells and young growth.
You can quickly create caps for queen bees in the field with your own hands from PET bottles. First, cut off the bottom with scissors. An awl is used to pierce up to 20 holes with a diameter of 2 mm. Three days after installing the cap, the exit is covered with wax, drilling a hole for the queen. If the queen does not come out on her own, she is released by lifting one edge of the cap.
Inventions for beekeeping
Crafts and devices in beekeeping are an essential part of the functioning of an apiary. There have always been people who preferred their own creations to any purchased analogues, especially since in many cases it is possible to get exactly what is required only when it is created personally.
Ingenuity in beekeeping helps make work easier and ensure better apiary efficiency. In the modern world, quite a large number of people are interested in beekeeping and actively use their skills from everyday life to make work easier when engaging in this “hobby” (or additional business).
Benefits of invention:
Many young people prefer to “automate” the process as much as possible. Many of the same home-made structures are used, ranging from simply lifting the hive lid or removing the frame using built-in motors, to almost full-fledged robots that do most of the work for the owner.
Bee scales
Apiary weighing equipment is expensive, and you can’t do without it. It takes a beekeeper's ingenuity to build a bee scale with his own hands. The design is made according to the principle of a suspension system. You will need to hang a set of blocks from a solid ceiling, pull a cable through them and attach scales.
You can get more convenient scales for hives yourself by converting a factory device with a strain gauge. The scales are being dismantled. The removed electronics are taken outside and secured in a convenient place.
The movable scale platform is mounted on levers connected to the frame by springs. To re-equip, you need to weld a frame from a corner with your own hands and equip it with four bearings. The homemade frame is attached to the main frame with four screws.
To lift the scales, a nut is welded onto the frame and a handle is screwed in. For weighing, 55 mm thick bars are placed under the bottom of the hive. Roll the scales into the gap and press the power button. When zeros appear on the display, turn the handle to raise the movable platform by 20 mm. After weighing the hives, the beekeeper turns the handle in the opposite direction.
The bearings of the bee scales are rolled synchronously. To raise or lower the platform, turn the handle about 20 times.
Beekeeper's trailer on wheels
It would be wise for the owner of a nomadic apiary to acquire a mobile beekeeper’s house in the form of a trailer on wheels. There are specialized factory-made models, but they are expensive. Beekeepers often convert a car trailer into a bee wagon.
Benefits of use
With a trailer you can move across the fields, transporting the apiary closer to the seasonal flowering honey plants. Due to such a trip, bribes increase, the beekeeper gets the opportunity to collect different varieties of honey. If the apiary trailer is located on a large platform, the hives are not unloaded at the place of arrival. They remain standing on the site.
How to make it yourself
To make a bee wagon you will need a trailer, preferably a two-axle one from agricultural machinery. You can convert a single axle car trailer by lengthening the frame and adding a second pair of wheels. The frame of the beekeeper's trailer is optimally welded from a profile or pipe. A wooden structure will become loose with frequent moves.
Drawings, tools, materials
Initially, you will need to develop or find a ready-made drawing. Dimensions are calculated individually. Depending on the dimensions of the platform and the load capacity, the apiary trailer can transport hives installed in one or several tiers. A beekeeper's room, a compartment for a honey extractor and a printing table are provided in front near the towbar to reduce the load on the rear axle.
The materials you will need are pipes, a profile, a corner, and boards. The set of tools is standard: grinder, electric drill, screwdriver, wood saw, hammer. To assemble the frame and increase the frame, you need a welding machine.
Build process
The assembly of the bee wagon begins with the frame. The trailer is freed from the sides. What remains is the frame with wheels. If necessary, it can be extended by welding a profile or pipe. The next step is to weld the frame. The racks are fixed to the frame and connected by an upper trim that forms the base of the roof.
The bottom of the trailer is covered with boards or sheet metal. From the inside, the locations for installing the hives are outlined. On a standard platform there are usually 20 of them placed in one row. If you plan to transport many hives, they are installed in tiers, and a stand from a corner is welded under each one.
When the inside of the apiary trailer is equipped, a sheet metal roof is laid. The walls are covered with boards. If the hives will not be removed from the trailer, holes are cut in the walls opposite the entrances. Windows are made with opening vents. The construction of the trailer is completed by painting.
Electrical booster
To simplify the work with wax, beekeepers created an apiary waxer with their own hands. Its peculiarity is that it runs on electricity. To assemble an electric generator with your own hands, you will need an old working battery and 2 wires with clamp terminals.
The essence of the apiary device is that the terminals are connected to the wire on the frame. When the circuit closes, it begins to heat up. The foundation is placed on a hot wire and pressed with glass. Through the transparent sheet you can see how the strings are soldered into the wax.
Beekeeper protection
Bees fiercely defend the hive from intrusion, even at the cost of their own lives. A bee that stings will certainly die, leaving its proboscis in the skin of the enemy. Therefore, protective clothing is necessary when working with bees. It should be light. Kit includes:
- a hat with a brim and an attached tulle net, with a cord for a snug fit at the bottom;
- overalls or simple clothing that covers the body;
- gloves, you can use ordinary, household, knitted ones;
- closed shoes.
Bee stings are painful, but there is a way to treat rheumatism with stings, since bee venom acts as a medicine.
The best defense against bees is the behavior of the beekeeper. Clean, sweat-free clothes and the absence of perfume and tobacco aroma will put insects in a peaceful mood. Movements should be smooth, speech should be calm.
Conductor for assembling frames
It’s easy to assemble a small number of frames with your own hands. For a large apiary, mass production is being established. Special templates - conductors - help speed up the process. Apiary devices can be made of wood or metal. The easiest way is to construct a jig for assembling hive frames with your own hands from wood.
The template is assembled in the shape of a box without a bottom or lid. The internal size corresponds to the dimensions of the frame. Holes are cut out in the side walls of the template, slats are inserted so that a gap is formed between them and the elements of the conductor, equal to the thickness of the blank for the frame.
Planks with eyelets, which are the side elements of the frame, are inserted into the gaps. The side jumpers are inserted into the grooves of the planks, first from above and then from below. The elements are nailed down. The finished frames are removed from the conductor. Usually a beekeeper can make up to 10 pieces at a time with his own hands.
Tips and tricks
When constructing a structure, it is necessary to take into account the number of families that will be contained in it. Professional beekeepers recommend sticking to the drawings and the dimensions indicated in them. It is necessary to consider the lighting, ventilation, and heating systems.
Before starting construction, you should prepare boards, plywood sheets, metal products, nails and other tools and materials. First, a metal frame is constructed, then the roof and walls of the pavilion are sheathed.
How to make a bee analyzer
The beekeeper's complex apiary homemade products are based on electronics. An experienced radio amateur can solder them with his own hands. The most common apiary electronic device is the bee analyzer. The device helps monitor the activity of bees. The apiary analyzer reacts to noise. The frequency spectrum in a normal hive ranges from 260 to 320 Hz. In the event of swarming, disease, or loss of the queen, the activity of the bees decreases. The spectrum of noise frequencies is in the range of 210-250 Hz, which serves as a signal to the beekeeper.
A self-assembled apiary analyzer reacts to the frequency of noise in the hive. LEDs serve as signal indicators. One light bulb signals “Yes” and the other “No”.
In Fig. 1 diagram of the apiary analyzer, and in Fig. 2 – power supply. The numbering of radio components in the second diagram is a continuation of the numbering of the first diagram.
Pros and cons
Beekeeping in pavilions has many advantages. Each of the bee families is in a separate cassette, so maintaining the apiary becomes easier. To inspect a family of bees, you do not need to disturb all the insects; it is enough to select one cassette of the pavilion. The amount of honey produced is significantly greater than that obtained from bees kept in other types of hives. This is explained by the fact that such pavilions can be easily moved to a place located close to a cluster of honey plants. Insects survive winter well in such structures.
Among the disadvantages, it should be noted that the families are too close to each other. They often confuse the hives, and queen bees get lost among the houses. Beekeepers may find it difficult to work due to the cramped hives.
Device for stretching wire onto frames
Manually stretching the wire onto the frame with your own hands does not always end successfully for the beekeeper. The string breaks or sags. A special apiary device helps to carry out quick tensioning with your own hands under the required force.
To make your own bee tensioner, you will need an old tabletop or a piece of chipboard. The size of the workpiece should be larger than the frame. On the tabletop, stops are made from 5 blocks to stop the frame. The tensioning mechanism is a lever rotating on a pin with an eccentric. When turning down, the eccentric presses the side rail of the frame. After releasing, the installed string is tensioned.
Equipment for working in a beehive
To pacify the bees defending their nest, you will need a smoker. The smoker represents a device, inside of which there is a chamber with a lattice bottom, with smoldering coals and branches. With the help of bellows, air is pumped into the grate, and a directed stream of smoke emerges from the spout. For bees, smoke is a signal of fire and they, having collected honey in their crops, fly away. At this time, the beekeeper maintains the open hive.
When working, you will need a special bee chisel, with which the beekeeper pushes the frames, cleans the gaps, and collects propolis. You will need a white brush made of natural horsehair; use it to sweep the bees from the frame into the tray.
For a novice beekeeper, you need to make or buy a box for carrying frames, an apiary knife - all this is considered mandatory equipment for beekeeping.
How to make your own uterine insulator
To isolate the queen in the nest, beekeepers use a special apiary device - an insulator. The simplest cell is made with your own hands in the field from two necks of plastic bottles. First, they are sawed off with your own hands using a hacksaw. The blanks are connected with tape so that the threaded necks point in opposite directions.
A piece of plastic cut from the side of the bottle is inserted into one of the corks. Ventilation holes are cut in all necks and the inserted piece. Kandy food is pushed into one stopper, covered with a napkin with a small hole, and screwed onto the neck. The second plug is made with a hole so that the isolated queen does not suffocate. When replanting the uterus, it is unscrewed and the neck is covered with wax, lightly greased with honey.
The cage is hung inside the hive with the plug down. The bees gradually gnaw through the foundation and free the queen from the insulator.
Primary requirements
The hive should serve not only as a good home for insects, but also as a comfortable place for the beekeeper, giving him the opportunity to work calmly and effectively help the bee family.
Practice shows that during construction it is important to take into account the following rules:
- Maximum simplicity of the device. This reduces the cost of hives and allows the beekeeper to manufacture, repair, etc. themselves.
- Capacity sufficient for the normal functioning of bees.
- The ability to reduce or increase the size of the nest in accordance with the strength of the family (a weak family cannot cope with heating a large nest).
- Providing warmth inside the hive.
- Creating the necessary conditions for work that allow you to quickly inspect and disassemble the nest without crushing a single bee or damaging a single honeycomb. To do this, the hive must open from the top, and the frames must be easily removed through the top, without touching each other or the walls of the house. Otherwise, the bees will glue them together with propolis, and then they will not be able to be removed without shocks and tremors. And this, as a rule, greatly irritates insects.
- Convenient location of the entrance. So that nothing complicates the work of bees during flight, it should be located at the very bottom. This will make it easier for insects to remove litter and keep the home clean; working individuals will be able to immediately land on empty foundation and leave the prey they brought on it.
- The ability to adjust the size of the entrance so that if bees from another family attack, it can be narrowed or closed.
- Lightweight, compact and uncluttered. There should be no protruding parts.
- Convenient for cleaning bottoms. Detachable bottoms allow this work to be done quickly and easily.
- Good ventilation. Access to fresh air is important for insects, so the frames inside the hive should be positioned edge-on to the entrance (the so-called “cold drift”).
- Proper conditions for brood - the honeycomb frames should not be narrow or small.
- The store should be located closer to the baby so that the bees do not have to throw the worm.
In a small apiary, it is advisable to keep hives of the same type and size with standard frames. This will make their maintenance easier and will make it possible not to get confused with different frames, stores, etc.
Neat evidence painted in different colors can look very aesthetically pleasing and become a decoration in the garden
Hive covers
Inside the hive, beekeepers cover the frames with honeycombs with special canvases. It won’t be difficult to make them with your own hands, cutting them to size from natural fabric. Linen or cotton material is ideal. The fabric retains heat well, allows air to pass through, and removes steam from the hive.
Beekeepers cut polyethylene canvases with their own hands. Artificial material retains heat well, but does not allow air to pass through. For the winter, it is better to lay canvases made of breathable material.
Design idea
Mobile and stationary pavilions for bee families will help save space in the apiary. In addition, with their help you can make wintering and keeping bees easier, as well as significantly increase the percentage of yield. You can build it yourself, but you will need special drawings. The mobile pavilion is mobile, so it can be easily moved to suitable locations, such as flowering centers at specific times. When designing, you can use vans or truck trailers, drawing up a drawing of the device according to the appropriate size.
As for the stationary pavilion for bees, it does not have high mobility. It is not put on wheels. It is installed at a specific location in the apiary for a long period of time. The main purpose of the device is to facilitate the wintering and maintenance of bees, as well as to save space.
In beekeeping, there is a rule that implies that all bees must be completely safe, especially during the winter. Cassette pavilions are extremely popular. You can make them yourself. When constructing them, it is important to take into account the main features of the parameters of the automotive equipment acting as the tractor of the device. A self-made cassette pavilion for bees must fit into a van or trailer so that there is free space for the beekeeper to work (a small cubby).
The cassette bee pavilion resembles a kind of chest of drawers, in which hives with bees are located in separate cabinets, independent of each other. Thus, the process of keeping and wintering bees is simplified, and it is easy for the beekeeper to carry out all the necessary activities. The cassette structure can be easily moved to a specific area with honey plants. The beekeeper can do this manipulation independently, without using a face mask or a smoker.
What other homemade products can you make for beekeeping with your own hands?
There are many other apiary devices for a beekeeper, and you can make them with your own hands without much difficulty.
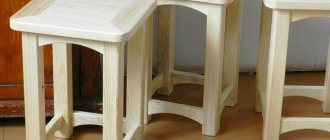
A convenient apiary attribute for a beekeeper is a box stool. The base is knocked off the bars. The seat is cut out of the board with your own hands, and a hole for the handle is sawn through. The body of the box is knocked off the plywood. It is convenient for the beekeeper to sit on the stool while servicing frames and hives. All the tools are always at hand in the box.
Beekeepers assemble intra-hive feeders with their own hands from frames. First, the honeycomb and wire are removed. The frame is covered with plywood, the joints are sealed with wax.
Beekeepers make over-frame ceiling feeders in the form of boxes. They are made with their own hands, wooden or plastic.
Important! The feeder is equipped with a floating raft to prevent the bees from drowning in the syrup.
Operating principle and design of a bee trap
A samolov is a box that swarming bees mistake for a hive. The optimal capacity is 40 dm3. Inside there are several empty frames and two with honeycombs that smell like bees.
The entrance to the temporary hive is the only entrance with a latch so that the insects do not fly away. There should be no gaps in the box.
Homemade products and devices for beekeeping
Homemade products and devices in beekeeping are very common. Compared to other enterprises, businesses or occupations, this is where you most often find various crafts made directly by the owners of the apiary with their own hands. This is explained by various reasons, including the lack of access to factory equipment, as well as the reluctance to spend money on not too complex elements.