Paracord
(from English
Parachute cord
,
paracord
) - a very light rope cord made of polymer, the fibers of which are made of nylon. This special type of rope was originally made for the military and was used to attach the rafters of parachutes. Paracord weaving is a skill used by the military. But now paracord is used not only for military purposes, but also for civilian purposes. To be honest, good and high-quality paracord can always be found from a professional hunter. Actually, like the bracelet cord itself. Special paracord weaving patterns and instructions make it easy to make strong loops, belts and weave a so-called survival bracelet. Even paracord braiding for a paracord knife - you can make everything yourself. This way you will get a real men's bracelet. Such a paracord bracelet can be given to a friend as a gift for Defender of the Fatherland Day, for example, and it will be appropriate. A paracord bracelet made by a master is a beautiful and practical product.
The paracord shell is made of numerous interlocking polymer fibers, making it quite smooth. If the paracord is made of polymer nylon mainly or entirely, then it will also be quite elastic. For civilian needs, paracord can be made from cheaper materials, such as polyester; civilians do not need absolute compliance with standards, like military paratroopers. However, a standard is a standard, and before you buy paracord for yourself, you need to figure out whether it is the product you are buying.
How to distinguish real paracord from fake
Real paracord is usually made in the USA. One of the most famous manufacturer brands is Rothco. But, in fact, it is not so important in which country the product is made, what is important is how well its quality meets international standards. However, the name “paracord” can hide anything that is at least a little similar to the original. Here are the signs by which you can distinguish a real survival rope from a fake that will not cope with its task.
- If you touch the paracord, you will immediately notice the softness. It is precisely because of the softness of packacord that it is convenient to weave products.
- Light the edge of the paracord. Combustion will occur with a smoky flame, with black smoke. It will smell like burnt plastic.
- The core and sheath fibers are never fused together. The shell will always melt faster and expose the core, similar to stripping insulation.
In such a men's bracelet from survival
You can weave a clasp: a carabiner or a metal loop. In addition, such a bracelet can be woven from leather straps. It will no longer carry a practical load, but will look very stylish.
Weaving pattern for a paracord bracelet with a plastic carabiner
How to choose material
If a user buys material for weaving a men's bracelet, the following must be taken into account:
- load capacity;
- strength;
- length.
You should build on the characteristics assigned by the manufacturer. If the bracelet performs a purely decorative function, then you don’t have to bother. If you plan to use it in the future, then it is best to choose a durable and load-bearing material.
Reference! Experts recommend choosing thick material in a bright color.
Simple paracord weaving patterns
A paracord bracelet can be woven from cords of several colors, then it will be elegant. However, a paracord bracelet in protective colors is considered classic: green, black, brown and white. A paracord bracelet can be woven in several ways. The most popular weaving patterns are given below.
Thin paracord bracelet
Paracord bracelet with clasp
We wrote that one of the principles of this direction is the use of the same things for different purposes. Today we would like to introduce you to one example of this approach. The handle for a knife or ax, woven from paracord, allows you to conveniently use it for its intended purpose, and if necessary, it will provide you with several meters of the strongest cord, which can be useful in camping conditions. To make such a thing you do not need any special skills or special tools.
Paracord (eng. Parachute cord, paracord, 550 cord)
is a lightweight nylon core rope that was originally used in American parachute lines during World War II. After landing, paratroopers used the lines to solve various problems. Nowadays, paracord is used as a universal rope by both the military and civilians.
Required materials and tools
- The base is in the form of a knife blade or a tourist hatchet
- Thin nylon cord (paracord)
- Scissors
- Lighter
Place the item on top of the paracord
Cross the two ends of the cord to the right
Make a loop on the right side and pass the cord under the handle to the left side
Tighten the loop tightly
Move the right part of the cord to the left over the handle
Make a loop and pass the left cord under the handle
Thread the end of the cord through the loop to make a knot
Tighten firmly
Perform the operation from step 7 in mirror image
Repeat the previous steps until the cord covers the entire handle
Secure the cord and burn the ends with a lighter
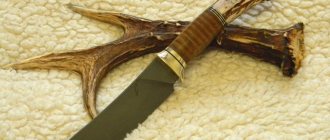
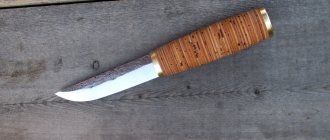
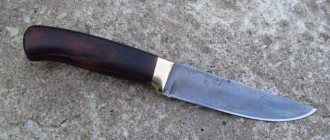
A hunting knife is essential for every hunter. First of all, it is used for finishing and butchering prey, but besides this, it remains a faithful assistant in a variety of hunting situations. Nowadays you can find a huge number of different models and modifications of blades on sale. But despite this, the need to make your own knife may arise. This usually happens due to the inability to buy the blade you need, either to replace a lost or broken one you love, or one you saw from friends and liked, or the knife you need is not on sale.
Main functions
When making a lanyard from cord or rope, the best option is to make an adjustable loop. And attach a carabiner to it. In this simple way, the blade is quickly attached to the wrist. The knot should not be tied too tightly.
Whenever necessary, you can really quickly turn it into the original state of the cord. Minor but significant functions of the product:
- preventing cuts when your hand slips from the handle;
- externally increases the handle of the blade;
- during work, uniform distribution of the load on the hand;
- the ability to quickly remove the knife from your pocket.
Homemade lanyard on a knife.
It is permissible to doubt the usefulness of these properties, but real users on thematic sites indicate precisely these positive factors. And experienced survivalists recommend weaving a lanyard from at least a three-meter cord.
Making a knife from a 9HF saw
In this article we will not focus on the shape and design of the blade, the type and width of the sharpening, etc. We believe that we already have a finished project or sample and will focus on the production itself.
In order for a homemade hunting knife to meet the basic requirements for such blades, it is recommended to make it from high-carbon alloy steels. For example:
- 9ХФ
– tool alloy steel, used for the manufacture of frame, band and circular saws, punches, trimming dies and a number of other tools. Usually saw blades are used as blanks; - Р6М5
– high-speed alloy steel of high strength. It is used for the manufacture of many types of cutting tools, drills, saw wheels, the latter can be used to make a workpiece; - 65G
– spring steel, with high wear resistance, can be blued and blackened. They make springs, springs, gears, etc. In addition to sheets, rear springs of trucks are used for blanks. Considered one of the cheapest knife materials; - X12, R3M3F2 and a number of others are also suitable.
The material for the workpiece can be taken from the above products, although now on the Internet you can order a plate for the workpiece from almost any steel. As a recommendation, take a pendulum saw blade for metal, the usual dimensions are 400x30 mm, thickness 2 mm, rough surface, color black or gray. If you want to make a homemade knife at home, in addition to the material for the workpiece, we will need:
- Angle grinder (grinder)
- Wheels for it, cutting wheels for alloy steel, for example inox A54S BF, sharpening and grinding.
- Drill or drilling machine
- Vise
- Pobedite and other special drills
- Files and diamond file
- Emery machine (very desirable).
The knife making process will be as follows:
The handle of the knife can be wound using paracord or made of wood; in the latter case, we drill holes in the handle according to a template, according to a sample or drawing. Holes are drilled using special drills with accompanying cooling using oil. It is more convenient to do this on a drilling machine.
To simplify the process, holes are first drilled with small diameter drills and then gradually drilled out to the desired size.
What can you weave from?
Knife lanyards can be woven from almost anything. But the most acceptable option is synthetic lace. This material will last a long time, as it is wear-resistant and does not rot. Experts advise using round rather than flat lace. It is desirable that its color be bright enough. If the knife falls, say, into the grass or snow, in this case it will be easier to find it. Sometimes even regular new shoe laces are used.
Among other things, it is necessary to choose the correct length and width of the lace. The size of the finished product itself will ultimately depend on these parameters. To make a thick and short lanyard, a coarse voluminous cord about half a meter long is suitable.
Handle
Knives are decorated with different handles. The choice of material for their manufacture depends on the purposes for which the knife is intended, ease of use and personal preferences of the owner. Below are two ways to make a knife handle at home.
Wrapping the handle with paracord in a few minutes
Using a paracord cord as a knife handle is not only easier and faster, but also more practical. You will always have a couple of meters of cord with you, which can be used for a variety of purposes when surviving in extreme situations.
For the winding we need:
- cord, 2 – 2.5 m;
- thick adhesive tape or electrical tape;
- lighter or matches;
- scissors;
- gloves;
- screwdriver.
Before you start winding the cord, decide whether you need a lanyard loop and if so, where it will be, on the side of the blade near the stop or at the end of the handle. If it is available, in addition to the ability to hang the knife, in the first case you can insert your thumb into it to make it more convenient and secure to hold the knife, in the second, you can use it to remove the knife from the sheath, etc.
Paracord is wound in the following order:
- We wet the cord, and it stretches better, and when it dries, it will sit more solidly on the knife.
- We seal the knife blade with tape or tape to avoid accidental cuts or cutting the cord. It is better to perform all operations with gloves.
- We press one end of the cord on the head of the handle so that 10 cm remains free.
- We form a loop from the cord, laid along the handle so that the top of the loop protrudes a couple of centimeters beyond the cord winding area.
- Then, holding the knife in your left hand and pressing both ends of the loop with your thumb, with your right hand we begin to wind the cord around the handle, starting from its head. We make the winding tight, turn to turn, do not tighten it too much, keep in mind that the cord will still shrink after drying.
- Having brought the winding all the way to the blade, we thread the remaining end of the cord into the protruding part of the loop.
- We cut off the excess cord, leaving about 3–5 cm, and burn the end of the cord.
- After this, pulling the free end of the cord from the side of the handle head, we pull the loop under the winding until the end threaded into it is hidden under the winding. Avoid pulling the loop completely out, otherwise the entire winding will unravel.
Winding is complete. With this option of winding, we will not have a loop for a lanyard. If we want to form it, the winding is somewhat more complicated. Initially, two loops are placed on the handle on both sides of the knife.
To form a loop for a lanyard on the head of a knife, the end of the cord is pressed onto the head of the handle and one loop is pulled to the blade, then the cord is thrown over the head and a second loop is placed on the other side. The winding starts from the head of the knife. Having finished the winding, the remaining end is threaded through both loops near the blade and pulled under the winding by the loop in the headband, thereby forming it.
So that the loop is near the stop, we do the same thing, but on the contrary, we start laying and winding from the stop, and pull the loop there to tighten the clamped end under the winding.
Making an overhead handle as an alternative to paracord
If you are a classicist and want to make a regular handle, use wood for this purpose. It is more accessible, easier to work with, the wooden handle is more pleasant to the touch, does not get cold, slips less in the hand, and if processed correctly, does not absorb moisture. The handle of a knife can be made of oak, beech, maple, birch, walnut or mahogany. In order not to waste time and effort on preparing and drying wood, there are two simple ways to get it. The first is parquet, you can buy it in a special store, where, by the way, expensive varieties are sold individually. The second is old furniture, in the attic, in the garage, at the dacha, with friends, you can always find unnecessary household rubbish and use it. For the handle you need two dies, if you have a standard size hand, then 10 - 15 mm thick, this includes a margin for processing so that the thickness of the future handle is about 20 mm. The length of the workpieces is 150 - 200 mm, so that there is room for fixing them during initial processing.
In addition to the tree, we will need:
- dowels made of aluminum, copper, brass, iron according to the number of holes and the corresponding diameter;
- drill with drills or drilling machine;
- drills according to the number of holes in the handle of the same diameter;
- a sharpening or grinding machine, it can be replaced by a wood file and a lot, a lot of time;
- jigsaw or hand jigsaw, or see previous paragraph;
- an engraving machine or a file with a needle file;
- sandpaper of different numbers down to the finest;
- epoxy based adhesive;
- linseed oil;
- thick adhesive tape or electrical tape;
- vice, clamp.
We make the handle as follows:
- Before starting work, wrap the knife blade with tape or tape to avoid accidental cuts.
- The first step is drilling. We place the knife blank on a wooden block, press it with a clamp or, at worst, wrap it with tape and drill holes. To make the hole neat, first drill with a thin drill, and then drill out to the desired diameter. After the first hole has been drilled, we insert a key or a drill of the same diameter into it, this is done to fix it so that the die does not move. Let's move on to the next hole.
- We drill the second die in the same way.
- After drilling, we assemble the dies on a knife, using keys or drills, to make sure that all the holes match.
- Then, attaching the dies one by one to the knife using dowels or drills and a clamp, we outline the contour of the handle along the contour of the knife. It is advisable to mark the handle with a slight indentation, 1 - 2 mm, for subsequent processing.
- After marking, we cut out the handle with a jigsaw or grind it on a grinding wheel; in extreme cases, the file is in your hands.
- Preparing the dowels. To make the homemade knife look aesthetically pleasing, we will not rivet the dowels, but glue them in. To do this, use an engraving machine or a file to make chaotic cuts on the keys, in which the glue will harden and set. At the ends of the keys we remove an inclined chamfer at 450.
- Since after gluing it will be inconvenient to process the cheeks of the stop, we finally process and polish them using sandpaper.
- We carefully sand the handle halves from the inside so that they fit tightly when gluing to the plane of the knife shank.
- Before gluing, we make a final test assembly.
- We carry out the gluing itself according to the instructions for the glue. The assembly procedure is as follows: lubricate the inside of one half, insert dowels coated with glue into it, put a knife on them, and then the lubricated second half. We clamp the assembled handle in a vice and remove the excess squeezed out glue. Leave the clamped handle for a day.
- After the glue has hardened, using files, emery, a grinding wheel, and so on, we finally shape, grind and sand the handle of the knife.
- When the handle is completely polished, it's time to soak. It is best to saturate wood with linseed oil. You can buy it in a store for artists, they use it to dilute oil paints. The handle is kept in oil for three days to a week. The process can be speeded up by boiling the handle in oil for a couple of hours, but you must strictly monitor the temperature, otherwise the glue may leak.
- Then the handle should dry at natural temperature for about a month, during which time the oil will polymerize and the wood will harden and become impervious to moisture.
- After drying, the handle is finally polished with a soft cloth.
The history of the lanyard
The history of cord knitting goes back hundreds of years. Historians date the first mentions to the 15th-16th centuries. Its original purpose was meant for the convenience of attaching a blade, saber or tool to the owner’s hand. Preventing item loss.
Later, the lanyard functioned as a weapon accessory and was part of the military uniform of soldiers and officers. And it had the meaning of a kind of insignia of its owner. In the modern world it is more often used as decoration. If you think about it, applications can be found for various purposes. Unraveling it will make a good rope.
Sharpening for beginners
Before we talk about sharpening a hunting knife, we need to remind you that homemade knives made from the metals recommended in the article are very difficult and take a long time to sharpen, since the alloy steels used have high hardness. This must be remembered when using a knife for purposes other than its intended purpose.
Now about the sharpening itself. At home, knives are sharpened on special sharpening stones. Such stones are ceramic (the cheapest and most common), diamond, natural and Japanese sea stones. The principle of sharpening on them is approximately the same, so in the future, by default, we will talk about the most common ceramic sharpening stone. In order to sharpen a knife efficiently, it is advisable to have either two sharpening stones of different grain sizes, or, what happens more often, a sharpening stone whose sides have different grain sizes. For ease of sharpening, the size, or rather the length, of the stone should be greater than the length of the knife blade.
It is advisable to sharpen a knife with both hands, so it is advisable to place the sharpening stone on a separate board, securing it either in a hole specially cut for this purpose, or using six nails driven into the sides. Sharpening the knife begins on the roughest stone. At this stage, the whetstone does not need to be wetted. We place the stone arbitrarily on the table, the main thing is that it is convenient for you to sharpen on it.
The entire sharpening process consists of giving the edge of the blade an acute angular shape. When doing this, you need to remember a few basic rules:
- you need to choose the optimal knife sharpening angle and stick to it throughout the entire process;
- The knife is driven across the stone with the blade forward, as if cutting off a thin layer from it;
- in one movement you need to sweep the entire edge of the blade for uniform sharpening;
- the edge of the blade should always be perpendicular to the direction of movement;
- each next time the blade must be turned over and held with the other side so as not to displace the center of the blade chamfer;
- movements should be smooth, without pressure;
- It is better to sharpen both sides with a unidirectional movement, either towards yourself or away from yourself, since moving the hand away from you is always worse and weaker than moving it towards yourself.
Now regarding the sharpening angle. It can be from 450 to 300, in the first case the knife will hold an edge longer, in the second it will be sharper. It is better to sharpen a hunting knife exactly at 300, this is not difficult to achieve, just when sharpening, move the knife as if you were cutting a thin slice of butter or cheese.
After you have turned the initial sharpness and brought out the angle of the blade edge, you can move on to a stone of lesser dispersion. It is advisable to periodically moisten it with water so that the edge of the blade glides better and metal dust does not clog the pores. You can finally sharpen the blade to a mirror shine and razor sharpness by sharpening it on an old leather belt with GOI paste. The main feature of straightening with GOI paste is that the knife is guided in the opposite direction to the blade, i.e. butt forward.
Types of devices
There are few useful properties from a simple leather loop. It can stretch and the product will dangle on your hand. The option is not very practical. According to their purpose, lanyards are divided into two main groups:
- with a loop. A device of this type is necessary, first of all, to prevent loss of the knife if it accidentally slips out of your hand. During chopping movements, it’s not much, but it takes the load off the hand. You can easily free your hand and the blade will hang on your wrist. When storing the product, you can hang it from the loop. This lanyard is considered the most functional;
- cord with a tail. With such a lanyard, you can quickly remove the knife from your pocket or case. In this case, the accessory is a kind of flexible extension of the handle. During long movements, the knife to which such a product is attached behaves more predictably, as it acquires additional inertia. Such a lanyard can often play the role of decorating a blade.
There are many ways to weave a lanyard, but two main ones can be distinguished: a straight knot and a simple knot. A lanyard, beautifully woven from rope, can be given as a gift. You can also put this business on stream and weave accessories for the knife for money.
Two options for lanyards.
Making a sheath (case) from leather
One of the necessary accessories for a hunting knife is a sheath. They are needed to protect the blade from dulling, and everything around from cuts and damage to things.
You can make a homemade sheath yourself at home, from a small piece of leather about 3 mm thick.
For this, in addition to the skin, you will need:
- scissors;
- a sheet of thick paper for a template;
- pen;
- an awl (a sharpened nail or nails can replace it);
- small nails and a hammer;
- universal glue;
- fork;
- paraffin candle;
- fine sandpaper or grinder;
- nylon thread and one or two large needles;
- pliers;
- snap clasp;
- wax or cream.
The procedure for making the cover will be as follows:
- Making a template. Applying the knife blade to a sheet of paper, trace it along the contour. Then around this contour with a centimeter indent we draw another contour, it will be the main one. Cut out the template along the outer contour. Separately, we cut out a T-shaped part for the fastener, the width of the harness is about 20 mm, and we measure the length of the harness along the handle of the knife.
- Mark the details on the skin. Having attached the template to the leather, we outline the part for one side of the sheath, then, moving the template to the side by 5 - 8 mm, we outline only one side to get a part for half of the insert. Then, turning the template over, we repeat the steps, outlining the second side and the second half of the insert. We apply and outline the T-shaped part of the fastener.
- Take scissors and carefully cut out all the details from the leather.
- Applying it to the knife, we try on all the details to see if they match.
- We rub the ends of the insert on the clasp with paraffin candles, and then sand them using sandpaper.
- We apply the fastener to one half, and using an awl and nails we mark and punch holes for the thread, in two rows.
- We sew the fastener; the thread can be pre-lubricated with paraffin.
- For ease of subsequent stitching, we glue the parts together. We cut out a part from the template along the contour of the blade itself. We place this part on the half of the sheath and coat it with glue so that the glue does not come out beyond the inserts. Glue according to the instructions on the tube. Lubricate and glue the inserts.
- At the tip of the sheath, between the inserts, we cut a groove for ventilation.
- Glue the other half. We place the sheath under the press for a while for high-quality gluing.
- We check how the knife fits and sits.
- Use sandpaper to sand the edges of the sheath.
- Using a fork, running two prongs along the edge of the sheath, outline the outline for stitching. Use a fork to mark the holes for the thread.
- If you want, you can get fancy by cutting a thread groove into the face of the scabbard so that it is flush with the leather. In this case, it will then need to be polished with wax or cream in the same color as the scabbard.
- Punch holes for the thread with an awl.
- We sew the cover. You can sew with one thread, or with two threads, threading them through the holes one at a time.
- Attach the button clasp.
- We finally grind and polish the scabbard with wax or cream.
The scabbard is ready.
I bring to your attention a new lesson. Today I will tell you how to create a stylish pen without spending a lot of money and time. We will need:
- Ordinary ballpoint pen
- 8 meters of floss threads
It is also possible to use colored wire with a diameter of 2-3 mm, which requires 4 meters. So. Step 1.
We disassemble the handle, we only need the rod.
Step 2.
Now we need to measure 4 meters of thread in each of the two colors. Fold in half, and then in half again. At the bend we get a loop:
At this point we place one color across the other to create an even cross.
To prevent the threads from getting tangled while working, I formed small skeins of them.
Step 3.
Let's remember our core. We place it upside down exactly in the middle of the cross.
Then we do the following. Take any of the threads and put it on the next one clockwise so that you get a loop. I took the top blue thread first. Here's what happened:
We do the same with the remaining three threads:
We thread the last thread into the first loop, and our circle closes.
Step 4, where we need a little ingenuity and skill.
The difficulty is that you have to simultaneously hold the rod vertically and tighten the threads. You can ask someone to hold the rod, but if no one is nearby, hold it like I do. That is, with our teeth :) One by one (carefully!) we pull on the opposite threads (they should have turned out to be the same color), until all the loops are evenly tightened. The result should look like this:
Repeat this step as many times as necessary to braid the rod to the base. My handle after five reps:
After 20 reps:
Step 5. Last.
After about an hour of work my handle looks like this:
It's time to fasten the threads. I have a little less than a centimeter of rod left to make the final knots. To prevent the threads from fidgeting, you can coat this part of the rod with glue (a glue stick is suitable, you can also use PVA). You need to regroup the threads, moving one to the left or right. Like this:
Now you need to tie several knots between adjacent threads, as you please, this is not critical. The main thing is that it stays securely. We will cut the threads to the very root! Therefore, we will lubricate them again with PVA. Be careful not to cut the knots. P.S.
This is the handle I got:
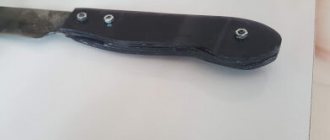
Not all knives have a wooden plastic handle. Sometimes the design means leaving a bare shank, which can slip out of your hand or make it cold. To avoid this, the steel handle is wrapped using a special method - a pattern of paracord weaving onto the knife handle.
Paracord knife handle.
Popular option
This pattern is very similar to the “cobra”, but much easier to make.
To create a bracelet we will need:
First, we need to cauterize one end of the rope, and then make four loops in the fastener slot. Next, make a loop from the long part and pull it through the four loops in the fastener for about 5 centimeters, then tighten all the loops in turn from right to left.
Then loosen them using tweezers. Between pairs of loops, pull out three more loops, leaving the fourth on the side. Then turn it over so that the left side is in front.
Pass the running cord through them, as in the second point. Tighten the loops from right to left.
Repeat all previous steps. When the length is suitable for your size, stretch the running cord to the last row and make three more loops for the second part of the fastener.
Burn the unnecessary part of the cord with a lighter and thread it through any loop, tying it in a knot. The bracelet is ready! This knitting is especially suitable for brutal men.
Materials and tools
Wrapping a knife handle with paracord does not require any special knowledge or tools, and the materials will be affordable for everyone. So, for work you will need:
- paracord cord;
- scissors;
- lighter;
- scotch;
- insulating tape
- vice.
How to choose paracord
To answer this question correctly, you should remember why paracord is used these days. First of all, it is a strong and lightweight rope. Secondly, due to its design features, it is used not only in this capacity, dissolving the base. Thirdly, many useful and fashionable things are woven from paracord, since its range of color shades is very diverse.
What does it mean to “choose correctly”? This means a product that can be used in many ways. And for each of them it will be the most suitable. The most popular products these days are the products of the American company ″Rothco″. It is labeled as “550 Paracord” and is considered a kind of standard. Needless to say, there are many more counterfeits of it than high-quality products. So the places to purchase it need to be chosen with no less care.
As a cord it is very durable. After all, it can withstand a weight of about 250 kg. Although it is not used in mountaineering, it is excellent as a passive insurance for all types of tourism. The shell is made of 32 intertwined nylon threads. It contains 7 cords woven from nylon. Each has three threads.
Those who are eager to purchase Chinese paracord should take into account that most Asians use polypropylene instead of nylon, and the core laces are woven from only two threads. Therefore, such paracord can withstand, at best, no more than 165 kg (or even less).
Mounting methods
Before you begin creating this unique accessory, you need to think about methods for attaching the lanyard to a knife or other tool .
For example, you can attach the decoration to the handle through a special hole. This is the simplest and most reliable fastening option.
It is also possible to mount it through a ring or shackle; this method is compact, movable and allows you to quickly find a pocket weapon by touch. You can attach a lanyard using different techniques: with a knot or with a clip, on a loop or with a special clip. Each method is good in its own way and depends on the tastes and wishes of the owner. The main thing in this matter is to secure the accessory in such a way as to ensure maximum comfort and safety for the future owner.
Weaving pattern and process
There are a large number of different nodes and ways of winding the blade. One of the simplest and most popular methods is criss-cross winding. It is performed as follows:
- Place the handle in the middle of the paracord.
Cut a long piece of cord and place it on your work surface. Place the handle in the middle of this rope. The length of the cut paracord should be four to five times the length of the handle. At the end of the winding, you can cut off the excess. - Fold the left end up.
Wrap it around the top of the handle and pass it under the right one, pointing it down away from the blade. Both edges should form a loop across the handle. The intersection of this loop should be on the right side. - Pass the right edge of the cord through the loop.
Take the second ending (the one you haven't used until now) and pull it through the loop from the back. Bring it out from the left side. It is necessary to stretch this edge from the back of the loop (the one that is under the handle) through its base, extending it through its top. This step will secure the loop in place. Pull both ends of the paracord firmly to get a firm grip on the handle. After this step, the right and left edges of the paracord will switch places. - Fold the right end up.
Grasp it and fold it over the handle below where you created the previous loop. Pass the right edge under the left, pulling it under and out at the top. As before, you will end up with a loose loop. This time the intersection point should be on the left side. - Place the left edge behind the handle.
Take it and pass it under the handle of the knife. - Thread the end through the loop.
Take the end you manipulated in the previous step and pass it through the loop on the right side of the handle. It is necessary to insert the edge of the loop from bottom to top. Pull the paracord tightly, securing it in place. At the end of this, the cords will again change places. - Each time, mirror the previous actions performed on the other side of the handle.
After tightening the loop on the left, repeat the steps exactly, but this time on the right. - Repeat until you have wrapped the entire handle.
Continue making criss-cross stitches along the handle of the knife, keeping them as close as possible to it and to each other, until you reach the edge. - Thread the ends through the hole.
Pass both ends of the cord through the hole on the edge of the knife handle. In the latter case, to secure the winding, tie the edges with a knot on the side of the hole. - Tie an end knot.
Tie both ends of the paracord into a strong knot. The resulting loop can be worn around the wrist.
After completing this step, the winding is completed.
Instructions for making a lanyard with your own hands
There are quite a few ways to weave. The popular options on thematic forums are:
- hunting knot;
- square weave;
- snake;
- spherical;
- diamond-shaped
The names will tell little to the average person. Let's consider the simplest version of the simple knot technique. The words will be supported by a diagram for a more complete understanding of the process:
- We use one rope, having found its middle, we need to make a loop.
- Insert one end into the hole. A simple knot is made.
- Perform such manipulations to the required length.
- Thread it through the hole on the top of the handle and secure it.
Having understood the principle of the method, it is too early to rejoice. Unravel the cord and tie it a few more times. Visual and muscle memory are the best teachers in handicrafts. Let's move on to a more complex version of two paracord cords of different colors:
- Tie the ends of the ropes together.
- Thread the resulting double cord into the hole of the carabiner, using it to measure the length of the future product.
- Two loose ends of different colors appeared near the carabiner. We take one of them and braid the other, like this: first it is placed on top then below, forming a loop.
- We insert the free end into this loop. We tighten the knot.
- We turn the product over to the other side and pass the first cord into the loop formed by the second. Repeat until required length.
It is really difficult to understand the principle from words. But photos and videos will help you figure out what’s what.
Weaving a lanyard using the “Snake” method.
Lanyard as an accessory
Today, the lanyard is more of a decorative decoration for the knife. It gives the blade style and an aesthetically pleasing appearance. It has become less used for traditional purposes. But in the past, this accessory carried a lot of useful functions.
For the military, the lanyard was part of the uniform; it was used as an addition to the award weapon. Then they made a lanyard from an order ribbon. This use of a lanyard is not very relevant today, but leather lanyards have their fans.
The accessory is especially popular among the peoples of the Caucasus; men believe that the blade should have a bright continuation. When performing a saber dance, it adds spectacle to the performance. Thanks to which, dancers are able to perform various tricks.
In some cases, in everyday life, a lanyard serves as decoration. Men like to decorate the handle of a knife. Today there are plenty of ready-made products on store shelves. And in some cases, you can weave a beautiful accessory yourself.
