Choosing the perfect coat is as difficult a task as meeting your soulmate. If you are tired of endless viewing of fashion magazines, meaningless advice from consultants in stores and unsuitable clothes, catch simple instructions on how to sew a coat with your own hands.
In this article we will tell you:
- How to choose the right women's coat?
- How to choose fabric and lining for a coat?
- How to make a coat pattern with your own hands?
- How to sew a coat with your own hands for a beginner? Master class + 12 step-by-step photos
- How to properly treat a coat?
How to choose fabric and lining for a coat?
First decide what time of year you want to make a coat for? If you need an option for a cool summer evening, jacquard, gabardine, thick denim, and organza .
Classic materials for spring and autumn coats are:
- Coat fabrics (drape);
- Thin fur;
- Cashmere.
You can take thin leather or suede, but these materials are difficult to work with. It is better for beginners to hone their skills on simpler fabrics: for example, drape.
Synthetic or viscose is used for lining ; the second option is preferable - it looks better, is more wearable and durable.
Don't forget to buy accessories: buttons or buttons.
You will also need dublerin - a woven cushioning material that is used to glue parts to give them rigidity and strength. In a coat, the front part, the edges and the bottom of the sleeves are treated with doublerin, and if the main fabric is loose and soft, then all the details are glued.
Hem the hem
When hemming a product made of heavy fabric, it is necessary to evenly distribute its weight. To do this, you need to make several rows of securing stitches. This method of hemming a coat will evenly strengthen the edge of the finished product.
If the coat has a loose lining, it is not sewn to the bottom of the product; the hem is attached separately. The cut edge of the fabric will require serging or other processing. The cut edge of the coat can be processed with edge braid or overlock. Alternatively, you can use a zigzag stitch on a sewing machine.
Such processing is necessary for thick loose fabric, since its edge cannot be processed with a double hem, which will make the seam rough and can ruin the appearance of the product.
Before hemming the coat, it is necessary to glue the hem area with adhesive material. It is important to glue the front side to the width of the hem - this will strengthen the fabric and protect the bottom of the product from deformation.
Press the hem line lightly. Pin the hem. Sew it on the inside using a herringbone stitch.
Carefully iron the folded and hemmed edge from the inside out. You can iron it through a damp cloth; it is not advisable to iron the coat from the front side.
How to make a coat pattern with your own hands?
If you haven't taken an outerwear design course, making your own patterns can seem as simple and straightforward as designing a rocket.
You can find ready-made patterns in fashion magazines or freely available on the Internet. Do not immediately take a complex model with many details, a hood and pockets, start with a basic straight pattern. The selected patterns need to be printed (if you found them on the Internet) or transferred to tracing paper (from a magazine).
If you are still willing to take the risk and build a coat pattern from scratch, you will need simple graph paper, a ruler and a pencil.
Start by building the back:
- Set aside point A and set point H vertically downwards from it so that the segment AN is equal to the length of the product (if you want a coat just above the knee - approximately 115cm). From point H, lay a perpendicular to AH and place point H1. HH1 - back width. Then construct the auxiliary point A1 so that you get a rectangle ANN1A1, i.e. segment HH1 is parallel and equal to AA1.
- From point A1, place 7 cm vertically downwards, this is point P - shoulder level. Set aside 8 cm from point A, so you will find A2 - the width of the neck. Connect it to point P so that it extends a little beyond the segment A1H1, you get point P1.
- Then set aside 31.5 cm from point A1, this will be point D - the depth of the armhole. Then from point A1 place point T - the waist line.
- From point A, set aside A3 (3cm) - this will be the depth of the neck. Connect A3A2 and straight line P1G with a smooth line.
Building the back
Exhale, drink tea or coffee, you've dealt with your back! Now you can move on to building the front:
- Place point A and set 108 cm vertically downwards from it, place point H. To the right of point A, construct the width of the side (point A1, 16 cm). Again from point A, but now to the left, set aside the width of the front - 28.5 cm, point A2.
- Set aside the AT (38cm) so you can find your waistline. Then draw TT1 (27.5cm). Construct a rectangle TNT1H1, and then set aside 14.5 cm from point T1, you will get point G, the level of the armhole.
- Connect A2 and G, A1 and H, you get a side line. From point A to the left, set aside another 7 cm, this will be point A3, the width of the neck. From A3, draw a vertical upward, 7.5 cm long, neck height, point A4. Connect A4 and A2 - shoulder line.
- From point A4 at right angles to line A2A4, draw line A4A5 (12cm) - the length of the collar along the back. From point A5, perpendicular to A4A5, construct a segment A5A6 (12 cm) - the height of the collar. Connect A6 and A1 with a smooth line.
Building a shelf
Hooray! You're almost done. Sleeve left:
- Start as usual: set aside a 50cm long vertical AN. Then set aside the AO, the height of the rim is 11.5 cm.
- From point O to the right, set aside OP, sleeve width equal to 20 cm. Connect AR.
- Divide this auxiliary line in half - this way you will find point P1. Draw a perpendicular 1.2 cm from it to get point P2.
- Now connect A and P through P2 with a smooth line. Set aside НН1 (sleeve width, 19 cm). Connect H1 and R.
Construction of the sleeve
You are awesome! You have all the parts to cut. Materials from the video were used to illustrate the instructions:
Blanket coat from Marit Ilison – Crafts Fair
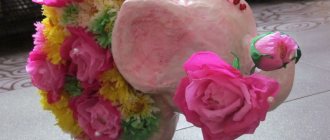
The time of long dark nights and twilight days is approaching. In the Finno-Ugric languages it received the short and succinct name “Kaamos”. This is the name for the period from November to January. I want to spend this time in a warm bed, wrapped in a cozy blanket. Put everything aside and fall into a deep, sweet sleep. Only in the depths of consciousness the signal light still burns: “Get up! Get up!
Similar thoughts apparently occurred to the Estonian designer Marit Ilison when she was preparing a collection of coats. They are sewn from old Soviet blankets. Marita believes that the color and texture of this bedding brings back memories of childhood rainbow dreams. However, rhinestones sewn to the lining do not allow you to sink into a dreamy slumber. They cause a certain inconvenience, like a pea under a princess' feather bed.
www.livemaster.ru
How to sew a coat with your own hands for a beginner? Master class + 12 step-by-step photos
So you have your pattern, what next? Decate the fabric, i.e. steam it and let it dry. The fabric can shrink up to 10%, but if you don’t decant the fabric, the finished coat will shrink 1-2 sizes.
Do not rush to immediately transfer the pattern to the main fabric, especially if you are working with expensive material (cashmere or fur).
First, cut out the coat on the pattern fabric. This will become a “test run” with which to evaluate the selected model.
The dummy fabric should be approximately the same density as the main one. Sketch out the details and try on a “test” coat. Evaluate the cut, style, sleeve length, and most importantly, width. Don't forget that a coat is often worn over a warm, thick sweater, so try it on in appropriate clothing.
If all is well, feel free to transfer the pattern to the main fabric. Don't forget to leave 1.5-2 centimeters for allowances. Cut out the parts and start assembling the product:
1. Duplicate the coat. Use hard dublerin, it holds its shape well. The shelf can not be duplicated entirely, but only in the shoulder area, armhole, pocket entry point and along the bottom. Same thing on the back. On the sleeves the okat is duplicated (the junction with the shoulder).
2. Take two back pieces, fold them with the right side of the fabric facing each other, pin them together with safety pins and machine stitch them. Press the resulting seam to one side.
3. Place the shelf pieces on the back , pin them along the shoulder seam and machine stitch them.
4. Press the remaining seam allowances to one side. Since the shoulder seam is not straight, but rounded, use a towel roller (place it under the seam) or a special sewing block for ironing.
5. Place the sleeve in the armhole, pin it, and stitch the seam. Repeat the same with the second sleeve. Press the seam to the sleeve side. Don’t forget to sew in a “bridge” of lining fabric, with which you will then connect the coat with the lining.
6. Fold the sleeve in half, fold the back and the front part, aligning them at the side seam. Sew the product along the sleeve and side seam.
7. Repeat all steps for the lining.
8. Stitch the neckline and hem at the side seams. Don't forget to duplicate the parts first!
9. Connect the lining and the lining. To do this, align them along the shoulder seam, and then along the entire length. The seams are pressed to the lining side.
10. Lay out the coat and lining, aligning the edge and hem. Pin them together and stitch them together. After this, connect the product along the neck.
11. The final stage is processing the bottom. Match the side seams of the coat and the lining, stitch the product along the bottom.
12. Cut out loops or install buttons on the finished coat .
To illustrate the instructions, we used materials from this video .
It is difficult to describe all the intricacies of sewing a coat. The nuances of the work depend on the style, fabric, presence of a collar, and pockets. It is better to sew the first product under the supervision of a master.
Shorten the coat
Wear your coat with the clothes you normally wear underneath and have someone help you draw a line that you can use to trim off any excess length. Your assistant can make the first chalk mark on the front of the coat.
Gradually turn to one side, and your assistant, with a long ruler in his hands, will make chalk marks directly along the front of the coat, remaining in place. The ruler should touch the floor, marks are made at the same distance from the floor. Connect the marks with a solid line, leaving a hem allowance of 4-5 cm.
Trim off excess fabric.
The hem of any coat that is not new is uneven, as the back of the product stretches over time due to wet weather. Since the fabric of the coat itself is quite heavy, depending on the characteristics of the figure, the back or shelves are more extended.
Therefore, it is impossible to shorten a coat well, focusing on the factory hem.
How to properly treat a coat?
We have good news! There is no need to process seams. The processing creates additional thickness, which is of no use in outerwear. The seams are covered with lining.
The exception is summer models without lining, then the seams are closed with a roll in the color of the main fabric.
Rulik is a strip of fabric cut from lining material on the bias.
Congratulations! If you did everything in accordance with the recommendations of our experts, then your craving for stylish clothes is unquenchable. And perhaps you have a coat ready. Or you realized that learning how to sew outerwear right away was not the best idea.
Now all roads are open to you: for example, you can take the Best cutting and sewing courses in Moscow and St. Petersburg .
Rehc costs about 15,000 rubles , it covers the basics of design and modeling, the key stages of sewing and reveals the secrets of wet-heat treatment. At the end of the day, the student receives skills, a beautiful self-sewn item, and a certificate.
If you don’t want to give up and aren’t looking for easy ways, take a mini-course on coat sewing. Such courses cost from 1,500 to 7,000 rubles . All stages of the work are controlled by the teacher, so you won’t be able to make a mistake or spoil the fabric. Training takes place in an equipped room, but materials (fabrics, duplerin, threads, accessories) will have to be purchased additionally.
Which coat do you think is ideal for you? Share your ideas in the comments! And if you’ve already sewed something new for yourself, tell us what difficulties you had to face - your example will motivate beginners!
Don’t forget to share our articles on social networks: this is how we understand what topics are interesting and relevant to you.
This training may be right for you:
- Best Online Cutting and Sewing Courses from 1,100 Rubles
- 10 Best Cutting and Sewing Courses in Moscow
- Best Cutting and Sewing Courses in St. Petersburg
- 10 Best Lingerie Sewing Courses in St. Petersburg from 1,500 rubles
How to Sew a Loose Lining
The method is that a fully sewn lining is attached locally - in one or two places, and it hangs freely without distorting the shape of the product. On a skirt, such a lining is sewn to the belt, on coats or jackets - to the hem of the collar and with a few stitches by hand to the hems.
- Sew a skirt without a belt. Cut the lining exactly according to the skirt pattern. Sew darts on the lining. Sew all the seams of the lining and press them flat. Press the seam allowance to the wrong side of the zipper opening.
- Place the skirt and lining, wrong sides together, so that the seams and darts match. Pin the garment and lining across the waistline and stitch above the seam line. Pin the lining along the zipper cut line.
- Make sure the zipper opens and closes freely without catching the lining fabric. Work the skirt and lining as if they were one piece, sew and finish the waistband. Sew the lining and zipper tape together, making sure the stitches are not visible from the right side.
- Using a machine, sew the hem on the skirt, then on the lining, the hem of which should be the same width as the skirt, or slightly narrower. The total length of the lining should be 1.5 cm shorter than the product. Press 1 cm of the bottom edge of the lining onto the wrong side, pin or baste and stitch.