A cosmetic bag is as important an accessory in the life of every representative of the fair sex as a bag. But some women are content with products from the same type and boring factory goods, while others create them for themselves. The solution is quite reasonable - making a cosmetic bag with your own hands is very simple: you will need to choose a suitable model, prepare materials and stock up on inspiration. With basic knitting or sewing skills, in just a few hours you can get a cute, and most importantly, exclusive accessory.
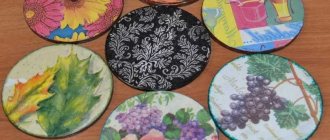
Fabric cosmetic bag
If there are scraps of fabric left from some voluminous work, a thrifty housewife, and besides, a needlewoman will never throw them away. Depending on the type of fabric, the remains can go to the outer part (thick, decorative) or to the lining (smooth, wear-resistant).
You can sew a cosmetic bag with your own hands, using simple patterns, and having basic sewing skills, in a couple of hours or in one free evening. As a result, an original, practical product will be born, and you will enjoy the creative process and the achieved result.
A fabric cosmetic bag can create a complete image and complement a suit, style, appearance, match a handbag or even the interior of a room or workplace. For every occasion in life, you can afford a new exclusive model for mere pennies.
Travel cosmetic bag organizer
If you are going on a trip and want all your things to remain in their places even while traveling, you have no other option but to make a travel cosmetic bag organizer with your own hands. A convenient and practical thing will serve you well more than once.
The main difference between the travel organizer is the abundance of functional pockets. It may have zippers and push-button latches.
It is convenient when there are transparent compartments where you can see everything that is in them. A good cosmetic bag is compact, it folds to the desired size and does not take up much space in your suitcase.
Knitted cosmetic bag
For those who know how to knit, making a handmade cosmetic bag will not be difficult. Those who are just mastering the technique of crocheting or knitting should also pay attention to this kind of product. A small thing can be made very quickly. It is very important to quickly and immediately see the result of your labors at the beginning of learning needlework.
Using such a simple example, you can practice the technique of knitting a cosmetic bag with your own hands, improve your hand and usefully master elementary techniques and new patterns. Knitting a cute little organizer for yourself or as a gift is a great way to organize leisure time for a girl who likes to do handicrafts.
The product is knitted in a separate fabric and then stitched. Or it may consist of several simple rectangular shapes or a couple of circles. The size of the cosmetic bag is influenced by the knitting density, the size of the knitting needles, and the characteristics of the yarn.
You can knit a beautiful product from leftover yarn and decorate it with knitted elements. Typically, such cosmetic bags need a lining, since the pattern and weave of the threads are loose. An openwork product with a contrasting lining can even become a decoration for an evening dress or a bride’s wedding dress.
Ideas for inspiration
Fabric is often the source of sewing inspiration. Review the pieces of fabric you have at home before buying fabric for making a cosmetic bag in the store. Velor, denim, leather and its substitute, and other materials are suitable for sewing.
Products made from scraps of fabric look interesting. To make the finished item look neat, choose fabric of the same thickness, but the texture and color can be completely different. The flaps must first be sewn into one piece, and only then start cutting out the future cosmetic bag.
A finished cosmetics bag can and should be decorated. You can buy adhesive stickers, use beads, sequins, and glitter based on adhesive. Embroidery lovers can decorate their cosmetic bag using this technique.
Felt cosmetic bag
Don't rush to throw away your old, out-of-fashion felt coat. With the help, imagination, skillful hands, and if you have free time, you can make a lot of useful things around the house from it. Including a cosmetic bag that can be sewn even without a sewing machine.
Felt products are now in trend. They are based on non-flowing material, the edges of which do not need to be overcast. Decorative hand stitches on felt products look very authentic. Felt is often used in children's art as a comfortable, tactilely pleasant, pliable material.
Photos and patterns of felt cosmetic bags can be found in abundance on the Internet. They will serve as a source of ideas and inspiration for you.
Note!
- DIY satin ribbon bows: photos of original design ideas, step-by-step DIY master class
- DIY hair bands - ideas for decorating homemade rubber bands + step-by-step instructions for making them yourself
- DIY shadow theater: step by step how to do it at home! 175 real photos
Volumetric cosmetic bag
Those who use a large assortment of skin care products and a variety of decorative cosmetics will fully appreciate the advantages of a large, voluminous cosmetic bag.
In shape and appearance, it resembles a small suitcase or chest, made of thick fabric, tarpaulin. But this does not prevent it from being beautifully designed. When sewing, it is better to use thick lining material, fabric with an adhesive layer, waterproof film or foam padding so that the cosmetic bag keeps its shape.
A voluminous cosmetic bag with your own hands does not require a complex pattern. All simple calculations can be done based on the master classes, and the video instructions describe the sewing process in detail.
Note!
DIY bracelets | Selection of the best models and master class on making beautiful braceletsDIY bird feeder - interesting ideas on how to make it quickly and easily from scrap materials
- Do-it-yourself cold porcelain: the best options for porcelain products, step-by-step instructions and recipes for making it yourself (photo + video)
Such a cosmetic bag can serve as a belt bag, a first aid kit, and a travel bag for baby accessories.
How to sew a cosmetic bag from felt and decorate it with your own hands
We invite everyone who loves beauty on their face and order in their purse to a master class on making a felt cosmetic bag with your own hands.
The sewing technique is so simple that it is suitable even for beginner needlewomen and young girls. You can use any colors and sizes as a basis; there is no complicated pattern here. Don’t be limited with jewelry either - focus on your skills, your own style, age and what’s in your box. Happy crafting!
- Sewing materials
- Step-by-step sewing and decorating techniques
Sewing materials
To sew a designer accessory you will need the following accessories and materials:
- felt in bright colors (purple, green, lilac, yellow);
- cotton fabric for lining;
- zipper (not hidden) 18-20 cm long;
- pencil, ruler;
- scissors;
- tailor's chalk;
- sewing needle;
- sewing threads to match the felt sheets;
- finishing elements (buttons, pendants).
Small felt pieces left over, for example, from sewing a yellow dog, a headphone holder or a children's handbag are ideal for decoration.
To sew a felt cosmetic bag with your own hands, you do not need a sewing machine. But if you wish, you can grind the lining material on a machine.
Step-by-step sewing and decorating techniques
The size of the rectangular cosmetic bag made in this master class: 10*20 cm .
From the felt you chose for the base of the cosmetic bag, cut out two identical rectangles measuring 10 cm by 20 cm .
From cotton material, cut out a square measuring 19 cm by 19 cm . Fold it in half. When folded, you will get a rectangle slightly smaller than the main parts.
Place the right side of the lining fabric on the wrong side of the zipper ( do not mix it up ) and align the cuts. Pin along the edge to prevent movement.
Sew the lining to the fastener at a distance of 0.5 cm from the edge. Use a back stitch with a needle as in the photo. Return the needle to the beginning of the previous stitch, then go the length of the next one.
As you can see in the photo, this seam imitates machine stitching. It is strong enough that it can be used to replace a machine one.
Now fold the lining and pin the second cut to the other side of the zipper.
Sew the lining on the other side.
Sew the side sections of the lining for the felt cosmetic bag using the same seam.
Open the “snake”, the front side should be inside. Set aside.
Cut out abstract figures from felt intended for decoration. You can make recognizable objects - lipstick, powder puff, bright lips, eyes. You can make a three-dimensional flower using our other master class.
Arrange the decor on the felt cosmetic bag in any order.
Sequentially sew all the elements with a dotted seam by hand.
Use threads of different shades, matching the finishing elements. When making stitches, pierce the felt all the way through. The wrong side will be closed, so no knots or stitches will be visible.
After this, decorate the front side of the felt cosmetic bag with beautiful pendants and buttons.
Place the lining part on top of the felt. Pin the top edge to the zipper so that it overlaps the stitching line for the lining.
Make a seam connecting the front piece and the clasp, placing it close to the teeth of the clasp. At the same time, it will serve as a finishing element.
Sew the pieces on the other side in the same way. The photo shows a view of the cosmetic bag from the inside.
Tuck the ends of the zipper in or cut them off. Then connect the corners and tack at the beginning and end of the fastener.
To do this, make several stitches in one place, bending the “snake” braid inward. Make fastenings on both sides of the felt cosmetic bag.
After this, align the edges of the felt on all three sides and sew them together.
Straighten the seams with your fingers, aligning the sides of the product.
This is what the finished cosmetic bag looks like inside.
It is convenient to carry cosmetics with you, keeping your purse organized.
See what else you can make with affordable and easy-to-use felt sheets. These are toys, flowers, crafts for the home and much more.
Zhanna Galaktionova shared the secrets of how to make an original cosmetic bag from felt with her own hands with readers of the “Women’s Hobbies” website. Photo by the author.
Jeans cosmetic bag
The most ordinary things can serve as inspiration for creating unique art pieces. How many interesting and useful things can be made from old, worn-out denim pants and jackets.
Denim has not gone out of fashion for over a hundred years. The universal fabric has long become a style classic. Decorative details - buttons, textured seams, pockets, flaps, snakes on jeans, if cut and sewn wisely and creatively, will serve as decoration for an author's handmade accessory in the form of a functional handbag for cosmetics and all sorts of necessary women's items.
New accessories from old things
Recycling is a popular and beneficial phenomenon. From old clothes you can get a new thing a couple of sizes smaller, make a rug, sew an eyeglass case, a wallet or a cosmetic bag.
Leather cosmetic bag
An old leather raincoat, which was all the rage in the 90s and happily hung in the back closet until now, deserves a better fate than just being thrown out. It can make a very nice cosmetics bag . And although leather is a finicky material to work with, there are several recommendations for achieving the best results in sewing:
- Unlike fabrics, leather should not be pinned or pinned, as the needle holes will not disappear.
- All patterns and patterns are fixed exclusively with adhesive tape (not to be confused with tape!).
- It is highly advisable to use a special needle and foot for leather.
The pattern for a spacious basic cosmetic bag is very simple; you can draw it on a large sheet of paper. First, draw a square 30 by 20 cm. On the long side, 11 cm are retreated from each edge. Thus, in the center you will get a rectangle 8 cm wide. From this rectangle you need to round off the outer edges. The pattern is ready. To sew a cosmetic bag using it, you will also need:
- A piece of leather 32 by 22 cm and a similar piece of plain fabric;
- Sewing machine;
- Scissors, thread, chalk;
- Lightning;
- Adhesive tape;
- Beads, beads and sequins, silver or gold gel pen.
Material selection
According to the laws of the genre, any, the most unexpected fabrics and non-woven materials are suitable for making small original bags with small items. Remade from old things, cosmetic bags remind you of moments dear to your heart.
Even completely waste materials, such as empty plastic bottles or used plastic bags, can become the basis for interesting works in skillful creative hands. Their cost will tend to zero, and their practical benefits will be immeasurable.
Some will only take a couple of hours to make. Others, for example, embroidered or woven from beads, will require many days of painstaking work. But the result of such work will exceed all expectations.
Original models
Some craftsmen show great originality when making cosmetic bags and sometimes use the most unusual things for their work. Material for needlework can be found at home by choosing suitable clothes, sewing, for example, a cosmetic bag from old jeans with your own hands. Such a thrifty approach to old things will give them new life. And the resulting denim cosmetic bag will become a useful accessory.
Even more unexpected solutions are products made from plastic bottles or plastic bags. They require a minimum of time to create, the cost of such models is extremely low, and they are easy to care for. But how easy these cosmetic bags are to use and how durable they are can only be determined experimentally.
Needlewomen who are distinguished by increased perseverance and have a lot of free time can create an accessory from beads - one-color, with geometric shapes, flowers, and fantasy ornaments on the surface. DIY cosmetic bags are a fertile and inspiring field for realizing your wildest ideas and creative potential.
Constructing a pattern
The shape, size and volume of the future product depends on which pattern is chosen. To create a pattern you will need:
- thick paper or cardboard;
- pencil pen;
- ruler or square;
- scissors.
On paper you will need to draw out the details of the future cosmetic bag. Pay careful attention to the sizes. Different parts must fit with each other - fit in length and width. This is important, because once the fabric is cut according to a poor-quality pattern, nothing can be changed.
Once the pattern is drawn, it is cut and placed on the fabric for cutting.
Basic details of a cosmetic bag
The simplest model of a cosmetic bag is cut from a single piece of fabric. To do this, you need to take a rectangle of fabric, fold it in half, stitch the sides and adjust the fastener with a snake, button or in the form of a patch flap. Such a primitive pocket will cope with its functions, but will not be very convenient.
Much more functional than cosmetic bags, which are given volume by the side parts. They consist of at least three parts:
- Two frontal ones, which can be rectangular, square, round and semicircular.
- Sidewalls (one or more) to create volume of the product.
The fastener is arranged based on the model and functional features of the product. Most often, a zipper or push-button fastener is used. A frame lock on a cosmetic bag looks original, but its use requires sufficient skill experience.
To sew a simple cosmetic bag, you can do:
- 2 main front parts - rectangles with a side of 10x15 cm.
- 1 part of the bottom is a rectangle 15x6 cm.
- 2 parts of the sidewalls are isosceles triangles with sides 10 cm and base 6 cm.
The result will be a cosmetic bag similar in shape to a pencil case for stationery or an eyeglass case.
Uncover
We offer a detailed master class on cutting out a cosmetic bag.
- The patterns are laid out on a clean, ironed fabric on the wrong side. If the patterns are asymmetrical, then they are placed in a mirror manner.
- The details are outlined with tailor's chalk, a thin piece of soap, and a special marker for marking the fabric. As a last resort, you can use a simple pencil.
- The main thing is that the markings are easily removed without a trace when washing the finished product.
- If you are cutting leather or other non-woven material that may have holes, you can secure the pattern to the fabric using safety pins.
- Don't forget to allow seam allowances. For loose and slippery fabrics (organza, silk, satin, etc.) they should be larger.
- If you are cutting pile material or fabric with a pronounced pattern, watch the direction of the pile and the pattern.
Sewing
Before sewing a cosmetic bag with your own hands or making a pattern, watch one, or better yet, several master classes to get a general idea of the technology and sewing of a simple product - a cosmetic bag. This way you can easily apply the acquired knowledge to your sewing conditions.
We will give only a few working subtleties, knowing which, you will quickly and correctly cope with the task.
- Before stitching the parts together, they need to be reinforced with non-woven fabric, dublerin, batting, thick cotton and similar cushioning materials.
- The parts of the product are folded with the right sides inward and sewn in sequence and in accordance with the specific instructions for sewing a particular model.
- If you use natural fabric (cotton, satin, linen) that is not very loose, leave seam allowances of 2-3 mm. If the fabric is slippery, smooth and very loose (tulle, satin, silk, organza), the margins from the edge should be larger - 5-7 mm.
- Non-flowing materials, such as felt, suede, leather, can be sewn on the hands with a decorative seam.
- External seams on a machine - on the front side of the product can be done with decorative stitching.
- Do not forget to iron or steam all seams and the finished product.
Sewing process
The process of creating a cosmetic bag usually does not take much time. To ensure that the effort and material are not wasted, it is recommended to follow the instructions and be extremely careful. So, DIY cosmetic bag patterns master class:
Let's look at the process of creating a pattern for a cosmetic bag with a zipper:
- You need to make a template using a piece of paper and a pencil. It is recommended to take a double checkered sheet from a notebook. You need to draw on one side so that after cutting and unfolding you get a symmetrical pattern.
- Then the fabric is taken and the pattern is applied to it. It is necessary to fold the flap in half, attach the template, secure it with pins or needles and cut along the contour.
- Loose fabrics, such as linen, need to be reinforced to prevent fraying. It is most convenient to use cotton material, cut to the size of the pattern, as a reinforcer.
- After this, you need to place 1 layer of fabric for a cosmetic bag, face down, place 2 layers of cotton pieces above it, and place the material for a handbag, face up, above it. 4 layers need to be secured with pins or needles around the perimeter.
- Using a sewing machine, you need to connect the parts together, retreating 3 mm from the edges.
You might be interested in this. We sew a beautiful top with straps using a pattern
Important! It is required to leave a free, unsewn space for the zipper.
- Then the workpiece needs to be straightened and ironed.
- The area for the zipper is edged with trim. You need to act in such a way that the front side of the handbag is located on top. Particular care must be taken in rounded areas. It is recommended to baste the bias tape first, and then finally sew it on using a sewing machine.
- Then the part must be turned out, placing the front side inside. From the bottom fold to the top of the bag, 9 cm is measured and a mark is placed. You can secure it with pins or sweep it away.
- The side seams must be machine stitched, making bartacks at the beginning and end.
- On the side you need to measure 2-3 cm from the bottom and make a mark with a pencil. You can make a mark higher, then the cosmetic bag will become more voluminous.
- The corners will need to be hemmed on both sides by machine.
- After this, the fastener is sewn on. The optimal zipper length is 25cm.
- For decoration, you can use beautiful stitches with finishing threads, beads, beads and other decorations.
This completes the sewing. The finished accessory can be used for its intended purpose. The dimensions of the pattern can be increased and decreased as desired. The same goes for the shape and design of the handbag.
Advice! To increase the swelling of the bag, it is recommended to lay a layer of insulation in size between the lining and the main material.
This cosmetic bag can be a great gift for a girl for any occasion.
Option with zipper
How to sew a zipper correctly
Patterning a cosmetic bag with your own hands is usually done taking into account that the closure will be with a zipper. Now we will tell you how to correctly, without errors, sew a fastener into a finished product.
- The size of the fastener and its length depend on the size of the product and the space for the zipper that is allocated by the model. As a rule, a regular zipper on a fabric base with teeth made of plastic or rigid fishing line is used; metal fasteners are less commonly used.
- Secure the closed zipper to one side of the cosmetic bag with pins or basting.
- Sew by machine.
- Then unfasten the clasp and connect the other side to the fabric.
- Carefully trim the edges of the fastener and tuck it inside the product.
With this method of stitching, the zipper slider does not get under the foot of the sewing machine and does not interfere with sewing.
ATTENTION: If the model includes a lining, the snake is sewn between the front fabric and the lining fabric. There is a possible method where the lining is inserted after, but then it will have to be sewn to the fastener by hand using blind stitches.
How to make it yourself
Sewing a ladies' cosmetic bag yourself is an interesting and not always difficult task. It all depends on the skill and desire of the needlewoman - you can choose either a very simple version of the product, which can be made in half an hour, or a more complex cut that requires patience and certain skills from the needlewoman.
Below are several options for cosmetic bags that you can sew yourself, with a detailed description of the manufacturing process.
Simple bag for cosmetics
This model can be sewn in any size from any fabric you like - it is comfortable, practical and quite easy to sew.
Required tools and materials:
- textile;
- padding polyester;
- lining material;
- zip fastener;
- ruler, pencil (chalk);
- scissors;
- threads, needles, pins;
- sewing machine.
If there is no need for a seal, it is not necessary to use padding polyester; the product can only have one lining.
Sequencing:
- From padding polyester, outer and lining fabric, cut out two rectangular blanks corresponding to the required dimensions of the future product.
- Fold the blanks in three layers: lining with the wrong side up, padding polyester, main fabric with the right side up. Pin the layers together.
- Sew the layers using any stitch (if you do this over the entire area, you will get a quilted cosmetic bag).
- Fold 1 cm and iron one long side on each piece.
- Baste, then sew a zipper to these sides from the inside.
- Sew the bottom. Fold the product so that the seam of the bottom coincides with the zipper.
- Sew the sides.
- Decorate the corners of the cosmetic bag: fold each of the four corners to form an isosceles triangle, stitch along the base of these triangles and sew the tips of the corners to the sides of the product.
- Turn out the finished cosmetic bag.
Depending on the size of this model, it can be used to store cosmetics, jewelry, necessary small items, or as a small handbag if handles are sewn onto it.
Leather
A leather cosmetic bag differs from a fabric one only in some nuances related to the specifics of working with this material.
First, you need a special foot and needle in a sewing machine designed for sewing leather.
Secondly, you cannot use ordinary pins for fastening - they will leave unsightly marks on the finished product; it is better to use soft-coated clothespins or binders.
Working with leather must be done very carefully; it will be impossible to rip the seam and redo it; you will have to take new material and start over.
If you follow all the rules for working with leather, the choice of model depends only on your own imagination and capabilities - from a simple rectangle or oval to a small reticule. Here we offer a version of a leather cylinder cosmetic bag, which is not difficult to sew (for example, from an old leather raincoat or jacket), but it will look almost like a store-bought one.
Tools and materials:
- leather;
- sealing material (non-woven fabric);
- lightning;
- duct tape;
- threads and needles for leather;
- scissors;
- chalk, ruler.
It is better to first make a pattern for a cosmetic bag on paper, and only then transfer it to the skin.
Work order:
- Cut out a rectangle and two round sides from leather. The length of the rectangle is chosen arbitrarily, as desired, and the width should be equal to the circumference of the side part.
- If a loop is desired for ease of use of the future product, it also needs to be cut out.
- In the middle of the rectangle, carefully cut a hole into which the zipper will be sewn. The result should be a narrow rectangle, the corners of which should be rounded.
- Open the zipper approximately 3-4 cm and place it under the cut out rectangle.
- Secure the zipper with adhesive tape to the skin for easy sewing.
- Sew, trying to get as close to the zipper teeth as possible.
- Fold the rectangle in half, wrong side up, and sew a connecting seam parallel to the zipper.
- Attach a loop to the side near the zipper with adhesive tape so that when you turn the product inside out, it will be on the outside.
- Take the non-woven fabric and glue the sides (round blanks). This way the finished product will better retain its shape.
- Sew the side parts into the resulting cylinder (the zipper must be open, otherwise it will be difficult to turn the product inside out).
- Turn the finished cosmetic bag right side out.
If desired, you can sew the lining and carefully sew it by hand into the finished product.
Faux, patent leather, suede or patchwork fabric are also suitable for sewing such a cosmetic bag.
With clasp
A cosmetic bag with a clasp is a great choice for those who love a sleek retro style. The shape of such a product most often depends on the shape of the clasp itself.
The semicircular shape of this part is a little more difficult to sew than the rectangular one, but with some skill it will also not take much time. Below are patterns of cosmetic bags with two types of clasps.
The clasp can be purchased at any store that sells sewing accessories; choosing the right size and desired shape is not difficult.
Necessary materials:
- textile;
- adhesive filler (dublerin or non-woven fabric);
- lining fabric;
- clasp;
- two types of threads (directly for sewing and for sewing on a clasp);
- needles, pins, scissors;
- chalk or pencil;
- sewing machine.
If you take felt or any other dense material that holds its shape well as the main material, then you won’t need any filler at all.
Sequencing:
- Transfer the pattern to the fabric. Cut with seam allowances. You should get two main parts and two side parts. In the same way (but without allowances) cut out the parts from the lining material and from the filler.
- Glue the filling to the wrong side of the fabric.
- Pin or sweep away one side and one main part; it is better to start from the bottom to avoid deformation of the product. Sew.
- Do the same with the other two parts. Combine and sew into one product.
- The lining parts are sewn together in the same way.
- Trim excess fabric along all seams and make small, neat cuts in the right places.
- Press seams.
- Place the lining into the cosmetic bag with right sides facing each other, and pin along the top, making sure that the side seams match.
- Sew along the top of the product, leaving one main side unstitched (for turning inside out).
- Hand sew up the remaining unstitched hole.
- Find and mark the middle of the central sides of the product, align with the middle of the clasp.
- Sew the clasp, starting from the found middle (for secure fastening, it is recommended to use strong threads or make a double stitch).
In order to get an elegant handbag, it is enough to sew a strap or chain to the finished product.
Cosmetic bag "Elephant"
A young girl will surely like this cosmetic bag very much. It is better to sew it from thick fabric, such as felt, leather or suede.
If a different fabric is selected for manufacturing, then it is necessary to use additional sealing material (non-woven fabric or doublerin).
To work you will need:
- textile;
- lightning;
- two beads (for eyes);
- paper, pencil;
- chalk;
- scissors;
- threads, needles, pins;
- sewing machine.
The size of the cosmetic bag can be chosen as desired, but small elephants still look better.
Procedure:
- Transfer the pattern to the fabric and cut it out.
- Make a cutout for a zipper along the back of the elephant and trim it. If felt or leather is used, no facing is required.
- Sew in a zipper.
- Make folds in the middle of the sides of the elephant and secure with pins.
- Fold the product in half and sew the trunk, sides, folds. Leave the bottom unstitched.
- Sew the inner parts to the ears, sew up the remaining holes.
- Sew an oval to the base of the elephant.
- Turn it inside out and sew on beady eyes.
You should end up with an elephant like this.
Other options for sewing elephant cosmetic bags are also possible.
Handbag “Cat” in patchwork style
The patchwork style, or patchwork sewing, is probably best described in three words: imagination, patience, originality. Compositions made from pieces of fabric, different in color, pattern, texture, will inevitably make any product exclusive and individual.
To make a “Cat” handbag in patchwork style you will need:
- fabric scraps;
- padding polyester;
- edging strip;
- beads or beads (for eyes);
- lightning;
- threads, needles, pins;
- scissors, pencil, chalk;
- sewing machine.
The final appearance of the product depends entirely on the imagination of the needlewoman - for example, if instead of several cats (as shown in the figure) you make one large one, you will get a completely different handbag.
Sequence of work:
- Transfer the pattern to the fabric and cut out the “cat” parts separately. These scraps (seven pieces) should be collected and sewn first.
- Assemble the remaining parts of the bag and combine them with the “cats”.
- Using a pencil and ruler, draw lines for subsequent quilting of the product.
- Assemble layers: lining, padding polyester, fabric. Pin and baste along the edge.
- Quilt the resulting “sandwich”.
- Decorate the edging of the top of the bag with bias tape or a strip of fabric, leaving a 3 cm “tail” at the beginning.
- From the wrong side, sew the sides of the handbag.
- Decorate the bottom: fold the corners, stitch.
- Turn the cosmetic bag inside out and sew in a zipper.
- Sew eyes on cats.
If desired, the handbag can be decorated with ribbons or lace.
Round
Cosmetic bags of this shape are most often made in small sizes, since to obtain a beautiful and neat product, round metal, plastic or other blanks are used when sewing. Some needlewomen use simple lids for screwing on jars for this purpose.
Tools and materials:
- textile;
- lining material;
- padding polyester;
- lightning;
- a small piece of ribbon or braid;
- glue;
- threads, needles, scissors.
In this case, having a sewing machine in the house is completely unnecessary - most of the seams are done by hand using blind stitches.
Sequencing:
- Cut out two round pieces from padding polyester. Their size should be slightly larger than the selected solid workpiece.
- Glue the padding polyester onto the blanks.
- From the main fabric, cut out circles that are slightly larger than the size of the padding polyester circles.
- Walk along the resulting fabric circle with small stitches, pull the thread and fasten.
- Sew a piece of fabric to the beginning of the zipper.
- Using hidden stitches, sew the zipper to the round bases.
- Make a loop from ribbon or braid and place it between the sewn piece of fabric and the zipper itself.
- Cut out two circles from the lining material (with an allowance for the fold).
- Carefully folding the edges, sew the lining inside the finished cosmetic bag.
You can decorate such a product at your own discretion - appliqués, embroidery, beads, etc. are suitable.
Decoration and decor
Woven material does not at all limit you in choosing a style, model, pattern, or size of the future product. Accessories that match the fabric:
- beads;
- beads;
- sequins;
- embroidery;
- rhinestones;
- buttons;
- ribbons;
- lace;
- rivets;
- metal fittings;
- application and much more.
It is the decorations that give the cosmetic bag a unique style and charm, indicating its uniqueness and belonging to its owner.
Options for decorating cosmetic bags
You can decorate the front side of the fabric even if you don’t know how to embroider and you don’t have deposits of beads, beads, sequins and other little things at your disposal. Simple machine embroidery will turn a boring plain background into an original abstract painting. To do this, you just need to draw lines of different lengths on the fabric with chalk and stitch them several times with threads of different colors.
A fashionable print can be applied to fabric without even having a special stencil and paints at your disposal. You will need a piece of thick lace with a large pattern, a tassel, whiteness and a respirator mask. The lace is placed on the fabric and secured with pins. Using a brush, apply Whiteness over the entire pattern. You can also work with a sponge, but then the drawing will turn out a little blurry. The bleach will etch the paint, leaving a white pattern. It is best to work in a ventilated area and wear a respirator mask.
A tassel-keychain that clings to the zipper dog will decorate and refresh any handbag. It's very easy to do. You will need several skeins of floss in at least three different colors. Remove the packaging from one skein and, using the other two colors, make an even winding in the center. Then this entire thread winding is folded in half and secured with another winding. The lower ends are beautifully cut, and a ring is inserted into the upper loop, through which the keychain clings to the bag.
Originally posted 2018-03-03 07:51:40.