dolio.ru » Handmade » Jewelry » How to make a phone case from beads and other scrap materials?
The abundance of smartphones and other types of mobile phones has led to the fact that today they sell a lot of additional accessories with a similar design and design. However, not wanting to be like everyone else, intricate needlewomen came up with a lot of methods on how to decorate them and make them truly exclusive things. Because of this, we decided to share with our readers a few ideas on how to make a phone case from unusual materials, as well as how to decorate it with some elements.
Beaded phone case
One of the most popular ideas for creating a protective case for a mobile phone is weaving the latter from beads. Thanks to a reasonable selection of materials, as well as careful attention, such an accessory turns out to be very presentable in appearance and completely exclusive in terms of design.
Necessary materials:
- bead packaging,
- thread "Iris"
- Crochet hook.
Progress:
- First, measure the width and thickness of the phone. Multiply the received data by two and cast on a series of air loops, the length of which is equal to half the final value. (For example, if the number 13 was obtained when multiplying the thickness by the width, the length of the first row will be equal to 6.5 cm). Tie it on both sides with single crochets. It is recommended to make small additions on the sides in the form of 3 tbsp. b/n., knitted in one loop. This should create a shallow bottom for the cover. At the end, fasten the thread.
- Now you need to collect as many beads as possible onto the weaving thread and begin to directly create the case. To do this, simply extend the knitting by adding beads to each loop present.
- Continue weaving until the product reaches the required height. At the end, carefully fasten the thread and, if necessary, decorate the case with a keychain.
In fact, there are a huge number of options for knitting beaded covers. And if you want to make any pattern, just find the desired weaving pattern and follow all the recommendations indicated in it. For example, they might look like this:
Step-by-step description of beading a mobile phone case
For this master class you will need the following set of materials that you will use throughout the entire process of making a case for a mobile phone:
- beading needle with thread;
- yellow, green and purple beads;
- scissors.
Pick up one yellow bead and then secure it. Then string another thirty-nine pieces. If you see that the thread is starting to end, then immediately tie the next one to it. But just make sure that the knot does not get caught in the stringed beads. As a result, you should have twenty-six rows.
Then comes the turn of purple and green beads, from which another sixty-eight stripes should be woven. Finish the fabric with two rows of yellow. Count fourteen pieces of glass from the end, and insert a thread into the fifteenth to make it as shown in the photo presented.
Upon completion of weaving the phone case, it is necessary to connect the first and second manufactured walls on both sides. In the photo you can see how the accessory should turn out.
How to make a phone case with dried leaves
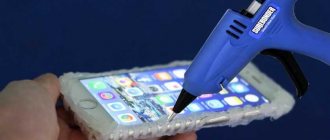
Another popular solution among women is to decorate a mobile case with beautiful stones, rhinestones and even dried leaves. Unlike beads, this does not require any special skills, and in some cases it can be done much faster.
Materials:
- plastic case,
- beads,
- colorless glue,
- cotton swab,
- acetone,
- scissors,
- flat wooden stick (you can take an ice cream stick),
- sealing epoxy resin,
- sheet of parchment paper.
Progress:
- Having dried petals of different shades and types on hand, fold them into the desired pattern, for example, on paper. Make sure that its thickness does not exceed 1.5 cm, otherwise it will be difficult to coat with resin. Having selected the required composition, take a photograph of it, which will help you navigate when reproducing the pattern.
- Clean the plastic case suitable for the selected mobile phone model from dirt and dry thoroughly.
- Lubricate the largest of all the leaves present with a small amount of glue and attach it to the place of the cover where it should be located. After this, repeat all the above steps with other leaves. Having completed the creation of the composition, add sparkles to the latter (if desired).
Helpful advice: when gluing certain parts of plants, it is worth remembering that light leaves when in contact with glue become even paler than before, and therefore the latter should be hidden under brighter petals.
How to embroider?
If you do not have much experience in embroidery, it is better to use a ready-made pattern printed on canvas. Such blanks, along with the necessary materials, are sold in specialized stores.
Embroidery
If you plan to embroider your own drawing, and not a ready-made pattern, you need to think through the details in advance and select the necessary materials. You can use both multi-colored beads and beads of the same color. For example, an embroidered evening bag or clutch will look very elegant if decorated with plain or transparent beads.
Beautiful bead patterns
Compositions made from beads and other decorative ornaments of different sizes also look interesting. In this case, it is better to place the largest elements in the center of the embroidery, and fill the empty spaces with beads and smaller beads. Do not try to embroider a bag with beads of all possible colors at once - the image looks more noble if it contains 3-4 color accents.
More often, an arched seam or a stitched seam is used for embroidery. For an arched seam, the thread is secured, several beads are collected on it and pulled through the appropriate number of warp cells. Then you need to go back one square, bring the thread through the last bead and string the next beads. Thus, only one bead is sewn to the base, and the rest are attached less tightly.
Butterfly diagram
When using the "stitch stitch" technique, beads are strung on a thread, which is then sewn to the base, securing with small stitches between the beads. This method allows you to embroider a bag faster than using an arched stitch.
Helpful Tips:
- The color of the thread must match the base: for embroidery on a light canvas, white or beige threads are used, and on a dark canvas, black threads are used.
- The length of the thread should be several times greater than the width of the embroidery row.
- It is more convenient to store beads not in bags, but in special transparent organizers or small jars.
- For beginners, a simple half-cross embroidery technique is suitable. The first row is sewn from left to right, the second - from right to left, and so on. This way the beads will lie evenly and tightly.
Handbag
The best ideas for decorating mobile phone cases
If the two MKs described above did not seem enough to you or they did not impress you at all, we invite you to familiarize yourself with a few more ideas for decorating cases for mobile phones.
For example, the latter can simply be painted with felt-tip pens:
Or complement them with these bright pebbles:
Give them a romantic look with homemade flowers:
Perform decoupage:
Knit from any threads you like:
As you can see, you can decorate your mobile case in any way you like. The main thing is to decide what style it should have and choose a pattern or design option for the accessory in accordance with this.
Share
Case weaving lesson
You will need:
- 70 grams of scarlet beads, black and white will also come in handy;
- heart-shaped bead;
- thread and needle.
The cover is made according to the pattern given in the article, using the “brick stitch” technique. The pattern is created on a grid in which the beads are arranged in a checkerboard pattern. The product consists of two sections: front and back with a valve.
This method of weaving will allow you to create a product with better fit over the entire shape of the phone. Weave a valve of various types in length and width, because this is not only a functional accessory, but also a decoration.
While weaving the first strip, you have the opportunity to adjust the size, that is, increase or decrease the number of beads in the row. To make it easier to lift the part while weaving the pattern, leave the side rows without a pattern.
When the size of the phone at the top increases, then to make an extension, use beads of a large scale in height. Based on the proposed pattern, weave rows one after another.
When you finish weaving, sew the product on the sides, as in picture No. 10. All that remains is to attach the bead and create a loop for fastening.
The original phone case is ready.
How does the camera under the phone screen work?
In case you missed it, the smartphone received an under-screen camera, which we have been talking about for several years. That is, if you look at the phone the camera is not visible. It becomes noticeable only if you turn it on. At this moment, a “black hole” appears on the screen and pictures can be taken.
This is roughly what the under-screen camera looks like when zoomed in.
This is made possible by using lower pixel densities in this area. If you look closely, you can see the grate that covers this place. When there is a dark background under the place where the camera is located, the change in the pixel structure is not visible at all. On a white background, if you look closely, it is there. But you really have to look for this place specifically. If you just use your phone, you don’t even think that there is anything in this place.
This design was first presented at the beginning of 2022, but it is still unusual.
What is a foldable phone for?
In our Telegram chat you can often come across a question about what the internal screen is for and why it is most convenient to use. I already said above that it is very convenient to chat on it. A lot of text fits on the screen and there is no feeling of constriction that I now get when launching Telegram on a regular smartphone.
It is also convenient to perform all tablet tasks. For example, work with tables, use the multitasking function and even print. True, you need to get used to a keyboard divided into two parts or to a regular one, but shifted for the right or left hand. Once you get the hang of it, it becomes quite convenient to use.
I'm not the most avid gamer and don't use my phone very often, but sometimes I still want to play. I was afraid that games would not work well on such an unusual screen, but it turned out that there were no problems with this. All large games that have not been abandoned by their creators work perfectly, occupying this entire excellent frameless screen. Sometimes I even slightly bent it. For example, in racing games like Asphalt 9, this was a great way to add extra dimension to the game.
Serious games expand to full screen.
But what almost everyone uses does not work very well on this phone. I'm talking about watching videos. When you launch it on this screen, it launches in a narrow bar. The quality is not lost, and the picture itself is large, but the black bars that are inevitable when playing a 16:9 picture on an almost square screen are simply terrible. It’s even a little offensive that you have such a big phone, and watching videos is inconvenient.
There are several other clearly far-fetched scenarios for using this phone. For example, in camera mode, you can use half the screen as a viewfinder and the other half to view footage. If you press and hold one of the photos, you can delete or send it. So-so application, but it exists.
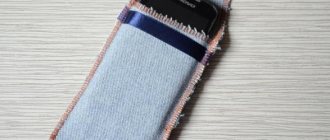
Special elastic band for the hand
The essence of the sports case is, first of all, that the athlete’s hands are free. It is most convenient to mount your smartphone on your biceps. This method is often used by cyclists.
To do this you will need to make a cutter with Velcro. We measure the required length of the elastic band. We sew Velcro on one side. We create a small loop at one end of the Velcro and sew it.
A wire is inserted into the created eye. Next, a second tube is cut out and the remaining end of the wire is also inserted into it. This creates an improvised buckle that will allow you to tighten the elastic in any part of your hand.


