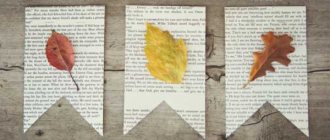
DIY paper bags for flowers, seeds and sweets
Sometimes it’s quite difficult to decide how to make a paper bag. There are several simple but diverse manufacturing schemes that have their own characteristics, advantages and disadvantages. The simplest option in terms of manufacturing is a regular bag for seeds. But there are more interesting solutions that can be implemented without much effort.
Sonobe Ball
We suggest making a magic ball out of paper kusudama according to the sonobe pattern, which is suitable for needlewomen without experience. Children can be involved in the proposed work. Let's prepare for work:
- square leaves, you need about thirty pieces;
- ribbon;
- PVA.
This kusudama is made according to the scheme described below:
- Let's start manufacturing modules. Take a square piece of paper and bend it. Unfold and smooth. We press both edges to the previously obtained line.
- We bend the top corner, it should come into contact with the fold. We do this with a different angle. We fold the resulting triangles again.
- We press the sides towards the center. Create auxiliary folds. We repeat the steps from the other end.
- We open one of the sides and put a corner into it. It turns out to be a rhombus. Fold the figure in half.
- We take a triangle from the workpiece and apply it to the center. We repeat the work with the opposite edge. All actions must be performed with the remaining squares for the future ball.
- We carry out the assembly. We insert the corner from one module into the pocket of the other. We take one more part and add it to the first two. It looks like a pyramid. We connect all other elements according to an identical principle. We fix everything with PVA glue.
The product is ready. Attach a ribbon to it and hang it in the chosen place.
How to make a paper bag
There are several schemes for how to make a paper bag - it all depends on the desired shape and features of use. Mostly cone-shaped bags are used, but there are also more universal types of design that can replace a bowl or glass.
There are other principles for the formation of “containers”, which differ in their appearance, strength and functionality.
Required materials and tools
You can make a paper bag using different assembly patterns. But first you need to decide for what purpose the product will be used. The main material is selected in accordance with functionality. For example, beautiful bags are mainly used as packaging, so you should choose paper or cardboard with an interesting print to make them. If this is temporary storage, then regular white cellulose or even newspaper will do.
In any case, you should use thick paper so that the bag holds its shape.
Step-by-step assembly for beginners
There is the simplest diagram on how to roll a paper bag with your own hands. It is enough to use a simple algorithm:
According to the standard, this is a paper bag for seeds, but you can also use it for other bulk products. The manufacturing process will take 1-2 minutes, and if you practice, even a few seconds.
Schemes and decoration options
Currently, there are a large number of origami schemes. One of the most unusual are the magic origami paper balls. It is from the simple transformation of a sheet of paper into interesting figures that one begins to become familiar with the origami technique.
Balls made using the kusudama technique are a real work of art, as their perfect shape attracts the attention of many people.
Thanks to the abundance of color options, they can easily become decorations for the New Year tree or an extraordinary gift for loved ones. Also very popular is the modular 3D origami technique, in which a whole figure is assembled from many identical parts (models).
To fold each module, one sheet of paper and the rules of classic origami are used. Due to friction, the modules are held together. Making simple origami involves folding paper shapes using mountain and valley folds.
Another technique is folding according to a development, that is, a drawing depicting all the folds of the finished model. Wet folding is also very popular, in the process of using paper moistened with water. It allows you to make smooth and expressive lines.
Origami paper ball: module diagram
Simple figures
To make your own simple paper ball, you need:
- paper, such as multi-colored square writing pads;
- scissors and glue;
- mug or compass with pencil.
You need to take prepared paper sheets and cut out circles from them. To make a ball you will need 32 circles with a diameter of 10 cm: 16 blue and 16 red. Each resulting circle should be folded in half. And then you can start gluing the parts together. To do this, you need to apply glue to the upper outer half of the blue circle and glue it to the lower outer part of the red element. In the same way, you need to glue all the parts together, alternating colors: red-blue-red-blue. The result will be a stack of semicircular leaves glued together, reminiscent of a book.
Using Petals
If there are still a lot of petals left after shedding, you can find other useful uses for them. They are perfect for showering the wedding bed and can create a romantic atmosphere.
With the help of petals you can decorate a banquet hall, as well as a wedding procession. One of the best options is to use petals during a photo shoot; any skilled photographer will be able to take successful shots in which the newlyweds will stand surrounded by floating pink petals.
This wonderful tradition creates an amazing festive atmosphere that reigns throughout the day.
What to make it from?
To build bags at home with your own hands, you will need any thick cardboard. A piece of cardboard is rolled up and glued together. This will be the basis of the blank, thick paper can be of any color, after which the accessory is decorated depending on the style of the celebration. The decor itself depends only on imagination, preferences and the theme of the holiday.
How to make a keychain with your own hands - many master classes and creative photo ideas
Knitted overalls for newborns - choosing a model, patterns, tips for beginners
Manufacturing recommendations
- In order to make a decent little bag, you need to use thick crepe paper, you can also take scrapbooking paper.
- This accessory can be made from fabric that must have a certain density.
- The top of the bag can be made into a shape; all you need to do is use scissors and your own imagination.
- You can write the date and names of the newlyweds on the bag; after crumbling, the empty bags can be distributed to guests as a reminder of the wedding.
- It is best to prepare the petals the day before the celebration to ensure they remain fresh and fragrant.
- To quickly cut out a cone, use a ready-made bag template for rose petals.
The bags will emphasize the festivity and solemnity of the event; they can also be used to sprinkle birthday gifts and for discharge from the maternity hospital.
Crane - origami
One of the simplest models, it is believed that if you collect 1000 cranes, your most cherished wish will come true.
Step-by-step instructions for making an origami crane look like this:
- Bend the paper sheet diagonally.
- We take scissors and cut off all the excess, in the end there should be a triangle left.
- Let's make one more fold.
- From the resulting triangle (one, since there will be 2 of them), we make a square using the straightening method. On the other hand, we repeat the procedure.
- Take the edges from above and gently bend them towards the center.
- Bend the triangle located on top.
- We unbend it, we form a contour.
- Bend the lowest corner horizontally.
- Fold the edges towards the center to form a diamond shape. We repeat all steps on the other side.
- Take it by the bottom and bend it along the inner counter. The result is a neck.
- We also make a tail.
- At the neck, carefully bend the beginning to obtain a beak.
- We bend the wings using a slight angle.
The crane is ready, you can color it if you wish.
Edible men's cascading bouquet
- Hunting sausages – half a kilogram
- Cheese braid – 1 piece
- Beer (0.5 l capacity) – 3 bottles
- Nuts – 4 packs (weighing 60 grams each)
- Cherry tomatoes – 9 pieces
- Capsicum – 3 pieces
- Rosemary in sprigs – 3 pieces
And available materials (ask for them in florist shops):
- Mica 25*30 cm
- Ribbon or decorative for tying a bouquet and its elements
- Wooden skewers 15 cm long (you can use sushi chopsticks)
- Scotch
- The tape is better green (since we will use it to attach the greens to the skewers)
- Transparent film for flowers
- Paper for wrapping bouquets
- Ribbon for tying a bouquet
Preparing products for an edible men's bouquet with your own hands.
Please note that everything must be done with very clean hands or gloves. Pour vegetables into a plate. Do not wash! Otherwise, they may leak already in the bouquet. Vegetables are washed immediately before consumption.
Just wipe with a cloth, you can gently rub until shiny. You need to do this especially carefully with tomatoes so that they don’t burst.
Now we need to prepare the cheese braids. We cut them into 2 halves. Pay attention to the ligament where the ends of the braid are with a whisk. Cut so that they remain together, otherwise everything will fall apart.
We cut the hunting sausages to about 5 cm.
Thread each sausage and both pieces of cheese onto skewers. The cheese is heavier, so we string it onto 2 skewers.
We string small tomatoes into 3-4 pieces. Large ones, one at a time.
We also put peppers on skewers.
We wipe down beer bottles thoroughly.
Take a beer bottle, glue a small piece of tape, place a skewer and secure it with tape. And in this way you need to glue about 8 skewers. The distance between the skewers is 2-3 cm wide. In this case, the skewers should be located just below the middle of the bottle in height. So that the label is visible.
Now we wrap the tape over the skewers several times. This needs to be done very tightly, literally pulling the tape. So that everything holds tight.
Wrap the tape until all skewers intersect. We process all 3 bottles in this way.
Cut the rosemary into umbrellas or panicles. And glue it to the skewers. But first we wrap the skewer with tape, and then we wrap the cut rosemary.
How to make a bag for an edible bouquet for men
We twist the mica into a triangular bag. And tape it on the side.
We place the mica bag on the stand. Pour nuts or popcorn or something else into it.
Let's tie it up. And insert a wooden skewer into the middle of the bag.
We cut the ends of the rope and wrap the base with tape. Thus, make several bags for an edible man's bouquet.


