Polymer clay is a magical material that allows you to create amazing decorative jewelry. Using these products you can create gift sets, decorate simple mugs and turn a souvenir into a real handmade item.
When working with polymer clay, you need to take into account the same working principles as with plasticine. However, some features of the sculpting process differ not only in technology, but also in the choice of tools.
Working with polymer clay
Polymer clay decor always looks bright and unusual. It is pleasant to work with this material - it is soft, flexible, easily takes on the desired shape and holds it, and has colors and shades to suit every taste.
When buying clay, carefully read the instructions and check the expiration date.
Materials for the sculpting process
Beginners who have been inspired by looking at several successful photos of polymer clay mugs should purchase Chinese-made material so as not to spend a lot of money during training.
- At the beginning of creating the first copies, mistakes are possible, you shouldn’t be upset, you need to continue in the same spirit, gaining experience, the process will bring exceptional pleasure.
- Experienced craftsmen select only high-quality components; they differ from the disassembled analogue.
- Ready-made phoras are baked at a temperature of 130 degrees, at which point the transparent shades of the cheap component will become a little cloudier, and the white color often turns grey.
It is important to achieve ideal plasticity, but do not forget about the norm; too flexible clay will bring such inconveniences as:
- The shape of parts may become distorted, especially in fragile areas.
- Achieving a streamlined surface is quite difficult.
- During storage, the material will absorb excess pigment.
Recommendation! To bring the main component to an ideal state and reduce the effect of softness, it should be kept in the open air for 2-3 days, and begin to implement the plan.
Instructions
There are a number of instructions for working with polymer clay that you should always remember.
- Choose fresh clay. It is softer and easier to mold.
- Pay attention to the baking temperature indicated on the package. If it is exceeded, the clay will burn, and if it is not baked enough, the clay will crumble.
- Wear gloves to avoid leaving fingerprints on the clay.
- After baking, glue the decor to the mug with epoxy glue.
Types of mugs
If you're going to try decorating a mug, there are usually two surfaces to consider:
- Glass or Ceramics.
Both are relatively easy to work with. Glass looks great with its shine after etching the design, and ceramics are ideal for decorating with paint.
Useful lifehacks
If the clay is so soft that it is impossible to work with it, place it between two sheets of paper, press down and leave for a while. The paper will absorb excess plasticizer, and the clay will become harder.
For clay that is too hard, there are special gels and softeners. You can use a small amount of sunflower oil to make the clay soft. Remember that the baking time depends on the size of the part or figure.
You can take colored clay, or you can use light, plain clay. Pastels allow you to color unbaked clay. Clay that has already been baked can be painted with acrylic paints.
It is better to coat the finished product with a special varnish. This can be plastic varnish or yacht varnish. This will further protect the clay from scratches and environmental influences.
The mug with clay should be placed in a cold oven. The mug should warm up evenly and gradually. Otherwise it may crack. Do not put a mug decorated with clay in the dishwasher.
Mug decor with acrylic paint
Acrylic paints are an excellent material for decorating ceramic cups.
It's worth noting that acrylic may or may not require baking.
Also, this material is non-toxic and tolerates washing well, so a cup decorated with acrylic will remain in its original form for a long time. With these paints you can create a drawing on any theme and use more than one technique.
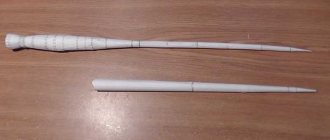
Tools and materials
Decorating and decorating mugs with polymer clay is a labor-intensive process that requires patience. Before starting work, you need to prepare all the necessary tools.
- Clay in several colors, it is better to take FIMO or Cernit.
- Epoxy adhesive.
- A cup without a pattern and without a three-dimensional texture.
- Toothpicks, straws, manicure tools that can be used to add texture to the product.
- Stacks, scissors, knives and blades.
- Rolling pin for rolling out layers.
- Wet wipes to smooth the clay and remove dust particles.
Preparing for work
There are a lot of ideas on how to make a clay mug for various holidays. Various figures are especially popular. These can be either fairy-tale characters (Santa Claus for the New Year) or little people (a boy and a girl for Valentine's Day).
Having decided on the choice of decor, you should prepare the necessary materials:
- mug of any color;
- polymer clay of the desired colors;
- stack set;
- acrylic paints or pastels;
- round template;
- stationery knife;
- sharp object (awl, needle, toothpick);
- acrylic lacquer;
- an object for rolling (a rolling pin, a special silicone roller, a bottle or a pasta machine).
Before purchasing the material, you should get acquainted with some of its features.
Ideas for implementation
Almost any idea can be brought to life on a mug. You can make a reproduction of a simple painting, sculpt a character from your favorite cartoon, or write a wish to the person who will receive this mug. The main thing is to decide in advance what exactly you will sculpt and prepare all the necessary materials so as not to be distracted by searching for them while working.
Set of modeling tools
Experienced craftsmen are happy to share not only ideas for creating beautiful and original mugs with their own hands, but also useful tips. In the first stages, it is better to purchase the most practical colors of the material that can be mixed with each other, these include: blue, yellow, red and white.
You should also take the preparation of the tool seriously so that during work you do not be distracted from the goal, which will cause discomfort.
The list of accessories looks like this:
- Knife.
- Rolling pin.
- Toothpicks.
- Stacks.
- Foil.
It wouldn’t hurt to stock up on decorative elements; many experienced craftsmen incorporate skeletonized leaves, various shadows and sparkles into their crafts.
Polymer clay bear
Take a piece of paper and a pencil. Draw a teddy bear of the required size. The finished product should not protrude beyond the edges of the mug or interfere with drinking tea.
Using carbon paper, make another picture of the same bear. We cut out one sample along the contour. We apply the second one to the inside of the cup at the level at which you want to see the result.
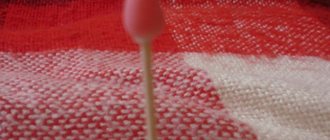
Quick decor of a cup with manicure polish
Decorating a cup using regular manicure polishes turns out to be quite interesting. One of the easiest ways is to create a watercolor on a mug.
For this decoration you should prepare:
- Nail polish remover or acetone;
- The cup is white;
- Cotton pads and sanitary buds;
- 2-3 varnishes of different colors;
- Ceramic plate or plastic container with warm water;
- Toothpick or wooden skewer;
- Paper towel or napkin.
Step-by-step action plan:
- Thoroughly degrease the surface with acetone.
- Add 2-5 drops of varnish to warm water (depending on whether the pattern is more saturated or transparent), then add a second, and then a third color of varnish.
- Using a skewer or toothpick, smoothly mix the varnishes.
- Dip the cup into the liquid for a couple of seconds so that the pattern is transferred.
- Let the mug dry for a couple of hours.
If desired, the decor can be supplemented with a pattern, decorative stones, sparkles...
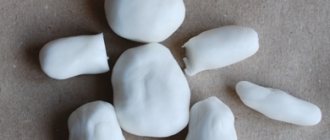
The process of making a bear
Making a figurine begins with choosing shades of clay. Knead the clay in your hands until it is comfortable for modeling.
Roll out the main color with a rolling pin - the base on which the figure will be made. Attach the prepared stencil and carefully cut it out of clay. Fix the flat figure on the mug so that there are no dents. Do not press too hard or drag with your nails to avoid unevenness.
You can cut out the muzzle using a stack. Start in small depressions - the eyes. If you want to get a more voluminous image, use thinly rolled black plasticine to create the muzzle. You can choose any color for the eyes. The pupils should be black.
Roll out ovals of the same size. These will be the paws.
If you want to decorate the teddy bear, you can add decorative elements - a bow, a bell, a ball, a flower, etc.
When the figurine is ready, place the mug with polymer clay in the oven. Set the temperature and time indicated on the packaging of the purchased clay. After baking, carefully remove the decor from the mug using a glass scraper.
Degrease the surface of the figurine and mug with alcohol or acetone. Glue the bear onto the mug using glue. It will take about a day for the glue to dry completely. After this, the mug can be used.
Instance with ruffles and frills
Such a master class on making and decorating mugs will be of interest to many beginners, because the elements used are very common, and wavy fragments can significantly change the appearance of the finished product. The detailed algorithm of actions is quite easy to understand, but all recommendations must be followed clearly in order to avoid making a mistake at one of the stages. The material is preheated, some part must be left at room temperature for 2 hours, after which you can start creating the container; after waiting for complete hardening, you can safely move on to the external design. To cut out decorative elements, you need to roll out part of the base material with a rolling pin; it is better to keep the thickness to no more than 0.1-0.2 mm.
Stacks with a round nozzle will help in realizing your plan; if you press on them a little and rub the clay, you will see a wavy, twisted part at the end. Some professionals use ready-made forms or create ruffles from circles of different sizes, successfully connecting them together. Drying should take at least 30-40 minutes, and you can add missing shades using acrylic paints.
Photos of polymer clay mugs
Glass mugs
Glass is a very popular option for decoration. It is easy to work with, and the result will please you for a long time. In this instruction we will look at the decor of a beer mug.
For those who have just started to try their hand at decorating, a beer glass will be very convenient for training their skills.
What do you need:
- Glass with smooth surface
- Etching cream
- Medium Paint Brush
- Stencil
- Rubbing alcohol and cotton pads.
Operating procedure:
- Clean the glass where it was etched with alcohol and let it dry.
- Glue the stencil to the glass. You can make your own stencil or purchase a ready-made one.
- Apply glass etching cream in a thick, even layer inside the stencil. Be careful not to apply it where you don't want to etch.
- Leave on for 10 minutes and then rinse completely under running water. Once patted dry, repeat the process again to ensure it is completely and evenly covered.
- Blot again and remove the stencil. And... done!
It's so easy to make and a great way to personalize your glassware.
Advantages of making clay products at home
There are several advantages of making ceramics at home that determine the popularity of this craft:
- It's cheaper in the long run because you don't need to rent a studio.
- All supplies of materials are always at hand.
- This saves time, no need to travel anywhere.
- Minimal investment required.
- Allows you to do this in the comfort of your home.
There are also a few disadvantages to doing this at home:
- You won't have a teacher to help you.
- You have to study everything yourself.
- You may not have the super professional tools that studios have.
- You may be limited in the items you want to make.
If you're just learning how to make ceramics, the first thing you need to do is work on your technique, and doing this at home is a good way to create a comfortable space and learn the basics of the craft. But if you don't have a home studio, then it's also worth trying to work in a specialized studio, especially if you don't have your own materials. This will allow you to quickly learn the basics of the technique and see if you can create a more comfortable environment for making clay products in your home.
Using a pottery wheel at home
You can use a potter's wheel, although we don't recommend starting with that. Here are some tips to help you master the potter's wheel:
- First, you need a pottery wheel that can hold at least a kilogram of clay.
- You may want to consider an electric pottery wheel as it is easier to use.
- Make sure you know how to use the clay you are working with, how to keep it moist, how to dry it, and how to fire it.
- Knead and roll the clay into a rope to prepare the workpiece.
- Remove any air bubbles to prevent oven cracking.
- Stick the resulting lump of clay onto the circle and center it.
- Wet your hands and keep them damp so they glide across the clay.
- Start the wheel, increase the speed and pull the clay up, smoothing the sides.
- Grab the clay with your hands and push it out from the center.
- Knead the bottom and pull out the clay to get the desired shape.
- Keep the walls as level as possible.
Ultimately, that's all you need to do to form a clay product on a potter's wheel.
Paired cups
People who are together, and especially recently, are usually touching about the signs of their cohabitation. Paired cups are such a small thing that is usually perceived very touchingly. A cute, simple idea that can be implemented if you are visiting newlywed friends, a couple who recently bought an apartment, or a sister who has found her soul mate.
Idea for paired cups found on Lezoemusings
Is it possible to add decoration to clay products?
Yes, you can! There are several ways to decorate clay products:
- Stamps with counter-relief. They can be found in specialized stores. Use them on slightly damp clay to make markings that are great for patterns or even "signatures".
- Tools: Forks, knives, needles, combs or the like can create amazing designs and textures that your pottery will benefit from.
- Imprints: leaves, stones, branches or similar. Press them gently into the clay to create an impression before firing or drying the piece.
The decoration really looks good, and unless you are creating pottery that requires glazing, these little decorations will make your pottery even more attractive.
Printing on mugs using thermal transfer paper
Surely you have already heard about the technology of applying images to souvenirs, including mugs. In principle, there is nothing complicated here, you need the following things: • A good photo printer • A thermal press • Thermal transfer paper But not everything is so simple, thermal transfer paper is not always processed well by ordinary home printers, and office MFPs cannot handle all of the paper. As practice has shown, when working with some printers, difficulties arise with the passage of thermal transfer paper through the fuser (the oven where the toner is fixed). It is worth considering a number of factors: • Possibility of printing on high-density paper • Temperature of ink application • Individual printer settings Our clients often have a question - which printer is best suited for printing on thermal transfer paper. We will conduct tests with various printers, but we will start with a detailed test and a step-by-step story for OKI printers (Xerox, Canon, Epson, etc. are next).
(I apologize for the not very good picture, on the first day of testing I only had my phone at hand)
The C5000 and C6150 series printers are built using single-pass tandem technology: 4 color cartridges are arranged horizontally in a row, which makes it possible to ensure uninterrupted supply of media with different characteristics. Low-temperature toner curing allows the use of most thermal transfer media, as well as a wide range of common print media from transparencies to 200 gsm card stock and above.
We decided to independently test various models from this manufacturer with different types of thermal transfer paper. The first printer we looked at was the compact A3 C8800n. For the test we used CMP 6.2, CPM 6.4 and CPM 6.5 Magic Touch paper for transferring to a hard surface, OBM 5.6 for transferring to colored fabric, TTC 3.1, TTC 3.3 and TTC 3.5 for transferring to white fabric.
The same paper was later used on the older model of the updated family – C5950n. In addition, TTC 3.5 was also tried on the company’s flagship – the C9800 printer. During printing, we found that most thermal transfer papers take some time to completely set the image on them; if you try to scratch a hot print that has just come out of the printer, the image can be scraped off.
However, after just half a minute it becomes absolutely stable and not subject to physical impact. It was also noted that on OBM 5.6 paper intended for transferring to colored fabric, a slight background appears on the white unprinted areas of the paper. However, experts warned us about this in advance, having previously familiarized ourselves with this medium: a smooth glossy surface can cause the appearance of similar printing artifacts. No defects were found on other types of thermal transfer paper.
When examining prints made on CPM paper by light, light streaks were noticed along the movement of the sheet. Most likely, they were left by rubber rollers located at the output of the sheet from the printer and in contact with the freshly fixed image. The streaks were areas of slightly altered surface texture and were not color streaks or indentations on the sheet. No traces of these stripes were found on the final products after thermal transfer. For thermal transfer to mugs, we used The Mug press BJ350, China. The image must be mirrored.
The heat press should warm up to about 120 degrees. Only after that the mug with the attached print is loaded there.
Leave the mug with the mock-up for 15 minutes.
And here is the result
Having personally verified the validity of statements regarding the quality and ease of operation of OKI printers with different types of thermal transfer paper, we, for our part, can recommend their use for making prints and subsequently transferring images to hard surfaces and fabric. Below is a list of the media we used and the print settings that were applied in the printer driver.
| Type of thermal transfer paper | Setting Density in the Printer Driver |
| CMP 6.2, CPM 6.4 and CPM 6.5 | Medium |
| OBM 5.6 | Label 1 |
| TTS 3.1, TTS 3.3 and TTS 3.5 | Heavy |
Pay special attention:
Due to the fact that thermal transfer media is not essentially paper, it is necessary to very carefully select the media parameters in the printer driver, without relying on the standard thickness sensor! If the parameters are selected incorrectly, then the media may melt in the oven with the media winding onto the thermal shaft, after which the printer will display error 980, which can only be eliminated by replacing the oven! The paper parameters are shown in the table above. If you use a different type of paper or from other manufacturers, be sure to conduct thorough testing before purchasing any serious quantities!
How to dry clay?
Unless you are working with a kiln, you are most likely going to air dry your clay or bake it in the oven. There are several ways for each of them.
For baking in the oven:
- Preheat oven to desired temperature.
- Place the clay piece there on a tray.
- Bake for the required amount of time.
- Check the hardness of the product.
It's simple, but again, the heat isn't high enough for porcelain or earthenware.
For air drying:
- Place the product in a safe place.
- Wait. This may take up to 24 hours.
- Check the product for hardness and give it more time if necessary.
- If you're air drying, use fine-grit sandpaper to remove any minor imperfections before moving on to painting.
Drying pottery takes time, but proper drying techniques can help you avoid mishaps.
Painting clay products
You can paint the clay with acrylic or latex paint if it is allowed to air dry. It is important that you follow certain rules here too.
Some painting tips:
- Make sure that if you are firing clay, the paint is suitable for kiln use.
- Some paints do not require firing, which can sometimes be a convenient option.
- Choose a paint that matches the required temperature, as air-dried clay cannot be fired.
- Apply paint with brushes, sponges or other methods.
- Allow the paint to dry according to the paint instructions.
- If you are going to kiln cookware for food and liquids, use paint and sealant first, and then start firing after drying.
- If you are using a kiln, also use glaze to fully seal the paint.
Painting will add a unique touch to your artwork, and while it may not be necessary at first, you can really benefit from it if you have some interesting painting ideas. Some also prefer to paint the products after baking in the oven, you decide for yourself what you like best.