Which form should I choose?
First of all, you need to decide on the shape of the future casket. Here you can put various nuances at the forefront: your own taste, the type of things to store, available materials.
The box can have the following forms:
- rectangle - can be made from a shoe box;
- heart-shaped - you will have to purchase it specially, although if you have saved a candy or gift box of this shape, it will do;
- circle - a candy or flower box will do;
- square - a phone box will come in handy here.
Shoebox Craft
One of the simplest (but no less attractive) are the original boxes made from shoe boxes. You can easily make them with your own hands and give them absolutely any appearance.
Tools and materials
If you like this master class, then to implement it you will need:
- shoe box with lid;
- scissors and glue composition;
- high density cardboard;
- fabric or paper for decorating the finished product.
It is recommended to place all the necessary components in the immediate area where creative work will take place. You should immediately put aside everything that will interfere and distract the master from making a creative box.
Step by step diagram
- If all of the above items for needlework have been prepared, you can proceed to modeling a beautiful box from a shoe box.
- The base in the form of a shoe box is already there, so all that remains is to effectively design and decorate it.
- Shoe boxes, as a rule, are quite large in size, so there will be room to roam around and get creative. The inside of the future box can be decorated with soft woven material. Fleece would be an excellent solution.
- The outer part of the box can be covered with sheets of colored paper, or you can resort to a very original design with decoupage.
- The design of a homemade shoe box can be made even more impressive and rich if you use decorations in the form of shining rhinestones, sequins or sparkles. There are incredibly many options on how to make such a box original and attractive.
- The next step is to design the inside of the box. This part of the structure can be divided into several separate sections/compartments. For separation, use strips cut from high-density cardboard. Next, these cardboard parts can be covered with colored paper to give the inside of the box a more attractive look.
- A product equipped with such separate sections is very convenient to use for storing a variety of creative items, sewing items, cosmetics or decorations.
- By designing a shoe box, the craftsman can let his imagination run wild. The external design of such a homemade product can be absolutely anything! The product can be made monochromatic, or you can give it a brighter multi-colored look - there are no restrictions in style and design.
How to complement a bouquet of sweets
Quite often, when creating a bouquet of sweets with your own hands, you feel the desire to add something to it. The most popular items to complement a candy bouquet:
- - fruits and berries;
- - Stuffed Toys;
- - alcohol;
- - marshmallows and marmalade;
- - Natural flowers.
You can also decorate a bouquet of sweets with coffee, tea, various decorative elements...
How to make a box from a milk carton?
This method is suitable for those who are just starting to master the design of boxes; it is very simple.
You will need:
- milk carton (you can use a juice carton);
- fabric, paper - the choice depends on capabilities or desires;
- decorative elements;
- scotch;
- scissors and glue.
Algorithm of actions:
- cut the box to form a lid;
- step back 3 cm from the edge that is smaller;
- glue the edges with adhesive tape or thin cloth;
- the base is ready, can be decorated with paper or fabric;
- the outside and inside of the box is glued with the selected material;
- To secure the lid, a braid or ribbon is glued to its edges so that a bow can be formed.
Christmas tree made of champagne and sweets
Giving champagne and sweets for the New Year has already become a tradition. But this tradition can also be beautifully and originally designed. A DIY Christmas tree made from champagne and sweets will look great.
What you will need to complete it:
- selected champagne and favorite sweets of the recipient,
- green tinsel (large and fluffy),
- glue (you can use a glue gun).
Let's start making crafts:
Step 1. We need to wrap the champagne in beautiful and bright tinsel with the selected candies. We begin to cover the champagne with tinsel strictly from the top. We gradually go down the spiral, also gluing the tinsel to the glue. At the very bottom we firmly fix the tinsel and remove the remaining tail.
Step 2. Let's start decorating our Christmas tree with candies. Slightly spreading the tinsel, we attach the candies in the bottle with glue. We beautifully cover the entire bottle with candies.
Step 3. To add even more brightness, you can add small Christmas tree decorations, bows or satin ribbons to the candies.
The craft is ready!
See also: 10 best Handmade gifts for the New Year
How to make a Christmas tree from champagne and sweets (video)
Crafts from candy containers
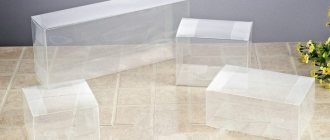
No less original and attractive will be a box modeled from an old cardboard box left over from sweets. Such containers can have a variety of shapes. There are square, round, oval, multifaceted and many other interesting variations of such boxes. From each copy you can make a chic box.
To make an attractive box from the above box, you will need:
- the box itself;
- multi-colored paper;
- plain paper;
- glue;
- acrylic paint;
- scissors.
Let's consider step by step how you can model an elegant box using these components.
- First you need to prepare a candy box. It must be clean, without candy wrappers and chocolate chips.
- The cleaned container will need to be very carefully covered with paper around the entire perimeter. The entire base should be completely designed in this way. At the same time, it is very important to leave a small supply of paper “finishing” at the edges.
- In order to decorate the lid and bottom of such a box as neatly and aesthetically as possible, you will first need to glue the side areas. The corners must be carefully trimmed, and then also carefully bent inward. At all stages, paper must be taken with a small margin.
- Using sheets of plain paper you will need to decorate the inner cavity of the future attractive box.
- When the interior design is completed, the box must be put aside and not touched until it is completely dry.
“Candy” boxes make especially attractive and elegant boxes. Almost any type of container in question is suitable for carrying out such manufacturing work.
Very beautiful boxes are made from Raffaello candy boxes. After that, you can store a variety of things in them, for example, jewelry and hairpins for girls.
MK Fabric box with embroidery from a round box 'Raffaello'
Hello! This is actually my first full-length master class, and I really hope that you find it well understood and useful.
So, we will make a cardboard box covered with fabric with embroidery on the lid from a ready-made Raffaello candy box. It happens that they give us a whole box of sweets, and then it’s just a shame to throw it away... We decorate it and use it as a box for small things!
There are three sizes of such boxes: very small with a diameter of 10 cm, medium - 15 cm and very large (I don’t know its exact size, I didn’t give one like this as a gift...