This holiday happens only once a year, so I want to create a unique atmosphere in the house. A decorated Christmas tree, tinsel and bright garlands on the walls are all indispensable attributes of the New Year. However, don’t forget about the festive table: a bottle of champagne in an interesting package will effectively complement the dishes. This can be a cover made of paper or fabric, tied with satin ribbons, or a neat bag, beautifully decorated with a bow. There are a lot of ideas on how to decorate a bottle of champagne for the New Year 2022. Let's look at the most interesting of them.
Ways of original New Year's decoration of champagne
You can also decorate a bottle of wine festively. In the photo: a cap, put on the neck, and a beautiful suit with a deer.
You can decorate not only the drinks that will be displayed on the New Year's table. A cover or original packaging, made by yourself, can be put on a bottle intended for a loved one or colleague.
It is advisable to complement such a gift with a set of chocolates or even flowers (an option for the woman you love). In any case, a gift designed independently and with all your heart will definitely not go unnoticed.
A removable knitted cover is a romantic decoration for such a gift. It can be complemented with something sweet (chocolate, candies), a jewelry pendant (for a woman) or a tie (for a man).
DIY clothes for champagne
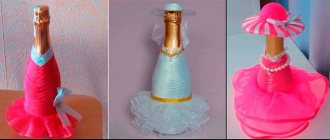
Today we will talk about decorating bottles. Today it is an interesting and exciting activity. With the help of a large selection of materials, an ordinary bottle can be turned into an original thing. Decorated bottles are an unusual gift for any celebration and also a stylish holiday table decor. You can buy clothes, but it’s better to make them yourself. And we offer you several design options.
Clothes patterns for bottles
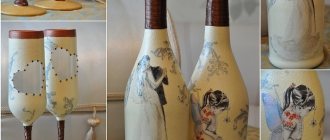
DIY champagne wedding clothes
When creating clothes, the master reflects all the nuances: the tone of the dress and suit of the bride and groom, the color of the tablecloth, age, etc. Each costume is unique in this and their uniqueness. You can create a small copy of the newlyweds' clothes. This will remind you of pleasant moments and save until your wedding anniversary. There are a lot of ideas here and your imagination is limitless! We offer several design examples.
Felt case in the form of Father Frost and Snow Maiden
Decorating items in the shape of the main characters of the New Year is always a good idea. Bottles in felt “clothes” will create a homely holiday atmosphere. To make Santa Claus you will need:
- white and red felt;
- ruler, scissors, pencil;
- red bias tape;
- egg from Kinder Surprise;
- wide red ribbon;
- elements for decoration (beads, sequins, lace ribbons, bows);
- glue
Step-by-step instruction:
- First you need to make the base for the bottle. To do this, take a piece of fabric measuring 20x30 cm and try it on champagne. The ends of the rectangle need to be glued together so that the resulting pipe can be easily put on and removed from the bottle. The joint on the cylinder is carefully sealed with satin ribbon.
- The felt tube should be cut 8 times vertically, the length of the cuts should be about 4-5 cm from the neck. The resulting strips must be glued together overlapping so that the cover tapers upward. On the inside, the joints are sealed with satin ribbons.
- The resulting workpiece must be braided completely from top to bottom with bias tape. This must be done carefully so as not to overtighten the felt.
Bottle decoration process
- Then you need to cut 3 strips of equal width (25 mm), 3.5, 7 and 9 cm long from the white fabric. Lace strips are cut out along them.
- White felt is used to decorate the neck, the smell of the “fur coat” and the bottom of the cover. Lace is carefully glued underneath it.
- Then you need to take the egg from the Kinder Surprise and separate the larger half. It is also covered with tape, and the bottom is covered with white fabric. You can decorate the hat with beads or lace.
Future Santa Claus
The final stage will be decorating the “fur coat” with beads and decorative sequins. Your DIY champagne bottle cover for the New Year is ready! And so that Grandfather Frost does not get bored without the Snow Maiden, you can decorate the second bottle in a similar way, but using blue materials or tapestry fabric.
If you attach such decorations to bottles, you can give them to friends or put them under the Christmas tree
Simple bottle case
All lovers of travel and other types of active recreation cannot do without water.
And it is important for them to always have water at hand, or better yet, in a pouch on their belt. You can make it yourself without being a professional cutter and seamstress
To your attention, perhaps, the cheapest of the methods.
You will need:
• tape (about 2 m) made of dense synthetic fabric, no more than 3 cm wide (similar to those used in fastening backpacks); • a plastic bottle of water 0.5 liters (or liter, it is simply inconvenient to carry a large container on the belt); • scissors;• thread and needle;• chalk or a piece of soap;• meter;• lighter (matches).
We measure the circumference of the bottle at the widest point at the neck and at the bottom.
We transfer our measurement to the tape (and add approximately 1cm).
We mark the measurement location with chalk and cut off a piece of tape.
In this case, you can attach it to the tape, using it as a template and cut off another piece of tape. You will get two ribbons of the same length.
But not all plastic bottles will do this. Some manufacturers make the base of the bottle wider. In this case, you should be guided by the base, otherwise you will not be able to fit the entire bottle into the finished case. The edges of the ribbon should be melted with a lighter to prevent fraying. The main thing is not to get carried away so as not to start a fire in the room. It is advisable that the room is well ventilated.
Now we take our blanks and try them on the bottle. That is, we overlap the bottle with our piece of ribbon and mark the edge with chalk, so that later we can sew a ring of the correct diameter from the ribbon.
Popular articles Goat from a pompom fur coat
It's time to grab a needle and thread. We sew the “ring” according to our mark.
That's why, when we transferred the diameter of the bottle to the tape, we added another centimeter to it. When you connect the ribbon into a ring, its edges, overlapping each other, form a kind of square. All four sides should be stitched, and also crosswise. We repeat the same procedure with the twin of our workpiece. We put them on the bottle. One at the bottom, no more than a centimeter away from the bottom, the other at the top - along the “shoulders” of the bottle. We take the bottle in our right hand (if you are left-handed, in your left hand), and with your left hand we lay the remaining “large” ribbon along the bottle: we press one end at the upper “ring” with our thumb and stretch it to the lower one. Then we stretch along the bottom and again to the upper “ring”, and press the other end to the bottle with the index finger from the opposite side. Let's draw a ribbon around the letter U.
Pressing the tape to the bottle in this way, we mark the joints (peculiar intersections) with chalk. This is necessary so that later, when you remove the “rings,” you can sew them on correctly.
Sew it on. The result will be something similar to a fire extinguisher mount. While we are not cutting anything, let the free end of the tape dangle quietly. We thread the bottle into the resulting structure. Okay, the case is half ready.
But now we run the free end along the bottle in the opposite direction: again from the upper “ring” to the lower one and back along the opposite side. You will get a loop that will help keep the case on your belt.
Press it firmly against the bottle with your fingers and repeat the procedure with chalk - mark the joints. We take out the bottle. It won't be easy at first, but the fabric tends to stretch a little over time. Now we sew along the marks. Cut off the excess end. Great!
Agree, it was not difficult. The case is so simple that even if something happens to it, it can be easily repaired. It can be built even in camping conditions (if you have a thread and a needle), but the water is always in a convenient place, whether you are hiking or just decide to rollerblade in the park.
Candy pineapple
This is a great way to decorate a bottle of champagne with sweets in a beautiful and interesting way. To make fruit from sweets, you will need:
- round candies in gold wrapper (for example, Ferrero Rocher or “Golden Lily”) 65 pieces;
- double-sided tape;
- hot glue gun;
- half a meter of organza;
- half a meter of sisal;
- aspidistra ribbon;
- leg-split;
- satin ribbon.
Production in stages:
- You need to start by gluing the organza to the surface of the bottle with double-sided tape. The material must be glued carefully so that wrinkles do not form.
- If the candies have tails, they should be folded inward so that only the round base remains. It is better to attach them with tape.
- Next, you need to glue the sweets one by one onto the bottle. This must be done from the bottom up, forming circles surrounding the vessel. The candies are attached using a glue gun.
- Then you need to divide the sisal into small pieces. With its help, the empty space between candies is decorated.
- From a ribbon resembling a living aspidistra, it is recommended to cut leaves so that they look like pineapple greens.
- They need to be glued one after another on top, overlapping (to make it look like the sheets of a real fruit).
- The joint between the leaves and the candies should be tied with twine or a beautiful ribbon. Tie a bow on top.
This pineapple can be made quite quickly: the design process is easy and will take no more than 1-1.5 hours.
Any drinks can be packaged this way. It doesn't have to be sparkling wine from the Champagne region. You can dress up a bottle of good whiskey as a pineapple, adjusting the amount of sweets to its height.
New Year's costume for a bottle of champagne
To do something special, you can use this idea and make a great New Year's costume with your own hands.
Required material:
- Fabric in white, red and beige;
- White material for making a beard;
- Scissors;
- Paper;
- Pen;
- Sintepon;
- Small buttons and beads;
- Sewing machine.
Manufacturing process:
- Draw or print beard and hand templates on paper. We transfer the finished templates to the fabric, trace and cut out.
- We sew them together on a sewing machine, leaving one edge unsewn (if you don’t have one, then carefully by hand).
- We fill the finished parts with padding polyester and stitch the remaining edge.
- In the same way, we cut out other fragments of the future costume (we make the costume from red fabric).
- We make the head of Santa Claus using material for the beard, and beads or buttons for the eyes. We sew the finished head to the costume.
- We sew the side edges of the suit so that it can fit onto the bottle. We put the base on the container.
- We sew sleeves to the suit.
- We make a Santa Claus hat and put it on our head. Our bottle is decorated!
Decor of a champagne bottle for the New Year: decoration with satin ribbons
To decorate a drink in this way, you will need medium-width ribbons. It's good if they are blue, red or green. On the first one you can glue Christmas tree decorations (thin snowflakes), after cutting off the loops from them. It is advisable to attach a small decorative Santa Claus bag made of felt or a Christmas wreath to the red background.
One of the most interesting ways is to make a New Year tree out of a vessel covered with green satin ribbons. It can be decorated with small elegant candies, hooks, a bunch of balls, and a shining star can be placed on the cork.
Quite a complex way of design. It is better to learn the process step by step through video tutorials.
Not only a master, but also a beginner can handle easier design
DIY clothes for bottles video
Girls, I laughed for a long time, but I still decided to offer you to buy “New Year’s clothes” for the toilet)))
I think this is such an unusual and original gift! No one will remain indifferent.
Everything is made to order, wait 20-40 days. Prices are final everywhere. Mail is free.
1. Sets for 550 rub. The last photos are real.
- Santa Claus set
- set of snowman in a hat
— blue snowman set (now on promotion, without promotion 660 rubles)
set of snowman in a hat
blue snowman set
2. Set “Santa Claus with patterns” red, price 750 rub.
blue Santa Claus set
3. Set “snowman with snowflakes”, price 600 rub.
4. Cover for the toilet lid.
— Santa Claus 230 rubles — snowman in a hat 190 rubles — white snowman 170 rubles —
Paper decor
A far from new way is to design a bottle using paper. You can corrugate it yourself or purchase the material at the store. Two pieces are cut out of the canvas: small and large. The neck is wrapped first, and the bottom of the vessel is wrapped second. Paper elements are secured with tape or twine (for more secure fastening, you can use double-sided tape). Decorative elements are randomly glued onto the corrugation on top. These can be beads, packaging tapes, lace, cardboard figures and much more.
Champagne wreath made from sweets
Don't know how to decorate a New Year's bottle in an interesting way? We suggest making a themed wreath. Materials:
- miniature New Year's toys (red and gold);
- champagne;
- glue gun;
- quiet paper (pale green);
- scissors;
- red satin ribbon.
Step-by-step instruction:
- First, cut the tishya into small squares, approximately 7x7 cm.
- Also cut the ribbons into pieces, about 10-12 cm each.
- Fold each ribbon in half and glue a candy to it (the two ends of the ribbon should be visible from above, as is done in the photo below).
- Now glue the decorated delicacy onto the bottle (in the middle), and attach it in a circle around it with silence, inside of which there should be a Christmas tree toy. Nearby, do the same trick with another treat and toys. Do this until you get a beautiful wreath around the entire bottle.
- Wait until the glue dries and you can hand it over.
Decoupage
To decorate a bottle using this technique, you need to prepare beautiful napkins. It is better to use two-layer or three-layer. If the champagne is to be given as a gift, for decoration you will need not decoupage napkins, but photographs printed on a printer (this requires special thick paper). Transferring a photo from paper to a surface will be similar to the standard decoupage process.
Decorating gift bottles in this way is easy and interesting. And most importantly, there are no restrictions in choosing pictures, because you can print the templates yourself.
Decoration using decoupage technique
This is a great way that everyone, young and old, can use. The technique is simple and easy to implement.
You will need the following items:
- PVA glue;
- Plastic knife;
- Primer;
- Napkin for decoupage – 3 pieces;
- Acrylic clear varnish;
- Brushes (small and large);
- Scissors;
- File.
Work process:
- We wash the bottle and remove the label.
- Using a wide brush, apply the first layer of primer to the container. We wait until it dries completely.
- Then very carefully apply a second coat of primer.
- Cut out the desired motif from a decoupage napkin.
- Carefully peel off the top layer of the napkin.
- We take the file, put our drawing in it so that the outer side is at the bottom. Now carefully spray it with water. The napkin should get wet.
- Very carefully straighten the folds, drain off excess moisture and transfer the design to the surface of the bottle, which has previously been smeared with PVA glue.
- We remove the file.
- Now we level the surface of the drawing using a brush or fingers moistened with the same PVA glue.
- After drying, coat the pattern with glue again.
- We apply silicone sealant to certain fragments to make the image appear three-dimensional.
- While the sealant is drying, take a second similar napkin and cut out the necessary fragments.
- We apply them to the sealant. And we cover the volumetric parts with a thin layer of PVA glue. Let it dry.
- All that remains is to cover the entire surface of the container with varnish, dry it and decorate the neck with an elegant bow!
If suddenly you don’t understand, watch the video lesson, it will 100% help.
Decor with toys and tinsel
You can prepare and sew toys in advance. To do this, you will need to make patterns and then sew them together according to the instructions. It is recommended to look at options for New Year's toys on the Internet (or purchase ready-made patterns). The only condition that must always be observed is that the pieces must be cut out carefully, exactly according to the parameters specified in the instructions.
The finished toy can be attached to the bottle, additionally decorating it with tinsel.
Cute toy “hats” that can be sewn or knitted. They will cheer up the owner not only on New Year's Eve, but also in the following days.
Crochet New Year's Father Frosts and Santa Clauses
Not a single New Year is complete without its main symbol - Santa Claus! And he will definitely have a granddaughter, the Snow Maiden and a beautiful green Christmas tree. We have already published a selection of 50 patterns for crocheted Christmas trees, today we will deal with grandfathers.
Grandfather Frost, and some Santa Claus are sold before the New Year in all stores. But we want to invite you to knit your most beautiful and most elegant grandfather this year. You can take it out every year, put it under the Christmas tree, be proud of it and make your deepest wishes come true. How could it be otherwise, because New Year's Eve is a time of miracles, and Santa Claus, who is connected to you, will simply be obliged to repay you for your birth with something good.
We advise beginning needlewomen to start with small toys or figurines to try their hand. If you succeed, then start knitting a large toy. Our selection includes classic Santa Clauses and more modern incarnations.
Crocheted Santa Claus doll, master class from Arina!
The New Year always gives us hope for the best, gives us many gifts and pleasant emotions. During this period, we can easily feel like heroes of a fairy tale. We all remember our childhood, perceiving what is happening around us through the eyes of a child.
Knitted toy – Santa Claus
My name is Irina. I live in Minusinsk, Krasnoyarsk Territory. I work in trade. I recently took up crocheting and yet, despite this, I decided to take part in the knitting competition “White Rabbit 2011” in the category
Crochet Santa Claus and Snow Maiden
Hello! My name is Aliya. I am very happy that I have the opportunity to take part in the New Year’s competition in the “Professional Look” Nomination. And here is my creation. Santa Claus, Snow Maiden and Christmas tree. TREE Symbols ch - air loop sc - single crochet ss
Booties Santa Claus, master class by Anna Kuznetsova
Slippers Santa Claus master class. 1. We knit the sole according to the pattern with red thread. For a sole length of 12 cm, I cast on the original 14 loops. 2. We knit the rise with green threads. We knit the first row with single crochets behind the back wall of the sole loops.
Santa Claus and Snow Maiden crochet from Olga Andreeva
Good day to all! I am Andreeva Olga. I hasten to put up another set for the competition, or rather, a New Year’s composition. At first there was an idea to knit only a snowman, but after finishing knitting I decided that he would be lonely alone. IN
We believe or not in Santa Claus, but without him we cannot create the spirit of a festive atmosphere. Who is he, this kind grandfather who brings us gifts in the form of happiness, joy and hope? There are many versions of how it became an integral part of the holiday. The formation of his image has changed many times and its origins go back to ancient times.
We are used to imagining him as a grandfather with a good-natured face and ruddy from the frost. Let's remember together the attributes of his image that make him who he is:
- Long, thick and gray beard.
- A floor-length fur coat, usually red, blue, white.
- Felt boots.
- Mittens.
- Sometimes a sash, or in other words a belt, with which a fur coat is tied.
- Warm hat.
- Staff in hand.
- A bag with presents.
- Three horses harnessed to a sleigh.
- Snow Maiden and Christmas tree.
Santa Claus is a close brother of our grandfather, so we often see mixed images among theatergoers, in souvenirs and toys.
Santa Claus commands snow storms and winter cold. Giver of blessings for the New Year. Do you have this important symbol of the holiday that fills your home with comfort? If not, then it's time to take care of it.
We suggest crocheting Santa Claus. The knitting process will take you into a space of pleasant worries before the holiday. Knit not only for yourself, but also please your family and friends with an original handmade gift. Crocheted Santa Claus will become a special souvenir, because you put your soul, love and good mood into every stitch.
Garland Santa Claus
My name is Tatyana. I live in the Kursk region in a small town called Lgov. I have been crocheting for almost 6 years, and knitting for less. I decided to take part in your competition. I present the work “Garland of Santa Claus”. For one Santa Claus
Sequin decor
Perhaps one of the simplest and most affordable ways to decorate. To decorate a bottle in this way, all you need is to purchase glue and a variety of glitter. The vessel should be evenly lubricated with the composition and sprinkled with glitter. It is recommended to complement the product with beads, rhinestones and tinsel.
What you need for work
As a material, you can use almost any decor that can be found in every home on the eve of the holiday:
- New Year's tinsel and serpentine;
- costume jewelry;
- corrugated and colored paper;
- New Year themed paper napkins;
- sweets in beautiful wrappers;
- special covers for bottles that you can sew with your own hands;
- satin ribbons;
- sparkles and other decor.
You also need to prepare tools and supplies:
- glue;
- scissors;
- threads;
- acrylic paints and primer;
- tassels;
- glitter;
- foam sponge;
- colored, shiny and corrugated paper;
- pieces of fabric;
- ribbons.
Knitted cover
This is a great option for those who love knitting. This is quite a time-consuming method (however, needlewomen can do it in 1 day). You don’t have to link New Year’s attributes; you can just make a small sweater for the bottle. Such vessels are usually placed on the fireplace: they successfully complement the interior of the room and make it more cozy.
Champagne with sweets
For many, a sparkling drink with chocolates is a classic combination for the New Year. To decorate a bottle of sparkling alcohol with candies, you will need the following:
- Chocolates in shiny wrapper;
- Double-sided tape;
- Christmas tree tinsel;
- Bow.
How to cover a bottle of champagne with candy for the New Year:
- Wrap the bottle with tape.
- Glue candies to the tape.
- Decorate the champagne with tinsel so that there are no empty spaces left.
- Tie a satin bow around the neck.
Painting on the bottle
To implement this idea, it is best to use acrylic paints, because they are the most durable, do not stain and are available in a wide range of colors. The surface is decorated with patterns, images of New Year's attributes or beautiful snowflakes. Artists can recreate thematic scenes, and amateurs can recreate simpler pictures: a cheerful snowman, a decorated Christmas tree, a snowy landscape.
New Year's colorful toys made from plastic bottles
Plastic bottles make fun crafts for the New Year. Thanks to scissors, paints, tape and some other materials, cute penguins, snowmen, Christmas trees and other toys are born.
Let's invite a snowman to the house
Having a homemade snowman will be interesting for both adults and children. Let's prepare white acrylic paint or a white plastic bottle, black and pink paints, fabric for a scarf, mittens and a hat, and wire for hands.
The work is not difficult, it will take the longest to sew a hat and scarf
Little penguins are funny toys
Children love to play with different animal toys, especially if they are created with their own hands. Help your child make a baby penguin!
You can create baby penguins by cutting off the wide bottoms of two bottles and gluing them together.
All that remains is to paint the work and complement it with decor made of colored cardboard or felt.
You can get a penguin in another way
Bells on the Christmas tree
One of the simplest options for simple Christmas tree decorations. We cut off the necks of small plastic bottles, paint them in the colors you like with acrylic paints or spray paint.
If the bottle is the right color, then you don’t need to paint it.
Tinsel, rhinestones, and sequins are used as decoration.
Snowflakes
To get a large number of snowflakes you need the same number of bottles. Only the bottom is cut off from each.
On the bottom, as in the photo, patterns are painted with a thin brush with white, blue or light blue paint.
To hang a snowflake, make a hole in it with a heated awl and pass threads or ribbons through it.
Cool Christmas trees without much effort
Craftsmen have become adept at using any material in their works, and green plastic bottles were no exception. It’s no good for such material to disappear on New Year’s Eve!
There are many ways to make a Christmas tree
As a base, you can take any stable, durable object, from PVC pipes to aluminum legs of folding beds. The plastic is held in place with tape. The more carefully you use the scissors, the thinner the needles will be.
Interesting Christmas trees are obtained when plastic is exposed to a hot object.
More ideas
There are also many different techniques for decorating a bottle of sparkling wine. The easiest way is to paint the container with the children. For a New Year's theme, it is better to use a blue and white background with bright splashes. You can decorate the bottle with cotton wool and “rain”.
There are a great many options for designing champagne bottles. They are decorated with shiny rhinestones, dressed in Santa Claus suits, covered with decorative plaster and even made into a three-dimensional Christmas tree. If you turn on your imagination and use your imagination, you can get an extraordinary result. Learn new techniques, watch video tutorials and what others are doing, and then try to create something of your own. All in your hands!
Knitted clothes
Do you like to knit and have a lot of interesting ideas in your head? Knit an outfit for a bottle of champagne in a New Year's theme.
You will need:
- hook or knitting needles;
- yarn;
- a little imagination.
You can knit anything: a hat, a Santa Claus or Snow Maiden costume, a dress or a fur coat. Many interesting ideas and master classes can be found on the Internet.
