What you will need for work
Before starting the work process, you need to make sure that you have everything you need at hand, the list may vary, but the main components are the same:
| Blade of knife | This part must be ready, since you need to see what kind of shank the workpiece has, further work directly depends on this. This element is most often ordered from specialist blacksmiths or purchased ready-made from artisans |
| Handle material | Most often, wood with an interesting texture is taken, it can be walnut, maple, oak or other options you like; the blanks should be a little larger than needed. You can cut them yourself, the cutting direction is selected so that the texture is presented in the most favorable light |
| Fasteners | This primarily includes epoxy resin, with which all components are connected. Also, sometimes rivets are required; for this, the easiest way is to use a copper or brass rod, which must have the appropriate diameter |
| Impregnation | High-quality impregnation for a wooden knife handle is also very important. For this, a special dish varnish or linseed oil is most often used, which can be purchased at any art store. |
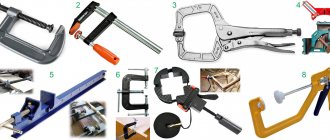
| Tool | For work, both manual options are used - a hacksaw, plane and wood cutters, as well as power tools. With its help, you can carry out all the necessary operations much easier and faster. |
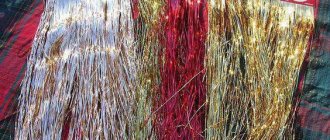
An interesting wood texture will decorate the product
What to do?
1. Draw a handle template. For example, on paper.
Draw a template for the future knife handle.
If part of the old handle has been preserved, you can circle it.
Cut out the template with scissors.
2. Place the template on the plexiglass and trace it with a felt-tip pen 5 times: you should get 5 identical plexiglass parts.
Note:
You determine the size of the parts yourself, focusing on the length and width of the knife blade.
In our example:
- blade length – 17.5 cm
- blade width – 3 cm
- handle length – 12 cm
- The width of the handle at the widest point is 3 cm, at the narrowest point – 2 cm
3. Cut out 5 outlined parts along the contour.
4. Cut one of the parts at the base by 3-4 cm. It will be in the middle.
5. Drill 3 holes for bolts in the first part. Then, placing the first part on the subsequent ones and marking the locations for the holes with a felt-tip pen, carefully drill three holes in each of the following parts.
Attention!
only one hole
in the middle part .
6. Apply super glue and connect all the parts in the following sequence:
- 2 complete parts
- 1 shortened – middle
- 2 complete parts
7. Insert the knife blade in the middle between the full parts - end-to-end with the middle part.
Two plexiglass parts on top, two on bottom - identical in size, only the middle, shortened part differs
8. Screw the bolts, using them to fasten all the parts of the handle.
All parts of the handle are glued together and then secured with bolts.
8. Use first coarse-grit sandpaper and then fine-grit sandpaper to carefully sand down the edges of the parts.
9. The new pen is ready!
Little hint
: if you want to make the handle unusual, then insert a picture between the two upper plexiglass parts before connecting them with bolts.
In our example
: asterisk.
The “Star” picture is inserted between the first and second plexiglass parts.
Where will this be useful?
In our “Fixing” section we publish practical advice.
The handle of the knife in the new version has become much stronger, which will allow it to be used for both gardening and household work.
Plexiglas reinforced with several layers makes the handle for this type of knife resistant to wear and durable.
1How to make a handle for a knife from PCB?
How to make a wooden sheath for a knife with your own hands
To make a handle for a knife from PCB, we will need:
- textolite;
- sandpaper;
- hacksaw;
- drill;
- bolts with nuts;
- pencil;
- rivets;
- file.
Manufacturing:
- On the textolite, with a pencil, draw the desired shape of the handle. If you still have the old handle, then apply it to the textolite and trace it with a pencil.
- Using a metal hacksaw, we cut out two halves of the handle from PCB.
- We place the blade on the sawn handles and drill three holes with a diameter of 4 mm.
- Insert bolts into the holes.
- We screw the halves of the handle to the blade.
- We process the handle with a file.
- We unscrew the bolts, pull out the blade, grind down the chamfers on the handle.
- We polish the blade if necessary.
- We countersink the holes by 1 mm, using a 6 mm drill.
- Insert rivets into the holes.
- We rivet the knife handle into a single unit. Don't worry about the handle cracking due to physical impact, as this material is very durable.
- The final step is to file the handle and sand it with sandpaper.
The PCB knife handle is ready!
Homemade wooden handle for a parquet kitchen knife
If you break the handle of a kitchen knife, don't despair! Our next article about homemade crafts useful for the home will tell you how to make a handle for a knife from a parquet board with your own hands.
A kitchen knife is not just an irreplaceable thing, it is also a friend and ally. If you need to cook something, then the hand itself looks for its most favorite and convenient tool.
Previously, we published articles about homemade products “around the kitchen”:
Unfortunately, there are often cases when a completely good thing has to be thrown away. Plastic stamped handles are very unreliable. But there is a way out. A new homemade handle is not difficult to make from a suitable piece of wood. In my case, the material was beech parquet. Or rather its two halves.
I mark the knife bed on one half of the parquet flooring.
Then, to keep the blade tightly in the handle, I drilled several holes with a thin drill.
Using a cutter I make a selection according to the thickness of the blade.
The sample must be made as accurately as possible according to the configuration of the bed. The reliability of the knife and how tightly the blade will stay inside the handle depend on this.
The set of blanks for the future kitchen tool, in general, turned out to be small: two halves of parquet, four toothpicks in diameter and number of holes, and the blade itself.
Now you need to remove all excess from the body of the future pen. I did this with a regular knife.
When both halves of the handle have taken on a lightweight appearance, they can be glued together. To make the gluing area as reliable as possible, I cleaned the surfaces with coarse sandpaper.
The glue I used was Titebond 2. Good, reliable glue - tested by experience.
The gluing procedure is usual - apply glue to both halves, dry for five minutes, connect, fix the position with toothpicks, squeeze with a clamp and leave for a day.
After the glue had dried, I outlined the contours of the handle.
I sawed off the excess. I made the handle a convenient length.
Primary processing was done mainly with a knife and file. Or rather, a set of files. Depending on the task at hand, I used files of different sections.
When the former parquet flooring finally took the form of a handle, it was time for sanding. For this I used sandpaper of various sizes. First large, then smaller and, finally, very small - automobile 00.
As a result, the handle took on a completely acceptable appearance.
I do the final finishing, one might say polishing, with a piece of the same wood from which I made the handle.
Of course, such an activity requires some time, but the result is entirely individual. The handle was made according to my own measurements.
Author of the article – Gennady Konstantinov
Dear readers, if you are also interested in this kind of creativity, please send us a photo and description of your useful homemade product.
2How to make a knife handle from birch bark?
DIY garden figures master class. DIY garden figures from plaster. How to make garden figures from cement. DIY figures for the garden and dacha, made of plywood, wood, polystone
To make a knife handle from birch bark, we will need:
- birch bark;
- glue;
- clamping vice;
- Bulgarian;
- wooden blocks 5 mm thick.
Manufacturing:
- We drill holes in the center of two wooden blocks of such a diameter that the steel handle of the knife fits into them.
- We cut out small squares of birch bark enough to cover the entire length of the handle.
- We drill a hole in each square of birch bark.
- We first place a wooden block on the metal handle, then birch bark squares and finally, a second wooden block.
- We saturate the birch bark with glue, then let the glue dry a little. After the glue and birch bark have set, remove the birch bark block and press it in a vice.
- After making sure that the glue has completely dried, we begin to shape the knife handle.
- We polish the handle of the knife. To do this, use a grinder with a grinding wheel. Initially, give the handle a square shape, then an oval shape.
- To give the handle the final look, polish the knife handle.
The birch bark knife handle is ready!
How to attach a blade to a knife handle
It will be necessary to attach the blade to the handle of the knife if the latter was made from a single piece of material. In this case, you need to perform the following manipulations:
- Mark the handle and drill a hole in the middle. It is advisable to make it a “wedge”, that is, perform several forward-reciprocal movements with a drill.
- Clean the hole with a thin file and blow out any remaining dust.
If the blade shank is not narrow/thin, but wide, then you will need to drill several holes in the wooden handle as close to each other as possible (the width of all holes corresponds to the width of the blade tail), then use a drill to remove the remaining partitions and clean the hole from dust and shavings.
All that remains is to insert the blade into the handle of the knife (into the prepared hole) and fix it there with wedges so that the metal is stationary. The voids are filled with epoxy glue mixed with sawdust and left to dry - from 1 to 24 hours (according to the instructions).
Handle mounting type
How to make a leather case for an ax with your own hands
There are only 2 options for attaching the handle to the blade - mounted (“rat tail”) and overhead (the two halves are secured with rivets or screws). Regardless of the material taken, the features and shaping of the blade are taken into account. If the blade was originally made for a mounted handle, then it can only be converted into linings by welding on an additional area near the fastener, and this reduces strength. Otherwise, the excess metal is simply cut off. The advantages of the “rat tail” include:
- Visual appeal. When making a handle with your own hands from wood or horn, the handle remains solid on the outside, and in the case of a set of several species, you can add individuality.
- Convenience. The closed type of the handle reduces the weight of the final tool, is easy to replace, and reliably protects the owner’s palm from electricity and contrasting temperatures.
- Practicality. The riding handle can be made in any shape and any size. The “rat tail” allows you to replace the handle with any piece of wood in an emergency.
For a handle of 2 plates, the blade is specially prepared - an expanded part of the metal, the shape completely (in rare cases not completely) coincides with the handle. The linings are fixed with rivets or bolts through holes in the blade itself. This option is more durable, but easily conducts current and temperature. Making grips is more difficult, but most hunters, tourists and fishermen choose this handle format.
Attention! In the case of a folding knife, there is no choice - an overhead handle is the simplest option. Otherwise, you need to redo the design of the blade, which will reduce its strength as a whole.
How to make a knife handle using epoxy resin
Using epoxy as handles is an unusual and interesting design topic. A knife handle made according to all the rules from epoxy resin will meet all stated safety and quality requirements. You just need to know some of the nuances of the work.
You can make unique things using epoxy resin
Choosing the type of future model
You cannot find specialized molds for making handles on sale. Therefore, they must be made by hand. You can make unique designer molds from epoxy by adding various dyes to the resin.
Advice. Features of the technology for making an epoxy handle will depend on the type of model chosen.
Molds from sculptural plasticine
For this technique, two longitudinal identical halves are used for the handle. And each has its own mold pre-made. To create the model you will need sculptural plasticine and polyethylene film. You should not use ordinary plasticine for classical modeling - it will flow even with slight heating, and at low temperatures it will not be able to maintain the given shape. The manufacturing technology is as follows:
- A film is laid on a block of structural plasticine (it is better to use stretch film). Attach it tightly, squeezing out any air bubbles with your hand.
- A cast is made from structural plasticine. The handle of any knife can act as a cliche. Press the cliche into the mold to a depth approximately equal to half the thickness of the future handle.
The cliche form is ready. This method is convenient, but requires a lot of effort in subsequent work. After all, molds will be made from two halves.
Glued molds
The procedure for making the future cliche is identical. Except that both halves of the mold are pre-glued to each other. Only a hole is left where the epoxy will be poured. The result is a single cast handle. The finished handle will only need sanding and polishing. There is no need to grind it further. But this option should be used if you have some experience - for beginners it will be too complicated and time-consuming.
The handle can be made in various ways
Solid wood handle
With this manufacturing method, the resin differs in the shape of the bar. And then using various tools it is turned to the desired shape. This method is the most complex and time-consuming.
Cylinder shaped handle
Solid acrylic pieces in the shape of tubes are used. The final products will not look attractive and aesthetically pleasing. But it is still worth considering this manufacturing option in order for inexperienced craftsmen to practice to gain the skill.
We prepare the necessary
Before work, prepare all tools and materials. You will need the following:
- prepared molds;
- the blade of the future knife (it can also be made in advance from any metal);
- epoxy resin and hardener;
- additional materials for design;
- sticks for kneading the mass;
- plastic container for preparing epoxy (mixing it with hardener);
- additional tools: jigsaw, workbench, drilling machine, grinder, clamps;
- polyethylene - they need to cover the working surfaces.
Manufacturing process
First of all, all additional items for decoration are placed in the blank mold. These can be pieces of fabric, metal mesh or wood, coins and any other objects. Then the resin is prepared for pouring. It is mixed with the hardener in the proportion specified in the instructions. Typically, 2 parts of hardener are added to 10 parts of resin. The mass is thoroughly mixed for at least 10 minutes so that all the air comes out of it.
Advice. When making epoxy, you can immediately add coloring pigments to the resin.
For work, it is worth preparing everything you need in advance. Part of the mold is poured with the prepared resin and the base of the blade is immersed in the mass. The structure is fixed and left for the resin to dry. For complete hardening, 1–1.5 days are enough. The finished handle is ground and polished. To make our handle look decent, consider some tips from experienced craftsmen:
- If small parts are additionally included in the filling, make sure that they do not float to the surface. To do this, pouring is done in layers, with each repeated layer being added after the first has hardened.
- Be very careful when pouring resin. During the process, make sure that each cavity of the mold is completely filled with mass. This is necessary to prevent the appearance of air bubbles that will ruin the entire intended design.
- When adding a phosphor to the resin (to give original illumination), remember that this powder dissolves very poorly in the resinous liquid. And after complete filling it can settle at the bottom. Therefore, in this case, it will also be necessary to fill in stages.
- The final grinding procedure alternates with polishing. Grinding produces a glossy surface, and polishing creates a pleasant shine to the handle. The stage begins with grinding with an abrasive material with a gradual reduction in the size of the cloth grains. For polishing, use specialized pastes.
To install parts into the handle, a hole is first made in the mold blank. Use a drilling machine for this. The handle is clamped in a vice and drilled. Drill without pressing or pressing hard to avoid damaging the handle.
Advice. When drilling an epoxy workpiece, first place a soft cloth in the clamps of the vice.
The blade itself is carefully inserted into the hole. The blade is attached to the handles using glue. You can use epoxy. It is also used to glue the halves of the handle if they were made from two forms. For additional strength, the halves are connected with metal rivets.
In order for the product to be durable, you must adhere to manufacturing technology
Knife handle: characteristics and properties
The design of any knife is extremely simple, because it consists directly of a blade (blade) and a handle
When purchasing, we most often pay attention to the material, sharpness and shape of the blade, leaving the handle without attention. This approach is incorrect, since an awkwardly shaped handle can nullify all other advantages of the product.
Figure 1. The shape of the handle directly affects the ease of use of the knife.
The ease of use of the knife, its maneuverability and operational efficiency will depend on the correctly selected shape and size of the handle. The selection of materials also plays an equally important role. For example, if you are going to use the tool primarily outdoors, it is better to choose a product with a handle made of durable and wear-resistant material - deer antler, wood or plastic. For home use, knives with handles made of plywood and other lightweight materials are suitable, which will help you use the knife for a long time without fatigue (Figure 1).
It should also be taken into account that the functional purpose of a knife largely depends on the shape of its handle:
- Oval:
this shape is considered the most comfortable, since it is easier for the hand to hold such a handle for a long time. It is noteworthy that not only hunting knives, but also table knives often have an oval handle, which once again proves its convenience. - Straight:
a characteristic feature of this handle is that it does not have any narrowing or expansion. As a rule, such handles are made in kitchen knives. A handle of this shape is not suitable for a hunting tool, since the hand will quickly get tired when working with a knife. - Conical:
can have an extension back or forward, and the latter option is most often found. This handle has an almost ideal ergonomic shape and does not slip out of your hand during use.
In addition, some hunting knives are equipped with concave or convex handles. A striking example of the first type can be considered Japanese blades or knives that were used in Ancient Rus'. In practice, the concave shape is not very convenient, so many hunters prefer to buy knives with convex handles, since they are recognized as the most comfortable and functional.
Materials and tools
Wrapping a knife handle with paracord does not require any special knowledge or tools, and the materials will be affordable for everyone. So, for work you will need:
- knife;
- paracord cord;
- scissors;
- lighter;
- scotch;
- insulating tape
- vice.
How to choose paracord
To answer this question correctly, you should remember why paracord is used these days. First of all, it is a strong and lightweight rope. Secondly, due to its design features, it is used not only in this capacity, dissolving the base. Thirdly, many useful and fashionable things are woven from paracord, since its range of color shades is very diverse.
What does it mean to “choose correctly”? This means a product that can be used in many ways. And for each of them it will be the most suitable. The most popular products these days are the products of the American company ″Rothco″. It is labeled as “550 Paracord” and is considered a kind of standard. Needless to say, there are many more counterfeits of it than high-quality products. So the places to purchase it need to be chosen with no less care.
550 Paracord.
As a cord it is very durable. After all, it can withstand a weight of about 250 kg. Although it is not used in mountaineering, it is excellent as a passive insurance for all types of tourism. The shell is made of 32 intertwined nylon threads. It contains 7 cords woven from nylon. Each has three threads.
Handle design and finishing
The knife handle can be decorated with carved patterns and ornaments. It is necessary to find out the feasibility of these actions. Wood carving will make the knife unique and beautiful. But using it in hiking or hunting conditions will literally have a negative impact on the drawing.
Carving on the handle.
The potential for the thread itself to wear away, becoming clogged with dirt and filled with moisture has the potential to negatively impact the longevity of the handle. If the blade is intended for decorative purposes, the decoration will look great, but difficult working conditions will give the opposite result.
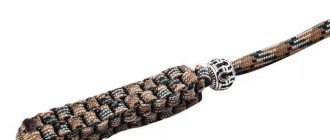
A good decoration option is to braid the handle, which will extend the life of the product and, if necessary, be used as twine.
Previous KnivesHomemade knives at home Next KnivesChinese kitchen knife Tsai Dao
Overhead handle
The wood treated with an antiseptic is clamped in a vice and cut into 2 parts.
The surfaces adjacent to the blade shank are carefully cleaned and polished to avoid gaps. Tools for wood processing in this case are as in the description above. Mark holes for attaching wooden pieces. Select a copper or brass rod of the required diameter in advance. Drill mounting holes that match the holes on the blade shank. Cut the required number of blanks for rivets; let their length be greater than the thickness of the finished handle.
Make a rough assembly of knife parts using rods. Process the handle using a cutter and sandpaper to connect the halves symmetrically.
Coat the sides of the wooden parts of the handle adjacent to the shank with epoxy glue, to which you can add a few drops of toner for cartridges to obtain a suitable color shade. Wrap the knife blade with tape so as not to stain it with glue. Connect to the knife blank and insert the prepared pieces of rod.
Cut off the protruding ends of the rivets flush with the handle.
The resulting product must be clamped in a vice. You can wrap the handle in oiled rubber to protect it from unnecessary scratches when squeezing. Drying time is at least 24 hours.
At the next stage, we impregnate the product in the same way as described in step 5 for the mounting handle. Oil treatment can be done several times.
After receiving the dried product, finish polishing and opening with wax or ship varnish according to points 6 and 7 of the previous description.
Types of handles
A wooden handle for a folding or regular kitchen model should first of all be comfortable. Actually, this is the attractiveness of making it yourself: you can make a handle of any configuration, any size suitable for your hand, and impregnate it with any composition.
When making your own, 2 types of wooden handles are most often used:
mounted - a cavity is formed at the end of the product into which a blade with a narrow shank is fixed. The handle is a single unit and is very resistant to damage. A folding knife cannot be made this way; overhead – suitable for blades with a wide shank. In this case, the handle consists of two parts that overlap the blade. The handle is heavier, which allows you to balance the wide blade
For a kitchen knife, for example, this is important. The folding model always refers to the invoice type
The photo shows a set for the folding version.
Advantages
When creating a handle for the blade, it is important to remember that organic glass weighs little. Our task is to achieve a balance between the main product and the handle. Moreover, the second one can be crystal transparent, matte, with an image, etc. The field for experiments is almost unlimited.
Due to the fact that plexiglass is easy to shape, it can be used to make good knife handles
The production of a pen is divided into three stages:
- drilling;
- gluing;
- bending and cutting.
The product can be smooth or ribbed. The second option is the key to comfortable and safe work with a knife.
The advantages of plexiglass include durability, strength and light weight. When deciding on the total weight of the handle, it is important to ensure that it is balanced with the blade. It's even better if it's heavier. The massive handle with an anatomical curve is designed to ensure stable work with the knife, and plexiglass is perfect for this purpose.
What is birch bark and its properties
Everyone knows very well that birch bark is the bark of a birch tree. What next? Few will answer. Birch bark consists of fibers; the natural material is distinguished by a snow-white layer, with longitudinal lines - lentils. It is easy to determine the age of a tree by the number of layers.
Due to its natural qualities, it is used by many artisans as crafts. They are well applicable in everyday life, and some unique products can be called highly artistic works of art. The material has the following properties:
- Along the fibers, birch bark is amazingly strong. This property resists wear and stretching. But as soon as you make a crosswise movement, the birch bark will immediately break.
- It is often used as packaging material. Porosity and elasticity absorb shock. And poor thermal conductivity will allow a slower effect on the temperature of the crust.
- Absorption of bending is an important useful property. When the shape changes, it tends to return to its original position.
- The aesthetic component is an important factor in its use as crafts and handles for knives. The fresh birch bark handle looks attractive. But it’s quite easy to ruin the appearance.
- Throughout Russia, this type of wood is very common. The availability of material is colossal.
Advantages and disadvantages
The inherent properties of this material are its positive qualities. But the site is not of a forestry nature. Let's try to highlight the advantages of making a knife handle from birch bark:
- the aesthetic appeal has already been noted. For collectors, blades occupy a significant place on the shelf. They perform the function of admiring them;
- People who actively use the product note a good grip and reliability of holding the handle in their hand. Despite the weather conditions. For hunters who cut up a carcass - a valuable quality;
- the velvety texture gives the hand a pleasant feeling;
- the birch bark handle has poor thermal conductivity, in winter it does not lose heat, and in summer it feels pleasantly cool;
- due to the high content of tar - a natural antioxidant, rotting processes and the development of harmful microorganisms are unlikely;
- Having dropped a small blade into the water, it will remain on the surface like a float, due to the porosity of the material.
Birch bark blank for making a knife handle.
The handle is made from birch bark. There is no other option. It is cut crosswise and mounted onto the shank. She has a minus. Birch bark quickly absorbs moisture or other liquids. Which subsequently leads to unpleasant odors from it. But by impregnating the product with special solutions, this can be avoided.
Durability of the material
People have long noticed the durability of birch bark. Sometimes there is a rotten tree in the forest, but the bark is like new. Bast shoes were woven from it, they took on waterproof characteristics. Used as writing paper. Thanks to its properties, multiple writings of our ancestors have reached us. Sometimes it is called Old Russian papyrus.
The birch bark handle of the blade, made using the inlaid method, is tightly tied with a pommel. And during manufacturing, each piece is coated with a glue solution. The material is flammable, an open fire is required for combustion; it can actually be heated to high temperatures, without consequences for the product. It’s easy to burn your hand; the handle will not lose its shape or change color.
Which handle to choose a knife with?
When choosing a knife to suit your needs, focus not only on the blade steel, but also on the handle materials. This is no less important detail than the steel of the knife or its design.
A lot depends on the choice of handle material, for example, how comfortable it will be to cut up a hunting trophy in winter or the absence of problems with the absorption of fish smell by the handle of a fishing knife.
How to choose the right knife handle based on the specifics of the work it performs, we’ll figure it out in this article.
Wooden knife handle
In the photo: Knife “Vostok” with a wooden handle (walnut)
Do you prefer natural handle material? Pay attention to the different types of wood. There is only one condition: the type of wood must be strong enough and hard enough.
Soft woods are only suitable for knives that do not require heavy loads, for example, kitchen, folding or mushroom knives.
Popular breeds that are worthy of handles for hunting, camping, or even survival knives:
- nut,
- merbau,
- rosewood,
- boxwood,
- sapeli,
- Karelian birch,
- ash,
- amaranth,
- bubingo,
- beech,
- wenge,
- cherry,
- hornbeam,
- oak,
- zebrano,
- maple,
- leyswood,
- Paduk.
Wood handles are inferior to modern synthetic materials, but wood also has its advantages: ease of processing, natural material, beautiful texture, reliable grip on the palm, and the ability to work comfortably in the cold season. A little care for wooden handles will preserve their original appearance for many years.
Knife handle made of birch bark
In the photo: Akela knife with a handle made of birch bark
Birch bark is one of the popular and affordable materials for making handles. The top layer of birch bark is used, which is “packed” into a briquette in a special way and glued with epoxy resin. One of the undoubted advantages of birch bark is the presence of birch tar in its composition.
Such a handle will have good water-repellent properties, as well as protection against rotting. Another undoubted advantage of a handle made of birch bark is the low thermal conductivity of this material.
That’s why they say about birch bark that it is comfortable in the hand, whether it’s hot outside or bitterly cold.
The disadvantages of birch bark are the absorption of odors. Therefore, we do not recommend this material on the handle of hunting or fishing knives. Birch bark will absorb the smell of fish or blood, and removing it will be very problematic.
Care instructions: wash, dry, apply natural wax or linseed oil. Blood and other food stains can be removed with hydrogen peroxide.
Knife handle made of stacked leather
In the photo: “Akela” knife with a handle made of stacked leather
The technology for making a leather handle is similar to the technology for making a birch bark handle. Leather is also a natural material with all the ensuing advantages, but the disadvantages inherent in birch bark are also inherent in leather - the absorption of odors.
Let us add here that leather absorbs moisture very well and can be subject to rot due to improper use of the knife and its storage. Leather handles are used on tourist, camping knives, as well as knives for the glove compartment of a car.
Care instructions: rinse, dry, apply skin care products or natural wax.
Knife handle made of PCB
In the photo: Knife “Cleaver” with a PCB handle
Textolite is an unpretentious material. It does not absorb odors, moisture and fat, and does not slip in the hand. The handle of a knife made of PCB will not be subject to factors such as shrinkage or swelling. The only disadvantage of PCB is its uniform texture and inexpensive appearance. Although, for example, there is textolite, which, when processed, gives an interesting pattern, for example, like on ZiK knives.
Knife handle made of plexiglass (plexiglass)
In the photo: Knife “Shtrafbat-VDV” with a plexiglass handle
The advantages of a plexiglass handle, like other synthetic materials, include resistance to moisture, grease and dirt. Plexiglas handles do not absorb odors and can withstand sufficient loads, but can be susceptible to chips and scratches (although they are easily polished). Plexiglas of different colors can be used on souvenir and gift knives, for example, knives with special forces symbols.
Kraton knife handle
In the photo: Knife “Penal Battalion” with a rubber handle
Although kraton is a synthetic material, it has a number of outstanding characteristics, for example, resistance to mechanical stress, good grip, and comfort when working in cold conditions. Knives with kraton handles are popular on tactical and survival knives. In the catalog of many foreign manufacturers, craton takes pride of place among materials such as G10 and micarta.
Combined handles
In the photo: Knife “Viper” with a stacked handle made of stabilized Karelian birch, fiber and brass.
How many materials can be combined in one handle? We think that this can only be limited by your imagination.
For the first time in history, the ZiK weapons company tried to combine such materials as wood of various species, plexiglass, fiber, brass, aluminum, textolite, birch bark and leather in various combinations into knife handles.
The practicality of such handles depends on the practicality of the materials that make up the handle, but the masters definitely achieved originality.
Handle mounting type
The methods for attaching a knife handle to a blade are not very diverse. There are only two of them: mounted and overhead. However, no matter what method is chosen, the production of the handle will in any case be carried out according to a template so that the finished product fully complies with the wishes of the future owner.
Since mounted and overhead handles differ from each other in many respects and have their own design features, we will look at the characteristics of each method in more detail.
Horseback
The mounted handle is also called a "rat tail". This name very accurately explains the technology of attaching the handle to the blade of the blade (Figure 2).
A narrow shank is made on the knife, onto which, like a rod, a handle is placed and secured in any available way.
If you decide to make a hunting knife with a wooden mounted handle, you should familiarize yourself with the advantages and disadvantages of such a design in advance.
The advantages include:
- Aesthetics:
mounted handles look more attractive in appearance, and they are often made from several types of wood at once to increase decorativeness. - Practicality:
this type of fastening allows you to create and attach a handle of any shape and size to the blade. - Ease of use:
Mounted handles are generally light in weight, which is an obvious advantage for hunters who have to move around a lot. In addition, such handles have low thermal and electrical conductivity, which is also an obvious advantage of their use.
It should also be noted that handles with a similar form of fastening are much easier to repair. Mounted handles have only one drawback - the method of attaching them is less reliable compared to overhead models.
Invoice
Knives with overhead handles have a slightly different design. They have a wide shank that completely follows the shape of the handle. Plates (linings) are attached to it on both sides and secured with rivets or screws. As a rule, this method is used for the manufacture of all-metal or folding knives with two handles (Figure 3).
Among the advantages of the overhead handle are ease of manufacture and high strength of connection of structural elements. However, it should be borne in mind that this mounting option also has disadvantages. Firstly, there are certain restrictions on the shape and size of the handle. Secondly, the finished product weighs much more than a model with a mounted handle. In addition, knives with applied handles have high heat and electrical conductivity. This means that you are unlikely to be able to operate such a tool for a long time in the cold without gloves.
At the same time, the reliability and durability of such knives completely outweighs their shortcomings, which is why many hunters and fishermen prefer to use edged weapons with applied handles.
Making a pen
When all the materials have been selected, you need to think about how the handle for the knife is made. There are several production methods. In the vast majority of cases, the process begins with cutting out wooden blocks with a hacksaw, up to 1 cm thick.
Several different bars can be mounted on a metal blade - this will diversify the design of the knife handle at the exit. After shaping the handle, it is carefully sanded, soaked in special oil and coated with wax. Linen drying oil is used as impregnation. Dish varnish and pure mineral oil are also used. This emphasizes the peculiarity of the wood texture and the exclusivity of the product.
Impregnation is also designed to protect the product from moisture. A good polish will add an elegant shine to the knife handle. To complete production you need:
- Wax;
- Turpentine;
- Sandpaper "zero".
Typesetting
To make a typesetting pen, you will need to prepare a maple board, brass rings, a hacksaw, a file and sandpaper. You can also make the product from birch bark. A hole is made in all selected wood plates for inserting a blade. The plates are strung together and lubricated with epoxy glue. After this, the resulting block is removed and pressed in a vice.
After drying, the block is put back on the blade. The plates are shaped into a handle by grinding with a file and needle files. A do-it-yourself knife handle, made using a type-setting fastening technology, after polishing, is soaked in drying oil a couple of times and dried in the sun. After this, the product is coated with ship's varnish or polished with a wax coating.
carved
A carved knife is usually made for hunting. First, the lower and upper stops are prepared with a slot according to the size of the blade's tail. The next stage is processing the wooden block. The wood is divided into two symmetrical halves. The inside of the workpiece is processed with sandpaper.
A small depression is constructed along the perimeter of the tail from the inside with a block, and the exit point of the tail is marked. Using a file, the block is given the desired shape. It is necessary to do a rough assembly, make sure that all parts fit correctly. Then you should assemble the parts and seal the gaps between them using epoxy resin. Rivets are placed in the holes of the upper stop. The knob is fixed so that the heads of the rivets coincide with it. Next, the product is ground, impregnated, and polished in the traditional manner.
Wicker
The braiding of a knife with a wooden handle is made using paracord. Holes are made in the shank of the knife blade from different ends - weaving will begin from one of them. The threads are threaded and their ends are glued to the metal from the inside. This way they will not interfere during work. The further weaving technique corresponds to the design of the knots, similar to when lacing shoes. The main thing is that the stitches are tightly tightened.
At the end of the weaving, the cord is pulled out through the hole and tied into a knot. You can put some decorative element on the remains of the cord - for example, a decorative bead. Once weaving is complete, the product is carefully coated with fiberglass resin.
Rubber
A technical plate is suitable as a rubber handle for a knife. The technology is similar to woodworking and is carried out using the mounting and overhead methods. The shape of the handle is turned with a knife or blade. Sanding is done with sandpaper or a sander.
Decorating Tips
Forging a knife and making a handle for it is only half the battle. A good product should emphasize the style and individuality of the owner. This can be achieved with beautiful design. The handle of a knife is exactly the part where the master can demonstrate all his skills and imagination.
Usually the handles are decorated with engraving, braided or carved. A lanyard looks beautiful on a knife, despite the fact that it is a simple loop or cord that is threaded through a hole in the handle. The pommel made of casting or carved looks very rich. But it is better to fasten such elements if the shank has a thread. This should be planned during the development of the entire design.
The easiest way is to paint the handle or burn a pattern on it. To prevent abrasion, the surface is degreased. The main thing is that the degreaser is compatible with the paint base. For example, turpentine works well with oil based ones.
Leather trim
Many craftsmen braid the handles with leather or tighten them. The handle of the knife in such a braid looks natural and lasts a long time. In addition to beauty, the material can give the product a more professional look and smooth out some imperfections. A plastic handle covered with leather will hold your hand much better.
@knife.com.ua
Before stretching this material onto a wooden handle, the surface should be sanded and grease removed. Next, the wood is coated with glue and left to dry. Then the leather is wound in a strip around the handle, after the first turn it is again treated with glue and dried. This is repeated until the procedure is completed. All skin scraps are removed with a blade.
Braid
Very often, knife handles are decorated with braiding. This decoration has become popular due to its simplicity. After all, the braid can be easily changed if it is already tired or has become unusable.
If desired, you can braid it with a leather belt, but usually paracord is used for this. This material is accessible and lightweight. Its prices are low, and it lasts a very long time, as it is not subject to rotting.
Handle decor
The handle can be decorated in various ways - braiding, pyrography, carving, leather finishing. The most popular method, despite new products (scrimshaw, etc.), remains braid due to its durability and aesthetics. Before any decoration, the wooden handle must be degreased.
Braid
Before work, the braid must be dipped in warm water for several minutes. The skin will become supple and soft. The cord should be about 10mm wide. For braiding, take a piece of leather equal to four lengths of a knife handle.
One end of the strap is applied to the length of the knife handle. The skin is secured to the handle below the blade with adhesive tape. To secure the cord, you need to wrap the handle several times. When forming the winding, you need to press the cord as hard as possible. The first turn should hide the adhesive tape.
Now you need to wrap the handle almost to the end, leaving about 2 cm. Then the braid is distributed over the entire handle.
After filling the handle with braid, all that remains is to tie a knot and trim off the excess material. The knife is almost ready - all that remains is to dry the skin. It will wrinkle a little, becoming stronger.
There are many options for braid design:
- dense braid;
- "Turkish head";
- "Cobra";
- "Snake Knot";
- "Ear".
Leather trim
The softened material must be tightly wrapped around the handle of the knife, and the cutting points must be marked. Use scissors to remove excess skin, leaving a 2.5 cm seam allowance on each side.
Now holes are pierced evenly along the entire length of the flap with an awl on both sides of the skin. The handle is wrapped with a piece of leather and the holes are sewn together with an overcast stitch. At the end of the work, you need to tie a knot on the back side of the flap.
Once the leather is completely dry, the knife is ready for use.
DIY knife handle at home
The handle of a knife is often made at home from wood. More precisely, these are the linings, and the metal frame (shank) is connected to the blade into a single whole.
Two wooden parts are cut to match the dimensions of the steel one. They need to be shaped as in the sketch. Grooves are cut on the inner sides, equal in thickness to the shank. Be sure to make holes in the top and bottom of each element for fasteners (pins or bolts). Wooden parts should be coated with linseed oil. When the tool is assembled, the handle is polished.
Making even a simple knife without experience is not so easy, but it is possible. To do this, you need to own at least hand tools, and it is better to do everything using machines. But you can get a unique product that fully meets the wishes of the owner.
How to make a handle for a knife from wood with your own hands - master class
We cut out blanks from maple and walnut with a hacksaw; if possible, you can use a jigsaw or a circular saw with a planing disk - the cut will be smooth, which will facilitate further processing
It is important to choose the correct sawing angle relative to the grain to get a beautiful texture on the cut.
Next, the resulting workpieces are sanded using sandpaper or a sanding mesh.
Particular attention should be paid to carefully fitting the wooden pieces to each other - they should fit without visible gaps. If the edges of the joint do not fit tightly, it’s not a problem, they will still be cut off during further processing
After this, they take a blade with a bolster attached, place it with a shank on a piece of wood and trace it with a pencil. Then, using a square, transfer the markings to the ends of the workpieces.
And so, the hole for the shank is marked, you can proceed to drilling. Having measured the thickness of the shank, select a drill of the same diameter. At home, it is best to drill with an electric drill, holding the workpiece in a vice. In this case, along the width of the shank, we got two parallel holes with a thin partition between them. The latter is removed using a file and a needle file.
Be careful, needle files break easily. The alignment of the hole is controlled by repeatedly putting it on the shank and turning the desired side
Knives with Navajo horn handles
Navajo is a classic Spanish knife that is made with a horn handle. The shape of the handle is curved, so there is no need to straighten the horns or change their configuration. The main thing is to choose the right part of the animal’s head “decoration”. Since this is a folding knife, the horn for the handle is processed in full - for example, the core is completely cleaned out, only the upper horny layer remains as material.
In addition, before boiling the horn in a lime solution, you will need to make a cut in the curved part of the horn - this will be the place where the blade is removed when the locking mechanism is snapped into place. The cut is made 0.2-0.5 mm larger than the width of the blade.
Experienced craftsmen do not recommend making handles from Navajo horns yourself, because the main problem is making the cut - it must be done carefully, without cracking the material.
Types of materials used in the manufacture of the handle
Choosing a material for a future handle is a difficult test for those who make a homemade knife. Factors such as strength, wear resistance, balance, resistance to absorption of odors and dirt, and attractiveness have to be taken into account.
Tree
Wood is one of the most widely used materials for making knife handles . The best woods for this purpose are hardwoods such as walnut, maple, ash, birch or oak. Wood is easy to process, pleasant to the touch, does not slip in the hand, allows you to work with a knife at low temperatures, and this explains its popularity as a handle material. At the same time, it is much inferior to synthetic materials in terms of strength and durability.
Types of products
The first stage of purchasing or making a knife is choosing its model, depending on the purpose of using the blade (Figure 2).
All bladed weapons are divided into types depending on the scope of application:
- Hunting:
such knives are most often made to order, because such a blade must successfully combine very serious characteristics. Since such blades are most often used for cutting game, the blade must be durable, extremely sharp and not dull for a long time. In addition, such products must be wear-resistant, because during the hunt you will not have the opportunity to replace the blade. - Tourist:
perhaps the most versatile option, since with the help of such a knife you can cut branches, plan wood chips and perform a number of other tasks. If you want to make such a folding camping knife with your own hands, keep in mind that its blade must be strong enough and wide, because such camping knives are often used as a replacement for an ax. - Survival knives:
a subspecies of tourist blades, which are separated into a separate group because of their versatility. As a rule, such models are equipped with additional devices that may be needed on a hike. But in practice, it is better to have all these devices separately, since when they are included in the knife itself, the width and performance characteristics of its blade deteriorate. - Kitchen knives:
such knives are also often made by hand, for example, from metal saws, since high-quality finished industrial products are usually very expensive.
Figure 2. Types of bladed weapons: 1 - hunting, 2 - tourist, 3 - survival knife, 4 - kitchen
In fact, you can make a knife with your own hands from almost any material - a bearing or a file, the main thing is to adhere to the correct heat treatment regime so that the finished blade is moderately hard, sharp and wear-resistant. Since many are interested in how to make a high-quality hunting knife with their own hands, we will look at all the nuances of this process in more detail.
Making a handle: instructions
A non-folding knife is simple in its design - this simplifies the process of making a handle. An example of such a need is a finished blade with a broken handle. It is not difficult to make a replacement from scrap materials - such a knife will be restored. You can try to choose an option according to your preferences and get a good handle for a multifunctional blade.
Required Tools
The tool for making a knife handle with your own hands is selected based on the material - most often it is wood. To process lumber, you can use electric woodworking machines, chisels, and files. If the choice is made of metal, then you need another auxiliary tool - a vice, abrasive stones, a drill or a metalworking machine. The list is changed accordingly, but there is a general principle - everything available for processing is prepared before work begins.
Requirements for size and shape
The minimum length of a normal handle for a knife, for example a hunting knife, is from 11 cm to 13 cm - it depends on the width of the owner’s palm. The form is set depending on the goals, based on the principle of a more convenient option. In the case of a hunting tool, they often prefer to make a convex handle
If you need greater reliability during operation, then pay attention to the need for expansion at the end and the location of the lanyard attachment
Handle attachment methods
The position of the handle in relation to the blade can be at an angle or parallel, depending on the shape. And the method of attachment is determined by the function intended for the knife.
There are only 2 fastenings: riveted and mounted, and each has its own pros and cons
Horseback method
A handle is attached to a fairly narrow tail. The tail of the blade does not have to be short - sometimes it protrudes and the handle is secured to it with a nut by riveting. This method of fastening makes it possible to construct a handle from several parts, that is, a composite one. According to his taste, the hunter can at any time change the handle that is out of order or simply boring. In such cases, it is better not to rivet the head, but to secure it with a nut. Such handles are located parallel to the blade. If the tail is shorter than the handle, then it is fixed with glue. Most often this is how the handle is attached, which is located at an angle to the blade.
Handle material – kraton
The mounted method has its advantages:
- Maintainability;
- Light weight;
- Greater attractiveness;
- Low thermal conductivity;
- The handle can have almost any size and shape.
Disadvantages: less strength compared to the riveted method.
Blade made of springs, handle made of KAMAZ pads, leather, aluminum
Riveted method
This is an easier way. The shank is made wider; its shape already determines in advance the shape of the handle, which will be secured in the form of 2 cheeks with rivets. Sometimes the method of riveting a solid handle with pre-drilled holes is practiced. Such knives are always heavier and there is practically no decor on them, since this is additional weight.
Advantages:
- Increased fastening strength;
- Easy to manufacture.
Flaws:
- Usually not a very comfortable shape;
- High electrical conductivity;
- Heavy weight.
Mounting according to view
There are several options for attaching the handle to the knife blade. The most popular are the mounted and overhead handles. Each of them is designed for specific knives.
Horseback
Mounted fastening technology provides for a narrow knife shank. The handle will be made in one piece. This mechanism provides resistance to damage. The design will be lightweight compared to riveted technology. This predetermines when used in long and voluminous work. If the manufacturer has chosen the mounting technology, epoxy resin and wood sawdust will be needed for excellent adhesion. The work is carried out according to the following scheme:
- Selected types of wood are treated with an antiseptic;
- A blank with suitable proportions is made from the block. The cutting angle is taken into account in order to achieve a beautiful cut;
- Marking is carried out and a hole of suitable diameter is drilled;
- You should dilute the epoxy, combine it with sawdust, and pour it into the hole;
- At the same time, you should insert the blade, which was previously wrapped with tape to protect it from dirt;
- Place the semi-finished product in a vice or press and wait until it dries completely (a day or two).
You can make such a handle with grooves for your fingers. To do this, make a recess under the index finger. You can practice performing the correct form on plasticine, only after that you can move on to wood. After this, you should use a cutter, rasp and sandpaper to sand the workpiece. Soak the product in heated drying oil and dry it in the sun. After this, treat the handle again with a zero polish. Complete the production with a coating of rosin, turpentine and wax, melted in a water bath, which should be used to polish the handle.
Marking the piece of wood
Mark the groove on the front end according to the size of the shank
We drill with a wood drill with a diameter of 6 mm. We drill further with a drill, marking the required depth with electrical tape. We turn the block over and cut a groove with a Dremel with a disk cutter, 1 mm thick.
We drill a series of holes in the groove with a drill with a diameter of 1 mm.
We cut the groove with a sharpened hacksaw blade.
We wrap the blade with rare fabric insulating tape.
Invoice
Such a handle provides for the presence of a wide shank, which is necessary to determine the contour of the created handle. It is assembled from two wooden blocks, united by metal rivets. This method of fastening does not affect the dimensions of the product in any way, thanks to this it is possible to balance a wide or elongated blade. The overhead fastening option is popular among the manufacture of kitchen knives. Main stages of work:
- The prepared wood is treated with an antiseptic and placed in a vice, where it is evenly divided into two symmetrical parts;
- The surface of the shank is carefully cleaned and polished to avoid gaps;
- Future fastenings are marked to connect the two parts;
- It is necessary to prepare a rod of copper or brass and drill holes in the markings in accordance with the diameter of the rod;
- Make rivets; their length should be greater than the thickness of the finished handle.
Before doing the work, you can practice rough assembly of parts. After assembly is completed, the handle should be processed using a cutter and sandpaper. The halves must be attached symmetrically. You also need to saturate the wooden halves on the side adjacent to the shank with epoxy glue or resin, and add toner to give the desired shade to the product. Next, you need to wrap the knife blade with tape and connect the workpiece, cut off the pieces of rod and protruding rivets. Place the finished knife in a vice again, after wrapping the handle in oiled rubber. Allow the finished product to dry (a day or two).
Soak the handle in heated drying oil and dry in the sun. After this, treat it with zero. Polish the product with a mixture of rosin, turpentine, and wax, melted in a water bath. Instead of this product, you can use ship varnish.
Preparing parts for a new handle similar to the old one
Adjusting the handle to the size of the blade
Finishing the handle with a file
Grinding chamfers
Pros and cons of inlaid knife handles
Such options are clearly superior to monolithic models. Among the advantages are:
- reliability - this is facilitated by the strong connection of all parts. The flexibility of the one-piece structure is not compromised. Breakage is almost impossible;
- Convenience – you can choose the shape and size of the parts. Typically, non-slip materials are used in production;
- affordable price - pieces of leather, wood, birch bark are quite simple and cheap. The stacking method allows you to connect different elements for comfort;
- low weight - the instrument is much lighter than a solid one;
- aesthetic appearance – beautiful decor makes the product attractive.
The disadvantages include:
- painstaking work in production;
- the need to purchase additional materials and tools.
In production they use:
- plexiglass;
- textolite;
- skin;
- birch bark;
- tree.
Everyone has their own characteristics. The first two options don't connect well. The rest absorb moisture and an odor appears.
Plexiglas handle.
Saiga horn like a knife handle
Saiga horns are highly porous and have a soft “core,” so this material must be carefully prepared before making a knife handle. Experts recommend soaking such horns in water for a week, changing the water daily. After such a “procedure”, it will be possible to clean the inside of the material by removing all softened tissue from there - the smell is very unpleasant, so the work will have to be carried out in a well-ventilated area and in a respirator.
If you need to bend the horn to create the desired shape of the handle, then this is done only in a muffle furnace - expensive, specific equipment where the temperature is maintained as high as possible. As soon as the horn begins to bend on its own in the oven, it must be immediately taken out, given the desired shape and left to cool naturally.
After such processing and polishing, the saiga horn becomes almost transparent and can be coated with dark decorative varnish.
Knife handles made from horns are the most successful option, which makes the weapon interesting, extraordinary and turns the product into a gift option. Making pens from such material is not easy, but if you strictly follow the algorithm and do not violate the technology, then even beginners will succeed.
General information about the scabbard
A sheath is a product designed for carrying and storing edged weapons. They protect the owner and surrounding people from accidental injury from a sharp blade and prevent the appearance of rust on the metal. If you need to organize the storage of collectible, expensive, exclusive models of knives, then the sheath can be made with decor from precious stones, gold, and silver.
For the manufacture of sheaths, various materials are used, which will be characterized by increased strength - genuine leather, hardwood, metal, thick fabric, plastic.
Materials you can make with your own hands
You can make a sheath with your own hands from the following materials:
- a natural skin;
- wood - hardwood only;
- plastic.
| Material name | Advantages | Flaws |
| Genuine Leather | The material is dense, will last a long time as a finished product, affordable | Working with leather is difficult (requires some skills), requires specific care, remains soft |
| Wood – beech, oak, walnut | Reliability of the finished product, it is possible to decorate the sheath with decor or paints | Working with hard wood is very difficult; for fastening you will need to make hinges from leather |
| Plastic | Waterproof, has a long service life, can be washed even with aggressive agents, inexpensive | To carry out the work you will need a professional construction hair dryer |
Types of fastenings
Depending on what the knife is intended for, the types of sheath mounts differ:
- traditional (worn on the belt);
- combat (shoulder, hip);
- special (suitable only for those who want to hide the presence of bladed weapons);
- image (applies only to folk traditions and the conditions for observing attire at ceremonial parades).
On the thigh
Combat knives are worn below the waist on the hip - this is typical for the military, but is also suitable for professional hunters or wilderness survivalists. In this case, the sheath is fixed to the thigh with a belt or cord at the lower end; the upper part can be additionally secured to the belt - this is especially true for large cutting tools.
Carrying a knife this way is quite specific: it is inconvenient for an untrained person to remove it, and there is a high probability that a leg injury will occur.
On the belt
A knife is attached to a belt by both amateurs and professionals - this method can be called a belt method and is considered universal. In this case, the weapon can be worn on the left or right side, for which the scabbard is structurally provided with left-handed/right-handed hangers; there is also an option for a double-handed hanger - you can place the knife on any convenient side. The latter type of fastening allows you to carry the cutting tool on a belt both at the back and at the front.
The disadvantage of this type of carrying is the difficulty of removing the knife from the sheath while sitting or lying down.
Shoulder
The shoulder sheath mount is most often used for combat knives. It is a wide cord that is threaded through a loop in the sheath and fixed on the shoulder or forearm. The knife is worn with this mount only with the handle down.
Only specially trained people can safely carry knives with a shoulder mount; amateurs are better off not taking risks - and taking out a weapon without specific skills is extremely inconvenient, and the risk of damage to the skin, soft tissues and even the periosteum is very high.
To the fisherman's vest
On the fisherman’s vest, the place for attaching the knife is pre-thought out, because this tool can save a person’s life - for example, if a fisherman fell into the water and became entangled in his own or someone else’s nets, then a quickly removed knife in his hands will solve the problem.
The weapon must be attached to the fisherman's vest with the hilt downward - this way it will be convenient to take it out. If the vest does not have a special pocket-compartment for weapons, then you will need to attach it to the sheath on special loops.
Watch the video on how to attach a knife to a fisherman’s vest:
Which ones are suitable for a dagger, hunting knife
For a hunting knife and dagger, you should choose a belt mount and here's why:
- the easiest and most affordable way;
- the knife/dagger is located on the right or left side (where the “working” hand is located);
- the weapon is positioned with the blade down.
If the dagger is an element of traditional clothing (for example, Cossacks or Caucasian warriors), then it is worn according to the rules, for example, in a sheath on a hanging belt hanging down on the hip.
Wooden scabbard
When wondering how to make a knife sheath, many opt for the wooden option. Wooden scabbards are reliable, practical and very beautiful. The wooden knife sheath is decorated with paintings. It is used for storing blades at home.
Pros and cons of the material
To make this type of protection, hardwood is used. It can be:
- oak;
- beech;
- nut.
Working with such breeds is very difficult. However, the resulting device will be reliable. In addition, it is possible to decorate it with decor, paints, wood painting (burning) and so on. If you plan to wear the sheath on a belt, you need to additionally create a loop for fastening made of leather material.
Required materials and tools
Wooden products do not have liners. It will be impossible to remove them and clean them. Therefore, to maintain safety, the inside of the wood is treated with wax or other waterproof compound. To make a sheath you will need the following materials and tools:
- wood for work (hardwoods are recommended);
- pencil;
- ruler;
- exemplary blade;
- chisel;
- sandpaper;
- wood glue;
- wax for impregnation.
Sandpaper for cleaning should be of medium abrasiveness.
Manufacturing stages
How to make a knife sheath with your own hands step by step:
- Take two pieces of wood. First we work with one of them. We apply the knife to it to the depth at which the blade is planned to enter the sheath.
- We outline the outline. Then we increase the perimeter by 2 mm for ease of use of the object.
- Using a chisel, we make indentations corresponding to the size of the blade.
- We repeat the same steps in mirror order with another piece of wood.
- Leaving about 5 mm for the thickness of the cover itself, we cut the rest of the wood along the contour.
- The core is sanded with sandpaper and treated with wax.
- The two halves are glued together using wood glue.
Making a sketch
Cutting out the core for the blade
Connecting the elements
Making a design sketch
Burn it out with a soldering iron
Design option
Post-processing
The prepared products must be carefully treated with sandpaper to avoid splinters when using the cover. Before you make a wooden knife sheath, you should think about impregnating it. It is advisable to treat them externally with wax.
We process the coating with sandpaper to remove splinters
Wooden handle
How to make a handle for a knife depends primarily on what kind of knife you will be making or have
It is also important to decide on the material from which this part will be made.
Don't rush to throw away your favorite knife if the handle breaks. With a little effort, you will get great results. The most popular homemade knife handle is made of wood because this material is easy to obtain and easy to work with. Even a beginner in this field can make the presented option a reality. The advantage of this option is that in parallel you can create not only a handle, but also a sheath.
Also read: How to make a tennis table with your own hands.
The easiest way to work is with a knife that has a long tail. Initially, you should make the ponytail a wave shape. To do this, use a file. Thanks to this shape, the knife will sit securely and firmly in the handle.
Then markings should be made on two boards (must be identical). Namely, redraw the resulting wave. For further work you will need a cutter designed for working with wood. As an alternative, you can replace it with chisels or a knife used by shoemakers. But a cutter would be a more suitable option, since with its help you can make the contours clear and as neat as possible without unnecessary hassle. You should cut out the outline of the knife tail on the inner surface according to the mark.
The marking must be as accurate as possible
Now you need to apply a layer of epoxy resin-based glue to both boards with the cutout and the tail of the knife itself. When connecting, you should make sure that everything fits tightly everywhere and there are no protrusions or distortions anywhere.
The advantage of this method of creating a handle is that you don’t have to make rivets and fuss with fixing them. After placing the workpiece under a heavy load, you need to leave it so that the glue dries well. No less than a day later, you can start the manufacturing process again.
Interesting: DIY swing-nest.
If you want to make a sheath for your knife, then the technology for creating it is the same.
- On two boards you need to outline and cut out the contours. And according to the same scheme, glue the two parts.
- Everything must be dried under pressure.
- The final stage is polishing the product, both the handle for the knife and the sheath for it. The knife should be “put on” in the created sheath. They are processed on an emery machine. This is necessary to give the sheath a beautiful aesthetic shape and make the corners smoother.
Also read: How to make a metal gazebo with your own hands.
Before processing
Processing material such as wood is quite simple, so you can easily cope with this task. At the very end, you need to do the final sanding using fine sandpaper.
After processing
How I decided to make a knife handle
Once a friend and I went out into nature several times and took with us an ax, a sapper, and the main character of this story - a cleaver, which we decided to call Heinrich. I liked it right at first sight, and a friend ended up giving it to me for my birthday.
Heinrich is an impressive cleaver, about 65cm long including the handle. It looked deplorable, although the steel was quite good, but it was covered with a layer of rust from idleness.
Having received it as a gift, I decided not to just leave this matter and make it into a great-looking and self-respecting cleaver.
If I had known that I would be writing this on Pikabu, I would have taken a lot more photos of the process, but I didn’t know. But since many are now interested in knives and their manufacture, I will describe the process in as much detail as possible.
- In the process of everything I did, I spent 6-8 hours on YouTube and I want to say right away that I didn’t have the necessary tools, so everything was done somehow, but at the same time with the highest quality, well, as much as possible without the necessary ones tools and experience in such things.
- What I needed in the process:
- 1. Danish oil
- 2. Brass blank
- 3. Wooden block
- 4.WD-40
- 5. Container for tumbling the knife
- 6. Pebbles
- 7. Ferric chloride
- 8. Epoxy glue
- 9. Sandpaper
- 10. Gloves
- 11. Respirator
- 12. Safety glasses (you can get by if you squint well while working :D)
- Initially there was just a plastic handle and I decided to start by knocking it down, then cleaning the rust from the metal, pickling it and tinting it.
No sooner said than done, with grief I knocked the plastic in half, because the inner part of the handle (the iron itself) reached right up to the very end of the plastic. Deciding to make the handle wooden, but not get too worked up, I ordered a block of bog oak directly from a website dedicated to making knives.
I want to say that the bars of even the most ordinary wood are not very cheap, so I didn’t really want to cut them either.
Having learned from YouTube that it would be a good idea to treat the wood with something after work, I also ordered a small sample of Danish oil. The sample is cheap, relative to a whole jar, but you don’t really need a whole jar, because you will need to blot some rags with oil a couple of times and use it to rub the oil into the wood.
I removed the rust with a small Dremel, and then manually, first with coarse and then fine sandpaper, the process is quite long, especially considering the size of the blade and how long it rusted idle in the garage.
Then I spent several days choosing what exactly I wanted to etch the knife with, because I didn’t want to remove a lot of metal, and different acids and alkalis produce completely different results. Well, since this is a brutal cleaver Heinrich, the choice fell on ferric chloride, which makes the metal dark gray and matte, plus, as I wanted, it does not etch deeply.
It usually looks something like this. This jar was barely enough for me to fit the size of a cleaver. If memory serves, this is 50 grams, but I could be wrong. Plus, it is much more convenient to work with ferric chloride, unlike nitric acid or something similar, which requires much more serious protective measures than just rubber gloves.
I adapted an ordinary box for the container, in which I put a huge garbage bag, since Heinrich did not want to fit into anything else. And even in such a box it only fit diagonally.
I poisoned it for about 40-60 minutes, periodically washing it and checking the effect. You can etch metal with ferric chloride for a very long time, essentially until you achieve the desired effect. I would still advise etching longer, since a thin layer is easily erased. During my first trip to nature and after cutting branches, my etching was partially erased.
Handle mounting options
Depending on the type of attachment of the knife handle, there are mounted and overhead models. Each of them is designed for a specific type of blade. Both techniques are available for self-production.
Mounted technology is optimal for knives with a narrow shank; in this case, the handle is a single piece. The work is carried out as follows:
- The wooden block is treated with an antiseptic, giving the workpiece an optimal shape.
- Make markings and make a hole. Epoxy resin mixed with sawdust is poured into it, then the blade is inserted.
- The product is placed in a vice until completely dry.
The riding handles are lightweight and resistant to damage. Overhead knives usually have a wide tang. The manufacturing process is carried out in stages:
- The wood is coated with an antiseptic composition. The block is placed in a vice and cut into two equal parts.
- Make markings and make a hole for the shank.
- Fix rivets whose length exceeds the thickness of the handle.
The handle made in this way is processed with a cutter and sandpaper. The workpiece is impregnated with resin or epoxy glue; toner can be added to give the desired shade. Overhead handles are most often used when creating kitchen knives. These options allow you to balance elongated or wide blades.
An ergonomic knife handle is the key to comfortable use of the product. You can make the handle yourself by choosing suitable materials, techniques, and fastening methods. A variety of decoration options and braids will give the product a unique appearance and exclusivity.
Horse handle
Treat the pre-selected tree with an antiseptic.
Mark and drill a hole of the required diameter and length slightly larger than the blade shank. Dilute epoxy resin in a ratio of 100:13, mix with sawdust and pour the resulting mixture into the hole. Insert the shank of the blade, previously wrapped with tape to protect it from contamination. Now press the semi-finished knife into a press and wait 1 day for the resin to dry.
If the handle has grooves for the fingers, then a deeper recess should be made for the index finger. Using plasticine, you can make a visual shape so as not to make a mistake on the tree. Next, use a cutter, rasp and sandpaper to bring the workpiece to the desired appearance.
Then perform impregnation, for which the oil or drying oil is heated in a water bath and the knife handle is immersed in the heated raw material for 1 day. When ready, there will be no air bubbles on the surface of the oil. This is followed by drying, preferably in the sun.
Carry out the final finishing treatment with a “zero” finish.
Mix rosin, turpentine and wax in a water bath and cover the handle with the resulting mixture. Finally, polish the handle and remove the tape from the blade.
Making a scabbard
Sheaths are an integral part of quality hunting knives. They are designed to protect the blade from external negative influences, and also allow you to keep your hunting dagger always at hand. A knife for everyday use should be equipped with a collapsible sheath for easy cleaning. The sheath for a hunting knife can be made of leather and wood. Everyone chooses for themselves how to make a knife sheath.
Wooden scabbard
Necessary:
- Cut a suitable piece of wood into two halves. If the handle is made of wood, then it is best to use a block of the same type of wood.
- Draw on each half the outline of the corresponding side of the blade.
- Make a recess according to the outline in the two halves of the sheath to the thickness of the blade. You should slowly adjust the recesses so that the sheath fits tightly in the future.
- Glue the halves strictly along the edges of the recesses. A moderate coat of epoxy should be applied to prevent penetration into the blade recess. If necessary, pre-sand the surfaces to be glued for a tighter fit. You can also fasten the halves together with decorative screws.
- Give final shapes using a file or Dremel and sand.
Leather scabbard
You will need:
- Make a mockup out of paper and tape.
- Transfer the pattern to the leather and cut, leaving a seam margin of approximately 7-10 mm.
- Soak the skin in water at room temperature for 20-30 minutes.
- Cut out a thin plastic liner.
- Protect the blade with masking tape.
- Wrap the knife in the soaked cut leather. Fix the necessary bends (you can use regular clothespins).
- Make a pendant (trench) and form a hole in its loop. Cut a strip of leather and fold it in half, this will be the pendant.
- After the leather has dried, glue the pendant and sew it to the sheath.
- Glue in the plastic liner.
- Make an expansion wedge for the top of the sheath.
- Sew the sheath by first making symmetrical holes.
- Soak the sheath and place the blade in it, then place it under a press to give the final shape.
- After drying, you can impregnate the leather with shoe wax or special impregnations.
Workflow Description
Before starting work, it is necessary to determine what type of handle will be used in this case; there are two main options.
Types of handles
Everything is quite simple here:
Mounted type options are used for blades with a narrow shank. As the name implies, assembly consists of securing the blade in a cavity that is made at the end of the handle. The advantage of such solutions is that the handle turns out to be one piece without any joints.
Mounted handles are used mainly for knives with small blades
Overlay options are used for blades with wide shanks; this is a more common option, which differs in that the handle consists of two halves that need to be perfectly aligned with each other to ensure the best comfort of use.
Product assembly
The work is carried out differently depending on the type of shank; first we will consider the mounted option:
A workpiece is taken and given a certain shape, this is done using any available means - a hacksaw, a jigsaw, cutters and other devices. When you get a rough version, you need to bring it to perfection using sandpaper, but you can also use a wood sander.
The finished handle should be perfectly smooth
- Next, a hole is drilled in the end, the depth of which should be equal to the length of the shank on the blade. If it is necessary to widen the hole, this is done using a needle file. As a result, the shank should fit freely on the handle.
- Now let's look at how and with what to impregnate a wooden knife handle; for this we use a water bath, i.e. Place a small one in a large saucepan with water, into which linseed oil is poured. The handle is lowered into it and held there until air ceases to be released from the material, after which the elements are removed, wiped and left to dry and cool for a couple of hours.
Some people impregnate the handles after assembly, but it is better to do this in advance.
After the handle has dried, you need to prepare epoxy resin (the instructions will tell you how to do this correctly). The composition is mixed with fine sawdust and the prepared cavity is filled with this mixture, after which a blade is inserted into it. Don’t forget to check its level position, then leave the product for a day, then you can use the knife.
After the epoxy hardens, the structure can withstand even significant loads
Overhead options are done a little differently:
- The workpiece is cut lengthwise into two halves. To do this work yourself, you will need to secure the wood in a vice so that you can accurately control the work process. The halves are brought to perfect condition in the same way as described above. To do this, use any tools and devices convenient for you, and the surface is brought to perfection using sandpaper.
- Next, you need to drill holes for the rivets; to do this, the handle is securely attached to the shank and drilling is done through all the elements at once, so you are guaranteed to get perfectly aligned holes.
- After this, you need to make blanks for the rivets, their diameter must match the holes, and the length must be equal to the thickness of all elements.
- The oil impregnation process is described above; you can do this after assembly, but it is better to do this in advance so that the elements are processed as efficiently as possible on all sides.
You decide what to impregnate a wooden knife handle with; it can be linseed or hemp oil, as well as other compounds.
- Epoxy resin is prepared, the internal parts of the handle halves, the metal shank, and the rivets are lubricated with it. All elements are assembled into a single whole, after which they are wrapped in a piece of rubber and wrapped with tape for tight fixation.
- After a day, the product is inspected and, if necessary, excess epoxy is cleaned off. Oil treatment can be repeated if the surface had to be heavily cleaned.
The finished product will not be inferior in reliability and quality to the factory versions, and the price will be much lower
Characteristics of a hunting knife
Which handle to choose for an interior door
In order to make a hunting knife, you need to figure out how it differs from other types.
So, in addition to performing regular cuts, it must cope with the following tasks:
- finish off a wounded animal;
- skin;
- cut up the carcass.
Based on this, we can highlight the characteristic design features:
- Straight butt for a powerful blow during finishing. For finishing, a separate blade with a central tip is often used; it is also called a hunting dagger.
- Blade length 100-150 mm.
- Use of harder steel grades.
- Handle made of wood, birch bark or non-slip artificial materials, with moderate relief. It should be comfortable for cutting towards and away from you, as well as piercing movements.
- Lack of additional devices in the design.
So, how to make a hunting knife?