Visual video:
Today we will talk about how to make or forge your own traditional Japanese knife or samurai tanto dagger with a wooden sheath.
We will also consider a detailed description and step-by-step photos of making a tanto with your own hands using Japanese technology. First of all, you need to know that a tanto (translated from Japanese as “short sword”) is a samurai dagger. The tanto blade is characterized by a one-sided blade, less often sharpened on both sides, 25-40 cm long. The tanto is made of sponge iron (tamahagane) and must have a hamon hardening line, a removable handle, which is secured with a menuka bamboo pin, and a round guard, which can be remove - tsuba. Calling the tanto a knife is incorrect, since it is a dagger and has never been used as a knife. Tantos are usually made using the hira-zukuri method, in other words, they do not have a stiffening rib, but sometimes you can see blades with a stiffening rib (Moroha-zukuri, sharpened on both sides). Tantos, which had a thick triangular blade, were called yoroidoshi and were used in close combat to pierce armor. The tanto was used only as an additional blade for finishing off the wounded, decapitation, seppuku, etc., and never as a knife, which was a small kogatana knife carried along with the wakizashi or tanto in special compartments of their sheaths.
Tanto was used, as a rule, by samurai, but it could also be used by doctors and merchants for protection. Noble women also sometimes wore small tantos called kaiken in the belt of their kimono (obi) for defense or hara-kiri.
To make a tanto in a regular workshop, take a metal rod, bolt or piece of reinforcement 30-40 cm long. Heat it over coals and begin to shape the blade on an anvil.
Ideally, you should end up with a triangular blade with a shank approximately the same shape as in the photo above. The thickness in the butt area should be 2-4 mm
Japanese craftsmen traditionally process and polish the blade by hand. The workpiece is clamped with wedges on a workbench and each side is processed in turn. To speed up the process in modern conditions, you can use various grinding and polishing machines and tools that you have available.
When the processing of the blade is completed, you can begin to harden it. In Japanese blacksmithing technology, the entire blade is rarely hardened. Usually the working part of the blade is hardened.
For these purposes, a special fire-resistant paste or clay is taken, with which the entire blade is coated. Only a 3-5 mm thick area in the blade area is left unsmeared, as shown in the photo. After this, the blade is heated in a forge and hardened by immersing it in water, oil, or hanging it in a cold wind. For more information about blade hardening methods, see other sections of the site.
After this, you can begin to manufacture various attachments for the blade and sheaths, which are made from various metals - copper, brass, steel, silver or their alloys. Every detail is carefully adjusted to the blade
In places where the working part of the blade will come into contact with metal attachments when removed from the sheath, it is necessary to use softer metals such as copper or partially solder them, as shown in the illustration. This is done so that the blade does not become dull when rubbing against these parts.
A good design combination with copper attachments is provided by parts made from silver or cupronickel spoons. In addition, these metals hold solder well
Silver and cupronickel alloys are quite soft and ductile metals that lend themselves well to any mechanical and thermal treatment.
The more time you devote to processing and adjusting each individual part, the better your future tanto will turn out.
Do not strive to achieve the obligatory polishing of every detail to a mirror shine. On the contrary, it is better to show that each nozzle was made by hand.
To fasten individual parts, you can use ordinary tin or lead solder. As a result, you should have the following number of attachments and fastenings for the blade and tanto sheath
After this, you can begin making the wooden handle and sheath of the tanto. In Japan, the wood used is local mountain pine, larch, cherry or maple.
We recommend using hardwood - oak or beech. The handle and sheath are made of two dies, which are then glued together. The grooves for the blade and shank are cut with ordinary carpenter's chisels
Leather is glued onto the finished handle. Also, do not forget to first mark and drill a hole in the handle for the fastening pin, which securely fixes the shank of the tanto dagger and the handle itself. In the process of cutting grooves in the sheath, constantly try on the blade, which should fit there perfectly.
The blade should enter the sheath gently, but should not dangle there freely and fall out of it. When the grooves for the tanto blade are ready, glue both halves of the sheath. Any high-quality wood glue, PVA glue or epoxy will be suitable as glue.
The sheath should remain under pressure until the glue has completely dried. After this, you can grind and polish the sheath, which should have an oval shape in cross-section. Also take care of fitting the attachments. The attachments should also fit perfectly into their grooves.
Before final installation of the nozzle, coat the contact points of all parts with quick-drying “Moment” type glue.
On the sheath itself, glue a copper attachment with a fastening ring for a lace, as shown in the photo
Cover the well-polished scabbard with several layers of paint. You can even use metallic paint and apply some kind of Japanese-style ornament
As a result, you should get such a samurai tanto dagger
Source: https://remontavto-moto-velo.blogspot.com/2017/11/blog-post_20.html
Types of tanto knife and their parameters
Today, most people know this product as an American creation.
We need to tell the truth about the knife. During World War II, American fighters liked Japanese national blades. And they created mass production of steel knives. After erasing the historical value of the samurai blade.
In Japan, it is illegal to carry as many knives as the XO. These blades are used by famous Japanese yakuza and ninja. According to Japanese laws, about 300 craftsmen are engaged in the manufacture of real knives. Each blade is branded and has national value.
The history of the knife is extensive and has many antecedents from the past. There are several types:
- One of the oldest tanto style knives, the aptly named tanto-ken. Possesses a double-edged dagger blade. This is a ritual product; the first knives appeared in the 7th century. Gave as a gift.
- The variety worn by the master's servants. After the battle they went to cut trophies from the corpses of the soldiers. The servants' terrible "working tool" was called kubikiri. Having lost their advantage, they solved a narrow range of problems. This type of knife was also used for household needs. It was the size of a sword.
- A true military weapon used to pierce armor is called a yari tanto. Expensive inlaid blade, made with a hollow intestine. It had to be carried on a stick and used like a spear.
- Another representative of the military designation is hasiwari. Its dimensions reached 30-40 cm. A special feature of this product was the hook on the handle. His goal is to capture the enemy's weapons. The Japanese took advantage of this well.
- The knife for finishing off the enemy had a shortened length and was called aikuti. Killing a deceitful enemy with a sword was a violation of the warrior's code of honor. A small knife served this purpose.
- A type of hidden weapon used by: women, monks, ninjas, retired soldiers and even spies. It was called a fan. A small, high-quality steel blade helped all segments of the population in need of protection.
- A unique weapon of an unusual type is the tanto saw. Experts believe that it belongs to the shadow warriors: ninjas.
- An interesting option for the 16th and 17th centuries is a large cannon. Its quality was low, but it was considered a weapon of high-ranking people. Once unsheathed, the XO turned into a single-shot pistol.
Products made by Americans are now purchased by Japanese authorities and destroyed because they have nothing to do with national traditions. They sacredly honor their history.
Tanto knives of various types.
Varieties of samurai knife
In addition to the classic samurai knife, you can also find its varieties:
- Tanto fan . Distinguished by a sheath disguised as a fan, it was used for concealed carry by spies, monks, retired military men and women.
- Tanto pistols . Outwardly, they are practically no different from standard edged weapons, but outside the sheath they are a single-shot pistol. Used for self-defense. True samurai openly despise this type of tanto.
- Yari-tanto . The blade of the knife is a mini-spear. This type of weapon was intended for piercing armor; the handle can be hollow and richly inlaid. In battle it was necessary as a weapon for the second (“non-working”) hand.
- Hashiwari . On the blade, almost flush with the guard, there is a hook that can be used to grab a sword/knife from an enemy during a fight and pierce his helmet.
- Tanto saw . On one of the edges of the blade (on the concave side) the knife has teeth. This type of weapon is rare; ninjas used it to penetrate buildings/premises - for example, by cutting a hole in a wall.
- Tanto yoroi-doshi . It is distinguished by a triangular and thick blade, compared to a classic short sword, and is excellent for close combat. Capable of penetrating even enemy metal armor.
- Aykuti . It is interesting that this type of tanto was never considered a sword, and therefore was used to finish off the enemy: according to the “code” of the Japanese warrior, this cannot be done with swords. On weapons of this type there is no guard at all, and there is no braid on the handle.
- Kubikiri . The literal translation from Japanese is “head cutter” and is distinguished by a more curved blade shape. During the war, it was used to cut off the enemy’s heads (they were collected as trophies); in peacetime, it was also used to chop wood and take care of the garden.
- Tanto-ken . The blade imitates a dagger and has a double-sided sharpening. This type of bladed weapon was produced specifically for Buddhist ritual ceremonies.
- Kusungobu . Ritual knife from the tanto series for committing hara-kiri or seppuki (ritual suicide). It is distinguished by its small dimensions - maximum total length 297 mm.
- Kaiken . Also a type of classic Japanese combat knife, it was intended to be worn/used by women. Perfectly hidden in a sleeve or behind a belt, used for self-defense.
- Moroha-zukuri . It features a double-edged blade; the concave side of the blade is the cutting edge.
The appearance of tanto knives in Japan
The earliest knives appeared during the Heian period from 794 to 1185. These knives did not differ in skill. During the Kamakura period, better materials were used for this, and the knife itself became an invariable attribute of samurai weapons.
Besides the samurai, the yakuza's favorite weapon was the knife. Ninjas also loved to use it, since this knife was worn by different social groups of the population and did not arouse suspicion. Even the scabbard was so richly decorated. All tanto blades made using traditional technology are the cultural heritage of the country.
History of the small sword
The history of the Japanese tanto fell into different eras, the shoguns of which had opposing opinions about the effectiveness of this blade. During the confrontation between the Taira and Minamoto clans, the knife-sword began to be seen not just as an effective weapon, but also as a work of art. By the end of the Heian era, the warrior's weapons consisted of a naginata, a katana, a tanto and a bow.
It all started from Heian 794 to 1185, when this blade was made without decoration and served a purely practical role. During the Gempei era, the samurai began to flourish as a class on which the shoguns relied. The need for additional blades was very high, so the manufacture of tantos became a tradition. Along with the katana, gunsmiths also made a short sword for each samurai.
Blacksmiths made beautiful patterns and insignia on each blade. From 1185 to 1333, during the Kamakura era, the quality of steel improved, so the blades were much stronger compared to their older brothers. Kamakura became a city with a samurai government whose power extended throughout Japan.
More and more craftsmen appeared who performed skillful carvings, as the short sword became not just a necessary weapon, but also an object of samurai aesthetics. During the Moromachi era, from 1336 to 1573, the production of these weapons reached its peak.
Everything changed in the Shinto era, from 1603 to 1780, it became a time of new swords and armor; tanto swords were no longer included in the improved weapons. Its production was almost completely stopped, until better times.
They resumed production during the period of closure, from 1703 to 1853. Swords began to be produced in large quantities again, but the weapon itself and its style had already changed. Unlike all previously released blades, tans made at this time are distinguished by lower quality steel.
During the Meiji era, Japan returned to its former traditions. Active trade and cooperation with other countries began. Short swords came back into fashion, but in 1876 a decree was issued that prohibited wearing a blade on city streets. Due to the introduction of new types of weapons, the pistol replaced the tanto weapon.
As can be seen from the above information, the short knife-sword has undergone many ups and downs over the history of its existence, but has not disappeared without a trace, like other examples of Japanese weapons.
Etiquette rules for weapons training
Etiquette is the rules adopted in society to regulate relationships and prevent conflict situations. One of the main consequences of maintaining etiquette in martial arts is the development of discipline and self-control. Control over emotions undoubtedly helps to find a compromise in a conflict situation, and discipline creates favorable conditions for self-development and helps to avoid injuries during training.
The main rule of Aikido is to show consideration and respect to others without expectations.
In Aikido clubs, traditional rules of behavior are prescribed and strictly observed. When all club members follow these rules, safe exercise for body, spirit and mind is guaranteed. A separate paragraph outlines the rules of conduct for armed students:
- you must respect weapons, both yours and others. It is prohibited to touch someone else's weapon, or to injure someone (or their weapon) with your weapon.
- The weapon must not be thrown, placed (even in a corner), slapped or hit on the mat, or rested in a standing or sitting position.
- Weapons must always be placed behind the tatami.
- At the beginning and end of training, the weapon is placed directly in front of you. The bokken is placed on the jo, the “blade” facing towards the jo, the handle to the left.
- When training during seiza, the weapon is always positioned to the left and left of the jo, the "blade" facing outward, the grip is forward, the tips of the weapon are level with the left knee (not protruding).
- When standing with Joe, they hold him upright in the center of their right hand. In this case, the lower end of the jo is directed forward.
- While standing with the bokken, they hold it in an upright position by the handle in their left hand. The direction of the sword is down, back. In this case, the sword is held in such a way that the “blade” of the bokken is facing upward.
- The partner does not change throughout the training with the weapon.
- If you break your partner's weapon, then you need to buy him a similar new weapon.
Tanto: the shortest samurai sword
Tanto is a type of Japanese short-barreled weapon, which, along with the katana and wakizashi, was part of the standard set of samurai weapons. According to the European classification, a tanto (judging by its size) is a typical dagger, but the Japanese themselves consider it a real sword. The phrase "tan to" is translated from Japanese as "short sword".
In literature, this is often called a dagger or a samurai combat knife. Although the name "dagger" is not very suitable for this weapon. This is what folk authors often call it, forgetting that a distinctive feature of daggers is double-sided sharpening. Many - such as katana and wakizashi - have a sharp edge on only one side. It differs from its larger counterparts only in size.
In modern Japan, much made using ancient technologies (as well as some other types of edged weapons) is considered the cultural heritage of the nation. To start making such weapons, you need to study for a long time, and then get a special license. Since the end of the war, approximately 600 such permits have been issued in Japan. Tantos, which were mass-produced industrially during World War II for the needs of the army, are not classified as national treasures and are subject to destruction.
It should be noted that the Japanese themselves do not perceive it as strongly as a regular knife. Everything that was included in the warrior’s weapon set was never used for economic purposes. Only a knife that is used in everyday life is called hamono in Japan.
At the same time, today this word has a different meaning - it is also the name of the shape of the blade with a characteristic sharp break in the cutting edge towards the tip, very often used by manufacturers of combat and tactical knives. Since the general public has almost no idea what a sword is, almost anything can be hidden under this name. The so-called American knife is simply a knife (it comes in different sizes and shapes) made in the style of a Japanese sword. Sometimes this is also called folding knives. Such weapons are very popular today in the USA, Europe and Russia, and only very lazy manufacturers do not produce so many “knives.”
What are Tanto combat knives?
The original tanto (短刀= tan "short" + to "sword") is a traditional Japanese short knife available to civilians (as opposed to the long katana). National treasure of Japan. Tanto combat knives are considered edged weapons in all countries. In a safe form (made of plastic, wood, rubber, etc.) it is used in oriental martial arts.
Traditional samurai set - tanto, wakizashi and katana
In the European tanto classification:
- in size - a dagger;
- for sharpening - a knife.
Tanto knife in Japanese is hamono (刃 “blade, blade” + 物 “product, thing”). Despite the fact that both “hamono” and “tanto” have two hieroglyphs, the first is perceived as one word “knife”, the second - as a phrase with the keyword “sword”.
The second meaning of tanto is a special blade shape for modern knives:
- combat;
- tactical;
- folding, etc.
The thick tip of the tanto is the key to the strength of the knife even with inappropriate use
This form has little in common with the classic tanto, but is popular and widely used due to its strength.
Japanese Samurai Set
The Japanese tanto knife (or short tanto sword) is part of a set of three samurai swords:
- Daito (long sword);
- Seto (wakizashi or medium sword);
- Tanto (short sword or knife).
Since the longsword could only be carried by members of the samurai class, they were wakizashi, so much so that they were the main weapon of merchants and artisans who used them for self-defense.
Although the tanto is simply an elegant traditional knife to the US, the Japanese never thought of it that way. A real tanto is a bladed weapon, and it was also forbidden to use it for economic purposes. By the way, wearing a tanto in Japan is prohibited by law and is punishable by a large fine. For the Japanese who really want to carry a tanto-like knife, American companies have come up with folding models with tanto-like blades. Their size does not qualify as a bladed weapon in Japan.
Foreign variations of tanto
Outside Japan, knives called “tanto” are widely known. These are knives made in the style of a samurai short sword. Since little is known about what there are many outside of Japan, manufacturers call almost everything by this word. In particular, for example, in the USA there is an established stereotype: an Americanized “tanto” with a blade shape with a sharp break in the cut line to the tip, a kind of separate mini-trigger at the point that forms a rib with the main trigger, which does not meet the standards. In addition, they also make “tanto” with a one-sided trigger, which is practiced in Japan for some kitchen knives: yanagiba, deba, nata (Japanese version of a machete) and never for hunting knives and especially tanto.
Tanto blades in Japanese culture
Tanto blades are historically not a knife, but a sword, so they were most often carried in a sheath:
- for soldiers - behind the belt on the right;
- for women - in the sleeve, fan or behind the obi belt.
Until the 14th century, samurai armed themselves with a pair of swords - daisho (“big-small”):
- Daito (“great sword is the same”) - the main one, more than 66 cm.
- Shoto (“sword”) - increase, 33-66 cm.
Sometimes a Japanese sword was used instead of a set.
In the 14th century, samurai weapons changed:
- instead of daito-tachi then there is a katana;
- instead of shoto - wakizashi, sometimes a lot.
Over time, so much has been included in the military set continuously, the third element. It was considered simply a military weapon and was therefore used as such:
- finish off the enemy;
- for close combat;
- cut off heads;
- suicide (warriors-men, women, children);
- for self-defense (merchants, artisans, monks and other travelers).
Now much is cultural heritage.
Only permitted use:
- wedding ceremony of the royal family;
- oriental martial arts.
Types of tanto
In addition to the tanto itself, the short sword had dozens of varieties at different times:
| Title and photo | Difference and purpose |
| Tanto fan The tanto fan has a well-camouflaged scabbard | Sheath for tanto in the form of a folded fan. Concealed Carry:
|
| Tanto pistols The most despised tanto by samurai is the firearm | In the sheath it looks like a regular tanto. Outside the sheath is a single-shot pistol. In the 17-18 centuries - as a weapon of self-defense; status weapon |
| yari-tanto Like a spear - but no, yari-tanto | The blade is exactly like a yari spear:
For piercing armor. It could be put on a shaft like a spear. As a second hand weapon |
| Hashiwari Perhaps hashiwari is a prototype of the Japanese sai weapon |
|
| Tanto saw Tanto saw not only cuts, but also saws | On the concave part there are saw teeth. Supposedly the ninjas made holes in the walls to get into the house |
| tanto yoroi-doshi Tanto yoroi doshi looked approximately like this |
|
| Aykutti, Aigutti (or yaykutti). Aikuti (“fitted mouth”) was not considered a sword | Without a guard, without a braided handle, various tanto sizes, most often short. “Civilian version”, for finishing off an enemy (you cannot finish off someone lying down with a sword, but aikutti, unlike tanto, was not considered a sword) |
| Kubikiri Kubikiri literally means “head cutter” | More curved, sometimes without a point (or with a weakly defined one), the cutting edge is on the inside or on both sides.
|
| Tanto-ken Tanto-kens were forged specifically for monasteries | Double-edged blade like a dagger two parallel cutting edges. Ritual, for Buddhist ceremonies |
| Hamidashi The peculiarity of the Hamidashi is in the handle, or rather, in the guard-tsuba of modest size | The guard-tsuba has a specific shape - very small, barely protruding beyond the edge. A special feature of the Hamidashi guard is its open ryo-hitsu (places for inserting a “kogai” awl and/or a small “kozuka” knife) |
| Kusungobu (9 sun, 5 bu), also known as metezashi Kusungobu - a shortened version of the tanto for hara-kiri | Ritual, the size of the tanto knife is 29.7 cm. Seppuku or hara-kiri |
| Kaiken Too crowded for wakizashi? Use kaiken! |
|
| Moroha-zukuri A type of tanto with additional sharpening on the concave part | Double-edged, curved tanto blade for close combat |
| Unokubi and Kanmuri-otoshi Unokubi is a refined Japanese tanto in the truest sense, as it becomes thinner along the entire length of the striking part and retains only the tip and base thick | The back of the blade becomes thinner in the middle, but thickens again towards the tip. Difference in tip:
Perhaps the stronger tip was used for stabbing. Plus, such a weapon is lighter than a conventional one, monolithically thick along its entire length |
| Shinogi A short Japanese tanto knife with a stiffening rib is already more similar to the American tanto | Stiffening rib (approximately in the middle) |
Rarer executions of tanto (as well as wakizashi, katanas and naginata) are presented in the figure below.
Photo of tanto. Different geometries of Japanese blades
American tanto: differences
The American knife was the first widely advertised and more common knife than its Japanese "ancestor".
Differences between American-made weapons:
- the tip of the blade is strongly bent upward, which makes the knife look like an ordinary kitchen utensil;
- the blade has a stiffening rib and the bevel is made straight at an angle of 45 degrees;
- sharpening can be one-sided, but double-sided is more often used;
- blade length varies from 100 to 300 mm;
- the total length of the knife can be 220 mm, but does not exceed 500 mm;
- a variety of steels can be used in production, including Damascus;
- the fence may be completely absent or have a flat shape;
- the handle is not removable.
So American
From the point of view of Japanese samurai masters, many Americans are a real mockery of the cultural heritage of their country. But the aggressive marketing cleverly advertised by the first manufacturer of such weapons, Lin Thompson, did its job: the Americans believed that such a knife was the sharpest and had an almost eternal service life.
Technical characteristics of a Japanese tanto knife: blade, blade, shape, dimensions
The Japanese tanto knife has individual sizes and shapes, has a distinctive blade, and the entire blade is easily recognizable.
| Characteristics of a Japanese knife | Short description |
| Blade shape | Flat, with slightly curved end |
| Blade length | 303mm (standard), possible from 170mm (souvenir option) |
| Blade thickness | 5-7 mm |
| So much total length | 350-500 mm |
| Blade material | Sponge steel |
| Stick type | Removable |
| Control your attack type | Bamboo pin |
| Garda | Available, removable and round |
Modern examples of that same Japanese knife have worse characteristics. For example, they make a straight bevel of the butt at 45 degrees, which reduces the penetrating properties of the weapon; the blade is made absolutely straight, without a narrow nose, which impairs cutting ability. At the same time, the strength of the short sword blade remains at a high level, so you can always stick it into something hard.
Application
The medieval Japanese warrior was armed with three different swords (katana, wakizashi and tanto), which differed from each other only in size. In its design, the classic tanto is no different from its longer counterparts. It was usually worn behind the belt on the right side.
As mentioned above, so many were never used for economic purposes; they were real military weapons. It was usually used to finish off a defeated enemy and cut off heads. However, this particular knife was used to commit traditional Japanese suicide - hara-kiri. And it was used for this not only by male warriors, but also by women, and sometimes by children. A textbook example of this is the story of the siege of Fushimi Castle in Japan, in which the owner's entire family (including children) committed suicide to avoid falling into enemy hands. Later, this incident became an example of true devotion and honor for the samurai.
In different historical periods, there were varieties of tanto, which were intended to perform certain functions. For example, the three-sided tanto yroidoshi was intended to pierce enemy armor, and the hasiwari had a blade with a special hook that could intercept or even break an enemy sword.
Moreover, unlike the katana, tanto could be worn not only by samurai. It was used by artisans, traders, monks and other categories of citizens who often had to travel.
Currently, this weapon is used during the ceremonial wedding ceremony of members of the imperial family.
There are so many things used in different martial arts schools today. Of course, for training or practice fights they use blunt weapons or, in general, wooden or plastic dummies of them.
How to repair kitchen knives
- An original handle for a knife made from plywood with your own hands will be ideal if you initially make a template of the blank from paper or cardboard.
- Transfer the outline to the plywood dies, tracing the template with a pencil. You should end up with two identical wooden halves.
Varieties of short swords appeared at different periods. For hidden carrying, a dagger disguised as a fan was invented. Another option that was despised by the samurai was the gun tanto.
- Yari-tanto. The blade followed the shape of a yari spear. Used to pierce armor, as a weapon for the second hand.
- Tanto saw. The blade had teeth. This blade made it possible to penetrate houses through walls.
- Tanto-eroi doshi. They had a triangular thick blade.
- Hashiwari. There was a special hook on the dagger. The weapon made it possible to intercept and break an opponent's sword and pierce helmets.
- Aykuti. In this version there was no guard. It was not considered a sword.
- Tanto-kens. Forged for Buddhist ceremonies. The ritual weapon had a double-edged blade and 2 cutting edges.
- Kubikiri. Intended for cutting off heads. Presumably they were used by samurai servants to collect trophies. They were distinguished by a more curved shape. The edge of the blade was weakly defined or absent. The cutting edge could be on the inside or on both sides.
- Hamidasi. They had a small guard of a specific shape, the element barely protruded beyond the edge. A special feature of the dagger was an open space for inserting an awl.
- Unokubi. They were distinguished by the thin back of the blade. At the same time, the tip and base of the blade were thick. The edge was sharpened.
- Kaiken. Pocket version, hidden behind the belt.
- Moroha-zukuri. It was distinguished by a double-edged curved blade with additional sharpening on the concave side.
- Kusungobu. A ritual variant used for hara-kiri. It was a shortened version of the sword.
In martial arts, tanto dummies are used to practice fighting techniques. The material used for their manufacture is carefully selected so that the products can last for many years.
On the left is a modern unokubi, on the right is a modern version of aikuti.
How to treat the surface → Room decoration → How to choose the right paint → Surface treatment technologies → Leveling and finishing the walls → Selecting and applying a primer → Removal from the surface → Stretch ceilings and technologies → Reviews and testimonials
| Performance degradation | Reason (compared to classic tanto) |
| Lower penetration ability | straight bevel of the butt 45o |
| Worse cutting properties | straight blade shape |
Description of the Japanese Tanto sword
Greetings, my dear friends! Let's make a paper knife together. Edged weapons have always attracted attention.
Expert opinion
Strebizh Viktor Fedorovich, leading construction foreman
The medieval Japanese warrior was armed with three different swords: katana, wakizashi and tanto, which differed from each other only in their size. If you want to clarify something, please contact me!
The special significance of tanto for Japanese culture
For Japan, this is one of the elements of culture, a great heritage. The manufacture of this blade is permitted only after obtaining a master's license. Currently, just over three hundred craftsmen have received such a license in Japan. Certificates are attached to each blade from time to time. All samurai knives, both modern and antique, are licensed.
According to state law, tantos produced in large quantities from standard steel during World War II are not permitted. These products are recyclable and have no cultural value.
There are just as many stylized knives around the world today. This term refers to almost all cutting tools made in the Japanese style, including products with a one-sided bevel (“sharpening a chisel”). Such sharpening is unacceptable for a very long time. It is used only in the manufacture of certain types of kitchen knives.
The shorter blade of the samurai sword is sharpened on one side, but there are also options with sharpening on both sides. The length of the blade starts from 25 cm and does not exceed 40 cm. Cutting a wooden knife that imitates a samurai combat dagger is not difficult. Also on sale are plastic dummies that are used to practice aikido, karate, judo and other martial arts in the Land of the Rising Sun.
Numerous variations in the execution of the guard, accessories and style led to the emergence of subtypes of tanto (unokubi, kanmuri-otoshi, shinogi, sebu, aikuti, etc.). Each martial arts school used its own variety.
Traditionally, tanto blades are forged in the hirazukuri style. These are flat products without stiffeners. If a rib was present, which is more typical for a katana, it determined the shape of the side wall of the blade. Sometimes there are special products: double-edged.
If you want to try to do a lot of things yourself, keep in mind that the blade is forged from sponge iron (tamahagane). The design includes a hardener line, a removable handle secured with a pin (traditionally made from Manuka bamboo), and a removable round tsuba guard.
For aikido, karate and judo, a wooden dummy is used, which is easy to cut. Sometimes metal products are used, but with a dull blade. Wooden samples consist of southern wood species (dogwood, white acacia), endowed with special properties. Its processing takes place over a period of two years and goes through several stages of drying.
The craftsmen use a very complex and multi-level technology, select the material very carefully and do everything only by hand. As a result, the training weapon lasts a long time and does not lose its properties and appearance!
Tanto knife drawings
This section is for lovers of DIY knives. They will find life-size drawings of such popular models useful.
It is advisable for novice cutlers and knife lovers to know the details of these products. Using these parameters it will be easier to determine the authenticity of the blade.
- Mat tanto. The total length of the blade is 33.7 cm, and the stiffening ribs are more characteristic of a samurai katana. Lightweight with a significant length, “accustomed” to fighting with hands. It's called XO - a samurai dagger, truly adapted for combat.
- Tanto-imperious navrh. The knife is intended more for tourism, hunting or travel. It has a pointed handle and impressive dimensions. This Japanese dagger knife is considered a military product, with a one-sided sharpening. But due to the awkward handle, it is inconvenient to hold in battle.
- So big. As the name suggests, its size is significant. From the category of tactical blades, but most often used for hunting, tourism or cooking.
- Scout out a lot of melee weapons. The same pseudo tanto with a blunt end at an angle of 45 degrees. In the Russian Federation it is not classified as cold. Widely used among extreme athletes, military personnel and hunters. The weight of the product is considerable, and the sharpness of the blade is surprising.
There are many knives of these different shapes on the market. But all of them cannot be perceived as originals made by real Japanese cutlers. This blade is really hard to get.
How to make a tanto knife?
The ability to handle edged weapons has always been valued among all nations.
The skill of their creation was valued no less. But, perhaps, only in Japan were blades made in compliance with religious rituals. The tanto knife, which is the weapon of the samurai, was considered a short sword and was created by craftsmen in compliance with all traditions and tenets of faith. This blade had a strictly defined shape; various designs were applied to it during the creation process. They were believed to be the embodiment of the prayers of the masters. Due to this, the Japanese tanto knife, like the kattana, was called the container of “kami” (divine). When making it, the blacksmith was required to honestly fulfill his duties and observe religiosity.
Basic operations for making knives
Before you start making the blade and handle according to the drawing, you should prepare all the necessary materials.
The blade is made of tool steels, for example, R6M5 steel, which has good hardness. A blade made from such steel will not sharpen for a long time. You can also use carbon steel or non-corroded automotive spring material.
Knife making process
The handle is often made of wood, which dries little and has sufficient strength. Suitable for this:
If the handle tilts, then small diameter rivets will be required. They can be made from brass rod.
Tools you will need:
- drills and countersinks;
- sandpaper for roughness and scratches;
- electric drill;
- vice;
- file;
- hammer.
The technological process of making a hunting knife with your own hands consists of several stages.
- it is necessary to transfer the drawing with all dimensions to a metal plate.
- Cut the part along the contour, sand the excess and drill holes for the rivets.
- Make the cutting edge of the blade. Fix the future knife in a vice and grind the metal with a file at a certain angle. Repeat the process for the reverse side if necessary. After filing, finish the process with sandpaper.
- Temper the blade in the oven or on the stove for 15 minutes. To do this, place a piece of metal near coals or other heat sources. As soon as the metal turns red, the piece needs to be pulled out for a few seconds. Heating must be controlled using a regular magnet. The heated metal stops reaching the magnet. In this case, heating must be stopped.
- Place the hot piece into the oil, cutting end down. The immersion does not have to be done completely, but only 2/3. Stay in this position for about a minute, then slowly sink into the oil.
- Temper in oven at 400°C for 45 minutes.
- Treat with sandpaper or another method.
- Make a wooden handle according to the sketch, drill holes for rivets.
- Soak the handle with special solutions to increase strength.
- Collect all the parts.
- Polish the handle.
At this point the manufacturing process is completed, and we have a beautiful and reliable homemade knife.
Making your own Tanto
If you have any questions, advice, wishes or suggestions, you can contact me via feedback.
Let's start making a knife - tanto. I hope you have become familiar with the properties of wood and have chosen the material with which you will work. It should be said right away that the length of the knife ranges from 24 to 26 cm. I prefer the 24 cm tanto, but this is a matter of taste. So you must prepare a block of wood measuring 260x40x20 mm. The thickness of the bar can be from 16mm.
For such a length of wood, warping of the wood does not affect it. This remark is true if you have chosen a dry tree. Wet can cause drying. On this block, on the side, draw a sketch of the future knife using a template.
By clicking on the picture, you will open a full-size sketch of the knife 1:1
, which can be printed and used as a template when making a tanto.
On the side, make small marks with a pencil: From the very edge of the knife - 7mm. and from this mark - 10mm. Make these marks along the entire length of the knife at a distance of approximately 20 - 30mm. From the end of the handle, from the outer edges, make 7mm marks.
Next, connect these marks into a line. You should get something like this:
Begin cutting carefully, following the direction of the grain. Depending on this, cut strictly in the direction of the grain. You should get something like this:
View from the tip:
Now we need to shape the knife blade. To do this, you need to cut off the excess wood to the blade line (which was previously applied at a distance of 1 mm from the center line).
Now we form the tip of the knife itself:
As a result, you should get a knife of the following type:
The knife is almost ready! All that remains is to process the sharp edges of the knife. To do this, secure the knife to the table with a clamp (or a vice, but always through a spacer - a piece of hardboard or thick cardboard) and process the edges with a file - with light movements. DO NOT TOUCH the upper part of the blade! Process only the handle - to give it a rounded shape and the blade - to remove protruding edges. After this, polish the knife with sandpaper. All! This is where knife making ends! What remains is the final processing: polishing, staining, protective coating, etc.
Method of attaching tanto for processing
Courses in Moscow where you can learn Japanese
This information has been prepared for the convenience of people interested in learning the Japanese language in Moscow. The Department of Japanese Culture in Moscow does not bear any responsibility for the content of this information.
Moscow schools where you can learn Japanese
This information has been prepared for the convenience of people interested in learning the Japanese language in Moscow. The Department of Japanese Culture in Moscow does not bear any responsibility for the content of this information.
Training weapons for children
The teacher will determine the child’s readiness to work with weapons. As a rule, this is school age. At the initial stage, the child will need a baby bokken or wakizashi (for children 4-6 years old). After 12-14 years of age, it is recommended to purchase an adult training sword, fishing rod (ze, jo), tanto and a portable bag for equipment.
How to choose
- The choice of weapon will depend on the needs of the teacher and the financial situation of the parents.
- The student must like the weapon. When purchasing, you need to hold the sword in your hands, touch it, and find harmony with it.
- High-quality training weapons do not have cracks or chips.
Nuances of knife design from Japan
As with tools from any other manufacturer, even the “Japanese” one has a handle and a blade: two main components. Some models should have double-sided sharpening, others - one-sided.
They consist of several layers. The core is considered the most difficult. Made from high carbon steel. On the sides, softer metal alloys are used as coating.
This process is called lamination. Additional metal layers protect the steel from corrosion, increase its strength, hardness and wear resistance. Durability largely depends on the owner, but don't be afraid that it will deteriorate quickly. These are high-quality devices designed for long-term use.
Another feature is the number of covers. A double-edged blade has two of them, that is, on each side, while a single-edged blade has one, located on the sharp side. That is, under the chef's arm.
The blade can be a full-fledged continuation; it fits into the handle.
Step-by-step manufacturing instructions
After looking at the blade shape in our article or anywhere else, the image needs to be printed. The product model is the first thing done when making a knife. Then follow the instructions:
- Cut out a template for a white knife from paper and glue it to a file from a cutter for quick cutting. This is a reliable option for cutting out the outline of the future blade. Having secured the workpiece in a vice, using an angle grinder and a cutting wheel, we cut out the shape of the product according to the sketch. Cut with a margin of 1-1.5 mm; when sanding, the excess will go away. We also monitor the color of the part; overheating must not be allowed. Notice the slightest change in color - stop. Allow the parts to cool.
- The workpiece must be cleaned of chips on a grinding machine and the contour must be brought to an exact match with the sketch. We work slowly, monitoring the temperature of the product. Again, overheating is contraindicated.
- Once you have a perfect match, wet the design with water and remove. It's time to make the bevels, a critical feature of the blade's future cutting capabilities. They must be marked with a strictly symmetrical marker. There is an article on our resource - “how to make a descent with a knife at home”, it will be useful to read. After cutting the knife, carefully lower the blade on the belt sander and slowly lower it.
- It is better to sand the product by hand using sandpaper, starting with large grains and ending with the finest grains - 1500-2000 units. The blade will acquire a pleasant shine.
- It's time to drill holes in the shank for the pins. 3, for secure fastening of the handle. We cut the brass rod into pieces 3 cm long, no longer needed. And we try them on in the drilled holes, these are future rivets.
- After descending, it is necessary to remove the cutting edge and pre-sharpen the blade. Preparation for hardening is complete. Preheat the oven to 900-1000 ° C, the optimal temperature for the saw blade. It is advisable to check with a magnet whether the part will no longer be attracted. Remove the product with pliers and immerse it in a container of oil for 3 seconds. Hardening is complete, let the part cool in the air.
- After the procedure is completed, the blade is discharged. It is produced in a conventional gas oven, at a temperature of about 200 ° C for a couple of hours. After tempering, the steel will become more malleable and acquire all the qualities of a worthy blade. It should be sanded again with fine sandpaper and water.
- The handle will be produced from the invoice. To do this, the wooden block must be divided in half, and the part adjacent to the blade must be sanded with sandpaper for a perfect match. Then mark the blanks for the holes along the shank. Drill them.
- Mix up some epoxy glue, coat the blanks and rod, attach everything together and insert the brass pins. Counteract them. Then clamp the entire structure with clamps and leave for a day until the glue dries completely.
- The final step will be sanding the handle. Try making a pen based on the original model. If you want to do this for a specific hand, no one will interfere. Work the way you like. More information about the handle can be found in the material - “Methods of attaching a knife handle.”
Drawing of a tanto knife from standoff 2
How to Make a SHURIKEN Standoff 2 KEYCHAIN. DIY Charm SHURIKEN from Popsicle Sticks
How to make a TANTO Standoff 2 KNIFE from a line. DIY KNIFE TANTO made of wood
Asuma Sarutobi Chakra blades made of wood. How to make a knife - Asuma Sarutobi's brass knuckles from Naruto with your own hands
Cool DIY CS:GO Butterfly Knife made of wood. How to make a Butterfly Knife from popsicle sticks. CS:GO DIY
KUNAI made of plastic - easy and fast. How to make KUNAI "BONE" from a plastic pipe. STANDOFF 2 DIY
You have tagged the maximum number of friends (64) in this photo.
You can't tag a person in a photo at this time. Please try again later.
To tag a person, move the cursor over them and click the left mouse button. To tag yourself in a photo, move the cursor over yourself and click the left mouse button.
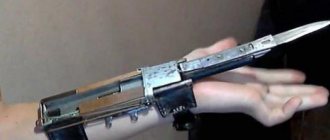
And today, based on numerous requests, we have released from our production a kit for making a “Tanto” type knife. Its distinctive feature is a one-sided cut, but first things first.
Meet!
The first thing I want to emphasize is the steel of the blade. Not just any ordinary stainless steel, but X50CrMoV15 from the Finnish-German concern Outokumpu. By the way, a certificate for steel comes with each set.
What information can be useful to knife makers from this certificate? This is the chemical composition and, in fact, information about the origin of the steel.
Go ahead. The second thing I would like to mention is the one-sided cut on the blade, i.e. on one side there are slopes, and the other side is left flat.
This was done for two reasons:
- The first is that the thickness of the blade is only 2.4 mm, and when cut on one side, the safety margin of such a blade increases.
- The second is originality; you must admit that it’s not every day that you come across blades with such a design.
By the way, the thickness of the blade is 2.4 mm, which means that the knife is not a bladed weapon; if it were thicker, it would be a weapon.
Certificate for knife
But we took care of this in more detail. Included with each kit will be this test report, which will answer all the questions the police officers have if they have any for you.
We also made sure that all the main labor-intensive operations, such as thermal treatment, grinding, cutting, adjusting the guard, polishing the guard, making linings to size, were performed by master gunsmiths at a high level.
And we equipped the kit for making a Tanto knife yourself with everything you need:
What will you need to do to assemble the knife?
1. The overlays included in the kit must be given a certain shape. In the absence of any equipment, this can be done with ordinary sandpaper (first coarse, then fine). The thickness of the overlays is selected in such a way that grinding has to be done to a minimum.
2. It is necessary to make holes in the linings and “sink them”. To do this, you will need two wood drills of 5 and 10 mm, a screwdriver or a hand drill.
3. Before securing the lining with screws, the holes in the blade must be lightly passed with a round diamond file. The fact is that the diameter of the holes is exactly adjusted to the diameter of the screws, but during laser cutting there is a small scale left from the laser, so it needs to be removed with a needle file.
4. Secure the covers with screws.
5. The knife blade is supplied unsharpened. This most difficult operation can be performed using sharpening stones of various grain sizes, special devices, or in the nearest workshop for sharpening knives and scissors. Please note that the sharpening of this model is also one-sided!
Additionally, you can soak the linings with oil wax and. that's all! Tanto is ready!
Japanese tanto knife The differences between them are in shape and purpose.
What are Tanto combat knives?
The original tanto (短刀= tan "short" + to "sword") is a traditional Japanese short knife available to civilians (as opposed to the long katana). National treasure of Japan. Tanto combat knives are considered edged weapons in all countries. In a safe form (made of plastic, wood, rubber, etc.) it is used in oriental martial arts.
See also the article Combat knives and their characteristics
In the European tanto classification:
In the classical sense, Tanto knives are exactly a sword.
Tanto knife in Japanese is hamono (刃 “blade, blade” + 物 “product, thing”). Despite the fact that both “hamono” and “tanto” have two hieroglyphs, the first is perceived as one word “knife”, the second - as a phrase with the keyword “sword”.
The second meaning of tanto is a special blade shape for modern knives:
- combat;
- tactical;
- folding, etc.
The appearance of tanto knives in Japan
The first tanto knives appeared during the Heian period from 794 to 1185. These knives did not differ in quality. During the Kamakura period, better materials began to be used to make tanto, and the knife itself became an invariable attribute of the samurai’s weapons.
Besides the samurai, the tanto knife was the favorite weapon of the yakuza. Ninjas also loved to use it, since this knife was carried by various social groups of the population, and it did not arouse any suspicion. The sheath for the tanto was also richly decorated. All tanto blades made using traditional technology are the cultural heritage of the country.
Description of the Japanese Tanto sword
The classic tanto should be done like this:
hira-zukuri The correct shape of the tanto blade is flat with a slight curve
1 shaku A standard school 30 cm ruler is exactly 1 exemplary Japanese shaku
Tamahagane Tanto is made from “diamond steel” - tamahagane
Mekugi If you make a mekugi from metal or horn, the sword will be decorative, not combat.
Tsuba You can recognize the owner of the blade by the tsuba. The samurai code prohibited them from decorating, so they decorated tsuba. Simple “guards” are the lot of commoners
*Tsuba was never used by the Japanese to block weapons - only to rest the hand during a piercing blow.
See also the article Cold steel and their varieties
Description
The classic tanto sword has a slightly curved blade with a single-sided edge, just like the katana and wakizashi. However, it differs from its larger counterparts in size. In the classification of Japanese swords, it has the shortest blade - no more than 30 cm.
Traditionally, special, high-strength steel – tamahagane – was used for its manufacture. The tanto blade is usually flat (made in the hira-zukuri style). The weapon handle is removable. It is attached to the shank using a special bamboo pin - mekugi. There is a round guard called a tsuba.
Parameters of a short Tanto knife
Modern tanto knives differ from the canon in almost all respects:
The sketch is so detailed that you can even make a real Tanto sword yourself
This type of American tanto resembles a kitchen knife, but costs 10 times more.
| Performance degradation | Reason (compared to classic tanto) |
| Lower penetration ability | straight bevel of the butt 45o |
| Worse cutting properties | straight blade shape |
See also the article Butterfly knife - balisong and its varieties
However, the tip strength of modern tantoids is very high, so sticking them into something hard is much safer - and it will turn out much better than with other knives.
DIY small tanto knife
This homemade product is posted for informational purposes only. The creation and use as a bladed weapon is prohibited; according to Article 223.4 of the Criminal Code of the Russian Federation, it is punishable by imprisonment for up to two years!
Greetings to knife lovers. In this tutorial we will look at how to simply make a small tanto knife. The Japanese came up with this knife design, and initially it was a combat sword. But experience shows that this knife profile is excellent for a regular knife. It is convenient, it is easy for them to plan, cut, and so on.
Making a knife is not difficult, the most difficult thing will be making the bevels, but if you have a belt sander, then this should not pose any problems. The most important thing is to choose high-quality steel for your knife. The author used good steel grade 01. This steel is good because it is very easily hardened, and it can be hardened using a torch and a container of oil. Tempering steel can be done in a household oven. This steel contains as much as 1% carbon, which means that the metal becomes quite strong after hardening. In addition, this steel grade also contains manganese (1.2%), silicon (0.75%), chromium (0.5%), vanadium (0.20%) and tungsten (0.5%). Thanks to this composition, the steel is hardened to a hardness of 60 HRC. And thanks to the presence of chromium, steel is resistant to rust. So, let's take a closer look at how to make such a knife!
Materials and tools that the author needed:
List of materials:
— steel 01 or other similar; — plastic or wood for linings; - steel or brass tubes (for pins); - epoxy adhesive.
List of tools:
— belt grinder; - drilling machine; — polishing agents; - vices and clamps; — forge furnace, household oven, hardening oil; - band cutting saw.
Knife making process:
Step one. Preparing and cutting out the main profile
First you need to come up with or find a ready-made profile of a knife or tanto sword on the Internet or look at our website. On a computer you can reduce it to the desired size, and then print it on a printer. We cut out the resulting template using scissors and a stationery knife. We glue the paper template to the workpiece, in our case it is 01 steel. Immediately mark the places for the holes on the metal so that you can center the template if something happens.
Step two. Grinding So, we have a rough profile ready, now we need to process it along the contour to get what we need. A belt sander is very suitable for these purposes. We grind the remaining corners and get the finished blade profile.
Step three. Forming the bevels This is the most crucial moment in making a knife. The bevels of these types of knives are quite wide, and the blade gradually gains thickness. Thanks to this profile, the blade is very sharp, like a razor. First we need to mark everything, take a black marker and paint over the place where the blade will be. Next, we take a drill of exactly the same thickness as our workpiece and draw a center line on a flat plane. Now we will have a shiny line in the center, and we need to sand off all the black that remains.
To form bevels, the author has a special clamp that allows you to form the desired profile. First, we work with a coarse-grained belt, remove the base metal, and then go over it with a finer grained belt. Before grinding, the author weighed the workpiece; its weight was 232 grams. Step four. Preparing the overlays For overlays, you can use various materials, most often wood. But our author prefers to use synthetic materials such as plastic. They are good because they do not require subsequent impregnation, are durable, are not afraid of moisture, and so on. We apply the shank to the material and cut out two overlays.
Step five. Drilling holes Next, take the blade and drill two holes for the pins. The author's pins are quite large in diameter; he used tubes. First we drill holes of small diameter, and then we drill them out to the desired size.
In addition, the author drills another 10 holes of smaller diameter. These holes are needed to make the handle lighter, and this way the linings will stick better. The peculiarity of this knife is that the blade itself should be heavier than the handle, this will allow you to apply the correct force when cutting. Before such work, it is better to wrap the blade with electrical tape to avoid injury. To make the handle even lighter, the author sands it on a belt sander. He makes a groove along the handle. Thanks to all these drilling and grinding manipulations, the blade lost as much as 89 grams. Step six. Hardening and tempering When the blade is completely ready, we harden it. To do this, we use a forge furnace or a gas burner. We bring the blade to a yellowish glow; in this state, a magnet should not be attracted to it. Well, then we cool the blade in oil, this is how 01 steel is hardened. After hardening, the blade should not be taken with a file.
But hardening is only half the battle; after it, the blade will be very strong, but at the same time very fragile. We need to make it a little more elastic so that it springs back. Thanks to these properties, steel will no longer shatter when falling on concrete and so on. For these purposes, put the knife in a household oven for an hour or so. The temperature should be around 200 degrees Celsius. Then turn off the oven and let it cool with the knife closed. Now we have all tempered the steel, and we have a blade of excellent quality. Step seven. Cleaning and polishing After hardening, the steel will darken; this coating can be cleaned off and the steel polished. However, steel 01 is resistant to rust, and if you use another steel, then this coating can be left, it will not allow the metal to rust. First, we process the blade on a belt sander with a fine-grain belt. And then you can proceed to manual processing. We clamp the shank with a clamp and grind the blade with fine sandpaper, using a special product or ordinary water. Then we polish the blade to a mirror shine if necessary. When everything is ready, wrap the blade with electrical tape again so as not to hurt your hands and not scratch the knife itself.
Step eight. Gluing the handle To glue the handle we use epoxy glue. We apply it to the linings, install the pins, and then we compress the whole thing thoroughly in a vice and clamps. We leave the glue to dry for a day, this is usually enough. We immediately wipe off any remaining glue so that there is less sanding to do later.
Step nine. Finishing When the glue has dried, we begin sanding. We form the desired handle profile on a belt sander. Next, use lighter sandpaper to make the handle absolutely smooth. Well, as a result, the handle can be polished.
If you used plastic, then it does not need further processing, but we must impregnate the wood with oil and use stain if necessary. Without impregnation, wood absorbs moisture and dirt.
That's all, the knife is ready, sharpen it to a blade using sharpening stones. I hope you liked the project and learned something useful for yourself. Good luck and creative inspiration if you want to repeat it. Don't forget to share your homemade products and experiences with us.
This homemade product is posted for informational purposes only. The creation and use as a bladed weapon is prohibited; according to Article 223.4 of the Criminal Code of the Russian Federation, it is punishable by imprisonment for up to two years! Source
This post may contain affiliate links. This means I earn a small commission from links used at no additional cost to you. See my privacy policy for more information.
DIY small tanto knife
Tanto blades in Japanese culture
Historically, Tanto blades are not a knife, but a sword, so they were most often worn in a sheath:
- for warriors - behind the belt, on the right;
- for women - in the sleeve, fan or behind the obi belt.
Samurai until the 14th century. armed with a pair of swords - daisho (“big-small”):
- Daito (“big tanto sword”) - the main one, more than 66 cm.
- Shoto (“small sword”) - additional, 33-66 cm.
Sometimes the Japanese tanto sword was used instead of the shoto.
A couple of things that distinguished a samurai from ordinary people were a large and a small sword. Guess which tanto came from
In the 14th century The samurai's weapons have changed:
- instead of daito - tachi, then - katana;
- instead of shoto - wakizashi, sometimes - tanto.
- to finish off the enemy;
- for battle in close quarters;
- for cutting off heads;
- for suicide (warriors-men, women, children);
- for self-defense (traders, artisans, monks and other travelers).
Now tanto is a cultural heritage.
The only permitted uses are:
- wedding ceremonies of the imperial family;
- oriental martial arts.
Varieties of tanto
There are a large number of varieties of tanto, each of them has its own name and specialization.
Hamidasi. This knife is practically no different from the classic tanto, except for a very small tsuba guard.
Aiguti (or yakutti). The “civilian” version of the tanto, which has the same shape and dimensions of the blade as the classic weapon, but is completely devoid of not only the guard, but also the traditional braid on the handle for swords.
Kubikiri. This dagger differs from the classic one in the almost complete absence of a pronounced tip and sharpening. Kubikiri usually has a cutting edge on the inside of the blade or it has a double-edged sharpening. There are several versions about how this knife was used. Literally translated, “kubikiri” means “head cutter.” It is possible that this blade was worn by samurai servants to collect ominous trophies on the battlefield - the heads of defeated enemies.
Kusungobu. This is a ritual dagger that was used for only one purpose - to commit seppuku or hara-kiri.
Kaiken. A type of tanto that was most often worn by women and used for self-defense. The weapon was hidden in the sleeve or behind the belt.
History of the tanto sword
In Japan, tanto has a long history - to this day:
- Naginata,
- Onion,
- long sword,
- tanto.
Gradually they began to fall out of use, becoming a tribute to tradition.
After the 1950s, nothing interesting happened regarding tanto in Japan. But thirty years later, the tanto was reincarnated - in America, in the form of a combat knife.
The national cultural heritage of Japan is the tanto knife. Its history goes back tens of hundreds of years. During World War II, the Americans simplified the appearance and meaning of the blade. Cutting off the initially rounded nose at 45 degrees. Let's try to talk about a true tanto knife, its drawings and dimensions.
Types of tanto knife and their parameters
Today, most people know this product as an American creation. It is necessary to tell the real story of the knife.
During World War II, American fighters liked the national blades of the Japanese. And they started mass production of knives from serial steel. Crossing out the historical value of the samurai blade.
In Japan, tanto knives are prohibited from being carried, like XO. Such blades are used by the famous Japanese yakuza and ninja. According to Japanese laws, real knives are made by about 300 craftsmen. Each blade is branded and has national value.
The history of the knife is vast and has many antecedents from the past. There are several types of them:
- One of the oldest knives in the tanto style is rightfully called the tanto-ken. Has a double-edged dagger blade. It is a ritual product; the first knives appeared in the 7th century. Presented as a gift.
- The variety worn by the master's servants. After the battle, they went around and cut trophies from the corpses of the fighters. The servants’ terrible “tool of labor” was called kubikiri. Deprived of an edge, they solved a narrow range of problems. This type of knife was also used for household needs. It was the size of a sword.
- A real military weapon used to pierce armor has a name - yari-tanto. An expensively inlaid blade met with a hollow interior. It was intended to be put on a stick and used as a spear.
- Another representative for combat purposes is the hashivari. Its dimensions reached 30-40 cm. A special feature of this product was a hook at the handle. Its purpose is to capture enemy weapons. The Japanese skillfully used this.
- The knife for finishing off the enemy was short in length and was called aikuti. Using a sword to kill a lying enemy was against the warrior's code of honor. A small knife was used for these purposes.
- A type of hidden weapon used by: women, monks, ninjas, retired military personnel and even spies. It was called a tanto fan. A small blade made of high-quality steel helped all segments of the population in need of protection.
- A specific weapon of an unusual type is a tanto saw. Experts consider him to be a shadow warrior - a ninja.
- An interesting option for the 16th-17th centuries is the tanto pistol. Its quality was low, but it was considered a weapon of people with high status. When the weapon was removed from its sheath, it turned into a single-shot pistol.
Products produced by the Americans are now purchased by the Japanese authorities and destroyed as having no connection with national traditions. They sacredly honor their history.
Tanto knife drawings
This section is intended for lovers of homemade knives. Drawings with actual dimensions of popular tanto models will be useful to them.
It is advisable for novice knife makers and knife lovers to learn the details of these products. Using these parameters, it will be easier to determine the authenticity of the blade.
- Mat-tanto. The total length of the blade is 33.7 cm and the stiffening ribs are more typical of a samurai katana. Light weight with a significant length, it “took root” in combat hands. The weapon, called a samurai dagger, is actually adapted for combat.
There are plenty of tanto-shaped knives on the market. But they cannot all be perceived as originals made by real Japanese knifemakers. Such a blade is really difficult to get.
Making a tanto with your own hands
The following materials and tools will be required:
- high carbon steel;
- angle grinder, belt grinder;
- vice, set of sandpaper;
- marker, pencil, paper, ruler, PVA glue and scissors;
- grinder with a set of circles for different purposes;
- furnace or forge, blacksmith's tongs;
- motor oil in a container;
- drill with drills;
- magnet, clamps;
- wood impregnation oil;
- wooden block;
- brass rod;
- epoxy adhesive.
The set includes quite professional tools. We will manufacture the product, which is also not easy. For carbon steel, we’ll take a blade from a quick cutter. It will suit the thickness of the butt and the quality of the steel.
Step-by-step manufacturing instructions
Having looked at the shape of the blade in our article, or elsewhere, the picture needs to be printed. The product template is the first step when making a knife. Then follow the instructions:
- We cut out a template for the knife blank from paper and glue it onto a piece of a quick-cutting saw. This is a reliable option for cutting out the outline of the future blade. Having secured the workpiece in a vice, using an angle grinder and a cutting wheel, we cut out the shape of the product in accordance with the sketch. Cut with a margin of 1-1.5 mm, the excess will be removed during grinding. We also monitor the color of the part; overheating should not be allowed. If you notice the slightest change in color, stop. Allow the part to cool.
- The rough workpiece should be cleaned of nicks on a grinding machine and the contour should be brought to a perfect match with the sketch. We work slowly, monitoring the temperature of the product. We repeat - overheating is contraindicated.
- Having achieved a perfect match, moisten the sketch with water and remove it. The time has come to make the triggers - the most important characteristic of the future cutting abilities of the blade. They must be marked with a marker, strictly symmetrically. There is an article on our resource - “how to make descents on a knife at home”, it will be useful to read it. Having marked the knife, use a belt sander to carefully and slowly lower the blade.
- It is preferable to sand the product manually, using sandpaper, starting with coarse grains and finishing with the finest grains - 1500-2000 units. The blade will acquire a pleasant shine.
- It's time to drill holes in the shank for the pins. It’s worth making 3 of them to securely attach the handle. We cut the brass rod into pieces 3 cm long, no more will be needed. And we try them on in the drilled holes, these are future rivets.
- Having made the descents, it is necessary to remove the cutting edge and pre-sharpen the blade. Preparations for hardening have been completed. We heat the oven to 900-1000 °C, the optimal temperature for the saw blade. It is recommended to check with a magnet; the part will no longer be attracted. Remove the product with pliers and dip into a container with oil for 3 seconds. Quenching is completed, let the part cool in the air.
- After completing the procedure, the blade is released. It is produced in a regular gas stove oven at a temperature of about 200 °C for a couple of hours. After tempering, the steel will become more pliable and take on all the qualities of a worthy blade. It should be sanded again using fine sandpaper and water.
- We will make the handle with an invoice. To do this, the wooden block must be halved, and the part adjacent to the blade must be sanded with sandpaper until it fits perfectly. Then mark the blanks for the holes in accordance with the shank. Drill them.
- Dilute the epoxy glue, coat the blanks and the shank, assemble everything together and insert the brass pins. Rivet them. Then clamp the entire structure with clamps and leave for a day until the glue dries completely.
- The final step will be sanding the handle. Try to make the handle in accordance with the original template. If you want to do it for a specific hand, no one hinders you. Process as you please. More details about the handle can be found in the material - “methods of attaching a knife handle.”
It is imperative to impregnate the handle with oils that prevent the wood from drying out and rotting. In fact, the instructions are not much different from making other blades. Template selection will play an important role.
Conclusion
But real licensed Japanese craftsmen make tanto using metal forging. In this case, we are amateurs. We do not have licenses to manufacture tanto; a good hardening of the blade will suffice. Don't forget to sharpen your blade. Made from saw blade - it will last for years.
History of creation and purpose
According to the understanding of schools, katana, tanto and wakizashi are the same blade, only of different lengths. That is, its European name “knife” or “dagger” is incorrect. The tanto knife first appeared in the Heian era. During the Kamakura period, these short swords were further developed, their production was of the highest quality, and they had an artistic design. Subsequently, their popularity dropped so much that they stopped ordering them altogether. After the overthrow of the Tokugawa shogunate, the Meiji Emperors revived the ancient art of tanto making.
Traditionally, it was the Japanese knife that was used by samurai to finish off their enemies or ritual suicide. However, it could be worn by both doctors and merchants. They could only use them to protect their lives or property. It must be said that traditions prescribed a specific purpose for each weapon; each sword or knife could only perform certain actions.
Making a tanto with your own hands
For connoisseurs of cutlery and not only in this section we will tell you how to make a lot with your own hands. According to actual drawings and dimensions. The shape of the blade, dear readers, you can choose from the above options.
You will need the following materials and tools:
- carbon steel;
- Angle grinder, belt sander;
- vice, set of sandpaper;
- marker, pencil, paper, ruler, glue and scissors;
- grinder with a set of circles for different purposes;
- furnace or forge, blacksmith's tongs;
- motor oil in containers;
- drill with drills;
- magnet, clamps;
- wood impregnation oil;
- wooden block;
- brass rod;
- epoxy adhesive.
The kit includes some pretty professional tools. We will make the product, which is also not easy. Similar to carbon steel, we take the blade from a cutter for fast cutting. Suitable for stock thickness and steel quality.
How to make a tanto knife with your own hands at home
The national cultural heritage of Japan is the tanto knife. Its history goes back tens of hundreds of years. During World War II, the Americans simplified the appearance and meaning of the blade. Cutting off the initially rounded nose at 45 degrees. Let's try to talk about a true tanto knife, its drawings and dimensions.
Homemade tanto knife.
- Types of tanto knife and their parameters
- Tanto knife drawings
- Making a tanto with your own hands
- Step-by-step manufacturing instructions
- Conclusion