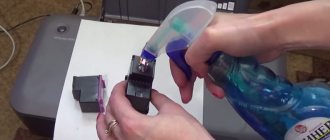
Plastic bottle across
There are no special problems here, you can even cut with ordinary scissors. But there is one trick - you need to start cutting, and to do this you need to pierce the bottle. But the side walls are thin and sag.
You just need to squeeze the bottle where you want to pierce it. So that a bulge appears, which will act as a stiffener. And it is more convenient to make a puncture with the sharp end of a knife, rather than with scissors.
Ideas for the garden: a castle made of plastic bottles - catalog of articles on the site
Contents
The magic castle on the site looks interesting. It can decorate a children's playground or alpine slide, and, in general, any corner of the garden.
In addition, such a castle can not only be decorated in different ways, but also “built” in the shape you like. Moreover, the shape of one lock can be changed from time to time.
The design of the castle includes single crafts made from plastic bottles of different sizes and plastic bottles. There are as many separate buildings as there are separate containers.
You don't have to limit yourself to building a castle. It is better to develop an idea for a garden and build a street with colorful houses, a town, a village, etc. There is also no need to line up crafts from plastic bottles: if you make a town where you can walk between the buildings, it will be very original.
Children especially love such play towns. You can populate a castle or town with “residents”: toy figures of men. Or perhaps your child will discover the movement of toy cars along the streets of the town.
As the idea for the garden develops, you can make “almost real” paths: from stones, bricks, remnants of tiles, etc., plant flower beds from miniature (low-growing) plants.
The appearance of the castle or town depends on the size and shape of the plastic containers you choose (small, large, round, rectangular), as well as their design. Containers can be painted both inside and outside. Background coloring is easier to do by pouring a little paint into each plastic bottle and turning it so that the paint “captures” the entire surface of the container. Draw the details of the turret houses with a brush (this, of course, will work better on the outside).
Be sure to secure crafts made from plastic surfaces so that the town is not destroyed by the wind. You can pierce each bottom of the house bottle with some kind of pin or rod, and then “plant” it in the ground. You can simply pour stones into containers to weigh them down.
By the way, a castle or town can be decorated with various natural materials: lining the buildings with small pebbles (pebbles, crushed stone), pieces of tiles. For this, cement or special glue for facade work is used.
Ideas for a garden of this type are very multifaceted; if you take on the construction of a decorative castle or town, perhaps crafts made from plastic bottles themselves will “suggest” the design to you.
MORE FOR THE GARDEN
How to paint crafts from plastic bottles Crafts for the garden: Tin Woodman and others
Garden Crafts: Ellie from the Emerald City
I want more articles:
Leave your review
Average rating: 0 reviews
Tags:
bottles house stones
www.domstoy.ru
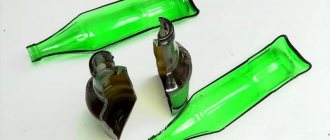
Plastic bottle along
The plastic in the bottle is much thicker near the bottom and neck. Here it can split along an unpredictable trajectory if you try to cut it with a knife, and even more so with scissors.
It is better to pre-saw these areas with a fine-toothed metal blade. Such files are found in manual and electric jigsaws.
Or you can heat the knife over a fire so that it passes through the plastic as if through butter. But this method is more dangerous and requires speed and precision of movements.
And the edges of the plastic will be melted and require large amounts of machining.
First initial construction
This model is not so common, it was the first model that showed good results. It differs from the second model in that to cut tapes of different widths you need to twist the knobs each time. Its advantage is its ease of manufacture.
This video is about how to create and use a tabletop machine for cutting tape from a one and a half liter bottle or other volume and about how to use the shrink properties of such tape. In the development of this machine, the author used the experience of another blogger, but he slightly changed the author’s development. The difference between lawyer Egorov’s machine is that it allows you to cut tape of different widths. This is achieved by simply moving one or more washers higher or lower. This design, unlike the original one, is also stronger and more reliable. This is achieved through the use of other materials. It does not use glue, adhesive tape, and uses a purely bolted connection. There is another difference - ease of assembly.
To demonstrate the heat-shrinkable properties of such a tape, a structure based on a tetrader was assembled. How is joint rigidity achieved? A PVC tape is wound and heated with a lighter or other heat source. The tape gives heat shrinkage. When heated, the tapes tighten the object. During the heat shrinking process, the tape becomes narrower, thicker and stronger.
What will you need to assemble the machine?
A piece of laminate. Large and small washers, 2 nuts, two bolts, a piece of a stationery knife. Tools: 2 drills, a screwdriver, a pencil, a wrench.
The marking will be simple. We connect two washers in one place and mark the holes. The hole must not be drilled all the way. We change the drill. We drill through holes. We got two holes. Insert the bolt into the hole. As you can see, it is not recessed. We need to drown him. The same must be done with the second bolt. In order to cut a tape with a width equal to 2 thicknesses of the washer, you should, accordingly, place two washers on each bolt.
Then place a utility knife blade on one of the bolts. Place at least one more washer on each bolt. Orient the blade so that the visible part of its cutting edge is located in the area formed by the shortest distance from washer to washer. Align the washers and tighten the nuts. The machine is ready. It can be securely fixed to the table with self-tapping screws or a clamp. The polyethylene used in the bottle is colorless. It can be transparent or painted in any color. The most popular colors are green or brown. First, an excessively thin black tape 1.5 millimeters wide will be cut into the frame. This is done to demonstrate that such a thin strip can be cut just as well as a wide one.
There is more than 35 meters of such tape in a 2-liter bottle. 2 five-liter bottles are enough to tie a raft. Connections using this tape are very strong and tight. After heat-shrinking the tape using a square from a fire, the knots became permanent, and the raft itself came together in such a way that one could not wish for more. The connection turned out to be stronger and tighter than twisting with wire.
Plastic bottle on stripes
Among the craftsmen there are real innovators, and those who thought of cutting bottles into strips are certainly one of them. The width of such a tape can be even one millimeter. And the length of each bottle is several meters.
You can use the strips to create crafts, weave ropes, or make durable heat-shrink fastenings. At first it is difficult to understand how it is possible to cut a bottle into ribbons, however, like everything ingenious, it is very simple.
The device for cutting a bottle into strips consists of the following parts
- Board serving as a base
- Two bolts
- Two nuts
- 10-20 metal washers
- Replaceable blade of a construction knife.
The assembly order is as follows:
- Two holes are drilled in the board.
- Bolts are inserted from below.
- Washers are put on the bolts.
- A blade is inserted between the washers.
- The nuts are screwed on top.
There should be a gap of about one millimeter between the washers. You can loosen the nuts and move the blade to different heights - the width of the resulting strip will depend on this.
The bottom of the bottle is cut off and a “tail” is made that can be inserted under the blade.
With one hand the bottle is held vertically by the neck, and with the other the “tail” is pulled. The bottle spins, the blade cuts it in a spiral, forming a strip.
Bottle lock master class
Author: Karpus Anna
I (Katya’s mother) made this bottle as a gift. The second is currently in progress, and a third is planned. I hope to make it in time for the holiday. Thanks a lot for the idea Kukune. In the process of work, I came across a lot of questions, so I decided to make an MK.
First, remove the labels from the bottle and wipe with alcohol. Perform reverse decoupage (thanks again to Kukuna for the dragon) - I smeared the picture along the edge with PVA glue and glued it to the bottle with a pattern on the glass. But it’s more correct to smear the entire picture from the drawing side with glue and apply the drawing to the glass.
I cut out a window frame from cardboard and glued it with PVA.
Now I paint with acrylic paint, gouache will not work - it is not suitable for glass. Experience shows that you don’t need to try too hard. Let dry
I laid cardboard bricks and eggshells with PVA.
I made the texture with semolina. Layer of PVA, sprinkle with semolina. The second layer of PVA is only on the bricks (so that the semolina does not clog the cracks between them) and sprinkle with semolina again. Fix the semolina with hairspray.
I thought about the roof for a long time. There was an idea with salt dough. but I didn’t like the result. A friend told me about the technique of folding stockings. I decided to do this: take old tights and cut off the sock. Apply a layer of PVA, put on the stocking and form folds, helping with a brush dipped in glue. Trim off excess stocking. The neck of the stocking is slightly twisted. Secure with PVA again.
You can immediately paint it with a 1:1 mixture of PVA and gouache. The roof is a little darker. Wait until completely dry.
I bought gold powder from building materials a long time ago and finally found it useful. I dilute the powder with PVA by eye until it becomes gouache thick. I create an aging effect: I paint over the cracks, and touch the convex surfaces with light touches of a brush that is almost dry and almost without paint. Due to the fact that the previous layer of paint was not dry everywhere, the gold turned green (slightly) over time, so I remind you about the drying of brown paint. Now leave to dry.
I almost forgot to say that the lid was painted with acrylic paint in two layers.
All that remains is to open it with varnish. I took parquet, saving on acrylic. But the lid did not open with varnish. At the same time, she placed the bottle on a matchbox. While the varnish was drying (2 days), the bottle stood on the box. The varnish flowed down slightly and hung in drops (like icicles). I removed it easily with the end of a piece of paper.
By the way, I liked it better without varnish, but it’s more durable with varnish. Perhaps it is worth opening it with matte varnish.
The second bottle is on its way. I improvised with the stocking: I made a “skirt at the neck.” But the gilding did not stand out, but blended in color with the brown paint. In the photo it has already been opened with varnish.
I’m not happy with the result, so I correct the situation: I add brown and black gouache to the varnish and thereby repeat the aging effect. I didn’t open it with varnish anymore. By the way, this bottle has a screw cap, so I don't do anything with it.
And now the third bottle is almost ready.
I want to make a copper bottle. I mix gold powder with varnish and a drop of brown gouache, and with this I age the bottle. Then I mix gold powder with gouache and once again age the light middle (bricks).
This bottle also has a skirted neck. I'm happy with the result.
Many thanks to everyone who stopped by and who left their comments!
—Search by diary
—Subscription by e-mail
—Categories
- My works and photographs (67)
- HOME AND FAMILY (985)
- Children are our happiness (110)
- Useful tips (38)
- Family relationships (35)
- For children, crafts with children (184)
- home economics (323)
- travel (180)
- feng shui, psychology, esoterics (115)
- All about beauty and health (881)
- for weight loss, diet (89)
- Perfumes, aromas (15)
- health, traditional medicine (366)
- beauty recipes for the face (195)
- hair care (84)
- hand and foot care (94)
- FOR THE HOME – handmade (2542)
- lampshades, night lights, lamps (125)
- Vases, flowerpots, baskets (240)
- wreaths (182)
- interior design (325)
- cardboard furniture (30)
- DIY furniture (152)
- Miniatures (20)
- mosaic (66)
- panels, frames, mirrors (252)
- crafts, interior decoration (555)
- bedspreads, curtains, rugs (379)
- repairs, interior decoration (56)
- DIY CANDLES. Decor (56)
- DIY topiary (132)
- Floristry (105)
- Fashion and style (361)
- FOR THE COTTAGE AND GARDEN handmade (382)
- Wooden furniture and buildings (79)
- indoor, garden plants (95)
- Garden figurines and sculptures (64)
- construction at the dacha (54)
- handmade for Garden and Cottage (97)
- HANDMADE from simple materials (1169)
- HANDMADE FROM CARDBOARD (227)
- from waste material (260)
- from branches, snags, birch bark (90)
- from wine corks (17)
- made of pebbles and stones (28)
- from coffee beans (75)
- from corn leaves, talasha (10)
- from light bulbs (17)
- made of lightning (27)
- from sticks, honey spatulas (42)
- from food products (56)
- from plastic bottles (110)
- from natural materials (102)
- button (28)
- from shells and corals (21)
- from pumpkin and seeds (17)
- from cones and acorns (44)
- from egg trays (32)
- nuts, seeds and pistachios (18)
- PAPER HANDMADE (1025)
- corrugated paper, napkins (85)
- boxes, baskets, panels (218)
- coffee filters (17)
- sheet music, book pages (112)
- origami, kusudama, quilling (177)
- papier mache (108)
- Paper Art (8)
- scrapbooking, pergamono (110)
- Paper FLOWERS (289)
- Flowers made of corrugated and crepe paper (120)
- VINTAGE (611)
- vintage pictures, prints (54)
- Vintage hand-made (318)
- burlap, jute, twine (261)
- prints on furniture, pillows (58)
- shabby chic / Shabby chic (49)
- EMBROIDERY (704)
- embroidery with beads, sequins (11)
- satin stitch embroidery, cutwork (65)
- children's embroidery (65)
- carpet embroidery (50)
- cross stitch, patterns (407)
- ribbon embroidery (77)
- 3D embroidery (22)
- plastic canvas (20)
- Useful tools for embroidery (42)
- KNITTING (2798)
- vases, baskets, sachets (76)
- knitting for children (219)
- knitting for men (46)
- knitting from bags (21)
- knitting. toys (245)
- knitted items, crafts (212)
- knitted jewelry, accessories (124)
- jackets, cardigans, vests (261)
- magazines, books on knitting (45)
- crochet rugs, ottomans (133)
- blouses, pullovers, jumpers (232)
- socks, slippers, knitted shoes (77)
- dresses, tunics, coats (139)
- Blankets, pillows, bedspreads (191)
- napkins, cup holders (150)
- Crochet tablecloths, curtains (46)
- bags, wallets, cosmetic bags (184)
- tops, sundresses, swimsuits (115)
- patterns, equipment, usefulness (177)
- sirloin, combined (45)
- crocheted and knitted flowers (147)
- Hats, shawls, scarves, snoods (206)
- skirts, shorts, trousers (48)
- DECOUPAGE (514)
- decoration (323)
- decoupage on fabric (34)
- volumetric decoupage (39)
- spot painting (12)
- stencils, templates, pictures (151)
- egg crackle (27)
- TOYS, DOLLS handmade (1028)
- Toys using the felting technique (38)
- toys, felt crafts (159)
- coffee toys, crafts (71)
- dolls made of nylon, from socks (107)
- textile dolls, Tilda (183)
- soft, textile toys (284)
- Christmas toys (36)
- Crafts, toys for children (207)
- COOKING recipes (1541)
- chicken dishes (49)
- fish dishes (45)
- in a slow cooker and microwave (29)
- preserves, jams (37)
- sweet pastries (187)
- Georgian, Caucasian cuisine (124)
- roast (42)
- appetizer, main courses (122)
- from zucchini, eggplant (63)
- carving (31)
- candies, cookies, desserts (96)
- culinary benefits (155)
- meat dishes (37)
- drinks (55)
- pies, pasties, pancakes (54)
- pizza, pies, khachapuri (140)
- salad recipes with photos (148)
- pickles, preparations for the winter (105)
- soups, liquid dishes (41)
- cakes (106)
- fruit cakes (51)
- decoration of cakes, salads (81)
- MOLDING (710)
- gypsum, clay (58)
- marzipan, mastic (145)
- plastic, polymer clay (299)
- salt dough (189)
- cold porcelain (209)
- MASTER CLASS / Tutorial (5217)
- NEWSPAPER WEAVING (718)
- Weaving from newspapers. MK (649)
- newspaper weaving ideas (72)
- HOLIDAYS, crafts and gifts (1959)
- Bouquets and gifts made of sweets (70)
- paper in gift decoration (90)
- unusual gifts (74)
- New Year, Christmas (859)
- Handmade cards (37)
- Easter (411)
- Gifts for lovers (167)
- Gifts for women (98)
- Gifts for men (22)
- wedding (150)
- Halloween - Halloween (92)
- NEEDLEWORK. TECHNIQUES (1660)
- Accessories, handmade jewelry (473)
- various techniques (15)
- felting (28)
- decor items (383)
- decor, shoe decoration (19)
- decorative bottles (84)
- leather (60)
- kinusaiga, patchwork without needle (33)
- books, magazines on needlework (82)
- DIY SOAP. Decor (22)
- drawing (31)
- fabric painting (29)
- painting objects (119)
- nylon flowers (22)
- flowers made from ribbons, flowers made from fabric (480)
- Techniques: WEAVING (288)
- beading. decorations (94)
- Tapestry, Isothread, Tenerife (26)
- macrame, tatting (73)
- beaded flowers and trees (84)
- UTILITIES (225)
- make money on the Internet (53)
- diary pictures (26)
- Liru (80)
- useful programs, links (94)
- WordPress site (3)
- SEWING (1647)
- Denim ideas (111)
- Pincushions (76)
- From T-shirts (55)
- baskets, plates, vases (98)
- shoes, slippers (79)
- clothing alterations (187)
- pillows, pillowcases, ottomans (173)
- sewing utilities (79)
- patchwork, patchwork (331)
- bags, wallets, cosmetic bags (304)
- sewing for children (188)
- sewing for animals (24)
- sewing. skirts (22)
- we sew ourselves (502)
- This is interesting (1019)
- cars (24)
- for the soul, prayers (7)
- online stores (286)
- beautiful photographs, pictures, paintings (56)
- incredible but true (9)
- useful services, websites (493)
- jokes (68)
- I. Miscellaneous (93)
- videos, clips, music, films (79)
- Songs for the soul (30)
- Wants and wishes (7)
Glass bottle across an angle grinder
An angle grinder, commonly called an angle grinder, can cut anything. Of course, a diamond cutting wheel can also handle a bottle.
You just need to spray the cut area with water and avoid putting too much pressure on the bottle, otherwise it will overheat and burst. Misalignment of the disc from the original cutting line can lead to the same result.
DIY lock made from polyurethane foam
Garden Crafts | DIY castle master class
You can make a lot of beautiful and original garden crafts with your own hands. And it is not necessary to buy any materials for this; old lids, basins, plastic bottles, tires, barrels, boxes, etc. can be used. Today I want to show you a very interesting master class on making a lock with your own hands from waste materials and polyurethane foam. The author of this master class is Nadezhda Gulak, she showed us and told us how you can make a very nice castle with your own hands for the garden from foam, cement and waste material. On the site you can also find many interesting and original garden crafts made from scrap, unnecessary materials. I think that each of you will definitely choose the right job for yourself. Now let's start making the castle and find out what we need for this.
To make a lock we will need: * Self-tapping screws. * Wire. * Insulation. * Rabitz. * Cement mortar. * Polyurethane foam. * Unnecessary basins, barrels, etc.
Method for making a castle: We collect everything that we don’t need to make a castle, various barrels, basins, boxes, etc. and let's start manufacturing.
And now the new residents have come to try out the fairytale palace)))
We take the wire and wrap it around our workpieces and tighten them with self-tapping screws for strength. We do this so that the concrete solution will hold up better later.
To make a castle, we will need everything, including buckets.
I think the cat is starting to like our castle)))
We take an unnecessary box and wrap it with insulation, then coat it with concrete mortar and wrap it with a chain-link mesh.
We pour cobblestones and clay into the boxes and put them in place. The work here is very hard. We also coat everything with concrete mortar and give it time to dry.
We draw bricks, windows, and basically everything your heart desires on the castle blank.
We take iron and cut a cylinder out of it, from which we will make a roof with a lock.
We take the chain-link mesh again and wrap it around the central tower.
Now we’ll make a balcony for the castle, otherwise what would a castle be like without a balcony)))
We sculpt the frame of the balcony in the place where it will be located.
We make a canopy as desired.
There are also railings on the balcony; we will make them from polyurethane foam.
We paint everything with the desired color, decorate it, and at the end of the work we can cover it with yacht varnish. The castle for the garden with your own hands is ready.
The cats really liked the castle, so it can also be called a cat's house)))
All that remains is to improve the area around the castle. Add crushed stones.
The castle with your own hands is ready for the garden; you can place a princess in it.
We thank the author for an interesting master class on making a castle with your own hands for the garden and are looking forward to new interesting ideas.
Copyright © Attention! The website mnogo-idei.com is protected by copyright law. Copying text and photographs can only be used with permission from the site administration and by indicating an active link to the site. 2022 All rights reserved.
mnogo-idei.com
Glass bottle along wire/thread
It is unlikely that anyone has been able to cut a glass bottle evenly lengthwise with a glass cutter. It seems that this cannot be done by local heating using burning twine or nichrome wire.
But, in general, the cut along is made in the same way as across. The only difference is that the wire/string is laid from one side of the neck through the bottom to the other side of the neck of the bottle.
Along the way, fixation is usually done with rubber bands, with gaskets made of non-flammable material so that the rubber bands do not burst.
Next, everything is done as when cutting across. Usually, the split of the bottle still deviates from the intended one where the glass is thicker - at the bottom and neck.
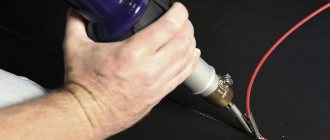
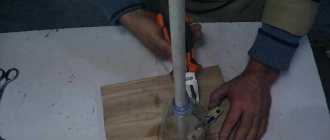
The second, more advanced model of Egorov’s bottle cutter
Working video
Addition
Explanation of how to make a bottle machine
Next is a video that clearly and clearly describes in detail the entire manufacturing technology of the machine, which is not so clearly visible in the previous video, but here you can familiarize yourself with the entire process in detail. The author of this craft is Alexander Tkachenko (YouTube).
Aluminum channel measuring 20 x 30 x 20 millimeters. Bolts are 6 mm. The hairpin is 50 centimeters long, by 6 millimeters. Nuts, washers 6 mm. Set of bits for a screwdriver. The blade of a construction knife is 18 millimeters wide. 6mm drill bit. Auxiliary tools, screwdriver, tape measure, metal saw, marker. So, there is an aluminum channel. There will be a blade inside, which will be pressed in the finished machine against the wall of the channel using a wooden block. You will find a drawing of a bottle cutter based on Egorov’s bottle cutting device at the bottom of the page.
We focus on the location so that it is convenient to hold the channel with your hand and so that you can screw the bottle cutter sideways to a wooden stand and cut a strip of plastic bottles. We assume that the blade will be located inside the channel, but marking is not very convenient. Therefore, we put the blade on the outside and mark the holes on it with a marker. Next, mark the place where the cuts should be. There are 7 cuts in total. We also indicate the upper part of the knife. There is one caveat. When the master applied the marking knife, he did not take into account the thickness of the metal. Therefore, when marking, you need to apply the blade taking into account the thickness of the metal. In this case it is 1.5-2 millimeters. The technician corrected the error by re-drilling the holes. The marking is complete. A pin will be inserted into the marked hole. In the marked places we cut slits with a hacksaw. We cut it like this: first, a short slot for a thin plastic tape, then gradually increase its length with each step. That is, first we cut through the nearest one, which is closest to the hole from the pin. The pitch is about 2 millimeters. Then we increase the step. The photo shows what a channel with slots should look like. The length of each of them corresponds to the width of the pet tape.
Next, drill a hole on the side opposite to the one that has already been made. After this, you can insert the pin by pushing it through both holes.
Tips for working with a bottle cutter
There are nuances. When you make cuts, be sure to cut clearly on the side on which you are adjusting the width of the tape to the width you want to achieve. On the other hand, on the contrary, you need to make wider cuts so that the bottle fits as closely as possible to the knife in this part. When you twist the hairpin, it is better to bend it beforehand. On the channel it remains level. The blade should fit snugly against the channel. What is a bottle cutter used for? First of all, you can use it to make shrink tape. It is great for repairing various tools and devices.
What plastic bottles are best suited to work with this bottle cutter? They must be without relief. If you use a bottle with a relief, you will get a ribbon, but it will not be of very high quality. Moreover, working with such a workpiece is inconvenient. The cut on the bottle when you cut off the bottom should be even.
If reading doesn’t bore you, there is another article on this topic.
Glass bottle engraved in any direction
In search of a method on how to cut a glass bottle as efficiently as possible, the collective thought came up with a method for cutting a glass bottle with a so-called engraver.
Based on the name of the company that was the first to start producing a universal hand engraver with interchangeable attachments, it is often called “Dremel”.
Such a tool is used for various delicate works, for example in model making. It can also be used to process glass, including cutting. Moreover, the cutting line will be limited only by your imagination, and the results of the work will look very neat.
It will take tens of times longer than other methods. But this is the only way to cut a glass bottle with really high quality in any direction - lengthwise, diagonally, zigzag - whatever you want.
Making a bottle cutter with your own hands
Generally speaking, any vessel is a downright sacred thing, and extremely useful in the household. It’s not for nothing that a person’s task of acquiring utensils has always been among the first ones, without it you can’t go anywhere. Each box and vessel was treated very touchingly, even an unfortunate clay pot, after being broken or cracked, was wrapped in birch bark and used for storing anything loose. Vessels are made from a variety of materials - wood, ceramics, metals, plastic, and of course glass. In old clay times, when glassware was blown by collecting molten glass on a special long tube, it was valued very highly and could hardly have been very widespread. Nowadays, automatic machines are engaged in its production; the dishes themselves are very cheap and widespread, although much less decorative than their sisters made by hand. However, glass is a very decorative material and even factory “conveyor” bottles, if a craftsman with a bit of imagination can easily find use in the household and as elements of his designs or crafts. Moreover, the material, which is actually waste, costs practically nothing.
Cutting glass involves applying a scratch to the desired location with a glass cutter, and then applying some force to the glass, where the scratch forms a crack. Making a good scratch with a glass cutter requires certain skills and knowledge of some of the behavior of glass. For example, a scratch should be applied in one uniform movement, preferably without stopping the glass cutter. The scratch should extend from edge to edge of the glass. You should not run a glass cutter a second time over a scratch - the service life of the carbide roller is reduced and the crack in the glass will most likely go crooked. It’s easier with sheet glass; all you need is a good, flat surface and an even block or strip of sufficient length. Using a glass cutter to scratch an even ring on a bottle so that its ends match is not so easy. Special simple devices help, allowing the bottle, as a body of rotation, to rotate without moving along the axis. Let's take a look at them.
It should be noted that there is a very simple and elegant solution - the cutting head from the glass cutter is one of the supports of the rotating bottle. Sections of metal-plastic pipes are used as supports for rotating the blank bottle. The main advantage of this type of cutter, besides its simplicity, is the ability to continuously rotate the workpiece, since both hands are free.
In this case, the scratch is applied according to all the canons of glass cutting. Among the disadvantages is that it is not universal, it is convenient to obtain parts only of a certain range of lengths.
A variation on the theme seems to be very successful - you can comfortably cut almost anywhere, but sliding on pieces of wood is worse. Perhaps the surfaces in contact with the workpiece should be finished with plastic that is slippery for glass.
The design of such a cutter is good for everyone, but fundamentally it does not allow cutting off the narrow neck of a bottle.
The second common type is with a movable glass cutter. The solution is less elegant, one might say “head-on” - a rotating part, a tool is brought to it. However, in principle, it allows you to cut absolutely any place on the bottle, including the narrow neck.
A good option for this scheme is a glass cutter holder with a joint. This will allow you to conveniently process a very wide range of workpiece diameters.
Note that the designer lined the wooden stop with slippery plastic for even and smooth rotation.
The cutter is good, but it does not allow you to make a scratch without interruption, in one movement - one of the hands is busy pressing the glass cutter, and it is very difficult to turn even an ordinary bottle, even with a large palm, 360 degrees, without stopping and intercepting.
So, an attempt has been made to develop a cutter for bottles that, if possible, combines the advantages of both construction schemes - rotation of the workpiece with both hands without stopping, any cutting location, including on the neck.
To build a universal device, the “support” of the glass cutter is fastened using a carpentry clamp. Advantages - simplicity, versatility - using spacers made from pieces of plywood or wood, moving the glass cutter assembly along the base of the device, you can place the glass cutter almost anywhere on the bottle, almost perpendicular to the surface. The axial stop is also fixed with a clamp.
What was used for the job?
Tools.
To process wooden parts, a planing machine, a pendulum saw, and a drilling machine were used. Brushes and utensils for painting. Screwdriver or screwdriver for self-tapping screws. To process the pieces of iron, we used the usual set of metalworking tools, the same drill, an electric sharpener, and a small angle grinder.
Materials.
A piece of a suitable board, a piece of timber, fasteners. Glue, paintwork, rags. Sanding paper. We also used a factory glass cutter and four wheels for furniture as blanks. A piece of stainless steel, a suitable spring, two simple carpentry clamps. A piece of roofing steel for the back support.
The base is a 50mm board, planed and “put” on legs - 50x50mm pieces of wood. Fixed with self-tapping screws and PVA glue.
The glass cutter unit should be slightly raised so that each time you do not have to use a spacer-stand of enormous height; a long platform along the entire base is made from a piece of block, also with glue and screws.
To prevent the wood from getting too dirty from dirty hands, I sanded it a little and coated it with several layers of varnish.
The glass cutter chosen is inexpensive, but quite powerful.
Its handle was sawed off, everything unnecessary was sharpened, and a platform for fastening was organized.
From two suitable strips of 1.5 mm stainless steel, a glass cutter mount is curved. A set of washers imitates an element fixed with a clamp to the base; the long “remnant” after the glass cutter will be used as a lever, with spring tension. The glass cutter itself is sandwiched between two strips, and a hole for an M6 bolt is drilled through the entire set. With nut, washer, stopper, as expected.
The fastening for the reverse end of the spring is made of a long M6 bolt. The smooth part without thread was cut off, and pads were made with a file for easy marking and drilling. The hole is marked and drilled. The former bolt itself is passed through the base board. Opposite the bottle on wheels, with an interval of 50 mm, a number of holes are drilled; by combining the installation of a spring bolt in them with the position of the back stop, you can place the glass cutter roller at any point of the bottle. To prevent the narrow head of the bolt from picking apart the soft pine board, a reinforced washer is placed on the bolt.
An excellently suitable spring was found, both size and stiffness, a dream and not a spring. An alternative option is a piece of a spring for slamming doors; they come in different stiffnesses; you can take a known stiffer one and bring the force to an acceptable level by etching the spring in acid, such as sulfuric acid for a car battery.
On the base, furniture rollers are secured with self-tapping screws, and the distance between two pairs should be maximum for greater stability of the workpiece, but the thinnest bottle should not touch the “bottom”. Length between pairs - focus on the shortest bottle intended for cutting.
Having tapped the shank of a drill with a diameter of 7 mm clamped inside on an anvil, I formed a “hole” for a piece of an M6 pin with a wing. No paper. To adjust the spring tension. On both sides, I fastened it with bolts, the same M6 ones, so as not to “produce the nomenclature.” It could have been welding. At several points.
Two strips were found ready-made in the pieces of iron - scraps and not too even, so that the washer under the wing lay flat, I had to work with a file, leveling the seat for it.
I trimmed off the excess glands. It's time to think about a standard part of the lever, instead of a set of washers.
This little piece of wood with cuts was born from a piece of birch board. Cuts to increase the width of the part pressed with a clamp, to make it more comfortable and less fidgeting.
I also made a back support for the patient from wood, fastened the elements in the same way, using glue and screws, lightly sanded it and coated it with several layers of varnish so that it would not crack from moisture and would not be grabbed by dirty hands.
I tried the tensioner in action, it works quite well, moving it only to another position is quite troublesome.
For smoother sliding, a piece of galvanized roofing steel was attached to the working surface of the rear wooden stop. Four screws in the corners. Practice has shown that the device works well even without a spring tensioner; it is convenient to use for a large number of identical cuts.
After applying a scratch, it is necessary to achieve the formation of a ring crack; this was best achieved by local heating with a candle or a small flame of a gas burner and sharp cooling with the corner of an ice cube or dripping water from a pipette.
The finished cut may have sharp edges; for safe use of the resulting glass, they should be smoothed. It is labor-intensive, but with ordinary tools, this can be done by forcefully rotating the glass cylinder, resting it on a piece of coarse or close to coarse sandpaper on a rag base lying on the table. It is better to place a piece of felt under the sandpaper; this will allow you to get neat, somewhat “overwhelmed” safe edges.